The Event types and assignment section of a Master page is where you determine how the bookings made on the Master page will be assigned to your Team members. This section is different depending on which scenario you selected for your Master page.
The four scenarios you can choose from are:
Tip
If you would like to generate one-time links which are good for one booking only, you should use a Master page using a Team or panel page.
One-time links eliminate any chance of unwanted repeat bookings. A Customer who receives the link will only be able to use it for the intended booking and will not have access to your underlying Booking page. One-time links can be personalized, allowing the Customer to pick a time and schedule without having to fill out the Booking form. Learn more about one-time links
Requirements
To define the Event types and assignment section of a Master page, you must be a OnceHub Administrator.
Building a team or panel page
The associations between Event types and Meeting providers are created on the Master page, allowing for a flexible setup that can be different for each Master page.
- Go to the Event types and assignment section
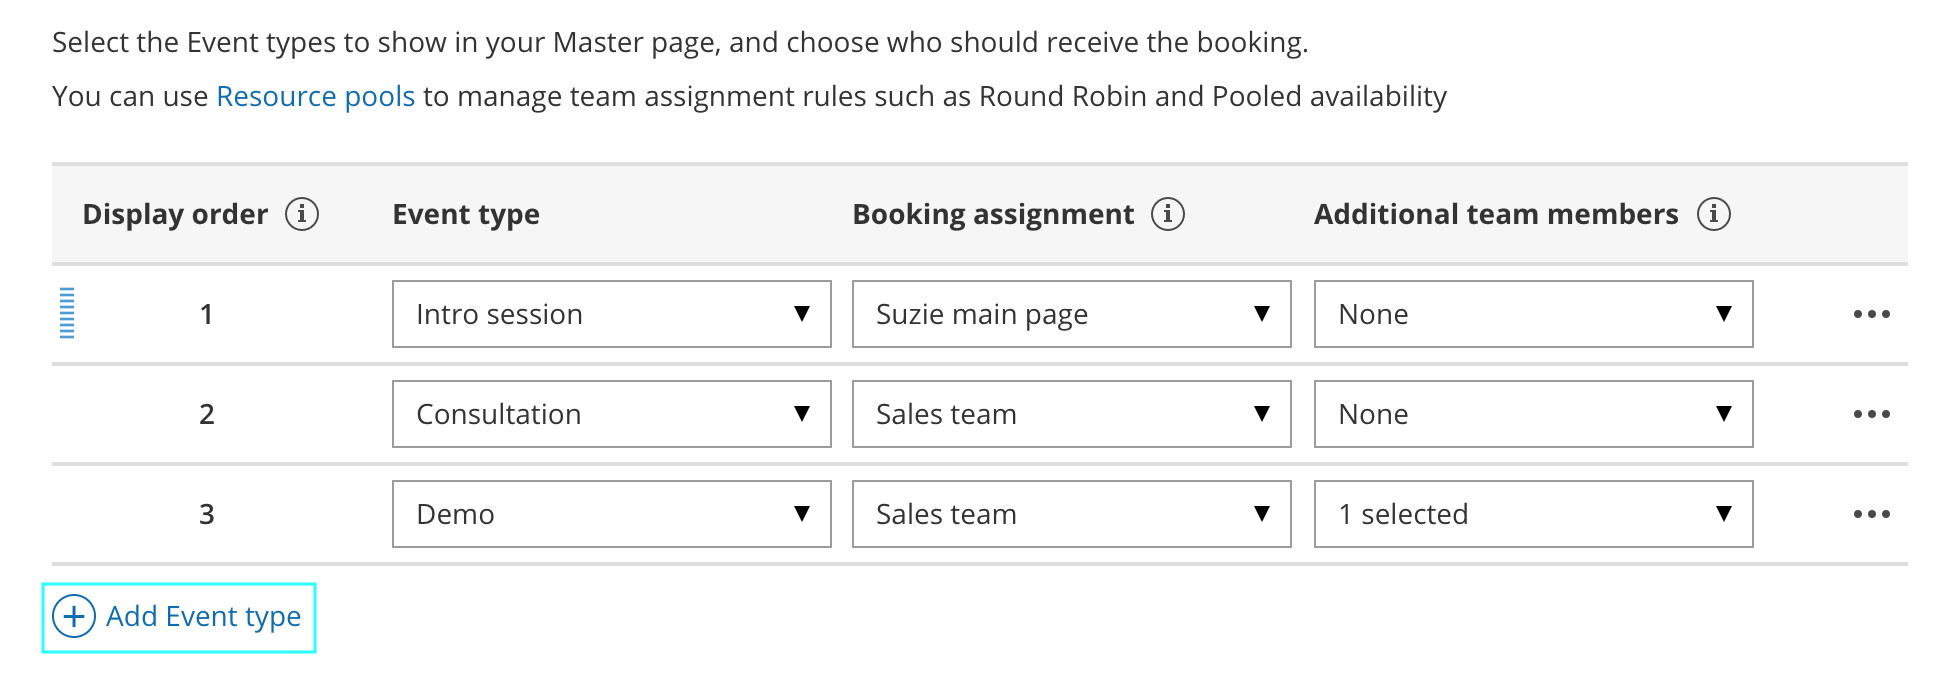
- Click Add Event type.
 Figure 1: Add an Event-based rule
- Select which Event types will be offered in your Master page (Figure 1). Master pages with team or panel pages can only include Event types configured to Automatic booking and Single session. Learn more about conflicting settings when using team or panel pages
- Next, use the Booking assignment drop-down to select who will provide your Event types. You can select a specific Booking page or a Resource pool.
- If your Event type requires multiple team members from your organization, use the Additional team members drop-down to add them. These team members can be defined by selecting specific Booking pages or by selecting Resource pools.
Note The same Resource pool cannot be selected as the Booking assignment and as the Additional team member in a single rule. Learn more about conflicting settings when using team or panel pages
- Reorder the Event types to ensure they appear on your Master page in the order that you want. You can move a row up or down by clicking on the left side of the row and dragging to the position you want (Figure 2).
 Figure 2: Click and drag a row to reorder
- Click Save.
Master pages with Event types first or Booking pages first
- Go to Booking pages on the left and select the relevant Master page.
- Click on the Event types and assignment section of the Master page.
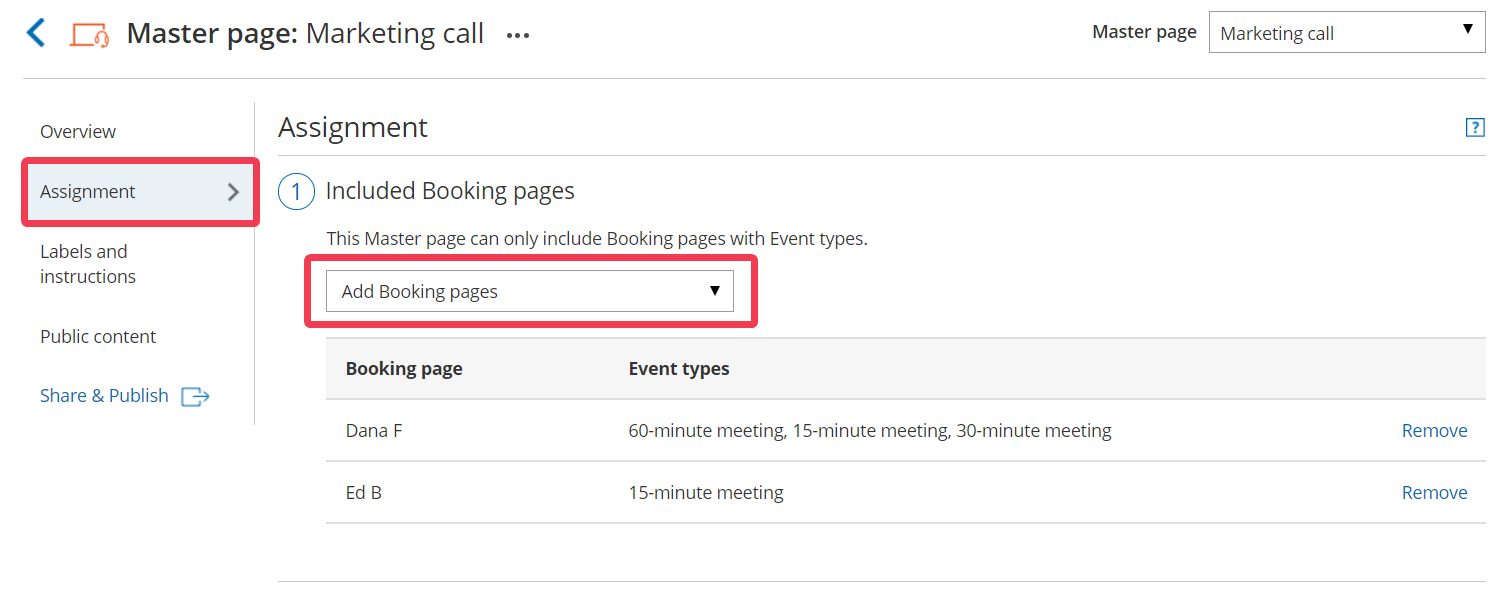
- Use the drop-down menu to select the Booking pages that you want to include in the Master page (Figure 3). Only Booking pages that are associated with Event types can be selected.
 Figure 3: Adding Booking pages to your Master page
- In the Assignment upon reschedule section, you can choose to assign a rescheduled booking to the same Booking page it was originally assigned to it. To enable this, check the box marked Reschedule is only possible on the page on which the booking was made.
- Click Save.
Master pages with Booking pages only
- Go to Booking pages on the left and select the relevant Master page.
- Click on the Event types and assignment section of the Master page.
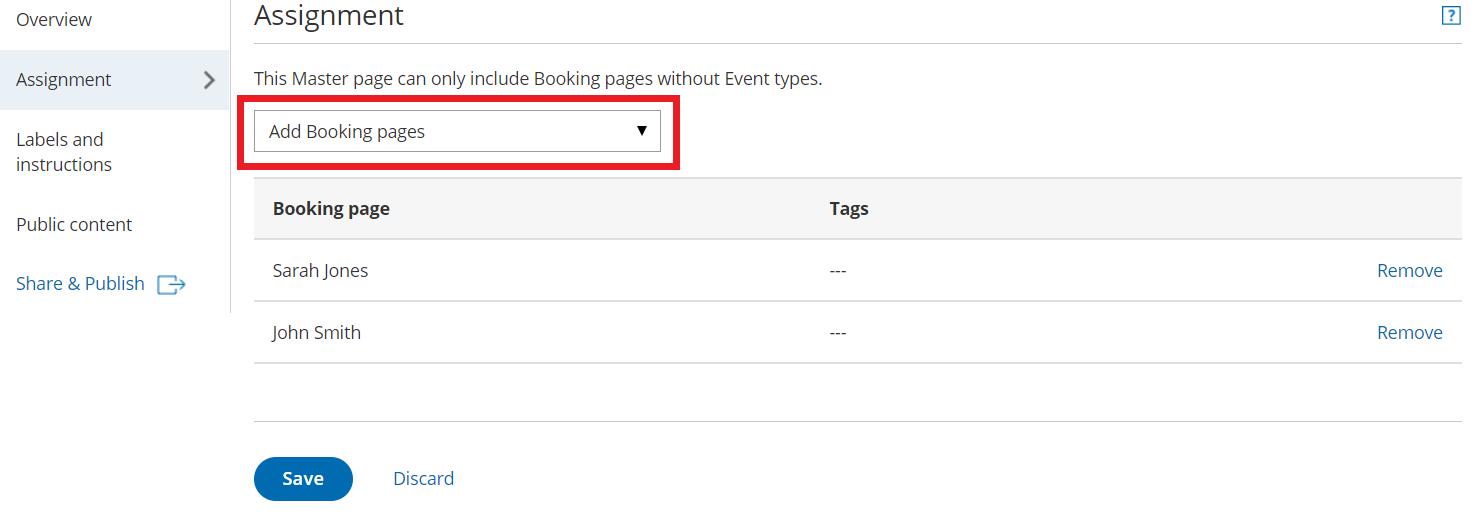
- Use the drop-down menu to select the Booking pages that you want to include in the Master page (Figure 4). Only Booking pages that are not associated with any Event types can be included in this Master page.
 Figure 4: Adding Booking pages to your Master page
- Click Save.


