Resource pools allow you to dynamically distribute bookings among a group of Team members in the same department, location, or with any other shared characteristic. Each Resource pool has its own method for distributing bookings, such as Round robin, Pooled availability, or Pooled availability with priority.
In this article, you'll learn about the Round robin distribution method and how to set up a Resource pool with Round robin distribution.
When should I use Round robin?
Round robin is an organization-focused distribution method. You should use Round robin if your top priority is achieving an equal booking distribution among your Team members. For example, you might choose to use Round robin to distribute demos or initial consultations to Account Executives. Each Account Executive will have an equal opportunity to achieve their sales goals.
When you use Round robin assignment, you can ensure that cancellations, reassignments, and no-shows do not affect booking distribution equality. By enabling Automatic correction, any Team member who falls behind will be automatically moved to the front of the line until they have caught up.
How are bookings assigned with Round robin?
To distribute bookings among Team members in your pool using Round robin, you must add the Resource pool to a Master page. When a Customer visits your Master page, they will only see the availability of the next Team member in line to receive a booking.
How do I create a Resource pool that uses Round robin?
- Go to Booking pages in the bar on the left.
- Select Resource pools on the left (Figure 1).
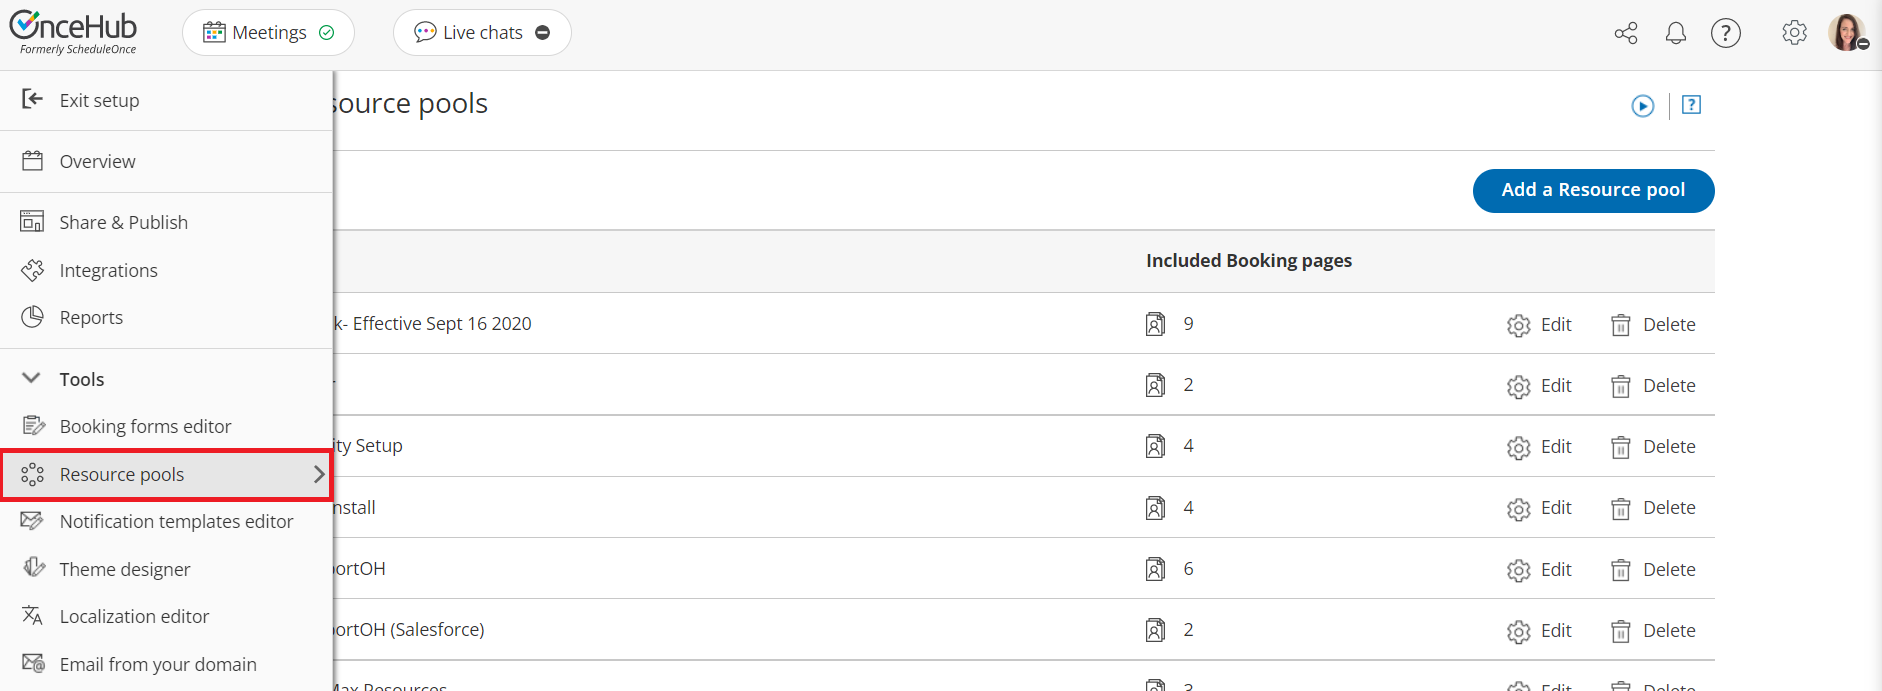 Figure 1: Resource pools in the Tools section
 - Click the Add a Resource pool button to create a new Resource pool.
- The New Resource pool pop-up appears (Figure 2).
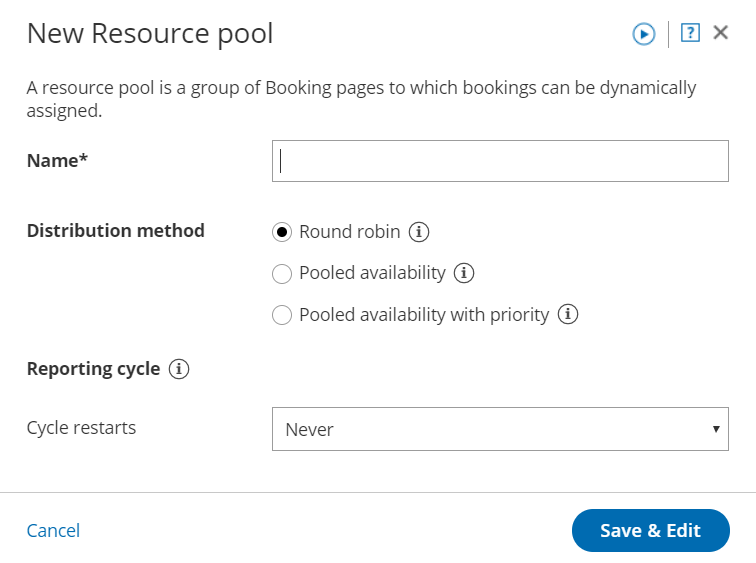 Figure 2: New Resource pool pop-up
 - Name your Resource pool.
- In the Distribution method section, select Round robin.
- Select a Reporting cycle.
- Click Save & Edit. You'll be redirected to the Resource pool Overview section.
- Navigate to the Resources section and select which Booking pages to include using the drop-down.
- By default, the Automatic correction toggle will be turned on to ensure that the booking distribution remains equal at all times (Figure 3). If for any reason you don't want removed bookings to be compensated for, you can set this toggle to OFF.
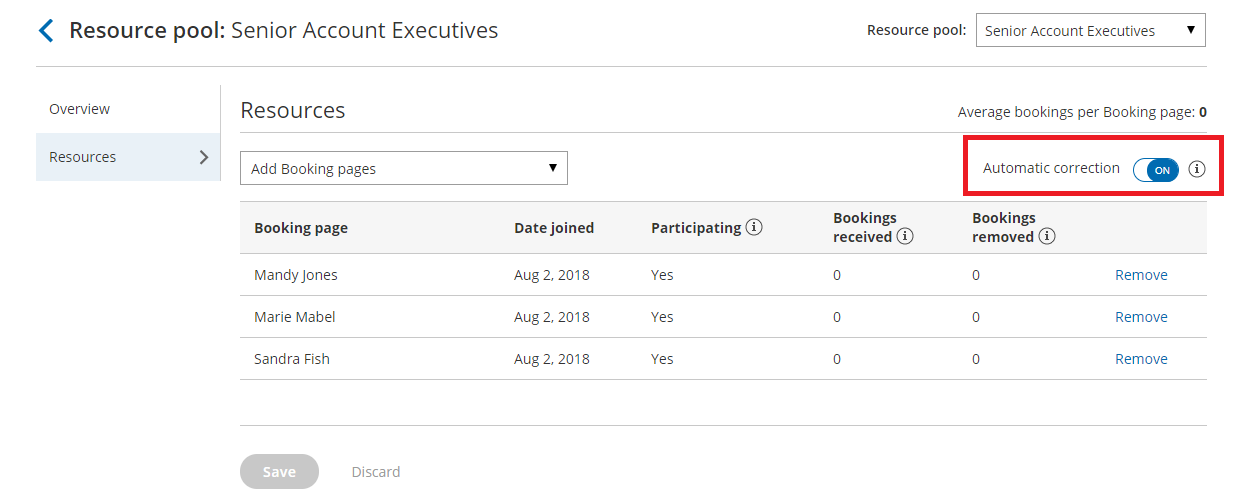 Figure 3: Automatic correction
 - Make sure to add your Resource pool to a Master page. Bookings will not be distributed to pool members until the Resource pool is included in a Master page.


