In the Booking form and redirect section, you can define the meeting subject, the Booking form you wish to use, and the redirect options when your Customer makes a booking.
You can also decide to skip or prepopulate the Booking form when a Customer makes a booking. This can be achieved when Customer data is passed to your Sharing links or Publishing options.
Location of the Booking form and redirect section
The location of the Booking form and redirect section depends on whether or not your Booking page has any Event types associated with it.
- For Booking pages associated with Event types, go to Booking pages in the bar on the left → select the relevant Event type → Booking form and redirect section (Figure 1).
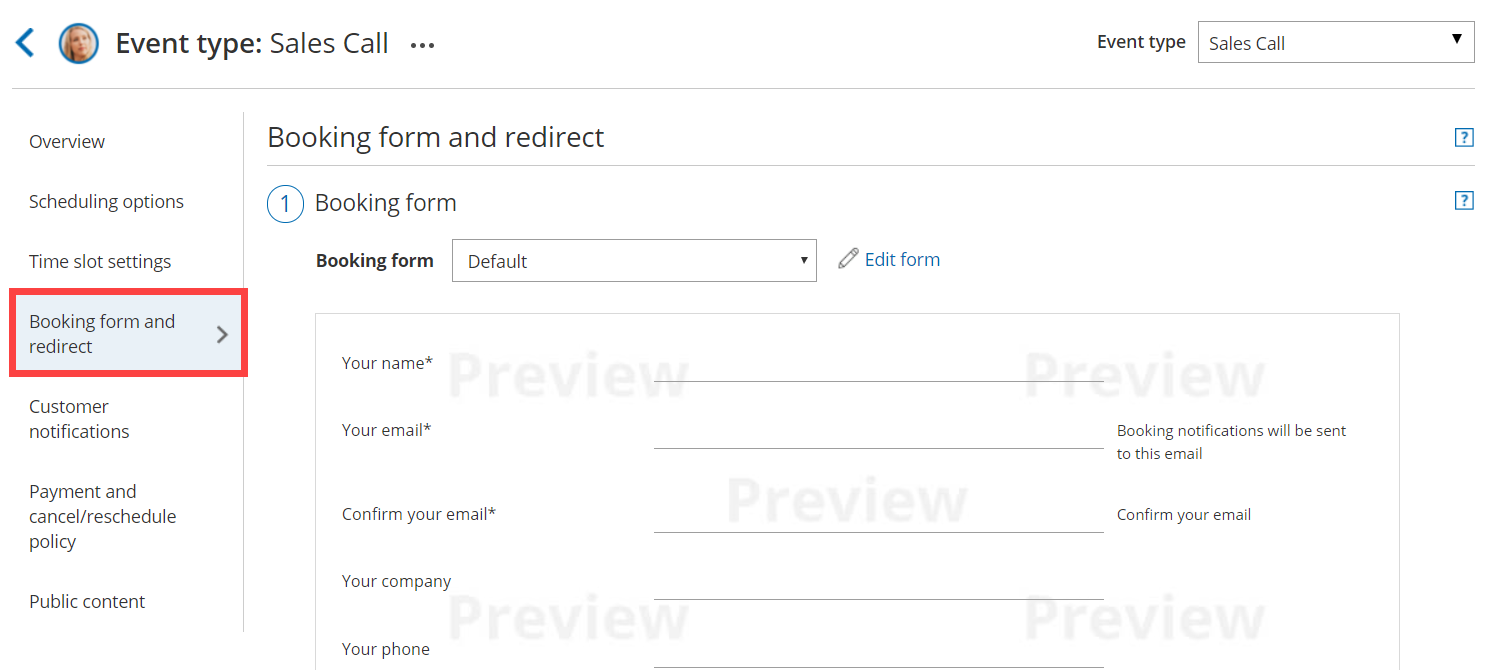 Figure 1: Booking form and redirect section on Event type
- For Booking pages not associated with Event types, go to Booking pages in the bar on the left → select the relevant Booking page → Booking form and redirect section (Figure 2).
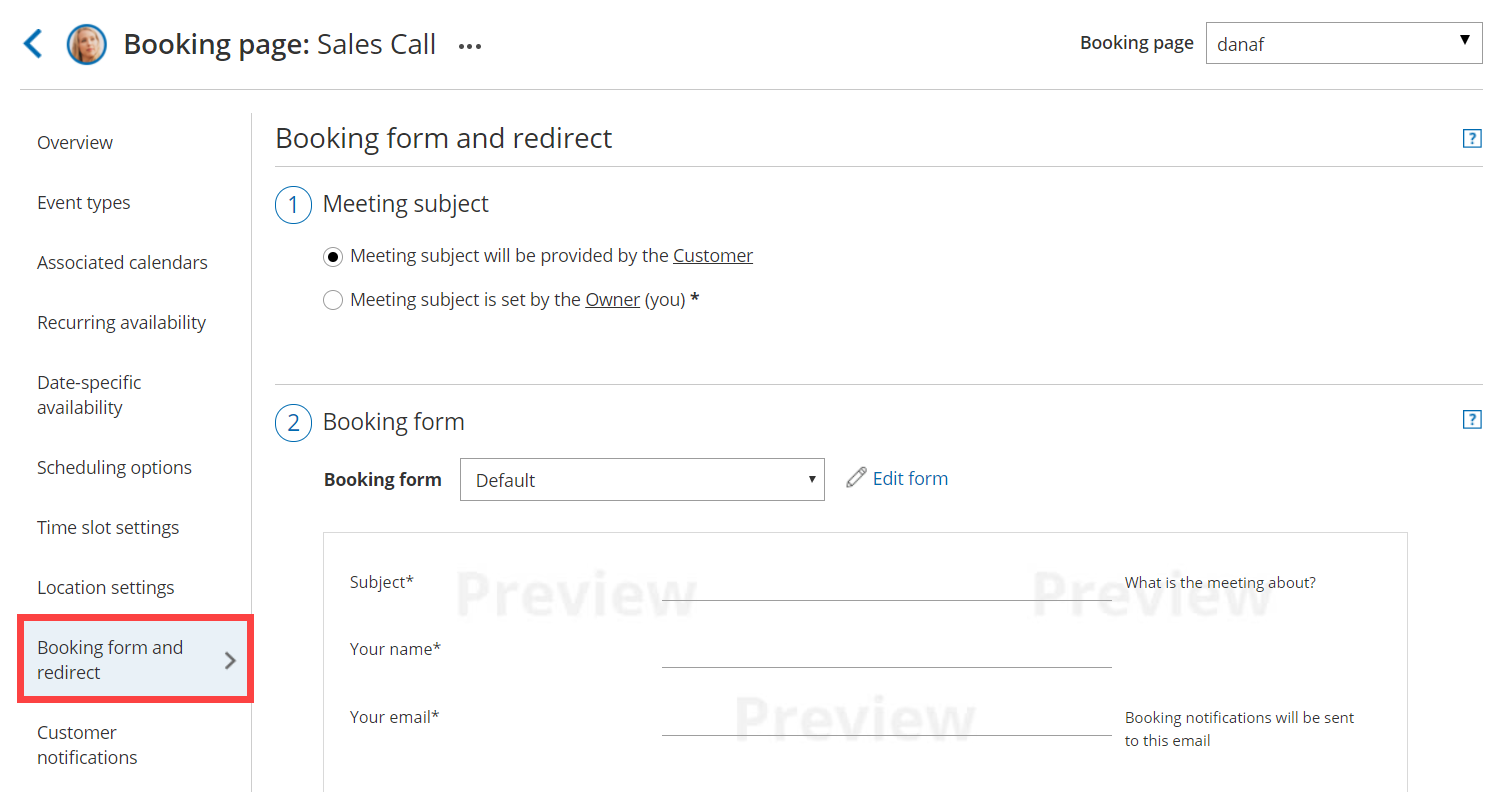 Figure 2: Booking form and redirect section on Booking page


Important
You can change the location of the Booking form and redirect section to be located on the Booking page or the Event type. To set the location, go to Booking pages in the bar on the left → Event types pane→ action menu (three dots) → Event type sections. Learn more about Event type sections
Meeting subject
You can choose if you want the meeting subject to be set by the Owner (you) or by the Customer (Figure 1).
If you choose to let the Customer provide the meeting subject, it will be a required field on the Booking form. The Customer will not be able to make a booking without completing this field.
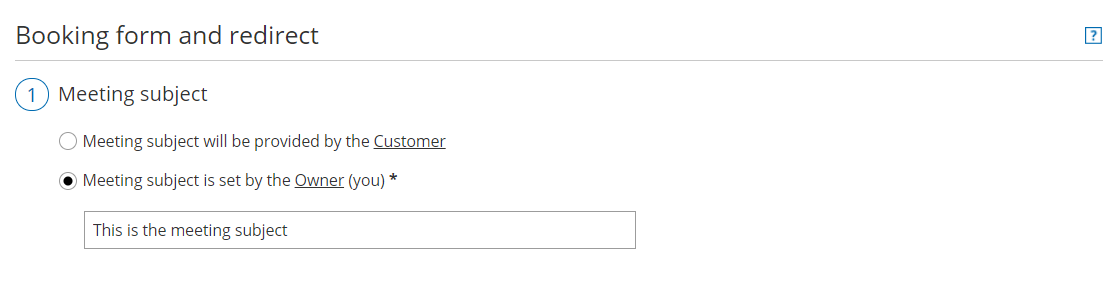 Figure 1: Meeting subject
When your Booking page is associated with an Event type, this section will not be visible. The meeting subject is set by default to the Event type name and cannot be changed.
Note
If the Booking form is skipped and the Meeting subject is set by the Customer, the Meeting subject is automatically set to Personal meeting.
Booking form
The drop-down menu contains the Booking forms that have been created in the Booking forms editor. A preview of the Booking form can be seen below the drop-down menu. The preview includes all the fields in the Booking form, in the exact order in which they will appear to your Customers.
If you wish to edit the Booking form, click Edit form. Learn more about the Booking forms editor
 Figure 2: Booking form
Automatic redirect
This setting allows you to decide what will happen after your Customers complete the booking process.
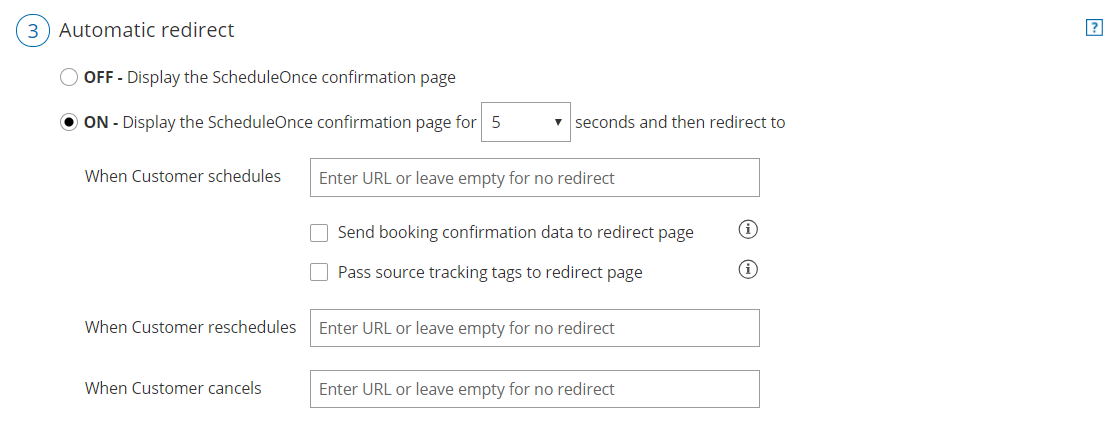 Figure 3: Automatic redirect
When Automatic redirect is set to OFF, the Customer will see a comprehensive confirmation page with the meeting information. This is the default setting.
When Automatic redirect is set to ON, the Customer will be automatically redirected to a web page of your choice when the booking is submitted.
- This can be used to redirect the Customer to a thank you/landing page or to a payment page.
- Another use case is to measure the effectiveness of your marketing campaigns by adding tracking code such as Adwords, Facebook pixel or Google Analytics code to the redirect target page.
- You can also pass source tracking tags to the redirect page, or redirect booking confirmation data to a custom confirmation page.
Separate fields are provided for scheduling, rescheduling and canceling redirect target pages. You can use the same URL for all three processes, or enter different URLs to serve each purpose. Note that automatic redirect can also be used when the page is embedded.