If you want to have more control over Customer-facing text in your Booking page, you can use the Localization editor to change every line of Customer interface text.
In this article, you'll learn how to edit Customer interface text.
Editing Customer interface text
- Go to Booking pages in the bar on the left.
- On the left, select the Localization editor.
- Click the New locale button (Figure 1).
 Figure 1: New locale button
- In the Custom locale pop-up, add a name for your locale and select an existing locale to duplicate as a basis for your new locale (Figure 2).
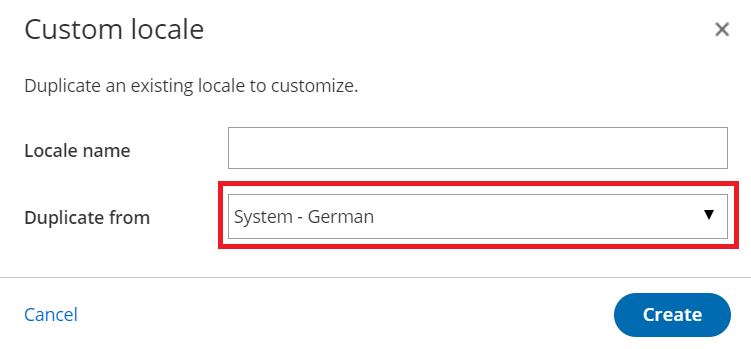 Figure 2: Custom locale pop-up
Note Dynamic values including time zones, countries, states, locations, country codes, months, and days of the week will always reflect the parent locale from which they were duplicated.
- Edit the text in the field in the right column (Figure 3) corresponding to the string in the English text column on the left. Some words may appear in multiple strings, so make sure you edit the correct string.
If you want to edit a specific string, use the browser search function (Ctrl + F on Windows or ⌘ + F on Mac) to find it.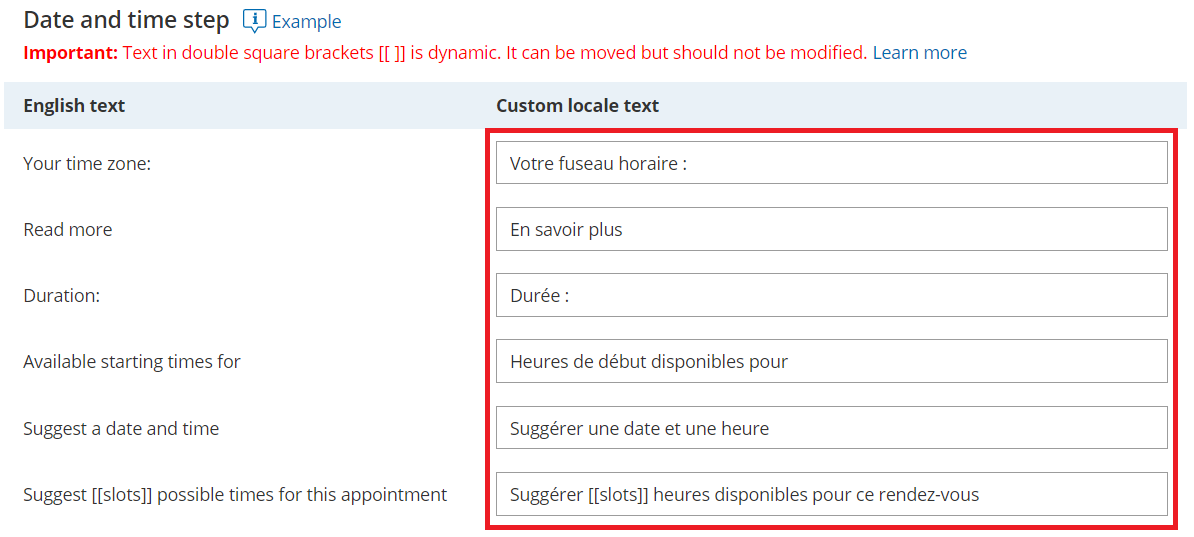 Figure 3: Custom locale text column
NoteParameters in double square brackets [[ ]] can be moved within the string.
It's important to keep the brackets intact as they will be replaced with live data when viewed by the Customer. - To preview a locale on a Booking page or Master page with your Custom locale, use the drop-down menu at the top right of the editor screen to select the Booking page or Master page. Then, click Preview.
 Figure 4: Locale Preview button
Note Previewing a locale does not apply the locale to the page.
- When you've made all the necessary changes, click Save.


Finally, apply the Custom locale to your pages on the Overview section of the Booking page or Master page.
Learn more about the steps to fully localize the Customer scheduling experience