If you want to integrate your web form with OnceHub, you'll need to set up your web form to redirect to an external URL and include the submitted form data in the URL.
The URL should be either a standalone Booking page (e.g. https://go.oncehub.com/dana), or a custom Thank you page with a website integration option on it (for example, a Website button or Website embed). The submitted form data must be formatted to match our supported OnceHub URL parameters.
In this article, you'll learn about integrating your web form with OnceHub using URL parameters.
Note This article describes how to send information from your web form to a OnceHub Booking page. It's also possible to redirect booking confirmation data from your OnceHub Booking form to a web form using URL parameters.
Using URL parameter with web form apps
There are many web form apps available on the market, but only a few of them support the URL parameters functionality. Most often, you will find this functionality in the Notifications section of your web form. In this article, we use Wufoo to describe the steps required to integrate your web form with OnceHub, but the same steps should apply to any web form which is capable of supporting URL parameters. Some other web forms that support this functionality include 123FormBuilder and GravityForm.
Requirements
To integrate your web form with OnceHub, you must ensure that the web form can pass parameters to the Thank you page.
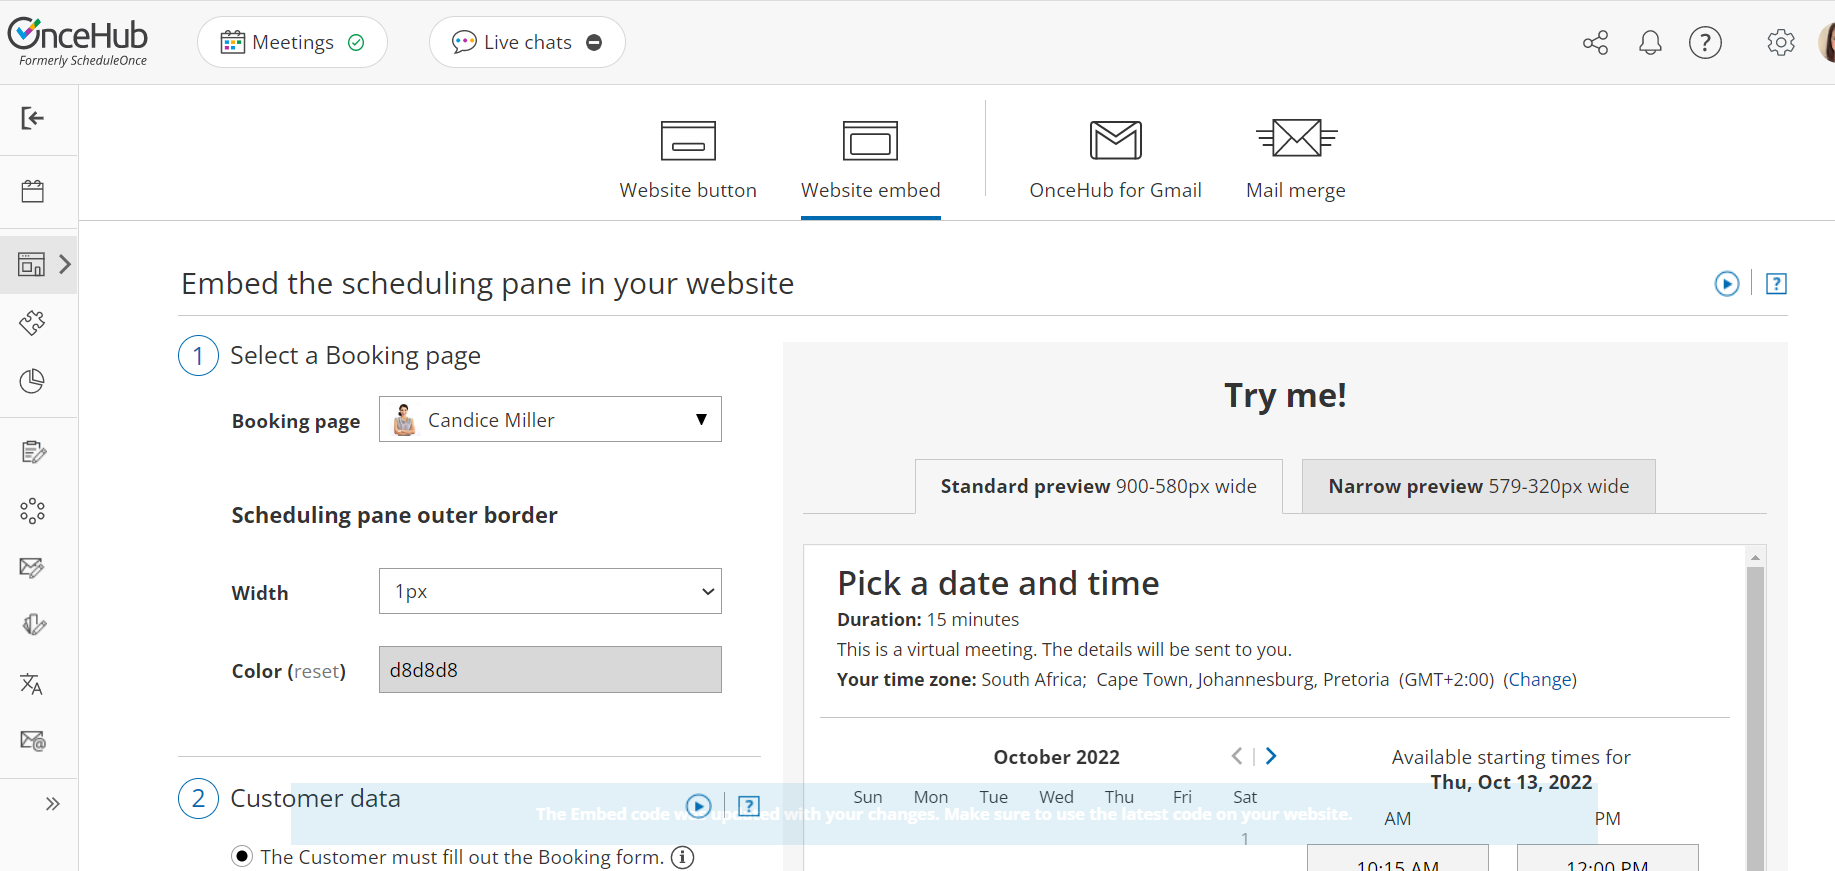
Copying the Website embed or Website button code from OnceHub
- Go to the Schedule button in the top navigation menu and select Publish on your website.
- Select the publishing option you will add to your Thank you page.
- Website embed: This option displays your Booking page as an integrated part of your web page.
- Website button: Clicking the button displays your Booking page in a lightbox on top of your web page, or in a new browser tab.
- In the Select a Booking page step, select the page you want to integrate with your web form
(Figure 1). Figure 1: Select a Booking page step
- Select Customer data is passed via URL parameters from the Customer data step.
- In the Booking form step, you can select one of the two options below:
- Skip the Booking form: Skipping the OnceHub Booking form helps you maximize your booking conversions and provides your Customers with a quicker booking process.
- Prepopulate the Booking form: The data is visible in the Booking form and can be edited by the Customer before submission. Learn more about prepopulated Booking forms
- Click Copy code to copy the code to your clipboard.
Creating a Thank you page
In this step, you'll need to create a Thank you page where your prospects will be redirected to after filling out and submitting your form. Most web form apps provide a Thank you page that you can customize. However, you might want to use your own Thank you page, which sits on your branded website or on an external landing page builder app.
On your Thank you page, paste the OnceHub Website embed or Website button code that you copied in the steps above. You should paste the code where you want the publishing option to show.
Sending the web form data to the Thank you page via URL
This is the most important part of the process. Follow the steps below to complete the integration:
- Redirect the web form to your Thank you page: When the form is submitted, it needs to redirect to the Thank you page you set up earlier. For example, if you're using Wufoo, you can use a feature called Form Rules to define the form submission redirect URL.
- Pass web form data to the Thank you page URL: In addition to redirecting to the Thank you page, you'll need to configure how the web form passes data in the URL to make sure that all Booking form data is added to the URL.
- Match web form data to OnceHub supported fields: To be able to use the web form data in OnceHub, you need to make sure the right fields are passed to OnceHub. Only supported fields are processed.
Most modern web form apps provide field mapping functionality, which allows you to change the names of the web form fields when passing them via the URL. For example, if you're using Wufoo, you can map Wufoo fields to third-party app fields using a feature called Templating. - To add more URL parameters to the code, check the OnceHub URL parameters article.
Congratulations! You have integrated OnceHub with your web form.
