Each Dynamic rule you create in a Rule-based assignment Master page must have a Booking owner. The Booking owner is the member who receives the booking.
You can define a Booking owner either by specifying a Booking page or by specifying a Resource pool. If you choose a Resource pool as the Booking owner, bookings will be assigned to a Booking page within the Resource pool according to the pool's distribution method. You can choose from Round robin, Pooled availability, or Pooled availability with priority.
If your Dynamic rule also includes Additional team members, the meeting then becomes a Panel meeting. In the case of a Panel meeting, the Booking owner owns the calendar event and determines settings including the location, the booking form, the post-scheduling flow, notifications, and third-party integrations.
Requirements
To create a Master page and add a Booking owner, you must be a OnceHub Administrator.
How to select a Booking owner
- Click Setup -> Booking Page setup in the top navigation bar.
- Click the Plus button
 in the Master pages pane.
 - In the Scenario field of the New Master page pop-up, select the Rule-based assignment scenario (Figure 1).
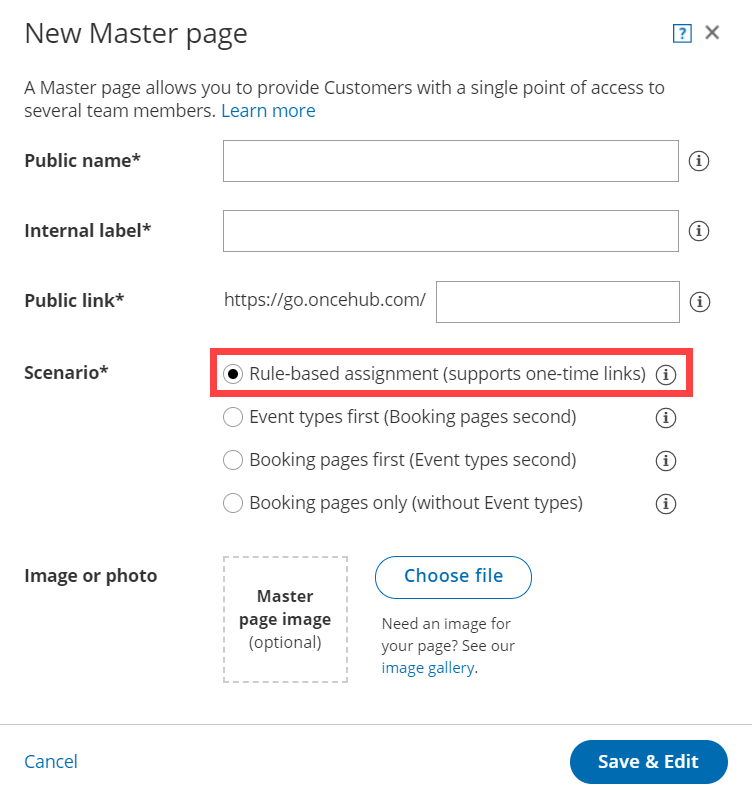 Figure 1: New Master page pop-up
- Populate the pop-up with a Public name, Internal label, Public link and an image if you choose. Then, click Save & Edit. You'll be redirected to the Master page Overview section to continue editing your settings.
- Go to the Assignment section of the Master page.
- In the Rule types section, select Dynamic (Figure 2).
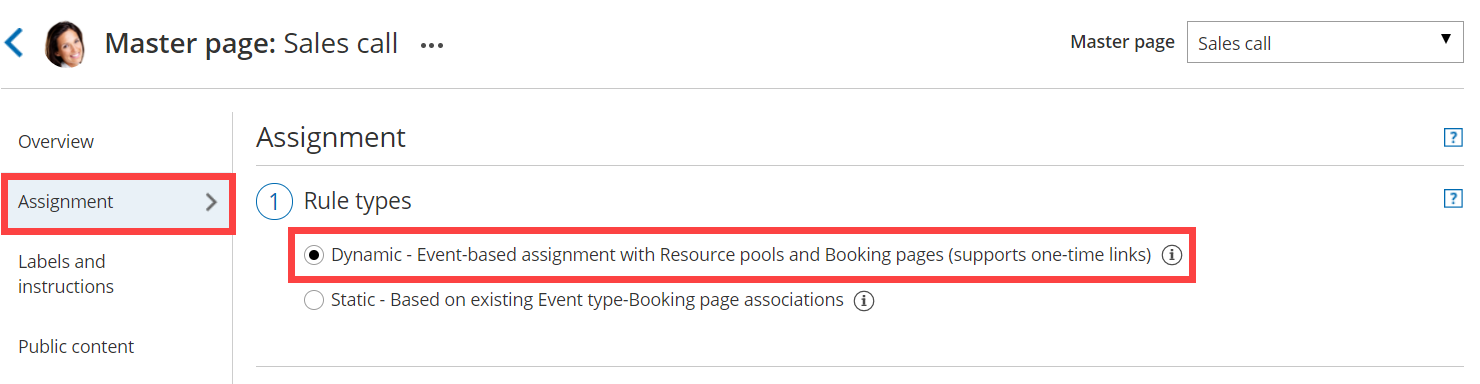 Figure 2: Select Dynamic as the Rule type
Tip
When you use a Master page using Rule-based assignment with Dynamic rules, you can also generate one-time links which are good for one booking only, eliminating any chance of unwanted repeat bookings.
A Customer who receives the link will only be able to use it for the intended booking and will not have access to your underlying Booking page. One-time links can be personalized, allowing the Customer to pick a time and schedule without having to fill out the Booking form. - In the Event-based rules section, click Add rule.
- Select which Event types will be offered in your Master page (Figure 3). For each Event type you want to add, you'll need to add a new rule. Master pages with Dynamic rules can only include Event types configured to Automatic booking and Single session. Learn more about conflicting settings when using Dynamic rules
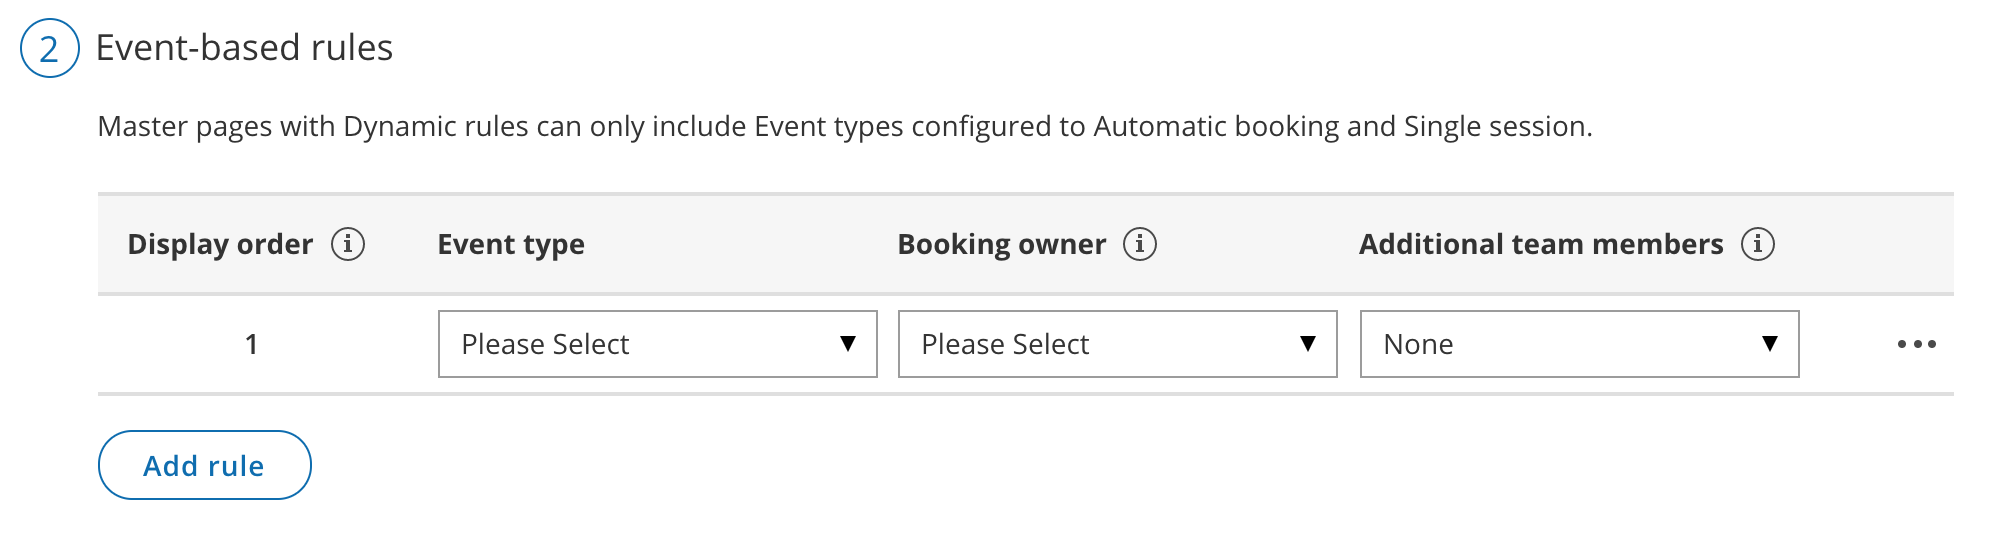 Figure 3: Add an event-based rule
 - Under Booking owner, choose a Booking page or Resource pool from the dropdown. You can only select one Booking owner.
- Click Save.
 in the Master pages pane.


You're all set! The Event type in your Master page now has a Booking owner. If your Master page includes multiple Event types, you can select a different Booking owner for each one. You can also add Additional team members if required.
NoteThe existing associations between Booking pages and Event types do not affect choosing a Booking owner. Any Booking page can be selected as a Booking owner to provide any Event type.