You can test your Custom templates by creating a test booking and filling out a Booking form as if you were a Customer. You can perform several of these test bookings to test every template you have created in every relevant scenario.
In this article, you'll learn how to test a Custom notification template.
Testing the Custom notification template
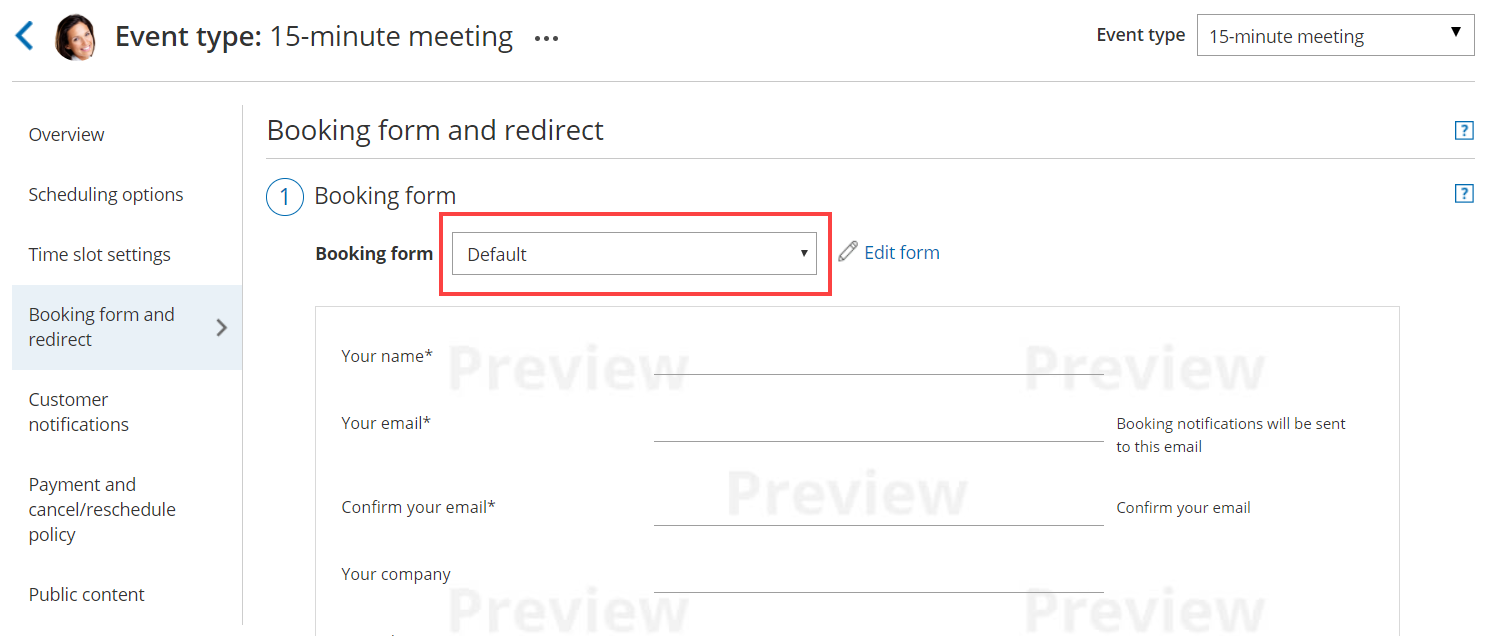
- In the Booking form section of your Event type, use from the Booking form drop-down menu to select a Booking form (Figure 1).
 Figure 1: Selecting a Booking form template
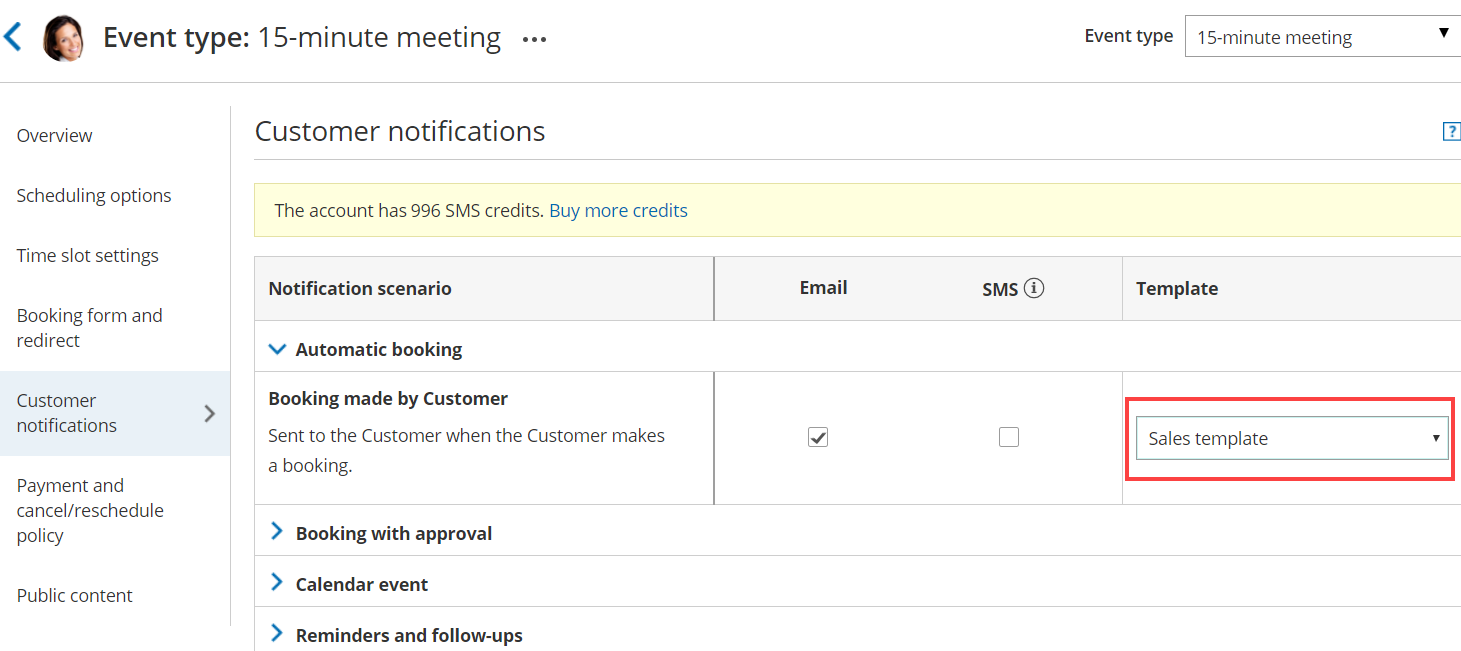
- In the Customer notification section of your Event type, select a template for each Notification scenario you want to send notifications for (Figure 2).
 Figure 2: Choosing a Custom notification template for each Notification scenario
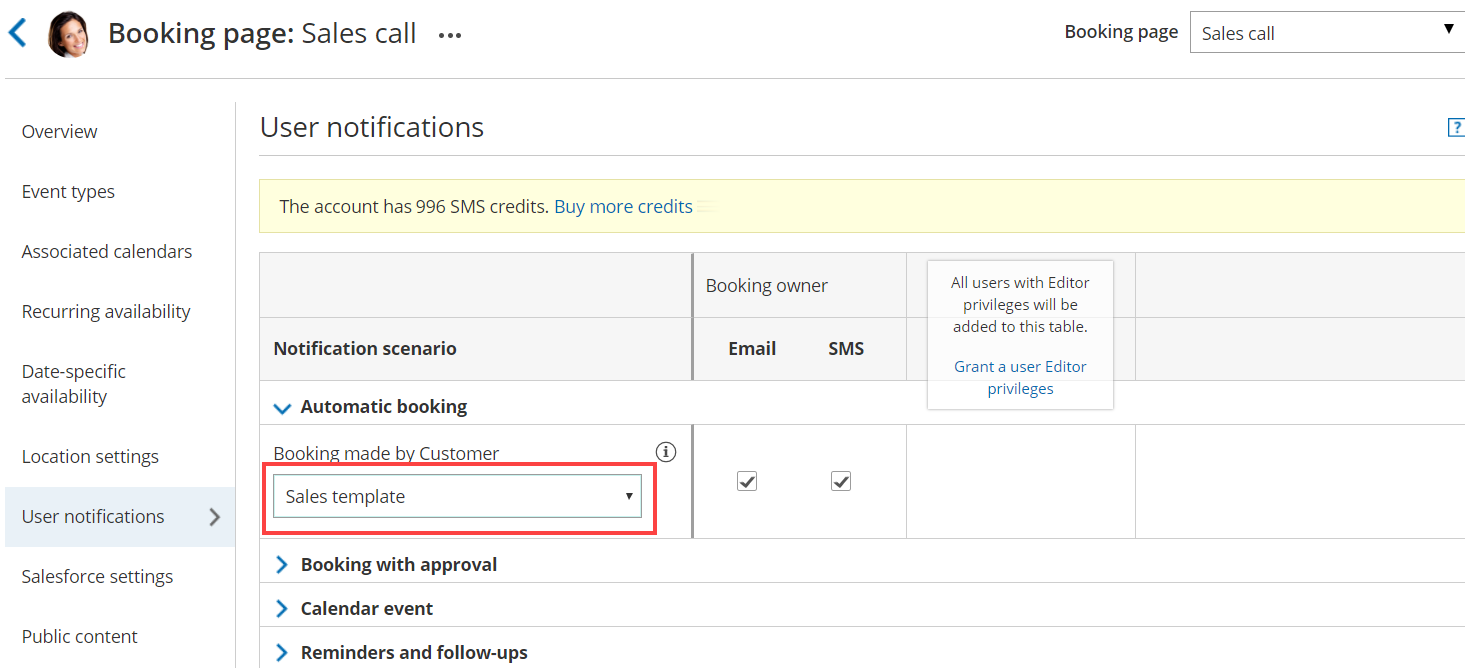
- In the User notifications section of your Booking page, select a template for each Notification scenario you want to send notifications for (Figure 3).
 Figure 3: Choosing a Custom notification template for each Notification scenario
NoteIf you want to receive User SMS notifications, you'll need to enter a phone number in your Profile's SMS notifications section.
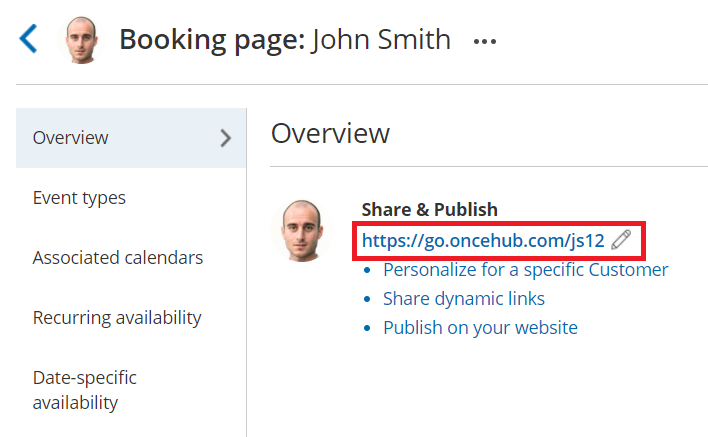
- In the Booking page Overview section of your Booking page, click on the public link in the Share & Publish section.
 Figure 4: Booking page public link
- Schedule a meeting and fill out the Booking form that you created as if you were a Customer.
- Click Done.
- You can now check that you received a confirmation email and SMS.
If you're using Booking with approval mode, you can click Approve the booking request in your User email notification. Learn more about scheduling booking requests
You can also check that the calendar event was added to your calendar. Learn more about calendar events - Finally, you can choose to cancel or reschedule the booking, or let the booking run its course and test the reminder and follow-up messages.
Testing checklist
During the testing, you should check the following:
- The text is written the way you want.
- The correct Dynamic fields were chosen.
- The spacing/formatting is correct.
- That you are sending emails and SMS notifications for the required booking notifications.


