NoteOne-time links are only available for Master pages using team or panel pages.
Master pages allow you to combine multiple Booking pages and Event types into one point of access for your Customers, providing support for a wide range of scheduling scenarios.
With OnceHub, you can generate one-time links, which are good for one booking only, eliminating any chance of unwanted repeat bookings. A Customer who receives the link will only be able to use it for the intended booking and will not have access to your underlying Booking page. One-time links can be personalized, allowing the Customer to pick a time and schedule without having to fill out the Booking form.
For example, you may have a Customer who wants to schedule a Support meeting to resolve a specific issue. However, you want to restrict access to your Support team because their time is limited. You can send this Customer a one-time link to schedule a booking for this specific issue.
After the Customer schedules the booking, they won't be able to use that one-time link to schedule bookings for any other issues.
Requirements
To create a Master page with a team or panel page scenario, you must be a OnceHub Administrator.
Generating a one-time link
To generate a one-time link:
1. In the top navigation menu, click the quick share icon (Figure 1).
 Figure 1: Quick share icon
2. Toggle the One-time link option to ON (Figure 2).
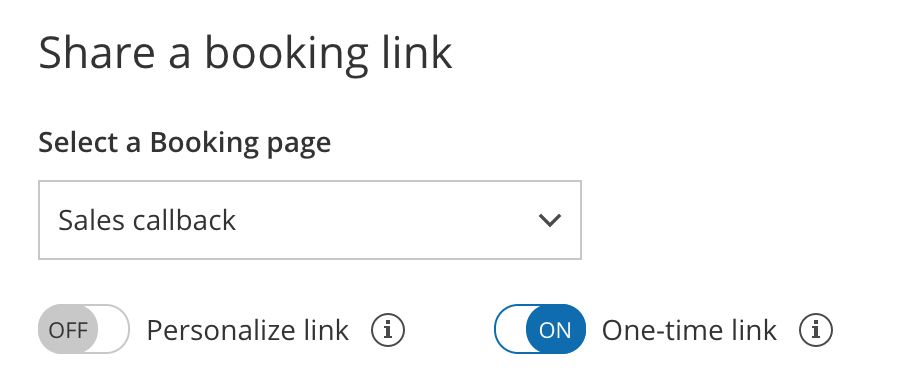 Figure 2: One-time link toggle ON/OFF
You can also generate a one-time link in the Overview section of the relevant Master page:
- Go to Setup in the top navigation bar.
- Select the relevant Master page that you would like to generate a one-time link for.
- In the Master page Overview section, click Generate a one-time link in the Share & Publish section (Figure 3).
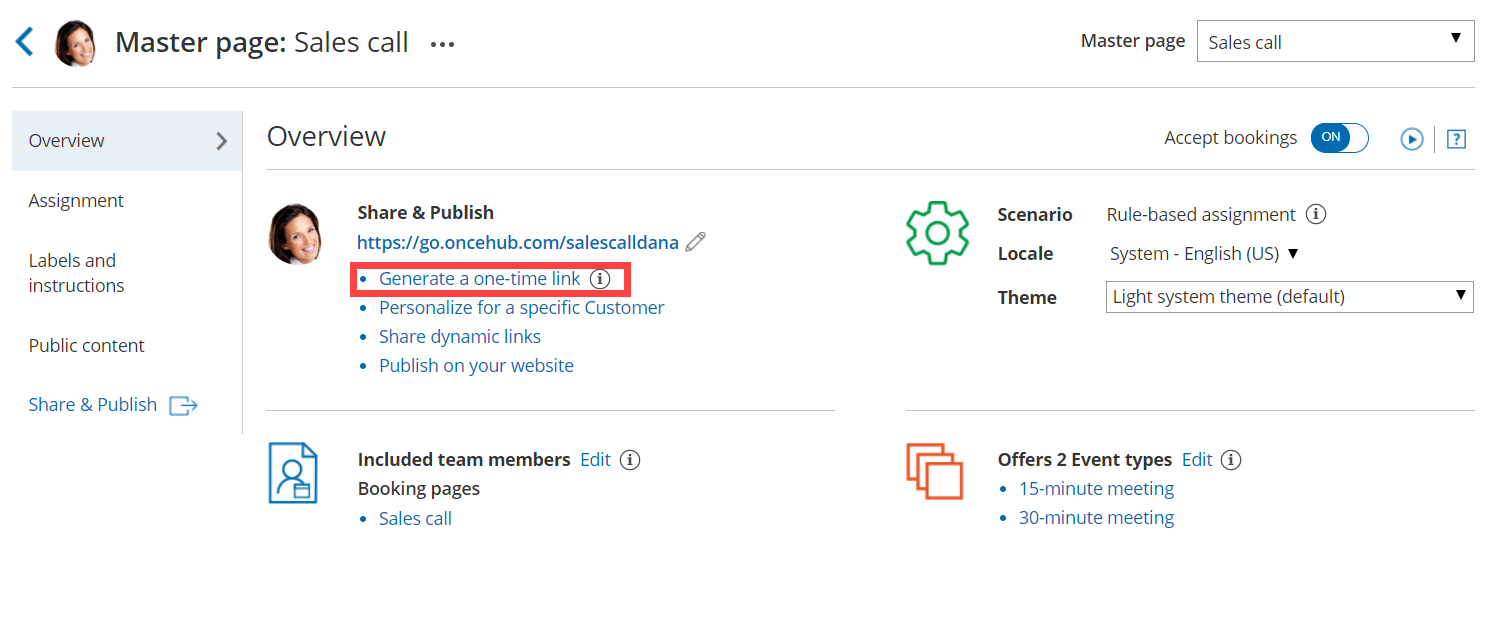 Figure 3: Generating a one-time link in the Master page Share & Publish section
- The One-time link pop-up will open (Figure 4).
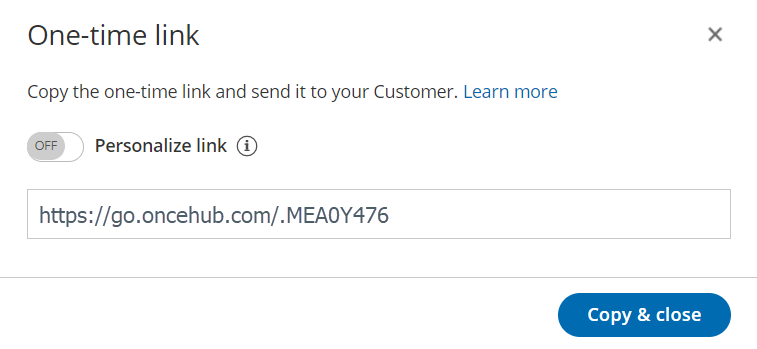 Figure 4: One-time link pop-up
 - Toggle Personalize link to ON if you would like to personalize the one-time link for a Customer (Figure 3). Enter a Customer name and Customer email.
NoteWhen you personalize a one-time link, the Booking form step will be skipped. Skipping the Booking form step allows for a quicker booking process for your Customers.
You can choose to show the Booking form by changing the Skip URL parameter to "&skip=0". Learn more about using URL parameters - Click Copy & close to copy the one-time link to your clipboard and close the pop-up. You can then paste the one-time link into an email or instant message and send it to your Customer.


Generating a one-time link for an individual Booking page
You can use the following workaround if you need to generate a one-time link for an individual Booking page.
- Create a new Master page with the team or panel page scenario.
- Go to the Event types and assignment section of the Master page.
- Click Add Event type (Figure 5).
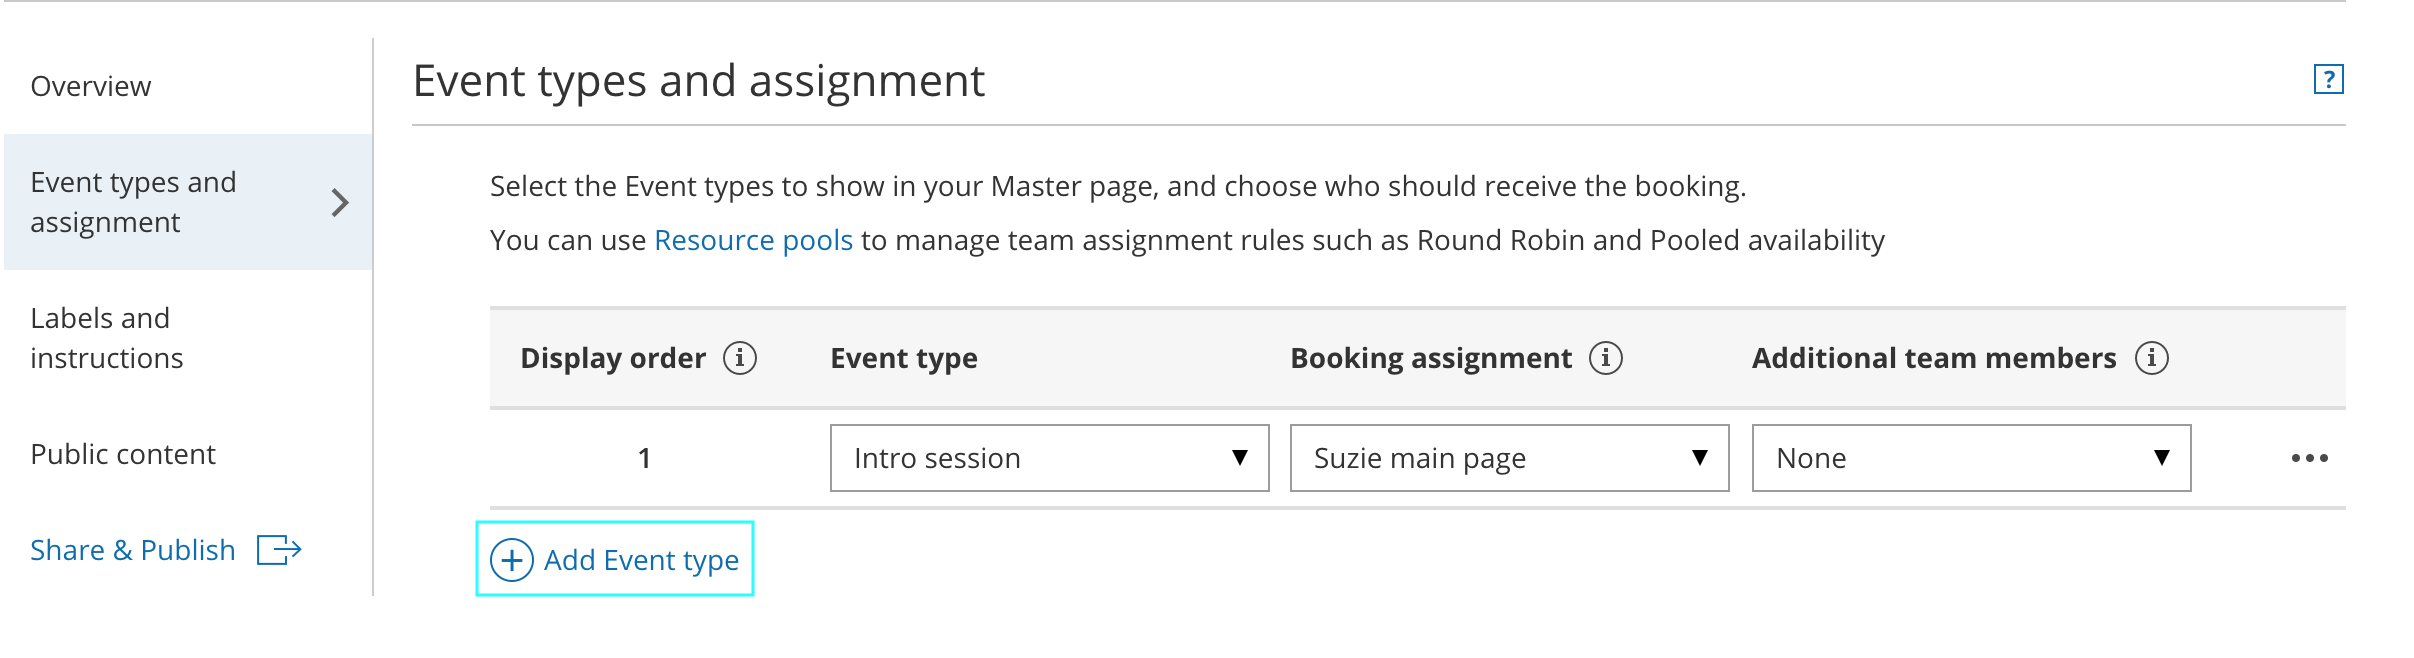 Figure 5: Add Event type
- Select which Event types will be offered on your Master page. Master pages with team or panel pages can only include Event types configured to Automatic booking and Single sessions. Learn more about conflicting settings when using team or panel pages
- Next, use the Booking assignment drop-down to select the specific Booking page that you would like to create a one-time link for. Select this Booking page for each Event-based rule you have created.
- Click Save.
- Access the quick share icon or go back to the Master page Overview section and generate a one-time link.
