The Localization editor allows you to localize the customer scheduling experience by applying different languages and date and time formats to your Booking pages.
In this article, you'll learn about the Localization editor.
Requirements
To access the Localization editor, you must be a OnceHub Administrator. However, you do not need an assigned product license. Learn more
Location of the Localization editor
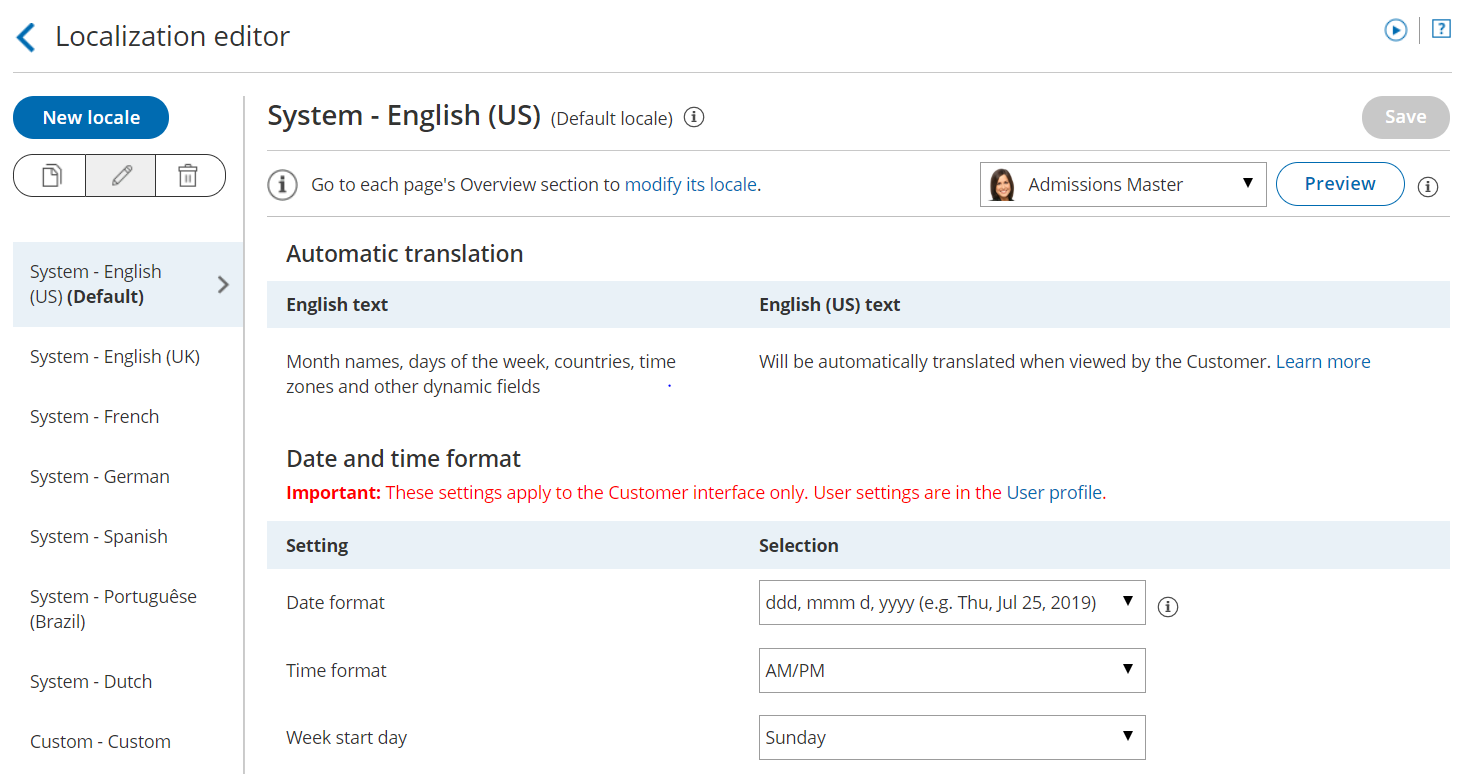
To access the Localization editor, go to Booking pages in the bar on the left. Select Localization editor on the left (Figure 1).
 Figure 1: The Localization editor
Locales list
All the locales of the account are managed in the left column. A locale defines the language and the date/time formats that are seen by Customers. Each locale is a collection of settings that define the following aspects of the customer experience:
- Language and wording of the Customer interface text.
- Dynamic values, including time zone names, days of the week, month names, and countries.
- Date format
- Time format
- Week start day
Locales are centrally managed in the Localization editor. To view the properties of a locale, click on it in the locales list.
Duplicate locale
You can duplicate any locale. To duplicate a locale, select it from the list on the left hand side of the screen and then click the Duplicate icon (Figure 2).
 Figure 2: Click the Duplicate icon to duplicate a locale
Create a custom locale
You can create custom locales by duplicating and then editing existing locales. To create a custom, click the New locale button (Figure 3). In the Custom locale pop-up, enter a name and select which locale you would like to duplicate from.
 Figure 3: New Locale button
Rename a locale
To rename a locale, select a locale from the list on the left hand side of the screen and then click the Rename locale icon (Figure 4).
 Figure 4: Rename locale button
Delete a locale
To delete a locale, select a locale from the list on the left hand side of the screen and then click the Delete icon (Figure 5).
 Figure 5: Delete locale button
Note
System locales cannot be renamed or deleted. To customize a locale, you'll need to duplicate it first.
Set a default locale
Any locale can be set as the account default. To set a locale as your default locale, select the desired locale from the locale list and then click Set as default locale at the top of the page (Figure 6).
 Figure 6: Set your default locale
The default locale will be automatically applied to any newly created page, but existing pages will not be affected. To modify the locale of an existing page, go the pages Overview section. Learn more about applying a locale
Preview a locale on a Booking page or Master page
You can preview a locale on any Booking page or Master page. Previewing a locale does not apply the locale to the page.
- To preview a locale, use the drop-down menu to select the Booking page or Master page you want to preview the locale on.
- Then, click the Preview button (Figure 7).
 Figure 7: Preview button
Automatic translation
Each System locale comes with its own set of language- and culture-appropriate Dynamic values. This includes time zones, countries, states, locations, country codes, months, and days of the week. These values will be automatically translated when viewed by the Customer.
Note These values are fixed and cannot be edited, to prevent conflicts.
Date and time format
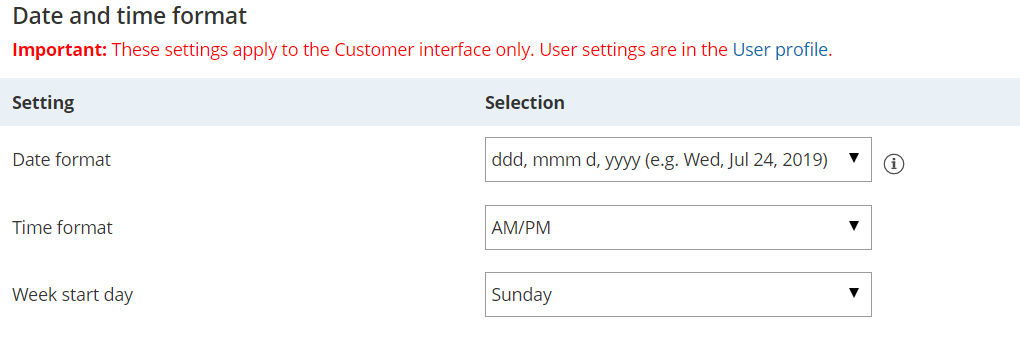
You can set the date/time format and week start day. Default settings are pre-selected for each language, but you can update them further to match your target audience preferences.
 Figure 8: Date and time format settings
Note Changes you make to the date and time format settings in the Localization editor only apply to the Customer interface. To edit User date and time settings, go to the User profile.
Customer interface strings
You can customize screen text, tooltips, button and links for each part of the Customer scheduling process.
- General
- Time-zone-confirmation pop-up
- Duration pop-up
- Date and time step
- Booking form step
- Confirmation page
- Cancel/reschedule process
- Payment process
- No times available
- Deleted Booking page
This text can't be edited in System locales. To edit this text, you'll need to create a custom New locale.