In the Master page Labels and instructions section, you can define the public labels for the different entities in your Master page. You can also customize instructions that will help your Customers make the right selections during the scheduling process.
You can access this section by going to to Booking pages on the left and select the relevant Master page → Labels and instructions.
NoteThe settings vary based on the Master page scenario, and whether you have public categories in your account.
Public label
Public labels are Customer-facing and are displayed during the scheduling process as the Customer makes selections. They are also used in scheduling confirmation pages and emails. If you have public categories in your account, you can set their labels here as Customers will see them.
For example, if the Event types in your Master page represent a product (Figure 1), then it will be listed as such in the confirmation page (Figure 2).
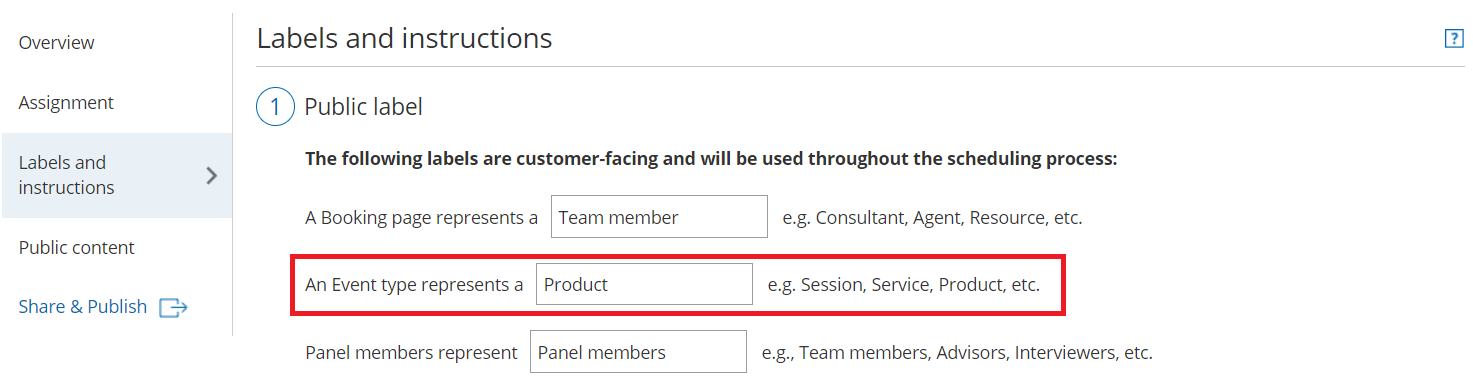 Figure 1: Adding a public label to an Event type
 Figure 2: Booking confirmation page
Selection instructions
In this section, you tell Customers what they should select. This section and its contents are different depending on the scenario you chose for your Master page. Only relevant fields will be displayed.
Specify the instructions to help your Customers understand what they are choosing. These instructions appear in the appropriate steps in the booking process.
For example, if you make the Selection instructions for Event types "Select a product" (Figure 3), then the title of the Event type selection step in the Customer scheduling flow will be "Select a product" (Figure 4).
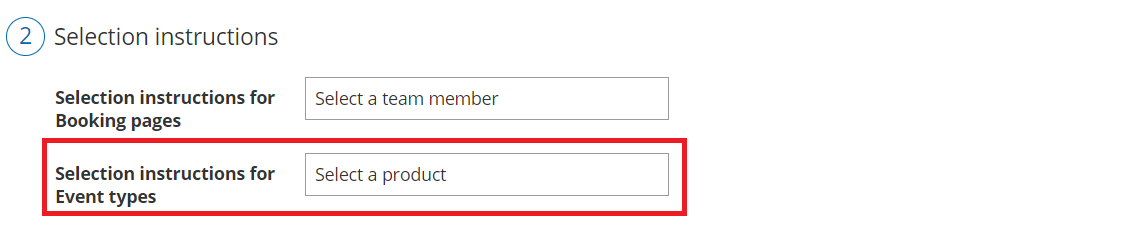 Figure 3: Selection instructions section
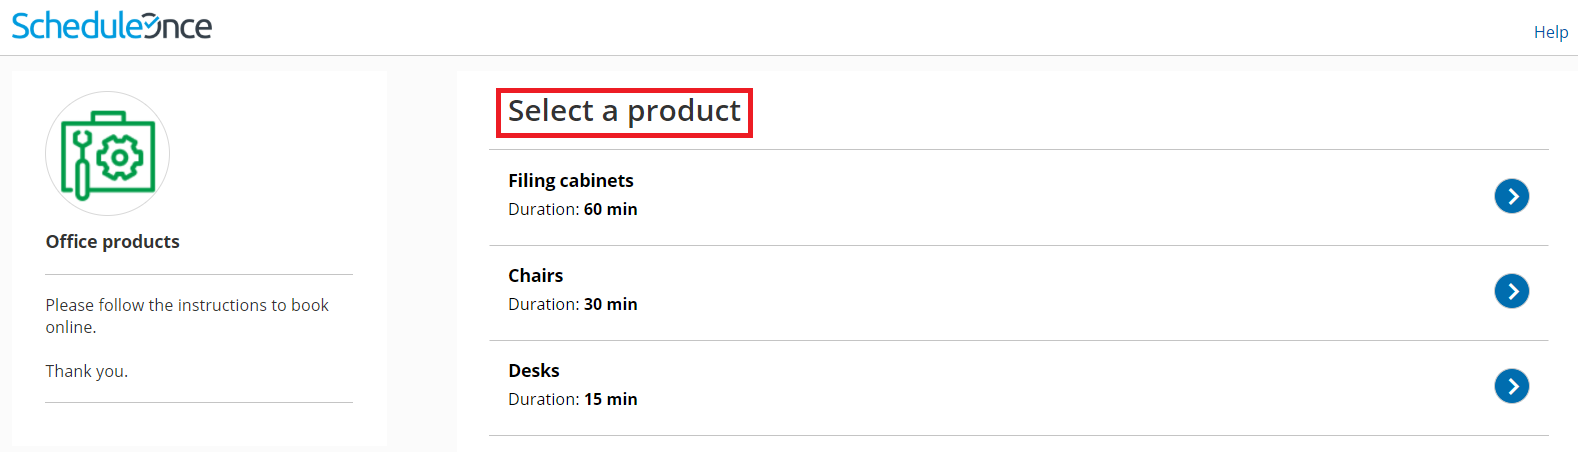 Figure 4: Event type selection