You can build a static Personalized link that includes a Customer's personal details. Personalized links for a specific Customer are based on URL parameters and are best used when you want to send a single email to a particular Lead or Customer. These links are different from dynamic links that are used when you want to send Personalized links to a large group of leads or Customers as part of an email campaign.
For example, a Sales Representative wants to send an email to a specific lead named "John". They want to include a personalized "Book time with me" link in the body of the email. This link will take John straight to a Booking page where he can choose a date and time for the meeting without needing to enter any personal information such as name and email.
The Sales Representative can create a Personalized link that looks like this: https://go.oncehub.com/dana?name=John&email=john@example.com&skip=1
TipYou can use the OnceHub for Gmail extension to schedule with Personalized links directly from your Gmail account. You can generate links, copy them in a single click, and send them in an email.
NoteWhen you use Personalized links with Booking pages that don't have Event types, it's recommended that you provide the Subject field of your Booking form.
To add a Subject field to your Booking form, go to Booking pages on the left → relevant Booking page → Booking form → Meeting subject. Select the Meeting subject is set by the owner option and enter the desired Meeting subject specific to your business case. Learn more about the Subject field
Creating a Personalized link specific for a Customer
- Go to Booking pages on the left.
- Select the relevant Booking page or Master page.
- In the Overview section of the selected page, click Personalize for a specific Customer (Figure 1).
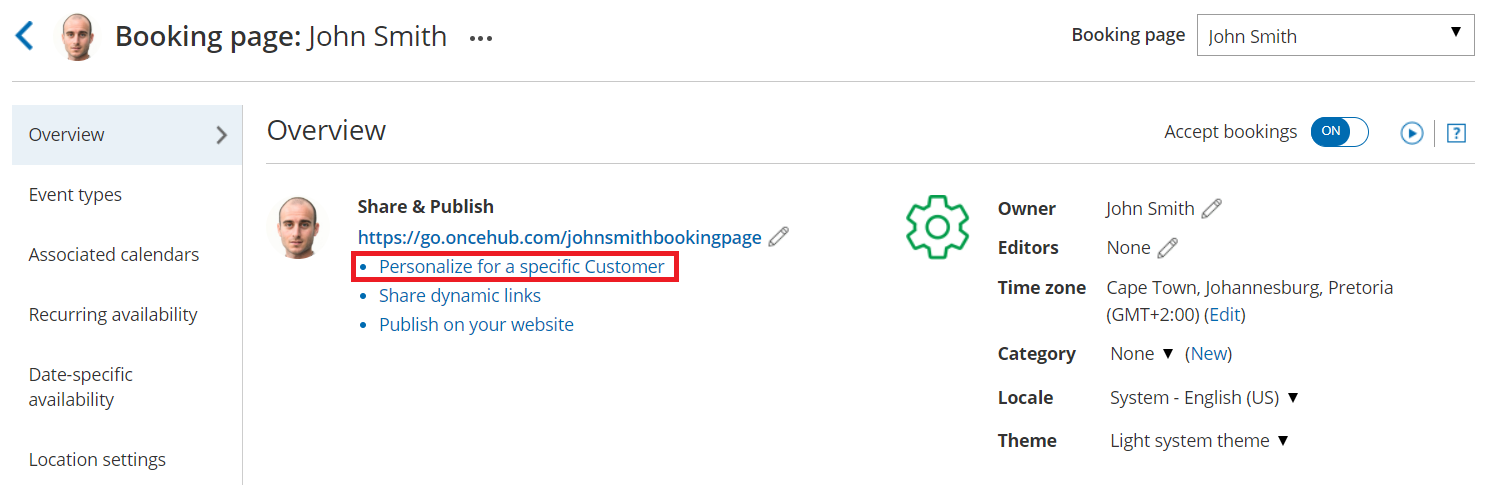 Figure 1: Booking page Overview section
- In the Personalize the link for a specific Customer pop-up, enter the Customer name and Customer email (Figure 2).
- By default, the Skip booking form field will be toggled ON once you've entered your Customer details. Skipping the Booking form step allows for a quicker booking process for your Customers.
- If you want to disable skipping the booking form, toggle the Skip booking form field to OFF.
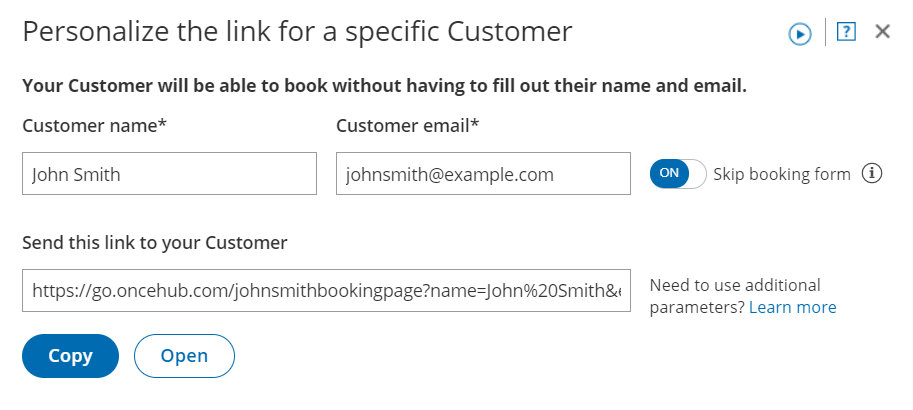 Figure 2: Personalize the link for a specific Customer pop-up
- To test the link, click the Open button.
- Click the Copy button to copy the link to your clipboard.
- Finally, paste the link into your email.


NoteIf required, you can include additional fields in the URL. Learn more about OnceHub URL parameters