Salesforce scheduling buttons for Person Accounts provide a quick method to schedule on behalf of a Customer. A schedule button on the Person Account record allows quick scheduling with the Person Account's related Contact record. Bookings made via these buttons are automatically added to the Salesforce record that the booking is scheduled from.
Salesforce scheduling buttons can be configured to prepopulate the booking form, or skip it altogether. This is enabled by the optional mapping step in the Salesforce setup wizard, where you can define the mapping between Salesforce record fields and OnceHub Booking form fields.
In this article, you will learn how to add the Schedule with Me button to the Person Account Page Layouts in Salesforce.
Requirements
To add the Schedule with Me button to the Person Account Page Layouts in Salesforce, you will need:
- A Salesforce Administrator for your organization.
- A completed Salesforce connector setup in OnceHub.
- A OnceHub User connected to Salesforce.
Creating a Contact Lookup field
First, we will add a custom Lookup field to the Person Account record.
- Sign in to Salesforce as your API user.
- Go to the Setup page.
- In the Platform Tools section, go to Objects and Fields -> Object Manager (Figure 1).
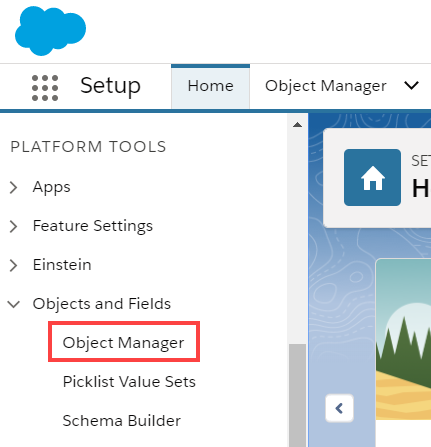 Figure 1: Object Manager in the Objects and Fields menu
- In the Object Manager list, select the Account object (Figure 2).
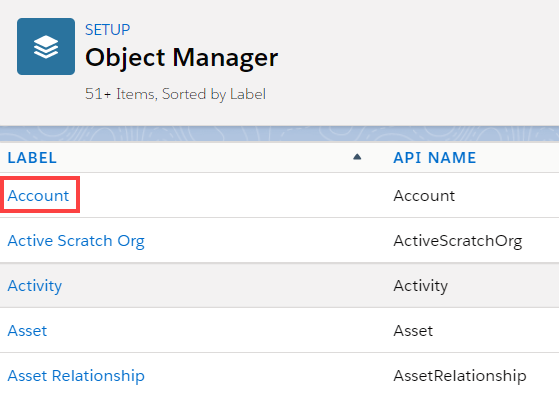 Figure 2: Account object in the Object Manager list
- Select Field & Relationships -> New (Figure 3).
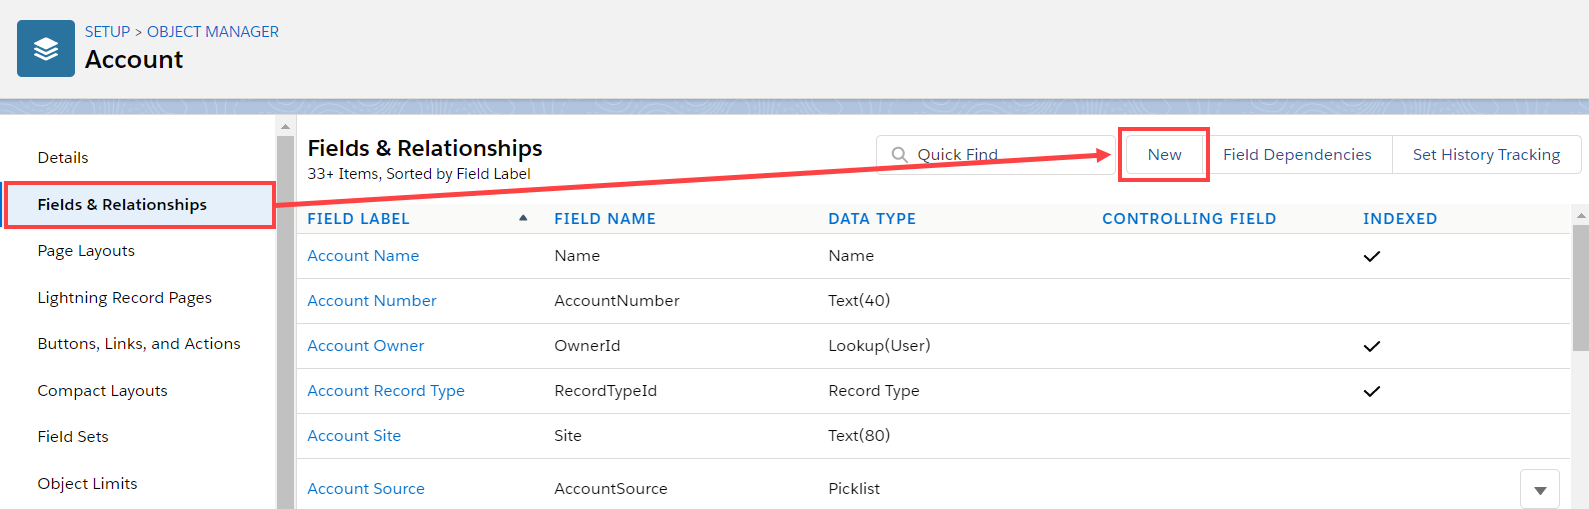 Figure 3: Fields & Relationships
- In the New Custom Field pane, select Lookup Relationship and click Next (Figure 4).
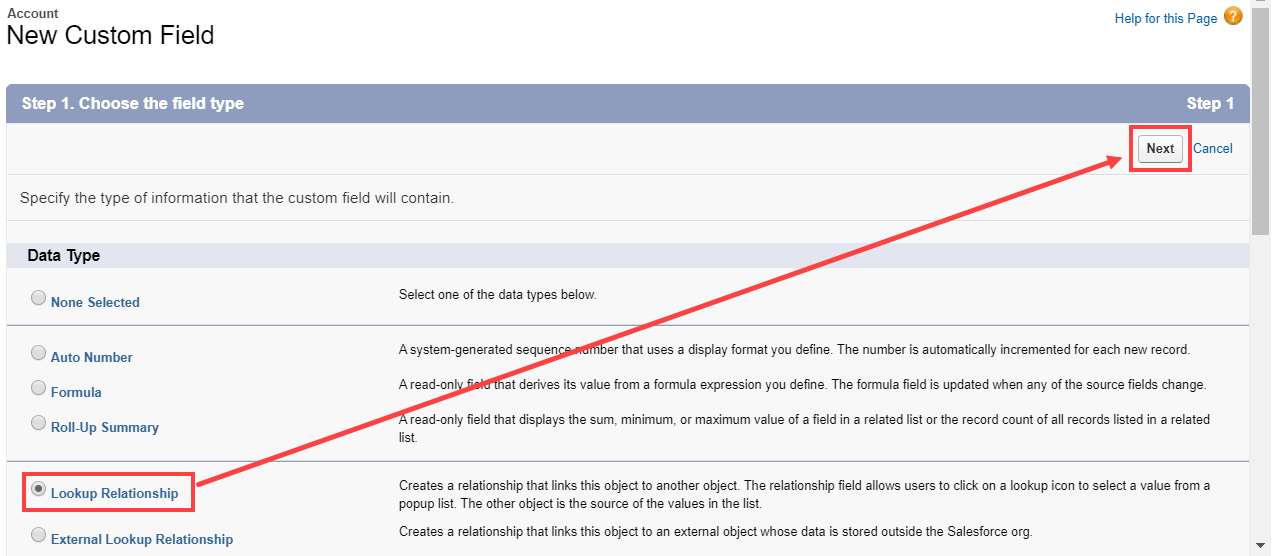 Figure 4: Lookup Relationship
- In the Related to drop-down, select Contact.
- Click Next.
- Enter a label and name for the Lookup field, then click Next (Figure 5).
- Field Label: Contact
- Field Name: Contact_ID
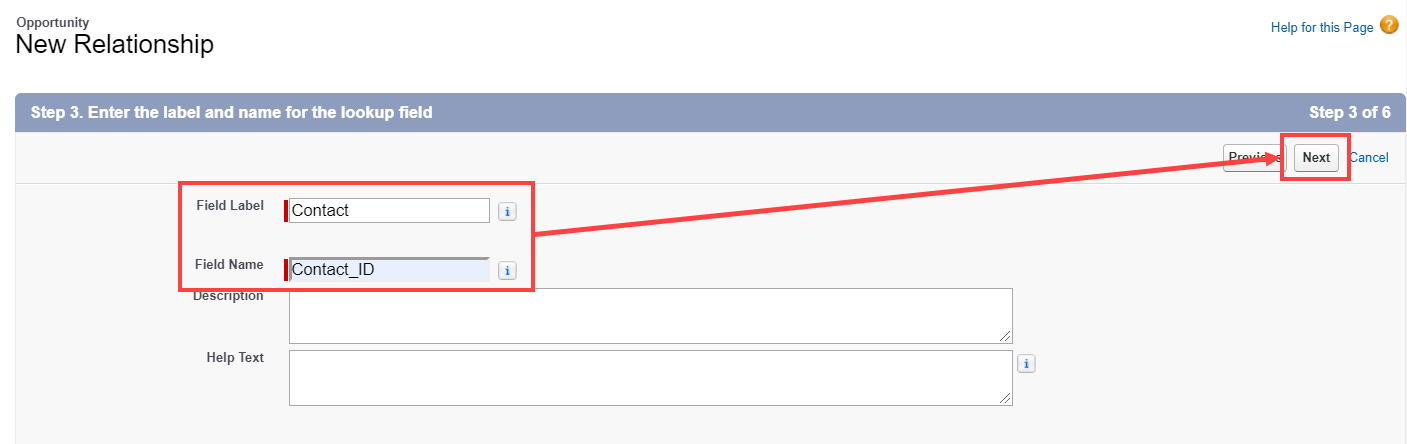 Figure 5: New Relationship
- In Step 4 and Step 5, click Next.
- In Step 6, click Save.


Creating a button in Salesforce
Now you can create the button to add to the Person Accounts Page Layout. The button will retrieve the Contact ID from the custom Contact Lookup field. When clicked, you will be able to make a booking on behalf of the Contact added to that Person Account.
NoteYou can also follow the steps below for Custom objects. In this case, the button and the custom Lookup field should be added to a Custom object instead of the Person Account Page Layout.
- Go to the Setup page.
- In the Platform Tools section, go to Objects and Fields -> Object Manager.
- Select the Account object.
- Select Buttons, Links, and Actions -> New Button or Link (Figure 6).
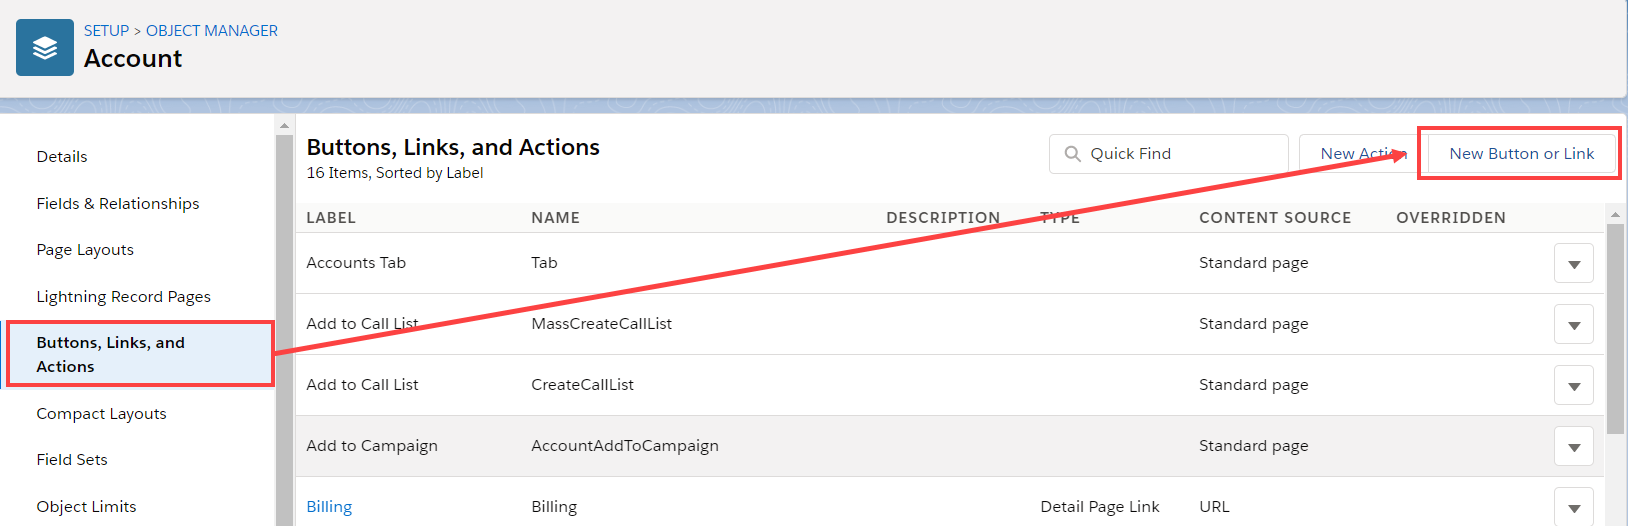 Figure 6: New Button or Link
- In the New Button or Link pane, enter the following information:
- Label: Schedule with related Contact
- Name: Schedule_with_related_Contact
- Description: This button allows you to schedule meetings on behalf of the Contact related to this Person Account record.
- Display Type: Detail Page Button
- Behavior: Display in new window
- Content Source: URL
Copy the following link and paste it in the large text box (Figure 7).
https://go.oncehub.com/EXAMPLEBOOKINGPAGE?so&Skip=1&sfLeadId={!Lead.Id}&sfContactId={!Account.Contact_IDid__c}&sfCaseId={!Case.Id} Figure 7: Paste link in the large text box
Replace the placeholder URL (Figure 8) with the Public link of the Booking page or Master page that you want to use for the new button. You can find the Public link in the Booking page Overview section or Master page Overview section.
 Figure 8: Placeholder URL text
For example, if you want to create a button for a Booking page with the Public link https://go.oncehub.com/danafisher, your finished link would be:
Figure 8: Placeholder URL text
For example, if you want to create a button for a Booking page with the Public link https://go.oncehub.com/danafisher, your finished link would be:
https://go.oncehub.com/danafisher?soSkip=1&sosfLeadId={!Lead.Id}&sosfContactId={!Account.Contact_IDid__c}&sosfCaseId={!Case.Id}- Click Save.


Adding a button to Salesforce Page Layouts
The next step is to add the new button you created to the Person Accounts Page Layout. The button will retrieve the Contact ID from the custom Contact Lookup field. When clicked, you will be able to make a booking on behalf of the Contact added to that Person Account.
Note Page Layouts control which buttons are visible. If you want to display the buttons only to specific Salesforce Users, you can assign your Page Layouts to specific Users. Learn more about assigning Page Layouts to Profiles
- Go to the Setup page.
- Enter Person Accounts in the Quick Find box.
- Select Page Layouts.
- In the Layout editor, select Mobile & Lightning Actions.
- Click and drag the Schedule with related Contact button to the Salesforce Mobile and Lightning Experience Actions section.
- Click Save.