Master pages allow you to combine multiple Booking pages and Event types into one point of access for your Customers, providing support for a wide range of scheduling scenarios.
When you create a Master page, you can it set up so that Customers can select the Team member they want to book with, or set it up so that bookings are automatically assigned to Team members according to rules you create. Alternatively, you can create a Master page that combines Booking pages representing different locations or channels. You can create as many Master pages as you need to meet your organization’s requirements.
 Figure 1: Master page Overview
In this article, you'll learn how to create a Master page.
Tip
If you would like to generate one-time links which are good for one booking only, you should use a Master page using Rule-based assignment with Dynamic rules.
One-time links eliminate any chance of unwanted repeat bookings. A Customer who receives the link will only be able to use it for the intended booking and will not have access to your underlying Booking page. One-time links can be personalized, allowing the Customer to pick a time and schedule without having to fill out the Booking form.
Requirements
To create a Master page, you must be a OnceHub Administrator.
Creating a Master page
- Booking pages on the left.
- Click the Plus button
 in the Master pages pane.
 - The New Master page pop-up will appear (Figure 2).
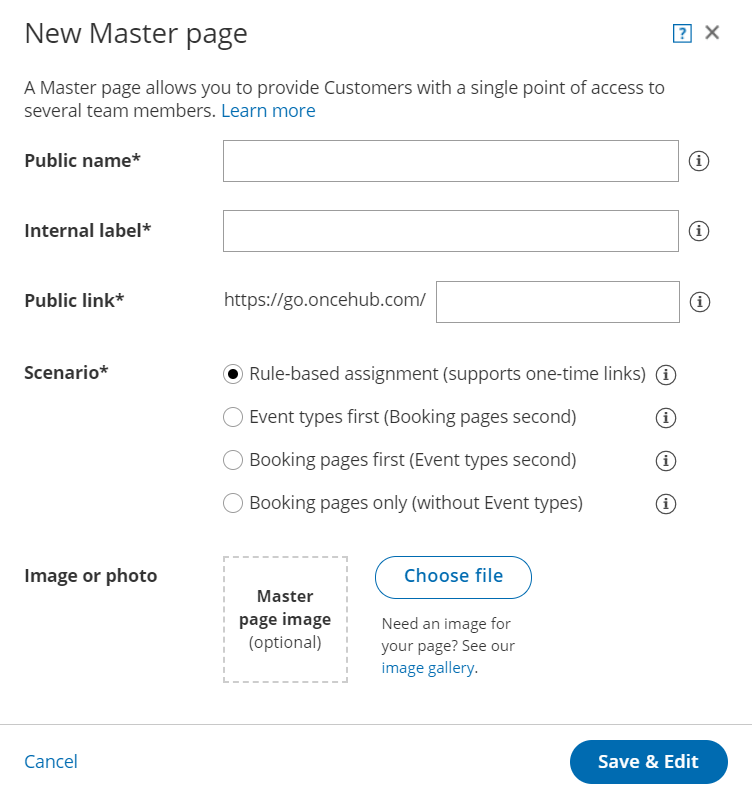 Figure 2: New Master page pop-up
- Define the properties for your Master page.
- Public name: The Public name is visible to Customers as the page title. It can be changed at any time in the Public content section.
- Internal label: The Internal label is only visible internally, and not visible to your Customers. A recognizable label is recommended because the Master page will be identified with this label throughout your OnceHub app. It can be changed at any time in the Master Page Overview section.
- Public link: The Public link is the link used by Customers to access the page. It must be unique and include at least four characters. It can be changed at any time in the Overview section. Learn more about Public links
- Select your Master page scenario. This determines your Master page's scheduling flow. Master pages can have one of four different flows.
- Team or panel page: Customers select a time and bookings are automatically assigned to Team members according to the rules that you define in the Master page Assignment section.
- Event types first: Customers first select an Event type, then they are presented with the Booking pages that provide that Event type. Once they select a Booking page, they will be presented with time slots based on that Booking page’s availability.
- Booking pages first: Customers first select a Booking page, then they are presented with the Event types offered by that Booking page. Once they select an Event type, they are presented with the availability of the Booking page they selected.
- Booking pages only: Customers select a Booking page. Then, they are presented with the Booking page’s availability. This option is useful if you don't use Event types and there are no shared settings between your Booking pages.
NoteThe scenario cannot be changed after you create a Master page.
- Add an Image or photo to your page. This will be visible to Customers. It can be changed at any time in the Public content section.
- Click Save & Edit.
 in the Master pages pane.
You're all set! You'll be redirected to the Master page Overview section to continue editing your settings.