When the activity status of a booking is Scheduled, Rescheduled, No-show, or Completed, the User can request to cancel or reschedule a booking directly from the Activity stream.
NoteYou can cancel or reschedule directly from your calendar if you have connected your OnceHub Account to Google Calendar or Exchange/Outlook Calendar.
In this article, you'll learn how to cancel or request reschedule directly from the Activity stream when you use Booking pages associated with Event types.
Effects of canceling or rescheduling
When you request to reschedule from the Activity stream, the booking is canceled and a reschedule request email notification is sent to both the User and the Customer. To reschedule, the Customer clicks the Reschedule now button directly from the email notification, or the Customer's cancel/reschedule link in the calendar event. Learn more about the effects of rescheduling
When you cancel a booking from the Activity stream, a cancellation email notification is sent to both the User and the Customer.
Learn more about the effects of cancellation
Requirements
To cancel a booking or request to reschedule from the Activity stream, you must be the Owner, an Editor, or Viewer of the Booking page that the booking was made on.
Rescheduling a booking made on a Booking page with Event types
- Select the activity in the Activity stream.
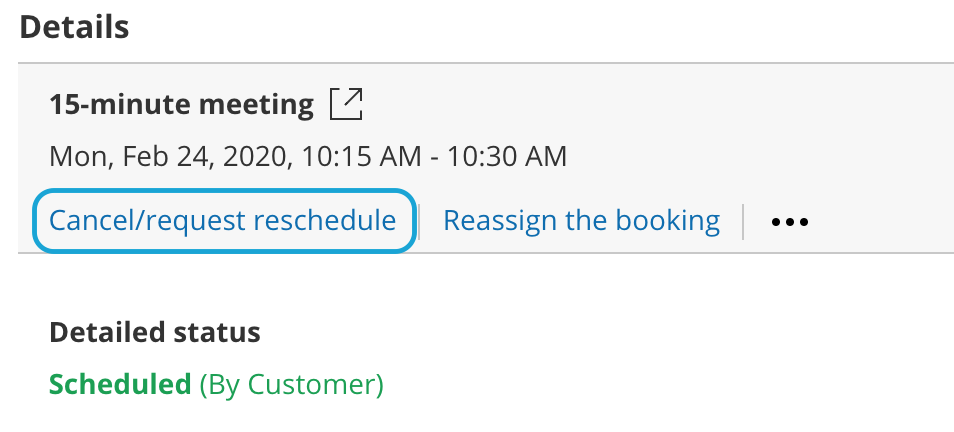
- In the Details pane, click the Cancel/request reschedule link (Figure 1).
 Figure 1: Cancel/request reschedule button
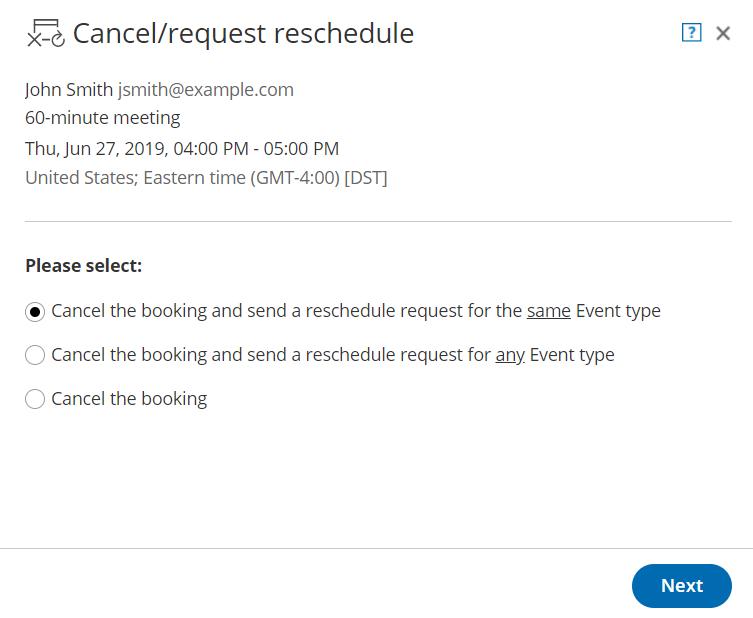
- The Cancel/request reschedule pop-up will appear (Figure 2).
 Figure 2: Cancel/request reschedule pop-up—Selection step
- Select whether you want send a reschedule request for the same Event type, or a reschedule request for any Event type.
- Cancel the booking and request reschedule for the same Event type: The Customer will only be able to reschedule with the same Event type that they originally booked on your Booking page or Master page. If you use Payment integration, the Customer will not be asked to pay any reschedule fee. The payment data will be reassigned from the cancelled booking to the rescheduled booking in the Activity stream after the Customer reschedules.
- Cancel the booking and request reschedule for any Event type: The Customer will be able to reschedule with any Event type on your Booking page or Master page. If you use Payment integration, the original booking is canceled and refunded. The Customer will be asked to pay the full Event type price when rescheduling, as if it was a new booking.
- Click Next.
- In the Notification step, you can add a reschedule reason that will be provided to the Customer.
- Click Next.
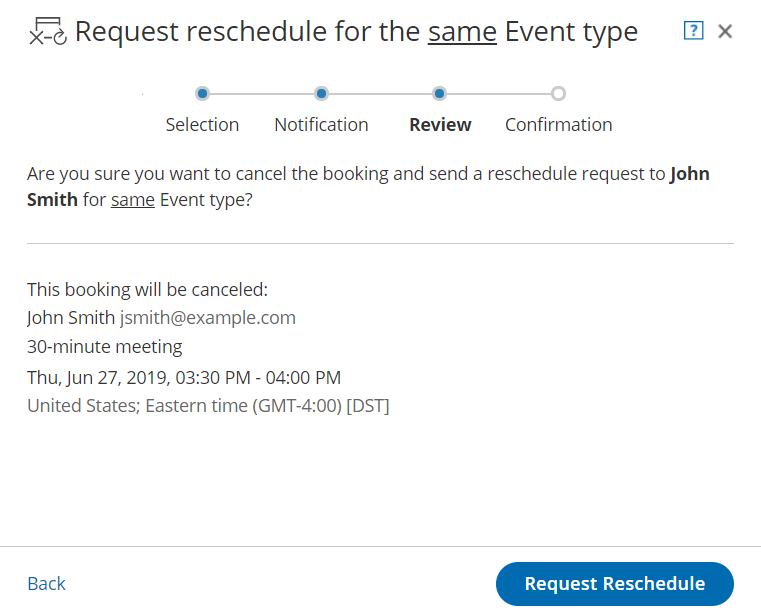
- In the Review step (Figure 3), you can confirm the details of the booking that you're about to cancel and request that the Customer reschedules.
 Figure 3: Cancel/request reschedule pop-up—Review step
- Click Request reschedule.
- The original booking will be canceled and the Customer will receive an email notification to reschedule. The Booking page Owner and any additional stakeholders with also receive an email notification. Learn more about notification scenarios
Note You can always decide to change your selection by clicking Back at any step of the Cancel/request new times process.
To confirm the action, you must click the Request reschedule in the last step of the pop-up.
Canceling a booking made on a Booking page with Event types
- Select the activity in the Activity stream.
- In the Details pane, click the Cancel/request reschedule link (Figure 4).
 Figure 4: Cancel/request reschedule button
- The Cancel/request reschedule pop-up will appear.
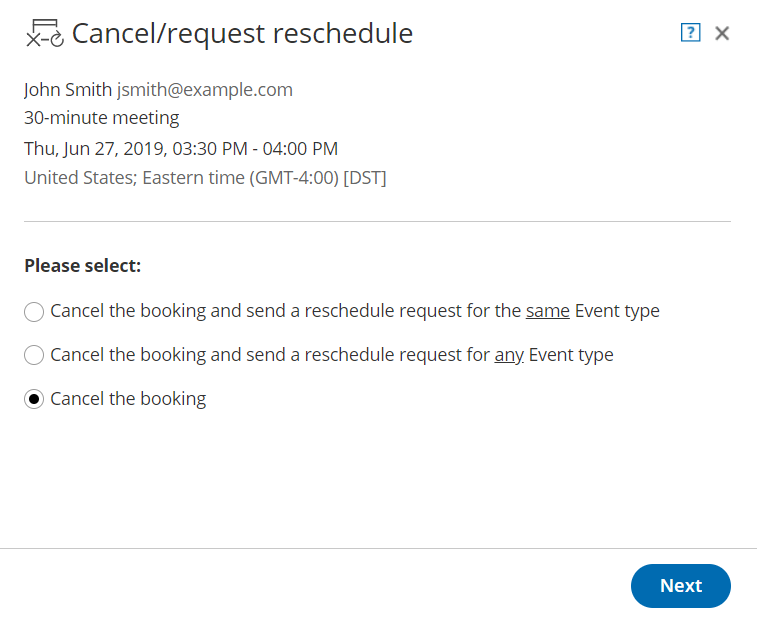
- Select Cancel the booking (Figure 5).
 Figure 5: Cancel/request reschedule pop-up—Selection step
- Click Next.
- In the Notification step, you can add a cancellation reason that will be provided to the Customer.
- Click Next.
- In the Review step, you can confirm the details of the booking that you're about to cancel.
- Click Cancel booking.
NoteWhen using Payment integration, refunds can be processed manually via OnceHub. In this case, manual refunds can be processed directly from the Cancel/request reschedule pop-up in the Refund step.
- The original booking will be canceled and the Customer will receive an email notification, along with the Booking page Owner and any additional stakeholders. Learn more about notification scenarios
NoteYou can always decide to change your selection by clicking Back at any step of the Cancel/request new times process.
To confirm the action, you must click the Cancel booking in the last step of the pop-up.


