Booking reassignment allows you reassign bookings in your Activity stream from one Team member to another. In this article, you'll learn how to reassign a booking.
Requirements
- You must be a OnceHub Administrator.
- Additionally, you must be the Owner, an Editor, or a Viewer of the Booking page that the booking was made on.
- Booking reassignment is only available between Users who are both connected to Google Calendar, or Users who are both not connected to any calendar.
- The meeting type must be a one-on-one meeting. Panel or team-hosted meetings cannot be reassigned
Reassigning a booking
- Select the booking that you want to reassign in the Activity stream.
- In the Details pane, select Reassign the booking (Figure 1).
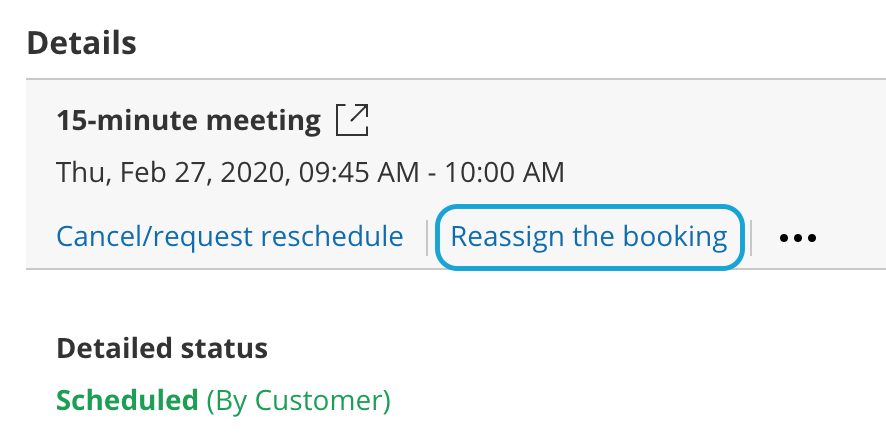 Figure 1: Reassign the booking
Note If the Reassign booking action is not available for the booking, it means that the booking is not eligible for reassignment. Learn more about the eligibility for Booking reassignment
- The Reassign the booking pop-up will open.
- Select the Booking page which you would like to reassign the booking to (Figure 2). You can filter by Booking page Owner or by Booking pages with available time using the left drop-down menu.
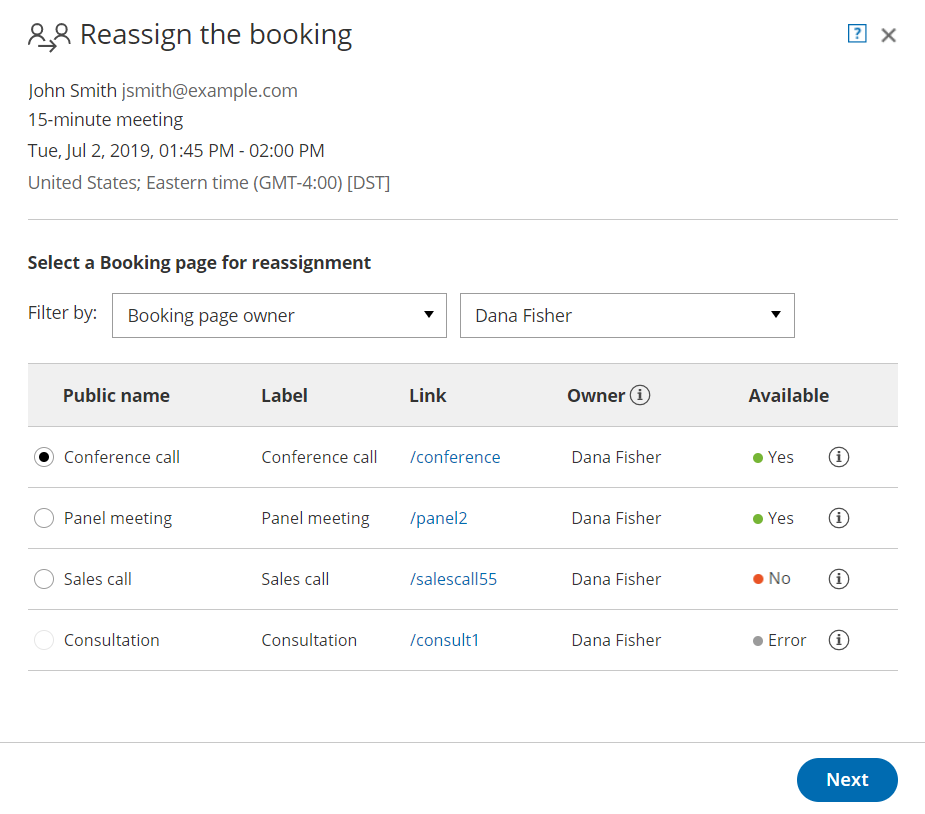 Figure 2: Reassign the booking pop-up
 - You can reassign a booking to a Booking page labeled Yes or No under the Available column.
- Yes: The Booking page is available at the designated time.
- No: The Booking page is either busy at the designated time, or the designated time is outside of the User’s recurring or date-specific availability. You can still reassign the booking to a Booking page that is not available.
- Error: The page cannot accept bookings due to a system error. The Booking page may be disabled, or there may be a calendar connection error. It can also mean that the Booking page is not eligible for reassignment.
- Click Next.
- In the Notification step, you can add a Booking reassignment reason that will be provided to the Customer. This step is optional.
The Booking reassignment reason is shown in the Details pane of the Activity stream for a reassigned booking. It is also included in the email notifications sent to the original Booking owner, the new Booking owner, and any additional stakeholders. This allows you to communicate the reason for reassigning a booking to relevant Users. - Click Next.
- In the Review step, confirm the details of the booking that you're about to reassign.
- Click Reassign booking.
- In the Confirmation step, you'll receive confirmation that the booking has been successfully reassigned.

