Panel meetings allow your Customers to book a time to meet with multiple team members simultaneously. When a Customer visits your Master page, they will see availability based on the specific panel combination. You can create panels with specific team members, or dynamic panels that use Resource pools to assign the relevant team member.
In this article, you'll learn how to create a Panel meeting.
Requirements
To create a Panel meeting, you must be a OnceHub Administrator.
Creating a Panel meeting
- Go to Booking pages in the bar on the left and click the plus
 button in the Master pages pane.
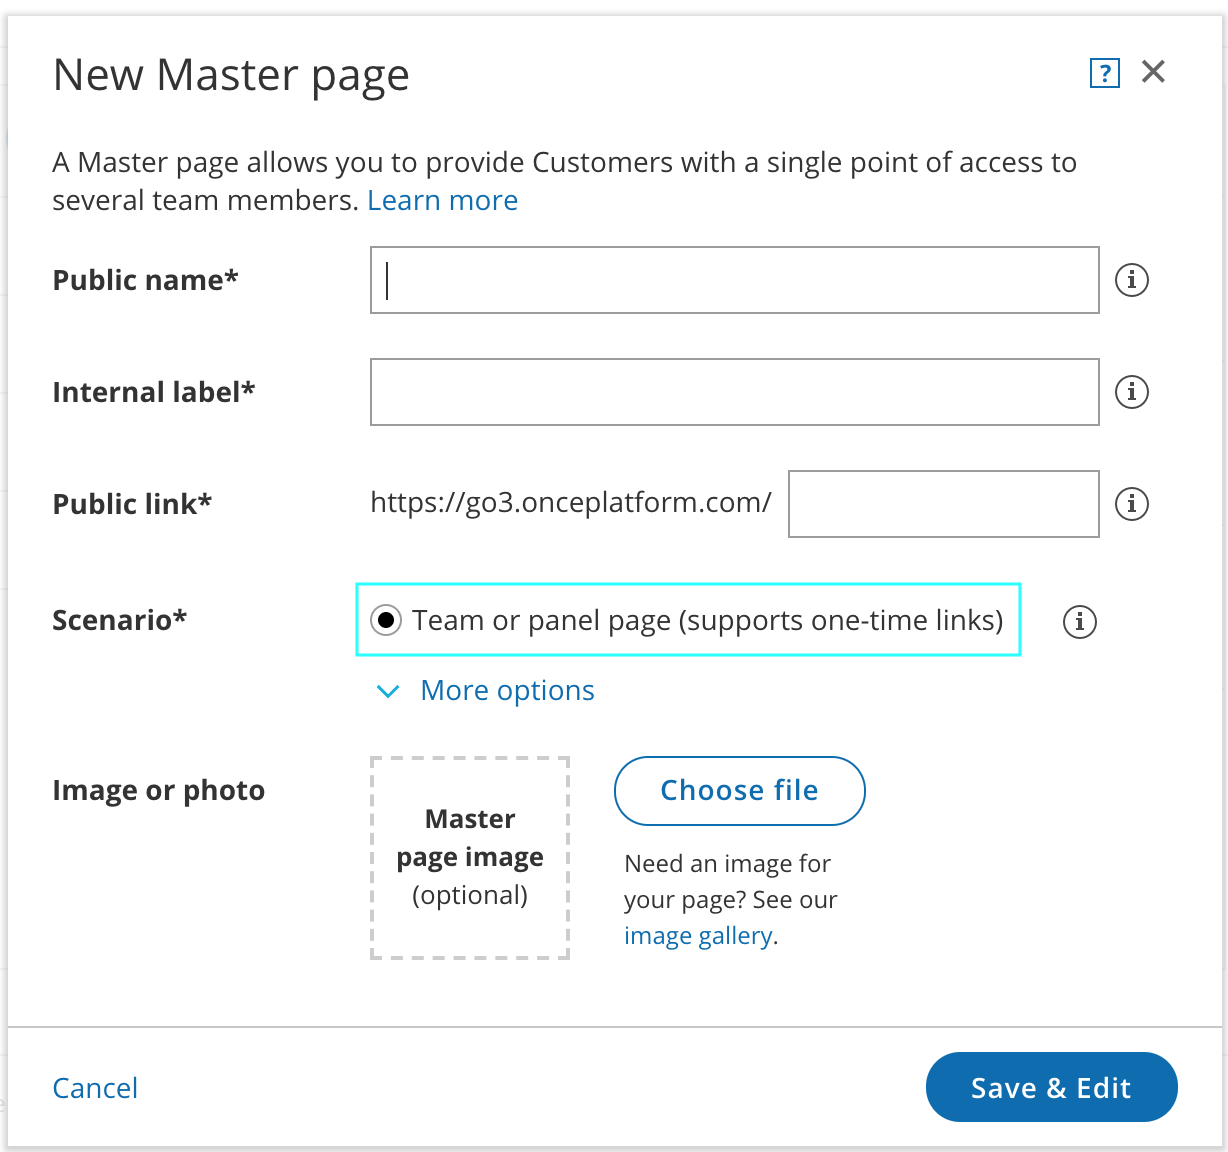
 - The New Master page pop-up appears (Figure 1).
 Figure 1: New Master page pop-up
- Select Team or panel page as the Master page scenario.
- Populate the pop-up with a Public name, Internal label, Public link and an image if you choose. Then, click Save & Edit. You'll be redirected to the Master page Overview section to continue editing your settings.
- Go to the Event types and assignment section of the Master page.
TipWhen you use a Master page with a team or panel page, you can also generate one-time links which are good for one booking only, eliminating any chance of unwanted repeat bookings.
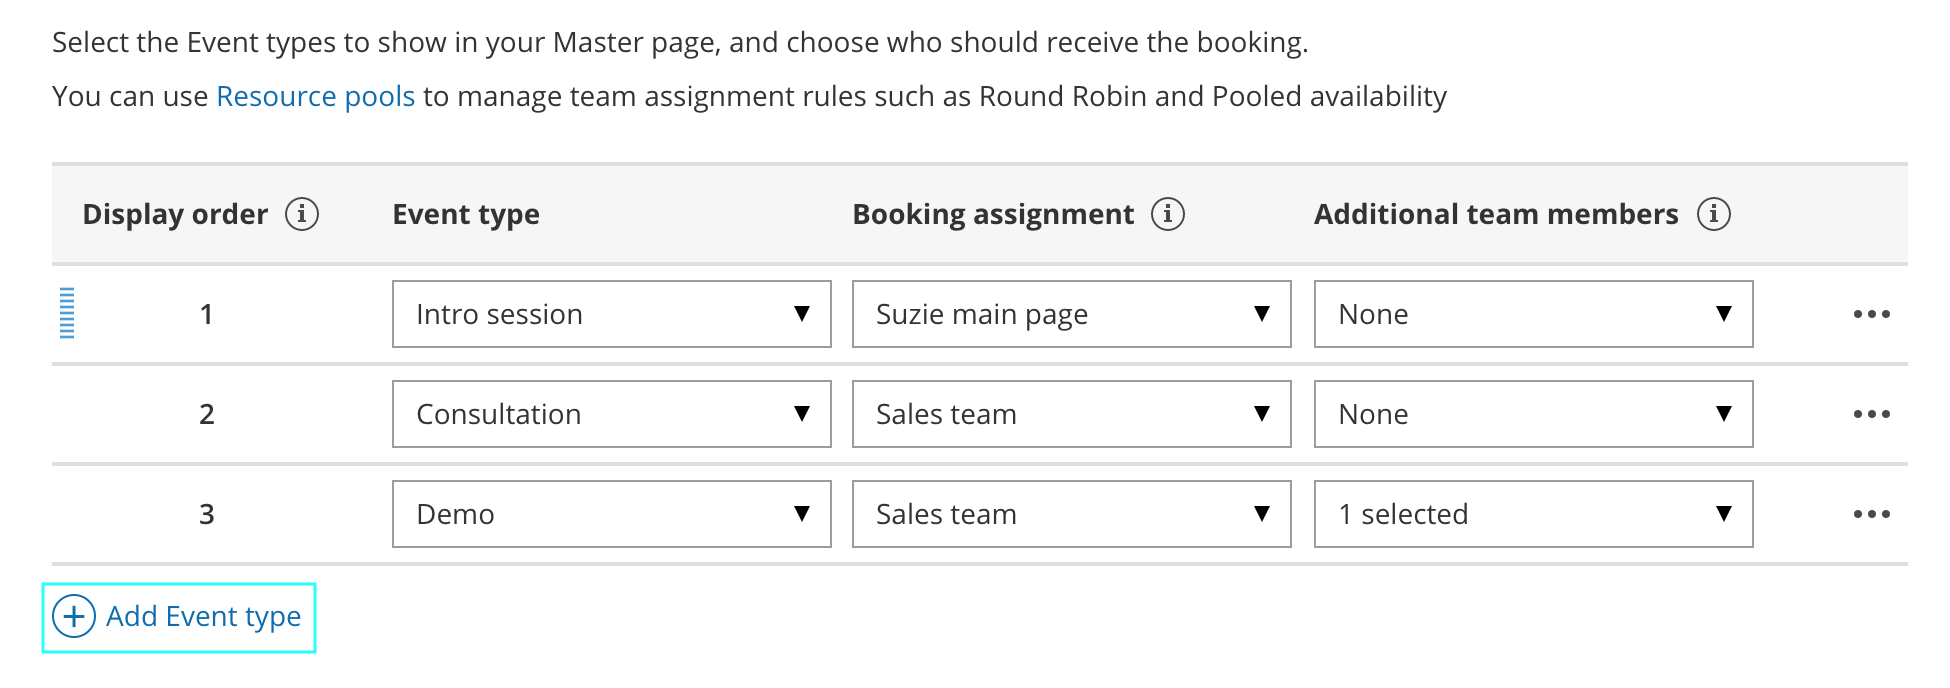
A Customer who receives the link will only be able to use it for the intended booking and will not have access to your underlying Booking page. One-time links can be personalized, allowing the Customer to pick a time and schedule without having to fill out the Booking form. - Click Add Event type (Figure 3).
 Figure 3: Event-based rules step
- Use the Event types drop-down to select which Event types will be offered on your Master page.
- Master pages with team or panel pages can only include Event types configured to Automatic booking and Single session. Learn more about conflicting settings when using team or panel pages
- Use the Booking assignment drop-down to choose a Booking page or Resource pool.
- The Booking assignment determines who owns the calendar event and the settings of the meeting, including the location, the Booking form, the post-scheduling flow, notifications and third-party integrations.
- If you select a Resource pool as your Booking assignment, bookings will be assigned to Team members according to the pool's distribution method.
- You can only select one Booking assignment.
- Use the Additional team members drop-down to select additional Booking pages and/or Resource pools to participate in the meeting.
- Additional team members are added as guests/attendees to the Booking owner's calendar event and are CC'd on all notifications sent to the Booking owner assigned.
- You can select an unlimited number of Additional team members.
- Click Save.
- Next, go to the Labels and instructions section and define the Public labels that your Customers will see. Here, you can also define selection instructions for your Customers. You should define what a Panel member represents, such as a consultant, interviewer, advisor, or Team member.
- Move on to the Public content section and define the information that Customers will see when they visit your Master page.
You're all set! When Customers visit your Master page, they will be able to book a time to meet with multiple team members simultaneously. You can test the page by clicking the Customer link in the Share & Publish section of the the Master page's Overview section.
NoteAny Booking page can be selected to participate in your Panel meeting, regardless of any existing associations between Booking pages and Event types.
 button in the Master pages pane.
