If you offer multiple meeting types which all have the same availability and same location, you can set up one Booking page with multiple Event types linked to it. Follow these steps to offer different appointment types on your Booking page.
- Create the Event types you need and define the settings for each Event type.
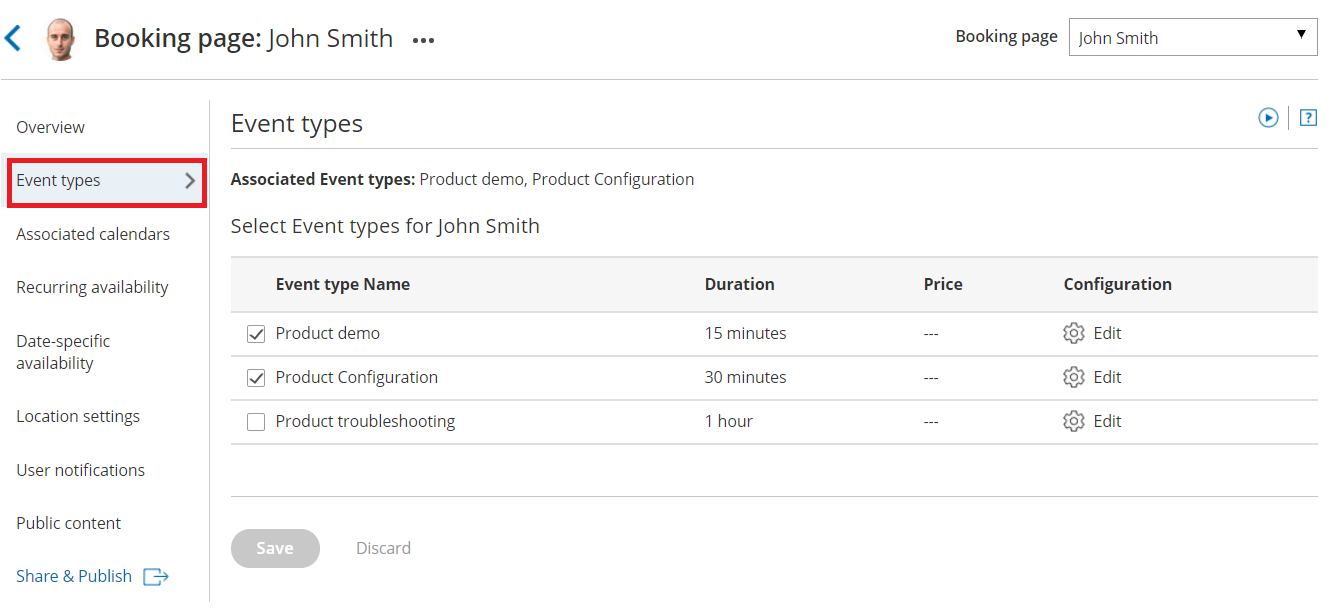
- In the settings for the relevant Booking page, go to the Event types section and add your Event types to your Booking page (Figure 1).
 Figure 1: Event types section of the Booking page
- Click Save.
Note The Scheduling options, Time slots, Booking form, Customer notifications and Cancel/reschedule sections will move from your Booking page and are now located on your Event types.
To test your Booking page with Event types, go to the Booking page Overview and make a test booking by using the public link in the Share & Publish section.
Using a Master page
If you would like to have more control over text and labels seen by your Customers, you can use a Master page. This provides you with more flexibility to customize the selection instructions and the public labels.
- Create a new Master page and add your personal details in the Public content section.
- In the Assignment section, add your Booking pages to the Master page.
- In the Labels and instructions section, customize the public labels and selection instructions.
To test your Master page, go to the Master page Overview and make a test booking by using the public link in the Share & Publish section.
Tip
If you would like to generate one-time links which are good for one booking only, you should use a Master page using Rule-based assignment with Dynamic rules.
One-time links eliminate any chance of unwanted repeat bookings. A Customer who receives the link will only be able to use it for the intended booking and will not have access to your underlying Booking page. One-time links can be personalized, allowing the Customer to pick a time and schedule without having to fill out the Booking form.
Learn more about using one-time links
