You can use the Notification templates editor to customize the email and SMS notifications that are sent to Customers and Users.
In this article, you'll learn how to create Custom templates for email and SMS notifications.
Accessing the Notification templates editor
Custom templates are created in the Notification templates editor. To access the editor, go to Booking pages in the bar on the left. Select the Notification templates editor on the left.
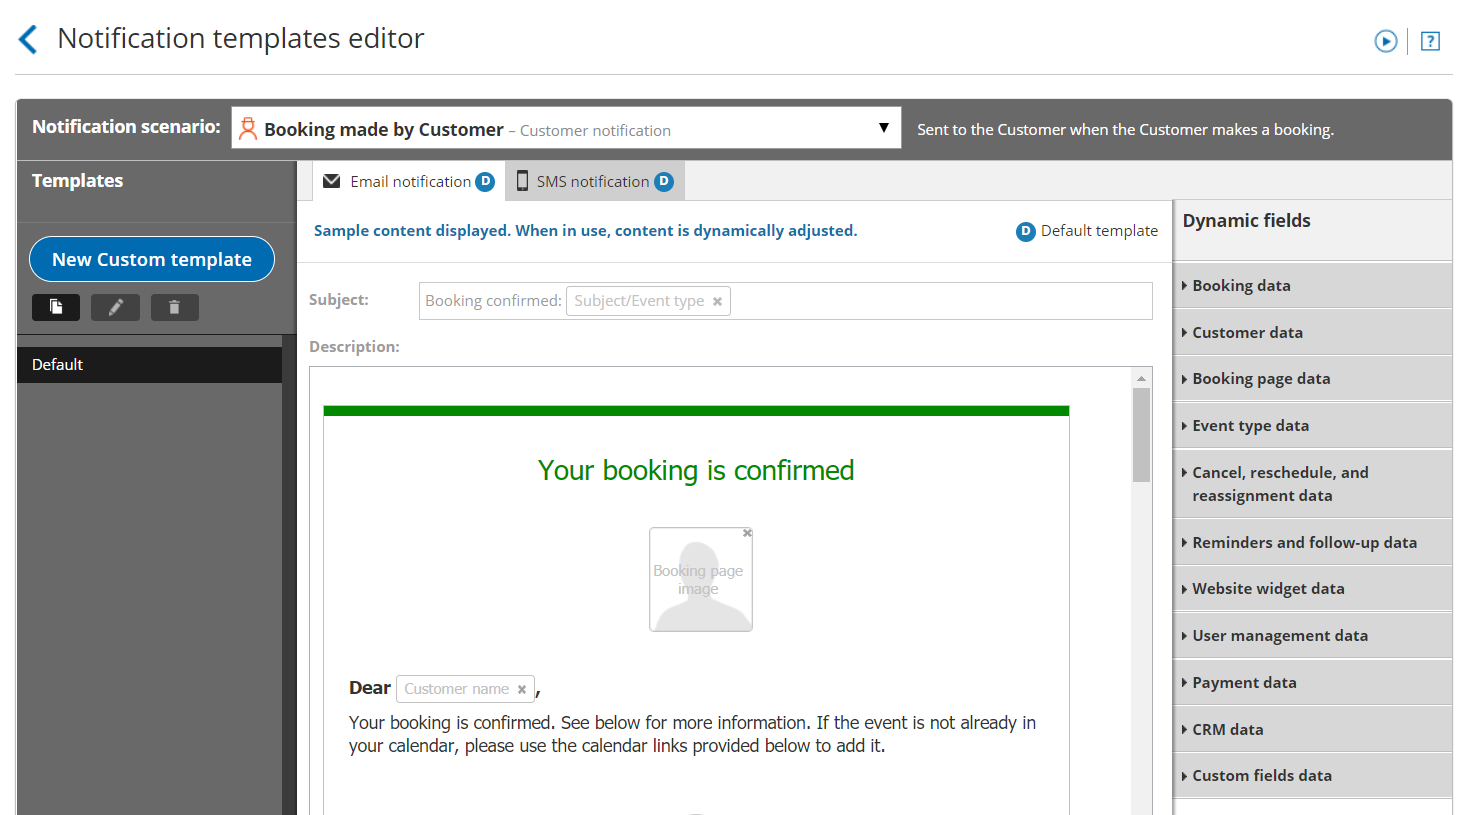 Figure 1: Notification templates editor
Creating a notification template
There are three ways to create a customized notification template. You can create a new template based on the Default template, copy an existing template you previously created, or create a blank template.
Creating a new template based on the Default template
If you like the Default template and want to make small changes to it, you can create a template based on the Default template and then customize it according to your needs.
- Select the Notification scenario that you want to work on from the drop-down menu (Figure 2). Learn more about Notification scenarios
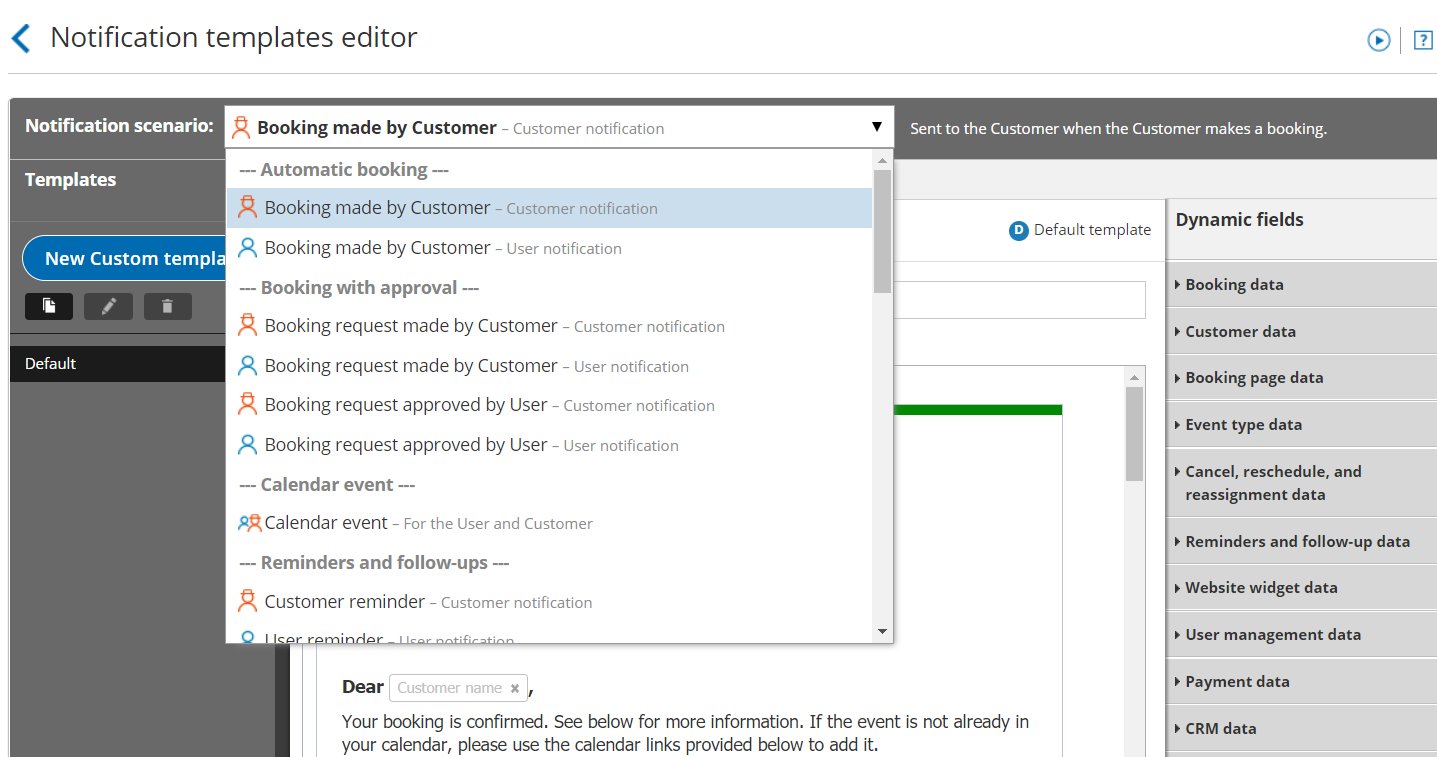 Figure 2: Notification scenarios drop-down menu
 - Click the New Custom template button in the left pane (Figure 3).
 Figure 3: Click the New Custom template button
 - In the New Custom template pop-up, enter a name for your template. This name can be changed later if required.
- In the Template content section, select Based on default template (Figure 4).
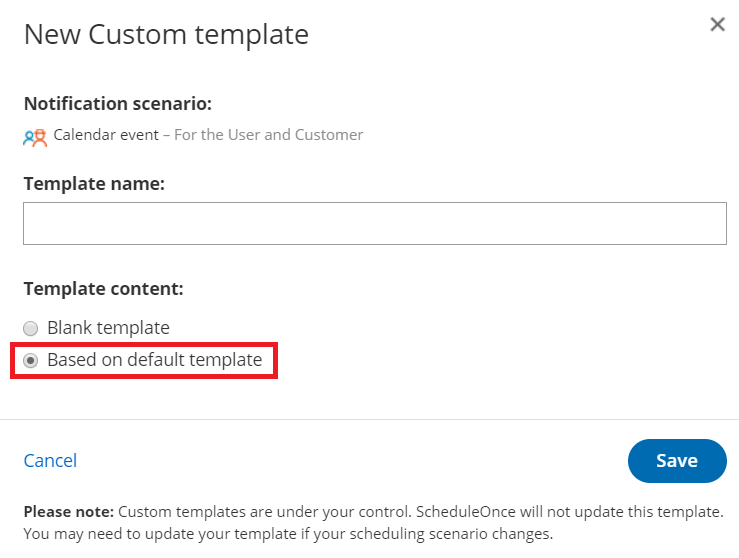 Figure 4: New Custom template pop-up
 - Click Save.
Copying an existing template
If you like a template that you've already created in the Notification templates editor, you can copy it and make changes to it, or use it for a different Notification scenario.
- Select the template you want to copy from the Templates list.
- Click the Copy icon (Figure 5).
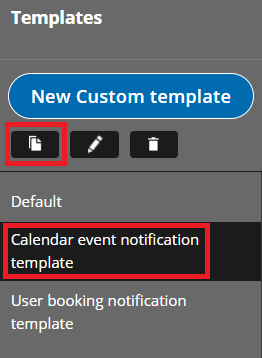 Figure 5: Copy an existing template
 - In the Copy template pop-up, use the drop-down menu to select the Notification scenario you want to use the template for.
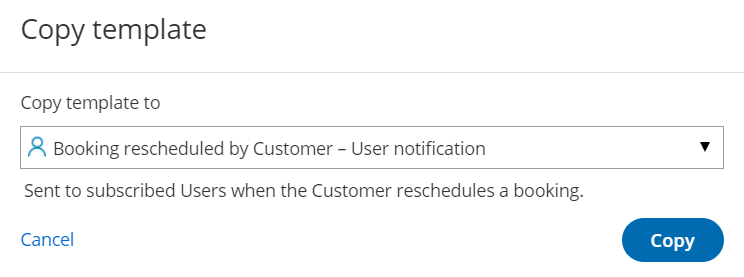 Figure 3: Copy template pop-up
 - Click Copy.
Creating a Blank template
If you want to create a fully customized notification template, you can create a Blank template.
- In the Notification scenario drop-down menu, select the Notification scenario you want to work on. Learn more about Notification scenarios
- Click the New Custom template button.
- In the New Custom template pop-up, enter a name for your template (It can be changed later).
- In the Template content section, select Blank template.
 Figure 4: New Custom template pop-up
 - Click Save.
Editing Custom templates
The Notification templates editor has two modes: WYSIWYG (What You See Is What You Get) and HTML. The WYSIWYG mode allows you to edit template content while viewing the content in the format it will appear. The HTML mode allows you to edit the HTML code directly.
Learn more about the WYSIWG editor
Dynamic fields
You can add Dynamic fields to your Notification templates to dynamically add variable data to your emails and SMS notifications. This allows you to personalize templates for different scenarios for Users or for Customers. For example, emails and SMS can include the Customer’s name and the meeting time and price if you are charging for an Event type. Learn more about Dynamic fields
Adding a Dynamic field
- Place the cursor in the template editor text box where you want to insert the Dynamic field (Figure 5).
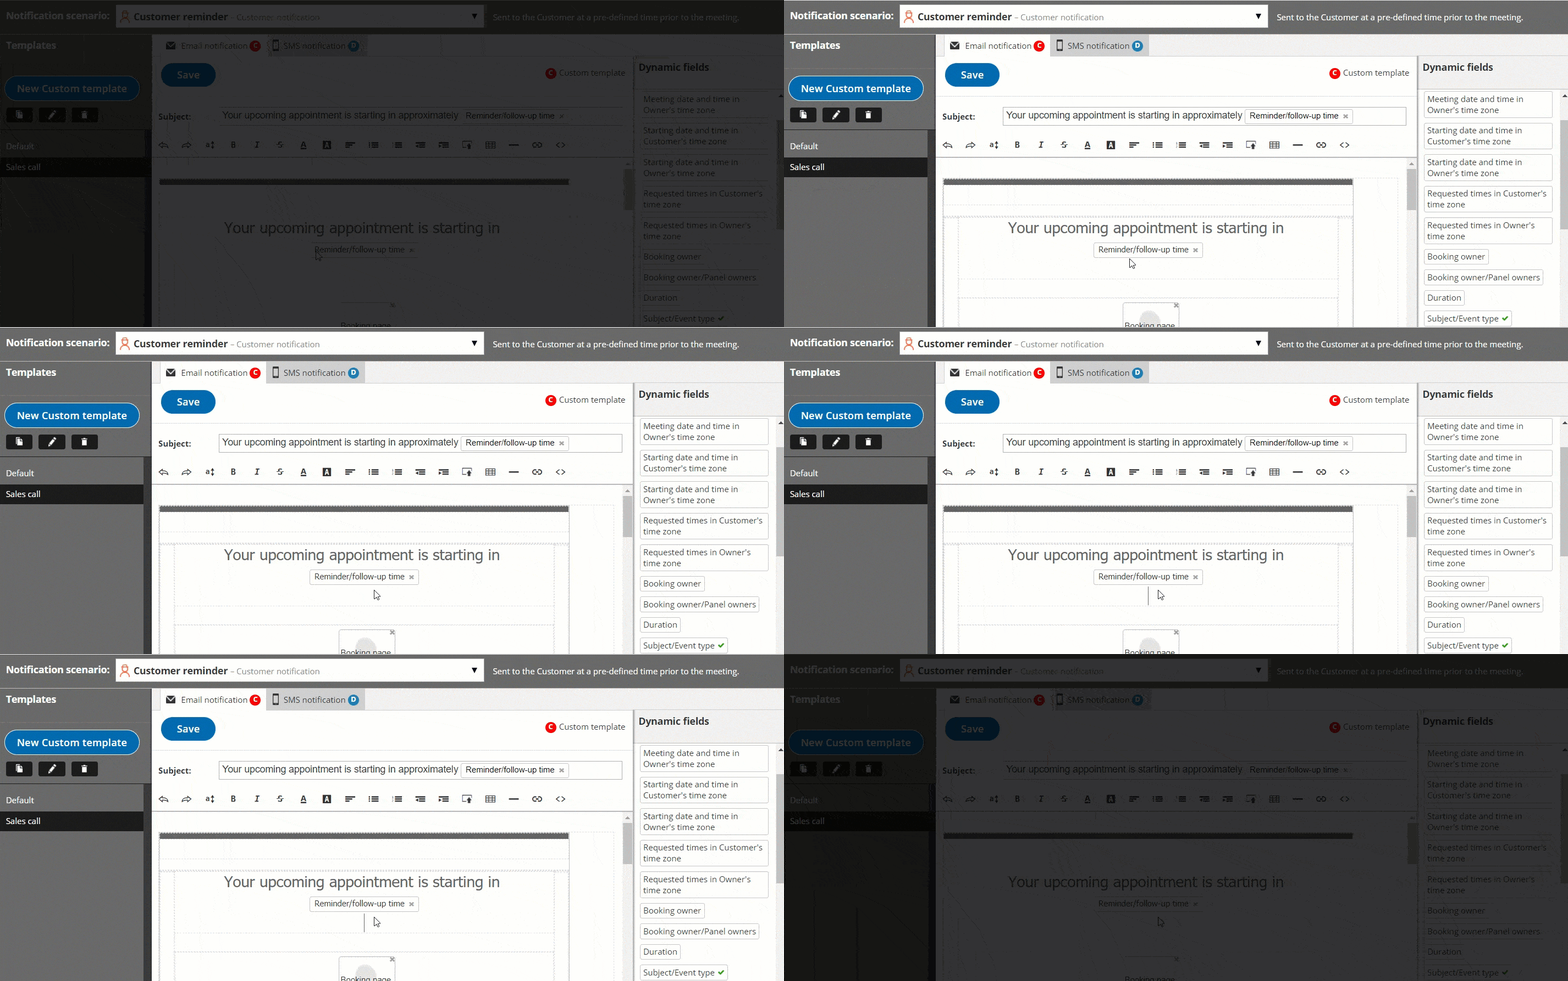 Figure 5: Place the cursor in the template editor text box
 - In the Dynamic Fields column on the right, click the Dynamic field you want to add (Figure 6).
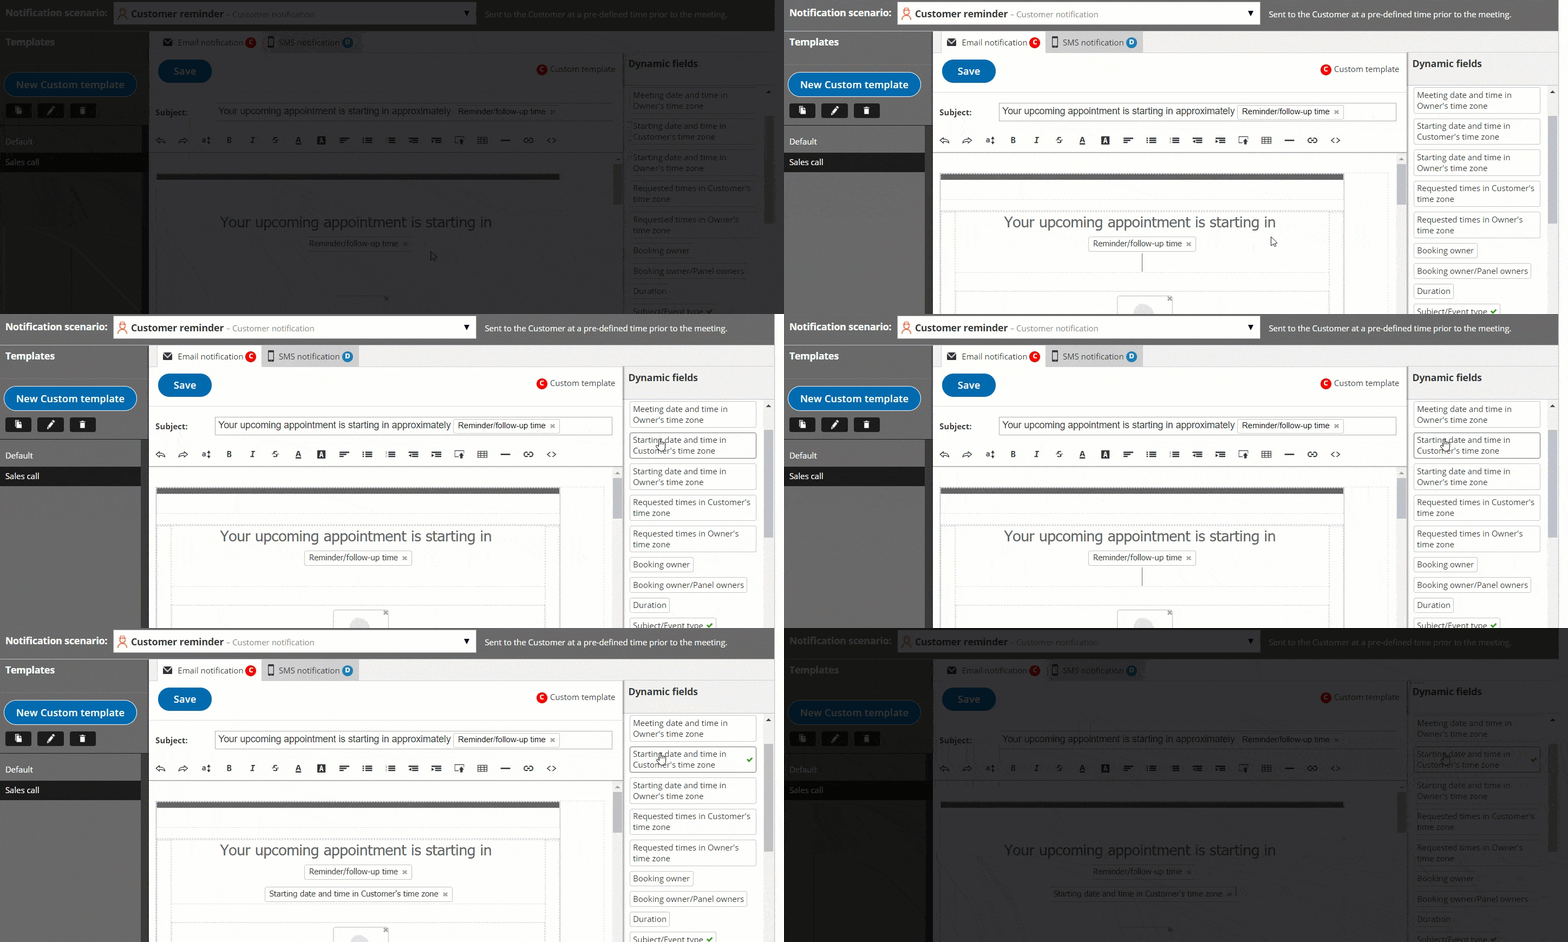 Figure 6: Add a Dynamic field
 - The chosen Dynamic field will appear in the selected location in the template.
To remove a Dynamic field, click on the X next to the Dynamic field you want to remove.
Note: When you use Dynamic fields, you need to be sure that the data exists in your account.
For example, Event type price is one of the Dynamic fields available to you. However, if you do not enter an Event type price in the Payment/cancel and reschedule policy section, no data will be displayed for this field in your emails and SMS notifications. Learn more about Dynamic fields
Where are notification templates used?
Notification templates are used in specific Notification scenarios. You can select which Notification template is used in each scenario from the Template drop-down menu in the Customer notifications section and User notifications section of your Booking pages and Event types.
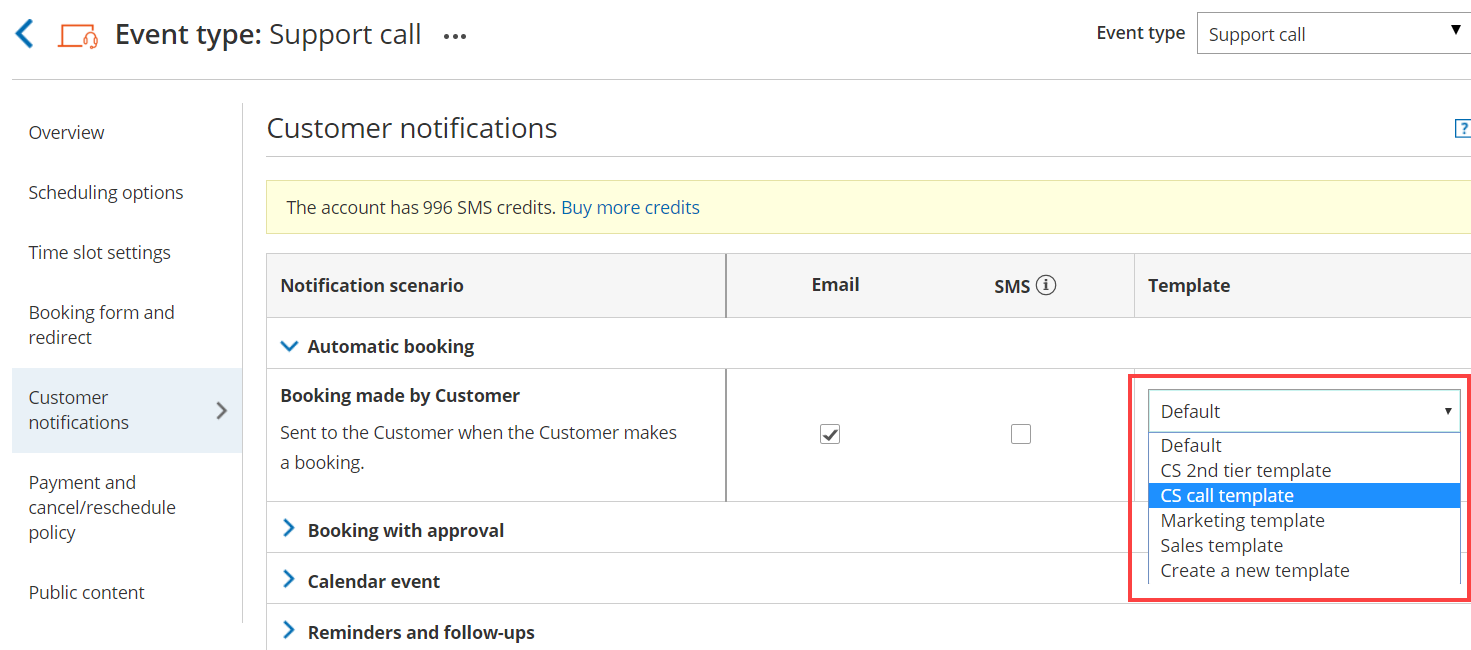 Figure 6: Template drop-down menu
Customer notifications templates
Customer notification templates are used in the Customer notifications section. To choose which notifications Customers receive, go to Booking pages in the bar on the left → relevant Event type→ Customer notifications.
NoteIf your Booking page is associated with an Event type, the Customer notifications section will be on the Event type.
When Customer notifications based on custom templates are sent, dynamic fields such as time zone, country, and location are shown in the locale (language) selected on the Booking page.
User notifications templates
User notification templates are used in the User notifications section. To edit which notifications Users receive, go to Booking pages in the bar on the left → relevant Booking page → User notifications (Figure 7).
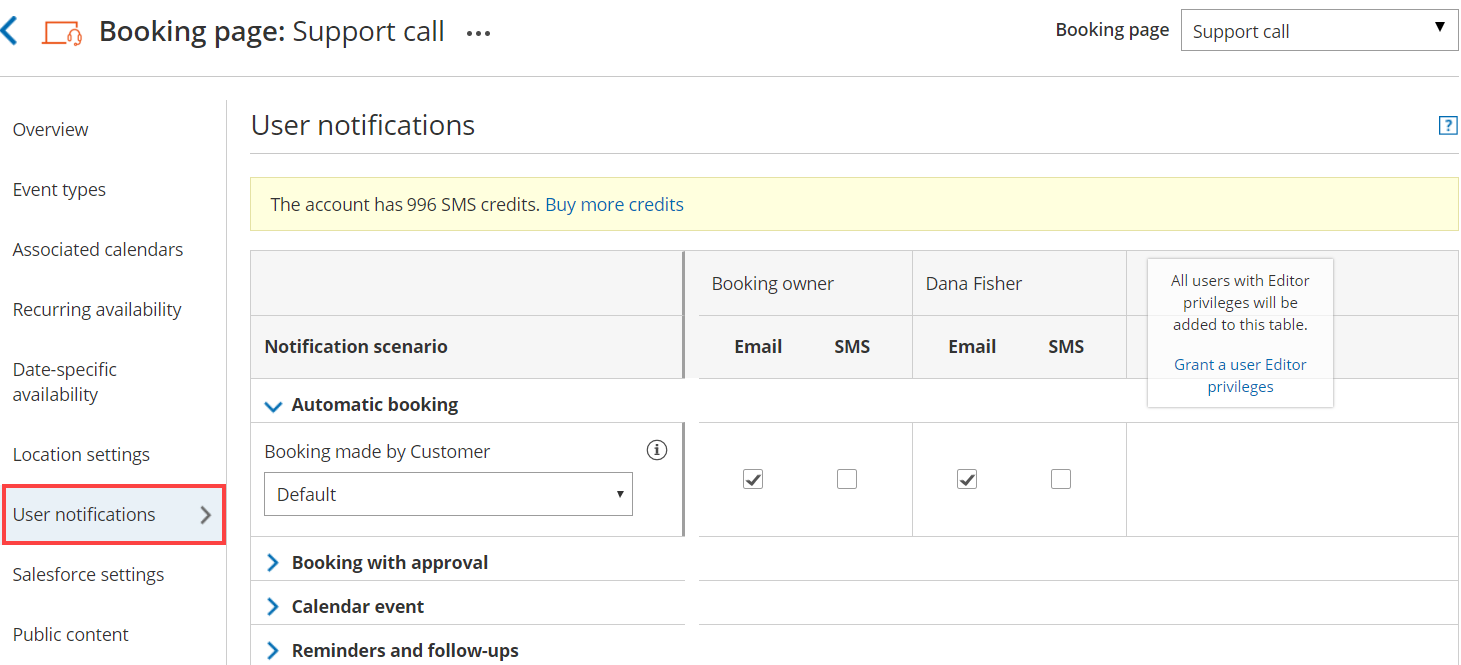 Figure 7: User notifications section
Calendar event template
You can access the Calendar event template in the User notifications section. To edit which template is used for the Calendar event, go to → relevant Booking page → User notifications.
New User sign-up template
New user sign-up templates is used in the Add a new User page. To edit which New User sign-up template is used, go to the Account gear menu → Users → New user button.


