Email from your domain allows you to personalize and brand your OnceHub email communications. You can use email from your domain to send all emails related to booking activity from your company’s domain and email address of your choice. Email from your domain is customized at the organization-level and changes the sending email address for all users.
You do not need an assigned product license to update the Email from your domain settings in OnceHub, though you do need to be an administrator. Learn more
In this article, you'll learn how to set up Email from your domain.
Requirements
To set up Email from your domain, you must be a OnceHub Administrator.
Setting up Email from your domain
Note Only admins are able to access account settings
- Go to Account settings by clicking the gear icon at the top right
- From the drop-down menu, select Security and compliance
- From the bar on the left, select Email from your domain
- Click the Connect your mail server button.
- The Email from your domain page will appear (Figure 1).
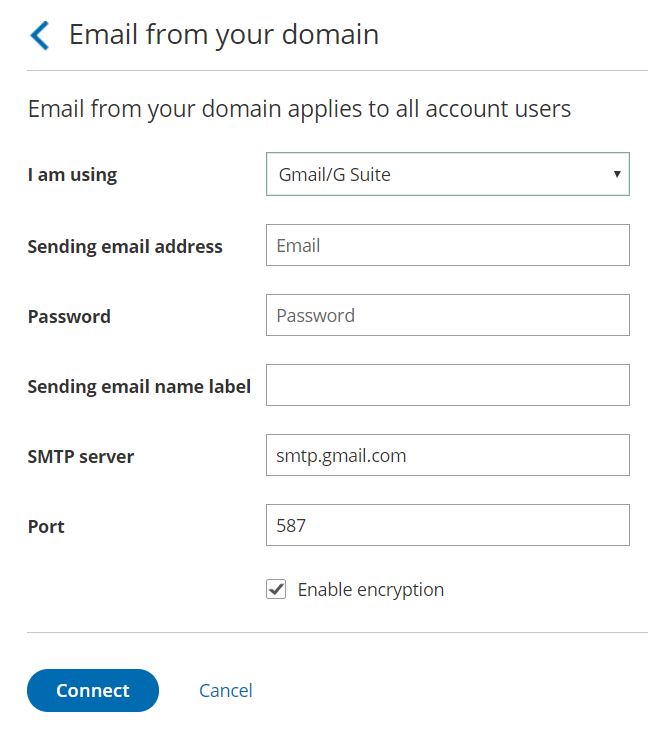 Figure 1: Email from your domain page
 - Choose your email server from the I am using drop-down menu.
- Enter the Sending email address. This will be the sending address for all Customer and User notifications for your OnceHub account.
- If you selected Amazon SES or Other in Step 7, you will need to enter a User name (Figure 2).
- Amazon SES: You will need your Amazon SES SMTP User name. Learn more about obtaining your Amazon SES SMTP credentials
- Other: You will need to figure out whether your email server requires SMTP credentials. If SMTP credentials are required, enter your SMTP User name. If not, enter the Sending email address as the User name.
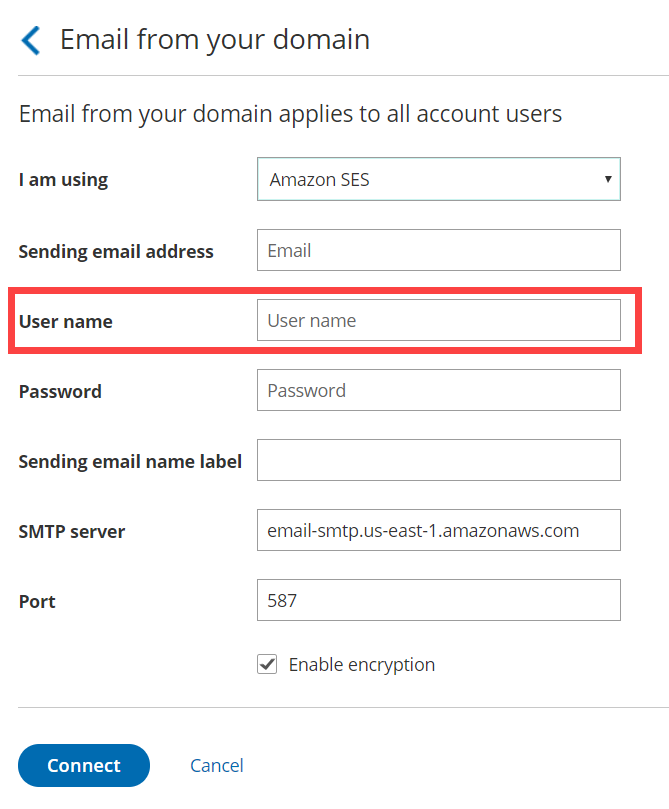 Figure 2: Enter a User name if you selected Amazon SES or Other
- Enter the Password. Please note this may not be the password you used to sign in to your email.
- If you're using Office 365, enter the password you use to sign in to your email account.
- If you're using G Suite, you'll need to either enable access to less secure apps OR use 2-Step Verification with an app-specific password. Learn more about connecting to a Google email server
- If you're using Amazon SES, you'll need the SMTP password, which is different from the AWS password you use to enter your email account. Learn more about obtaining your Amazon SES SMTP credentials
- If you selected Other in Step 4, you'll need to figure out whether your email server requires SMTP credentials. If SMTP credentials are required, enter your SMTP password. If not, enter the password you use to sign into your email account.
- Enter a Sending email name label. This will be the default label displayed in email notifications to every User on the account instead of the default label OnceHub Mailer.
Note If you selected Office 365 in Step 7, your Microsoft account display name that you set in your Microsoft account will be the default label for all email notifications to Users.
- Enter the SMTP server URL.
- If you are using an internally-hosted mail server, you will need to allow OnceHub to access it. The OnceHub server IP addresses are:
52.184.200.53
52.177.197.227
13.77.100.95
52.177.198.87
52.225.219.177
52.225.218.66
52.177.199.129
13.68.89.72
40.84.2.28
104.209.238.147
40.123.38.105 - If you are using a Microsoft Exchange server, you will need to enable relaying for the OnceHub servers. The IP addresses are:
52.184.200.53
52.177.197.227
13.77.100.95
52.177.198.87
52.225.219.177
52.225.218.66
52.177.199.129
13.68.89.72
40.123.38.105
- If you are using an internally-hosted mail server, you will need to allow OnceHub to access it. The OnceHub server IP addresses are:
- Enter the SMTP server port in the Port field.
- Click the Connect button.
- Once you are successfully connected, you should send a test email to make sure that Email from your domain is set up correctly (Figure 3).
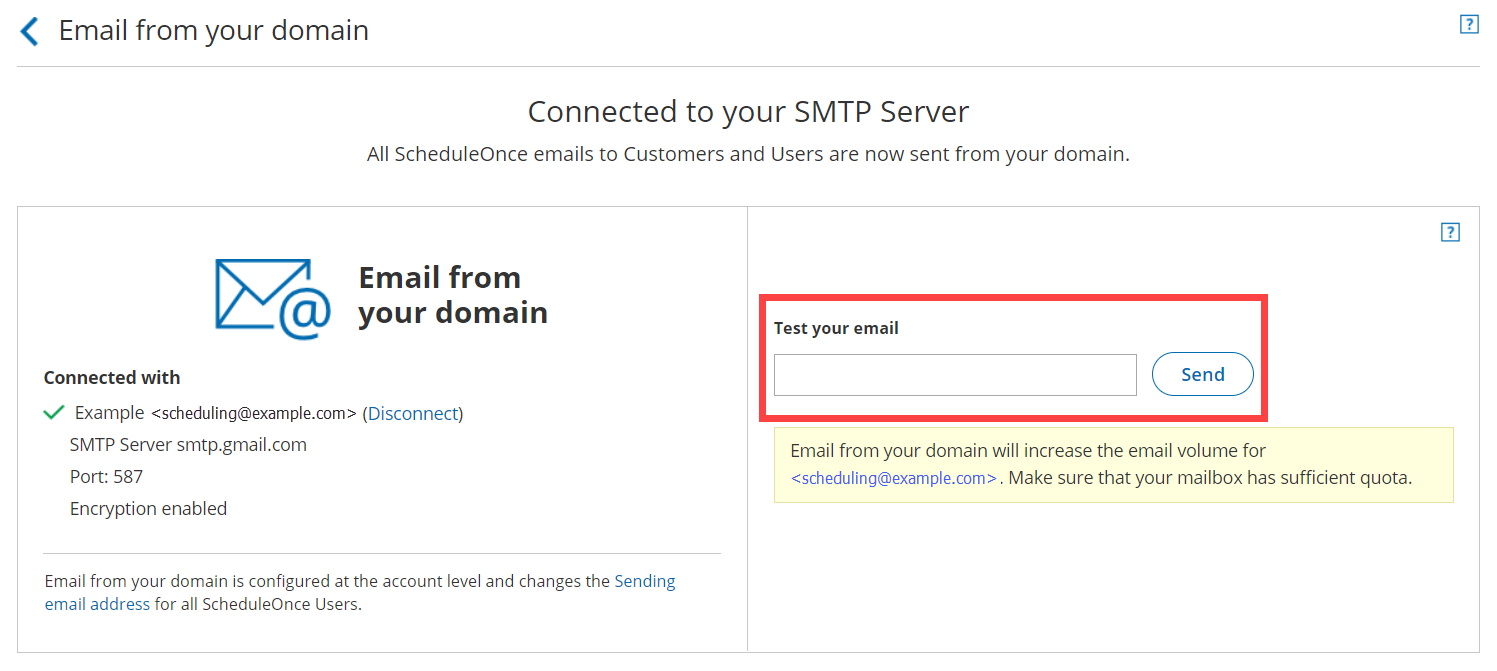 Figure 3: Test your email


Congratulations! You have completed the setup of email from your domain.
Note Please be aware that using Email from your domain is likely to increase the daily sending volume in your connected email mailbox from which OnceHub emails are sent.
It is advisable to check with your email provider that your email account can handle the estimated notifications volume.