Each user has a user profile that contains their details and the personal settings for their account. Members can only access their own profile, while administrators can access and edit certain sections of other users' profiles. Learn more about editing other user profiles
If you have received an invitation email from your organization, you will first need to join your Organization's OnceHub account.
Read on to find out the profile settings that are available in OnceHub.
Accessing your User profile
- Sign in to your OnceHub Account.
- Click on your profile image or initials in the top right corner and select Profile settings from the menu.
My profile sections
When you click on your profile settings, you'll see a menu directing you to key profile settings:
- Profile settings:
This takes you to your account overview, where you'll see the following options:- View and edit personal details such as your photo, user name, Role, and Email ID. Integrations, calendar connection, licenses, product status, and owned booking pages are also displayed in this section.
- User integrations:
This takes you to the integrations page, where you can manage the integrations linked to your profile.- Calendar connection: Connect your calendar to OnceHub.
- Video conferencing: Connect your video conferencing app to OnceHub
- Scheduled meeting availability
- Live engagement availability
Once you're in your profile settings, you'll see a menu on the left with access to the above settings, as well as these: - User notifications: Control the settings for email notifications sent to users and customers.
- SMS notifications: Choose if you want to receive OnceHub booking notifications via SMS, and enter your mobile number details.
- Date and time: Set your default time zone, date format, time format, and week start day.
- Password: Change your password.
- Authentication: Configure two-factor authentication for your account.
- Permissions: Manage various permissions for users. Only administrators have access to this section.
Personal details section
The Overview section allows you to update personal details, assign licenses to a user, and shows a summary of each user's information.
- In the Overview section, you can view the following information:
- Photo: your user photo will be shown as the Account and Profile icon in the top right corner. To upload an image, you must use a JPG, PNG or GIF format (max 200KB). When uploaded, the image can be cropped or scaled to a 200 x 200 pixels square.
Note When using OnceHub, the image will be set as the default booking page image for booking pages you own.
- First name: This information is taken from the sign-up form filled out when you first signed up for OnceHub. Your first name can be changed at any time.
- Last name: This information is taken from the sign-up form filled out when you first signed up for OnceHub. Your last name can be changed at any time.
- Role: Users can be either an Administrator, member, or team manager. Your user role can only be edited by a OnceHub administrator.
- Email ID: By default, this is the email address you used to sign up for OnceHub. If you want to change it, you will be required to provide your OnceHub password. Learn more about changing your Email ID
- Calendar: Any calendars connected to your user account will be displayed here. It is recommended that you connect a calendar to your account in order to optimize scheduling and avoid double-booking. Learn more about Calendar connection
- Integrations: Any third-party integrations connected to your account will be displayed here.
- Photo: your user photo will be shown as the Account and Profile icon in the top right corner. To upload an image, you must use a JPG, PNG or GIF format (max 200KB). When uploaded, the image can be cropped or scaled to a 200 x 200 pixels square.
- To edit your Personal details, click the three dots next to the first or last name fields to launch the Personal Details edit window (Figure 1). Once the desired changes have been made, click the Save button.
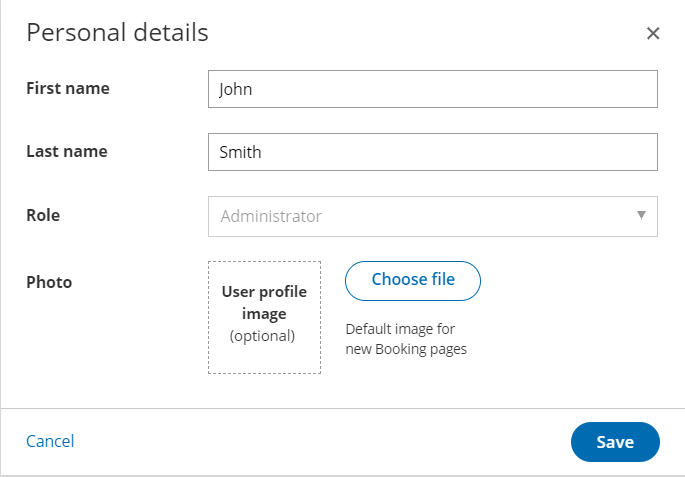
Figure 1: Personal details

Licenses
If you are a Member, you will see the following in the Licenses area:
- Which features you have licenses for.
If you are an Administrator, you will see:
- Which features you have licenses for. Learn more about purchasing licenses
- How many licenses are assigned and how many are unassigned. Learn more about assigning licenses
Scheduled meeting availability
When you update your scheduled meeting availability, all the booking pages/booking calendars you own can reflect this.
By default, all new booking pages/booking calendars use the owner’s profile availability and time zone.
Location
You can update your scheduled meeting availability by selecting your profile picture or initials in the top right-hand corner → Scheduled meeting availability.
Here, you can select you hours of availability by setting your times from the drop-down menu. Add time slots by pressing the + button.
Click Add a date override to set or remove availability for a specific day.
Differences and benefits of using Scheduled meeting availability or Booking page availability
| User availability | Booking page availability | |
| Where do I update my availability? | In one place, no matter how many booking pages you own. Update once and it affects all of them. | On each booking page you own where Scheduled meeting availability is toggled OFF for that booking page. Each booking page must be updated individually.
Located on the relevant booking page → Recurring availability OR Date-specific availability → Use booking page owner’s date-specific availability and time zone. |
| How do I enter my availability? | Recurring availability: Use the check-box to select days of the week and the drop-down time ranges on your profile's Availability page.
Date-specific overrides: Add an exception, select the specific date from the calendar, and specify whether you are unavailable or available for that that exception to your rules. |
Use the click-and-drag visual editor on the booking page's Recurring availability and/or Date-specific availability sections to specify the exact days you are available for meetings. |
Setting unique availability for an individual booking page
You may wish to take advantage of scheduled meeting availability while still maintaining an individual booking page with unique availability to that booking page, different from your scheduled meeting availability.
In that case, for the exception to your rules specific to that booking page, go to the relevant booking page → Recurring availability and/or Date-specific availability section → Select Set recurring availability / date-specific availability for this booking page only.
Recurring availability
When to use recurring availability
Update your Scheduled meeting recurring availability whenever your general availability changes. This availability is on a per-day basis; for instance, every Monday, every Tuesday, etc.
Increments are on a 15-minute basis. For instance, you can start or end your availability on the hour, or on 15, 30, or 45 minutes after the hour.
How to edit date-specific exceptions
Make sure the day you're changing is selected or deselected, depending on whether you're available that day each week.
If selected, specify the relevant hours you're available for that day.
Date-specific exceptions
When to use date-specific exceptions
You can create an exception for your recurring availability whenever your standard availability deviates from the norm. For instance, you're usually available 9AM-5PM every Monday, but on February 15 you're taking the day off for your birthday and on February 22 you have a doctor's appointment.
How to edit date-specific exceptions
Let's take the examples above. Create an exception by selecting the Add a date override button.
Select the relevant day(s) and times you want to create a date override.
Changing your user’s availability on their behalf
If you are an admin, you can update any user's availability on their behalf. This allows you to control which time slots show on their booking page without their involvement. There is no need for them to sign into OnceHub or update anything.
To update availability for all the booking pages they own, in the top navigation menu, select the gear icon → users → select the relevant user. In the left-hand menu, under their profile (for example, Profile: Jane Doe), select Scheduled meeting availability.
Keep in mind that their scheduled meeting availability on their profile will only be updated for booking page where no recurring or date specific availability have been set
Note
Although OnceHub looks at Scheduled meeting availability by default, keep in mind that if the booking page they own uses booking page availability instead, this will override their Scheduled meeting availability.
Live engagement availability
You can set manual or automatic availability for live chat and instant calls.
Manual availability
In the top navigation menu in the top right-hand corner, select your profile picture or initials. Toggle Accept chats ON or OFF.
Note: If you close the browser or sign out, you will not be available for accepting live chats.
Automatic availability
In the top navigation menu in the top right-hand corner, select your profile picture or initials. Select Live engagement availability. Select the option to set your availability automatically.
Select the days and hours that you’re available on a weekly recurring basis.
To set more than one time range on a given day, click on the plus. This will allow you to create a time slot from, for example, 9:00 am - 12:00 pm and 1:00 pm - 5:00 pm.
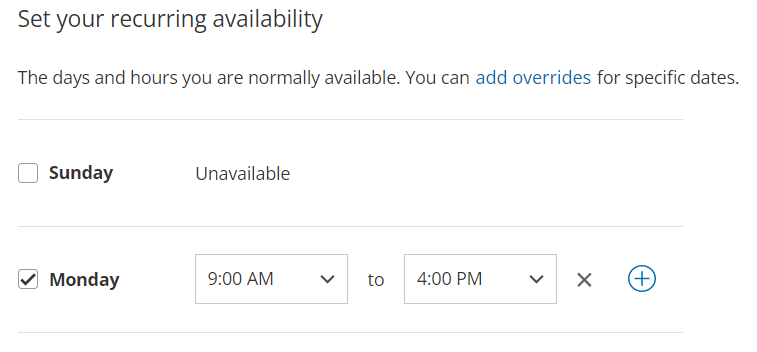
Figure 1: Setting more than one time range
Note: If you sign out or close your browser, you will still be available for live chats. To avoid missing chats, set up notifications to your team chat app (e.g. Slack, Google Chat, Microsoft Teams).
Date-specific overrides
You can also set date-specific overrides by clicking on Add a date override. Your date-specific override will override your recurring availability.
Overriding your working hours
Your working hours include your recurring availability plus any date-specific overrides. You can override your working hours by toggling Accept chats ON or OFF.
Outside working hours, Accept chats will be OFF. Toggle it ON to accept chats temporarily. Remember to toggle it back off, else you’ll remain available to accept live chats outside of recurring working hours.
Inside working hours, Accept chats will be ON. Toggle it OFF if you do not want to accept chats temporarily. Remember to toggle it back on to be available to accept chats again.
Email notifications section
The Email notifications section allows you to control the settings for email notifications sent to both the user and the customer. You can access the email notifications section from your user profile.
 Figure 1: Email notifications section
Email notifications to the user
- Emails sent from: This controls the sending name and email address for all generated emails sent to the user.
- Emails sent to: This controls the email address where the user receives OnceHub generated emails. By default, user email notifications are sent to the email address that the user used to sign in to their OnceHub account (sign-in ID).
You can also decide whether or not you would like to be sent emails with news and product announcements from OnceHub by checking or unchecking the box. We recommend keeping the box checked as emails are typically used to announce new features and product releases. Find out what's new in our latest release
Email Notifications to the Customer
- Sent from email: All OnceHub generated emails sent to customers will be sent from this email.
- Sent from name: This is the name that appears in the "From" field in customer email notifications. By default, the email name label will be the user's name entered when the account was created.
- Customer replies sent to: Any replies to customer email notifications will be sent to this address. By default, this email address is the same as the email you will receive notifications to. This email can be changed if you want replies sent to a different address.
Note
Email from your domain can only be applied to OnceHub email notifications. Learn more about sending emails from your domain
SMS notifications section
In this section, you can manage where user SMS notifications are sent to. You can access the SMS notifications section from your user profile.
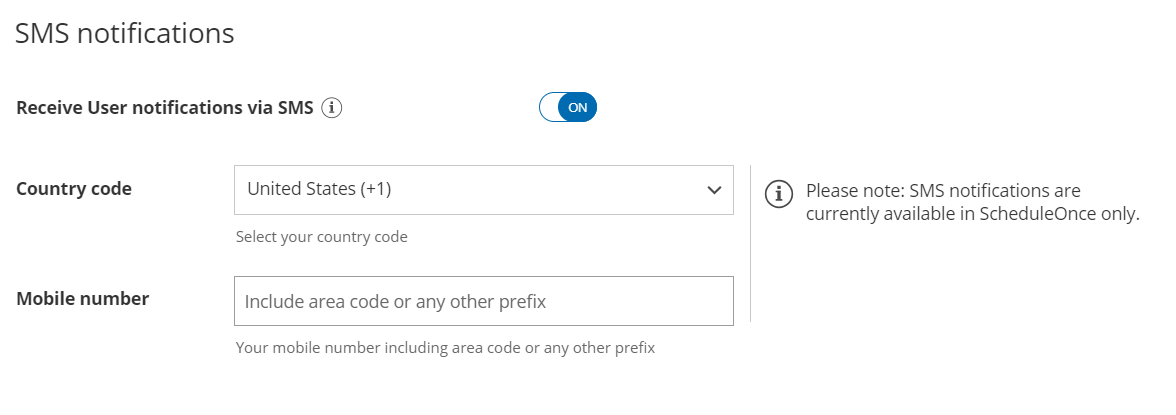 Figure 1: SMS notifications
Receive User notifications via SMS: If you wish to receive SMS user notifications, toggle this field ON and enter your mobile phone number here.
Country code: Select your country code from the dropdown menu.
Mobile number: Enter your mobile number here, including your area code or any other prefix.
Note
To receive SMS notifications on booking activity, you must also enable them in OnceHub under Setup → relevant booking page → User notifications section.