This is the full developer documentation for OnceHub Help Center
# OnceHub Help Center
> Help documentation for OnceHub scheduling, routing forms, chatbots, and integrations.
Find answers and guides for every part of OnceHub.
## Browse by category
[Section titled “Browse by category”](#browse-by-category)
* [Getting Started](https://help.oncehub.com/getting-started/) — Connect your calendar and set up your first meeting
* [Products](https://help.oncehub.com/product/booking-calendars/introduction-to-booking-calendars/introduction-to-booking-calendars/) — Booking Calendars, Routing Forms, and Chatbots
* [Integrations](https://help.oncehub.com/account-integrations/) — CRM, video conferencing, automation, and more
* [Insights & Operations](https://help.oncehub.com/activities-analytics/) — Reports, analytics, and account management
* [Security & Compliance](https://help.oncehub.com/security-compliance/) — Data privacy, SSO, and compliance settings
* [What’s New](https://help.oncehub.com/whats-new/) — Latest release updates
## Still on ScheduleOnce?
[Section titled “Still on ScheduleOnce?”](#still-on-scheduleonce)
Note
ScheduleOnce is the legacy OnceHub product. Your existing Booking Pages and bookings are not affected.
* [ScheduleOnce Help Center](https://help.oncehub.com/scheduleonce/) — Help docs for Booking Pages and classic features
* [Migration Guide](https://help.oncehub.com/getting-started/) — How to move from ScheduleOnce to OnceHub
# Account Administration
> Account Administration documentation and guides.
[User Management](https://help.oncehub.com/account-administration/user-management/)
[User Attributes](https://help.oncehub.com/account-administration/user-attributes/)
[Objects Properties](https://help.oncehub.com/account-administration/objects-properties/)
[Booking Calendar Templates](https://help.oncehub.com/account-administration/booking-calendar-templates/)
[Locations Rooms](https://help.oncehub.com/account-administration/locations-rooms/)
[Account Permissions](https://help.oncehub.com/account-administration/account-permissions/)
# Account Permissions
> Account Permissions documentation and guides.
[Managing Account Permissions](https://help.oncehub.com/account-administration/account-permissions/managing-account-permissions/)
# Managing Account Permissions
> Account Permissions is the central location for managing feature access and compliance.
[Managing Account Permissions in OnceHub](https://www.youtube-nocookie.com/embed/LbQeaRYrMbs?wmode=opaque)
**Account Permissions** is the **central location** for managing feature access and compliance.
This page is especially **useful for Account Owners** in regulated industries such as financial services and healthcare, where compliance, brand control and the ability to manage feature access at scale are critical.
***
## Who Can Access It
[Section titled “Who Can Access It”](#who-can-access-it)
Access to the Account Permissions page is determined by your role:
* [**Account Owners:**](https://help.oncehub.com/account-administration/user-management/user-roles-overview/#account-owner) Have **full edit access** to modify all settings and policies.
* [**Account Admins:**](https://help.oncehub.com/account-administration/user-management/user-roles-overview/#administrator) Have **view-only access** and cannot make any changes.
Note
If you are viewing this page as an Admin, a banner displays: *“You have viewing access only. Only the account owner can make changes.”*
***
## How to Configure Account Permissions
[Section titled “How to Configure Account Permissions”](#how-to-configure-account-permissions)
1. Click the **gear icon** in the top-right corner.
2. Select **Account Permissions** from the menu.
3. Review the **Account Status** and **enable or disable** available controls as required.
4. Confirm the changes when prompted.
## Available Controls
[Section titled “Available Controls”](#available-controls)
This section lists the account status and organization level controls managed by the Account Owners.
### Account Status
[Section titled “Account Status”](#account-status)
Displays your current state of the account, such as Active, Trial, or Payment Failure.
***
### Referral Code
[Section titled “Referral Code”](#referral-code)
Displayed as a read-only field only if a referral code exists on the account.
***
### Delete Account
[Section titled “Delete Account”](#delete-account)
Use the **Delete** button to permanently delete your account. If you don’t see the **Delete** button and you are the **Account Owner**, you will need to **cancel your subscription first**.
* Learn how to delete your account in [**Delete your Account**](https://help.oncehub.com/billing/deleting-your-account/) article.
* Follow the [**Canceling your Subscription**](https://help.oncehub.com/billing/canceling-your-subscription/) article to cancel your subscription before deleting your account.
***
### Phone Agent
[Section titled “Phone Agent”](#phone-agent)
Allows users to generate dedicated phone numbers for Booking Calendars and Booking Hubs to be used with **Phone Agent** feature. For more information, see [**Introduction to Phone Booking**](https://help.oncehub.com/product/booking-calendars/phone-booking/introduction-to-phone-booking/) article.
***
### AI Contact Summary
[Section titled “AI Contact Summary”](#ai-contact-summary)
Determines whether an AI-generated summary is displayed for each contact.
When enabled, it provides users with a quick, automated overview of a contact’s recent activity, interests, and recommended follow-up actions directly within the **Contact page**. For more information, see [**The Contact Detail Page**](https://help.oncehub.com/contact-management/the-contact-detail-page/#the-ai-contact-summary-pane) article.
***
### Enforce Booking Calendar Templates
[Section titled “Enforce Booking Calendar Templates”](#enforce-booking-calendar-templates)
Determines whether users can create Booking Calendars from scratch or must use a pre-defined template.
When enabled, the option to create a Booking Calendar **from scratch** is removed and users are required to select a pre-configured template as their foundation. This ensures organizational compliance and brand consistency across all new Booking Calendars in your account. For more information, see [**Total Brand Governance: Enforcing Standardization, Compliance and Control**](https://help.oncehub.com/account-administration/booking-calendar-templates/total-governance-enforcing-standardization-compliance-and-control/) article.
***
### Routing Forms
[Section titled “Routing Forms”](#routing-forms)
Determines whether **Members and Team Managers** can create and manage routing forms.
When disabled, access is restricted to **Admins and Account Owners** only. If Members or Team Managers already own routing forms at the time of this change, those forms are automatically transferred to the **Account Owner**. For more information, see [**Introduction to Routing Forms**](https://help.oncehub.com/product/routing-forms/introduction-to-routing-forms/introduction-to-routing-forms/) article.
***
### Chatbots
[Section titled “Chatbots”](#chatbots)
Determines whether **Members and Team Managers** can create and manage chatbots.
When disabled, access is restricted to **Admins and Account Owners** only. If Members or Team Managers already own chatbots at the time of this change, those chatbots are automatically transferred to the **Account Owner**. For more information, see [**Introduction to Chatbots**](https://help.oncehub.com/product/chatbots/introduction-to-chatbots/) article.
***
### User Integrations
[Section titled “User Integrations”](#user-integrations)
Serves as a **master switch** for organizational integration governance to toggle which third-party integrations are allowed for all users on the account.
Calendar integrations (Google and Microsoft) function as **parent toggles**. Disabling a parent toggle automatically disables all associated sub-integrations, such as Google Meet, Microsoft Teams, Gmail, and Outlook.
Note
All users must first disconnect from the specific integration before it can be toggled off.
***
### Powered by OnceHub Banner
[Section titled “Powered by OnceHub Banner”](#powered-by-oncehub-banner)
Controls the visibility of the ***Powered by OnceHub*** banner on all guest-facing products, such as:
* Booking Links
* Routing Forms
* Chatbots
* Guest Email Notifications
# Booking Calendar Templates
> Booking Calendar Templates documentation and guides.
[Introduction to Booking Calendar Templates](https://help.oncehub.com/account-administration/booking-calendar-templates/introduction-to-booking-calendar-templates/)
[How To Create and Manage Templates](https://help.oncehub.com/account-administration/booking-calendar-templates/how-to-create-and-manage-templates/)
[Getting Started Quickly Using Templates](https://help.oncehub.com/account-administration/booking-calendar-templates/getting-started-quickly-using-templates/)
[Centralized Control with Automatic Updates](https://help.oncehub.com/account-administration/booking-calendar-templates/centralized-control-with-automatic-updates/)
[How to Enforce Templates](https://help.oncehub.com/account-administration/booking-calendar-templates/how-to-enforce-templates/)
[Total Governance: Enforcing Standardization, Compliance and Control](https://help.oncehub.com/account-administration/booking-calendar-templates/total-governance-enforcing-standardization-compliance-and-control/)
# Centralized Control with Automatic Updates
> Centralized Control allows Administrators to enforce uniform settings across all associated Booking Calendars.
**Centralized Control** allows Administrators to enforce uniform settings across all associated **Booking Calendars**. Enabling it for a specific section such as the Booking Form or Notifications etc., locks those fields, preventing users from making unauthorized changes and ensuring organizational standards are met at scale.
If **Centralized Control** is toggled **ON**, any updates made to the templates are **automatically pushed** to all linked Booking Calendars.
## How to Enable Centralized Control
[Section titled “How to Enable Centralized Control”](#how-to-enable-centralized-control)
Follow these steps to enable centralized control within a template:
1. Click the **gear icon** in the top right corner.
2. Select **Booking Calendar Templates** from the dropdown menu to open the **Booking Calendar Templates Lobby**.
3. Click the **three-dot menu** next to the template you wish to edit and select **Edit**.
4. Select the tab you wish to lock (e.g., **Booking Form** or **Notifications** etc.).
5. Turn the **Centralized control** toggle **ON**.
6. Review the confirmation message and click **Enable centralized control** to confirm.
Once enabled, a **lock icon** along with information banner stating ***This section is controlled by the template’s manager*** will appear on the associated Booking Calendar.

***
Establishing a **Centralized Control** template follows a simple, three-step process:
## Step 1: Administrator Locks the Configuration
[Section titled “Step 1: Administrator Locks the Configuration”](#step-1-administrator-locks-the-configuration)
The Administrator defines which settings are mandatory for the organization to ensure a professional, uniform image that cannot be altered by individual users.
* **Locking Critical Settings:** The Administrator enables the **Centralized control** toggle **ON** specific tabs (e.g., Notifications or Page Designer).
* **Establishing the Standard:** The Administrator configures the master settings, such as a mandatory legal disclosure or specific brand logos. Once locked, these fields become read-only for users.
***
## Step 2: User Creates the Booking Calendar
[Section titled “Step 2: User Creates the Booking Calendar”](#step-2-user-creates-the-booking-calendar)
Users create their Booking Calendars using pre-configured templates.
* **Guided Setup:** When a user creates a Booking Calendar from this template, the locked fields are pre-populated and can not be edited.
* **Visual Indicators:** Users will see a lock icon and an information banner stating, ***This section is controlled by the template’s manager***, clearly identifying which settings are managed centrally.
* **Hybrid Flexibility:** Users can still customize any settings that the Administrator has left **unlocked** (e.g., individual availability or meeting location).
***
## Step 3: Automatic Updates & Synchronization
[Section titled “Step 3: Automatic Updates & Synchronization”](#step-3-automatic-updates--synchronization)
Whenever a template is updated, it pushes changes to all linked Booking Calendars and keeps them in sync. This eliminates the risk of manual errors and ensures that the entire organization remains up-to-date whenever the template is updated by the Administrator.
* **Instant Updates:** When an Administrator modifies a locked setting in the template (e.g., updating a legal disclosure), the changes are **automatically pushed** to every linked Booking Calendar.
* **Zero Manual Intervention:** Users do not need to take any action; their Booking Calendars are updated in the background without manual effort.
# Getting Started Quickly Using Templates
> Booking Calendar Templates help you get up and running faster by using pre-configured blueprints. This approach allows Administrators to provide a profession...
**Booking Calendar Templates** help you get up and running faster by using pre-configured blueprints. This approach allows Administrators to provide a professional starting point while still giving users the freedom to customize their own settings. It is the ideal solution for reducing setup friction and accelerating team onboarding.
***
Establishing a **Getting Started** template follows a simple, two-step process:
## Step 1: Administrator Prepares the Template
[Section titled “Step 1: Administrator Prepares the Template”](#step-1-administrator-prepares-the-template)
The Administrator creates a template to act as a starting point for the team.
* **Defining Defaults:** The Administrator pre-configures common settings like booking questions, booking settings, brand colors, and notification emails.
* **Staying Flexible:** The **Centralized Control** toggle is kept **OFF**. This ensures all settings are provided as helpful suggestions rather than enforced rules.
## Step 2: User Creates the Booking Calendar using a Template
[Section titled “Step 2: User Creates the Booking Calendar using a Template”](#step-2-user-creates-the-booking-calendar-using-a-template)
Users skip the manual configuration and go live in seconds using templates.
* **Instant Setup:** When creating a Booking Calendar, the user selects **From Template** to instantly pre-fill all fields with the template settings.
* **Personal Adjustments:** Because settings are **unlocked**, the user can immediately tailor their duration, location, hosts, or availability to fit their specific workflow.
As long as the **Centralized Control** toggle is kept **OFF**, any modification to the templates will not update the existing Booking Calendar.
# How To Create and Manage Templates
> Booking Calendar Templates allow Administrators to standardize settings across multiple Booking Calendars.
**Booking Calendar Templates** allow Administrators to standardize settings across multiple Booking Calendars. Use them to centrally manage branding, booking forms and notifications to ensure brand consistency, faster onboarding, and account-wide standardization.
## Navigating to the Booking Calendar Templates Lobby
[Section titled “Navigating to the Booking Calendar Templates Lobby”](#navigating-to-the-booking-calendar-templates-lobby)
The **Booking Calendar Templates Lobby** is your central hub for managing templates. It displays the **Template name**, the **Last updated date** and the **Number of Booking Calendars** currently linked to each template.
To access **Booking Calendars Templates Lobby**, follow the steps below:
1. Click the **gear icon** in the top right corner.
2. Select **Booking Calendar Templates** from the dropdown menu.
## Create a Template
[Section titled “Create a Template”](#create-a-template)
As an Administrator, you can **create templates** using the following steps:
1. In the **Booking Calendar Templates Lobby**, click the **Create template** button.
2. Enter a **Template Name** and click **Create**.
3. Configure settings across the available tabs: Booking Settings, Booking Form, Notifications, Page Designer, and Embed Designer.
4. Use the [**Centralized control**](https://help.oncehub.com/account-administration/booking-calendar-templates/centralized-control-with-automatic-updates/) toggle on each tab to **lock** settings or allow the users to customize the settings.
## Edit a Template
[Section titled “Edit a Template”](#edit-a-template)
Updating a template automatically syncs changes to all linked Booking Calendars. To update, follow the steps below:
1. Click the **three-dot menu** next to the template you wish to edit and select **Edit**.
2. Update the configurations and click **Save**.
* **Locked Settings:** Enabling **Centralized control** will trigger a warning that this action will **override** any previous user updates in linked Booking Calendars.
* **Unlocked Settings:** Updates to unlocked fields only apply to **new** Booking Calendars created after the change.
## Duplicate a Template
[Section titled “Duplicate a Template”](#duplicate-a-template)
Duplicating allows you to quickly create a new template based on an existing configuration without starting from scratch. To duplicate, follow the steps below:
1. Click the **three-dot menu** next to the template you wish to copy and select **Duplicate**.
2. In the **Duplicate Template** pop-up, enter a new **Template Name** and click **Duplicate**.
## Delete a Template
[Section titled “Delete a Template”](#delete-a-template)
Templates can be deleted from the **Booking Calendar Templates Lobby** using the following steps:
1. Click the **three-dot menu** next to the template you wish to delete and select **Delete**.
2. Confirm by clicking the **Delete template** in the pop-up.
Caution
You cannot delete a template that is currently in use. To delete it, you must first [**unlink** ](https://help.oncehub.com/product/booking-calendars/introduction-to-booking-calendars/how-to-use-templates-with-booking-calendars/#unlink-a-template-from-a-booking-calendar)all associated Booking Calendars or reassign them to different templates.
## Rename a Template
[Section titled “Rename a Template”](#rename-a-template)
Rename a template using the following steps:
1. Click the **three-dot menu** next to the template you wish to rename and select **Rename**.
2. Enter the new name in the **Template Name** field and click **Save**.
To learn how users use these templates with Booking Calendars, read our [**How To Use Templates With Booking Calendars**](https://help.oncehub.com/product/booking-calendars/introduction-to-booking-calendars/how-to-use-templates-with-booking-calendars/) article.
# How to Enforce Templates
> Enforce Booking Calendar Templates is an account-level setting that mandates the use of pre-configured templates for all new Booking Calendars.
**Enforce Booking Calendar Templates** is an account-level setting that mandates the use of pre-configured templates for all new Booking Calendars.
By enabling this setting, you remove the option for users to create Booking Calendars from scratch, ensuring that every new Booking Calendar built in your account follows an approved organizational foundation.
## How to Enforce Booking Calendar Templates
[Section titled “How to Enforce Booking Calendar Templates”](#how-to-enforce-booking-calendar-templates)
Follow these steps to mandate template usage across your entire account:
1. Click the **gear icon** in the top right corner and select **Account Permissions**.
2. Locate the **Enforce Booking Calendar Templates** section.
3. Turn the toggle **ON**.
When enabled, users will see a **Create Booking Calendar** pop-up with a mandatory **Template selection dropdown**. The option to create a Booking Calendar from scratch will no longer be visible.
Establishing **Template Enforcement** follows a simple, two-step process:
## Step 1: Account Owner Enforces the use of Templates
[Section titled “Step 1: Account Owner Enforces the use of Templates”](#step-1-account-owner-enforces-the-use-of-templates)
The Account Owner establishes a global requirement for the entire organization. This ensures that all of the new Booking Calendars are created using templates only and remain compliant with company standards.
* **Activating Enforcement:** As the Account Owner, navigate to **Account Permissions** and turn the **Enforce Booking Calendar Templates** toggle **ON**.
***
## Step 2: User Creates Booking Calendars using only Templates
[Section titled “Step 2: User Creates Booking Calendars using only Templates”](#step-2-user-creates-booking-calendars-using-only-templates)
Users are required to use a standardized template.
* **Standardized Creation:** When a user clicks to create a new Booking Calendar, they are presented with a mandatory template selection dropdown.
* **Required Foundation:** Users must choose from the library of templates created by the Administrators. They cannot bypass this step or create a Booking Calendar without a template.
# Introduction to Booking Calendar Templates
> Booking Calendar Templates are pre-configured blueprints that allow organizations to standardize configurations and manage Booking Calendars at scale.
**Booking Calendar Templates** are **pre-configured blueprints** that allow organizations to standardize configurations and manage Booking Calendars at scale.
These templates serve as reusable collections of default settings that bundle booking rules, forms, notifications, and brand controls such as colors, logos, and footers into a single starting point.
**Administrators create templates** to help users **get started with Booking Calendars quickly**, maintain **centralized control** over branding and core settings, and **enforce template usage** by requiring that all new Booking Calendars to be created using templates only.
## Use Cases
[Section titled “Use Cases”](#use-cases)
Templates simplify the management of your account as it scales by addressing three primary use cases:
* [**Getting started quickly using templates**](https://help.oncehub.com/account-administration/booking-calendar-templates/getting-started-quickly-using-templates/)**:** Eliminate the need to configure Booking Calendars from scratch. This reduces setup time and helps users get started in seconds. **For example:** a new team member can **fast-track their onboarding** by instantly using a pre-configured **Client Onboarding Call** template.
* [**Centralized control with automatic updates**](https://help.oncehub.com/account-administration/booking-calendar-templates/centralized-control-with-automatic-updates/)**:** Administrators can lock key settings to ensure a uniform brand image. Once centralized control is enabled, template changes are **automatically pushed** to all linked Booking Calendars without manual intervention. **For example:** administrators can create a template to include their **mandatory legal disclosure** message. If the legal text changes, updating the template once will automatically sync the new disclosure across all linked Booking Calendars to ensure total compliance.
* [**Enforced template usage**](https://help.oncehub.com/account-administration/booking-calendar-templates/how-to-enforce-templates/)**:** Account Owners can enable a global toggle that mandates all new Booking Calendars to be created exclusively using templates. **For example:** in regulated industries like finance, Administrators can enforce specific templates with mandatory fields to ensure every interaction remains policy-compliant.
Note
**Centralizing Control** and **Enforcing Templates** provide [**total governance**](https://help.oncehub.com/account-administration/booking-calendar-templates/total-governance-enforcing-standardization-compliance-and-control/). By mandating template usage and locking critical fields, such as legal disclosures and notification logic, Administrators can scale scheduling operations while eliminating manual errors and unauthorized changes.
Learn more about setting up and using templates:
* For Administrators: [**How to Create and Manage Templates**](https://help.oncehub.com/account-administration/booking-calendar-templates/how-to-create-and-manage-templates/)
* For Members and Team Managers: [**How to Use Templates with Booking Calendars**](https://help.oncehub.com/product/booking-calendars/introduction-to-booking-calendars/how-to-use-templates-with-booking-calendars/)
# Total Governance: Enforcing Standardization, Compliance and Control
> For organizations requiring the highest level of standardization, Centralized Control and Template Enforcement work in tandem to provide Total Governance.
For organizations requiring the highest level of standardization, **Centralized Control** and **Template Enforcement** work in tandem to provide **Total Governance**. While these are distinct features, using them together ensures that every Booking Calendar in your account **starts with the correct foundation and stays strictly compliant over time**.
This combined approach is specifically designed for regulated industries or large-scale enterprises where consistency and legal compliance are non-negotiable.
***
Establishing **Total Governance** follows a simple, three-step process:
## Step 1: Establishing the Gold Standard
[Section titled “Step 1: Establishing the Gold Standard”](#step-1-establishing-the-gold-standard)
Set the standards for the entire organization by combining two powerful tools.
* **Enforcing the Template:** The Account Owner enables **Enforce Booking Calendar Templates** at the account level.
* **Locking the Content:** The Administrator creates a template and enables **Centralized Control** on critical sections (e.g., locking a mandatory legal disclosure or logo).
***
## Step 2: User Creates a Booking Calendar using the Template
[Section titled “Step 2: User Creates a Booking Calendar using the Template”](#step-2-user-creates-a-booking-calendar-using-the-template)
Users are required to use a standardized template.
* **Required Selection:** When a user creates a new Booking Calendar, they must choose from the library of templates.
* **Automatic Safeguards:** The new Booking Calendar is created using templates with all critical fields (like legal disclosures or notification logic) already filled and locked.
Users see the **lock icon** for sections that are managed centrally, to help them stay compliant without extra effort.
***
## Step 3: Effortless Account-Wide Synchronization
[Section titled “Step 3: Effortless Account-Wide Synchronization”](#step-3-effortless-account-wide-synchronization)
As your account scales, your Booking Calendars remain 100% aligned with organizational standards and policy compliance.
* **Persistent Connection:** Because enforcement is active, users cannot **Unlink** their Booking Calendars from the template. They remain permanently synced to the master configuration.
* **Instant Scalability:** When a policy or branding change occurs, the Administrator updates the master template once. This update is **automatically pushed** to every linked Booking Calendar in the account.
You stay perfectly in sync with zero manual effort. Whether you manage ten calendars or a thousand, your booking links remain 100% compliant and up-to-date automatically.
# Locations Rooms
> Locations Rooms documentation and guides.
[Location and Rooms](https://help.oncehub.com/account-administration/locations-rooms/location-and-rooms/)
[Booking Calendar Room and Resource Scheduling](https://help.oncehub.com/account-administration/locations-rooms/booking-calendar-room-and-resource-scheduling/)
[Offering Multiple Meeting Locations Per Time Block](https://help.oncehub.com/account-administration/locations-rooms/offering-multiple-meeting-locations-per-time-block/)
# Booking Calendar Room and Resource Scheduling
> Integrating Booking Calendars with your productivity suite’s room directory simplifies the process of managing physical meeting spaces, such as meeting rooms or conference rooms.
Integrating **Booking Calendars** with your productivity suite’s room directory simplifies the process of managing physical meeting spaces, such as meeting rooms or conference rooms. OnceHub allows you to connect room workspaces, ensuring that bookings align with room availability while eliminating scheduling conflicts.
***
## Supported Platforms
[Section titled “Supported Platforms”](#supported-platforms)
* Microsoft 365 Room Workspaces.
* Google Workspace Room Workspaces.
***
## How to Connect Your Room Workspace
[Section titled “How to Connect Your Room Workspace”](#how-to-connect-your-room-workspace)
Follow these steps to integrate room scheduling with your OnceHub account:
1. Click the gear icon in the top-right corner and then select **Locations and Rooms**.
2. If no Location exists, click **Add location** and provide the address.
3. Select **Add rooms** and choose the workspace you wish to connect.
4. Click **Connect** and follow the on-screen instructions to complete the process.
***
## How It Works
[Section titled “How It Works”](#how-it-works)
Once connected, you can create a **Location** in OnceHub and designate specific rooms for scheduling. Depending on your configuration:
* **Single Room:** Bookings are assigned to a specific room, with events automatically added to its calendar.
* **Multiple Rooms:** Bookings are dynamically allocated to any available room from the selected pool.
## Key Features
[Section titled “Key Features”](#key-features)
* **Conflict-Free Scheduling:** OnceHub reads busy times from the connected room calendars to prevent overlapping bookings.
* **Automated Updates:** Calendar events are created directly in the selected room’s calendar for better coordination.
***
## Using Rooms with Booking Calendars
[Section titled “Using Rooms with Booking Calendars”](#using-rooms-with-booking-calendars)
After creating a **Location** and assigning its associated rooms, they will be available for use as physical meeting locations in **Booking Calendars**.
* **Access for Users:** All users can assign these Locations to their **Booking Calendars**.
* **Admin Management:** Only administrators can manage the Locations and Rooms lobby to configure room resources.
***
## Benefits of Room and Resource Scheduling
[Section titled “Benefits of Room and Resource Scheduling”](#benefits-of-room-and-resource-scheduling)
1. **Optimized Resource Usage:** Dynamically allocate rooms to ensure efficient use of meeting spaces.
2. **Accurate Availability:** Prevent double bookings by automatically syncing room schedules with calendar events.
3. **Time-Saving Automation:** Eliminate manual room allocation with automatic booking and calendar updates.
4. **Customizable Configurations:** Tailor room setups for single or multiple resource scenarios based on your needs.
# Location and Rooms
> Locations and Rooms in OnceHub help streamline scheduling for meetings held in physical spaces, such as meeting rooms or conference rooms.
Locations and Rooms in OnceHub help streamline scheduling for meetings held in physical spaces, such as meeting rooms or conference rooms. By integrating your room calendars with OnceHub, you can seamlessly manage bookings and streamline in-person scheduling.
To access this feature, navigate to the Account menu (gear icon) in the top-right corner and select Locations and rooms.
***
## **Connecting your room workspace**
[Section titled “Connecting your room workspace”](#connecting-your-room-workspace)
To begin, you can link your room workspace to your OnceHub account:
* Supported Platforms: You can currently integrate Microsoft 365 room workspaces, with Google Workspace room workspaces support coming soon.
* Connect Rooms: Click Connect rooms and select the desired account in the popup, then follow the onscreen steps to integrate your room workspaces with OnceHub.
***
## **Creating Locations**
[Section titled “Creating Locations”](#creating-locations)
Once your room calendars are connected, you can create a Location to pair with these resources:
1. Add Location: Click on Add location and then provide the Address for the physical location you will be offering scheduling for.
2. Assign Rooms: For each Location you have different options available for room assignments:
1. Single room: Bookings will be made with the selected workspace.
2. Multiple rooms: Bookings will automatically be made with one of the assigned workspaces available at the selected time.
3. No rooms: you can also choose to not use a workspace. Bookings for this Location will then default to the connected calendar of the assigned host for that meeting.
***
## **Adding Additional Information to the Address**
[Section titled “Adding Additional Information to the Address”](#adding-additional-information-to-the-address)
When creating a Location, you can include Additional Information (optional) such as parking instructions or building access details. This information will be shared with guests in their booking confirmation.
***
## **Using Locations with Booking Calendars**
[Section titled “Using Locations with Booking Calendars”](#using-locations-with-booking-calendars)
Once a Location is created, it will be available as an option when setting up Booking calendars, or in the Scheduled meeting availability section of each user’s profile:
* Access to Locations: All Users on your account can select these Locations when assigning a physical location, but only Administrators can access the Locations and rooms lobby.
* Effortless Scheduling: Assigning a Location ensures accurate meeting logistics and reduces scheduling conflicts.
***
# Offering Multiple Meeting Locations Per Time Block
> Meeting locations define where your guests can meet with you when scheduling an appointment. These options integrate with your availability settings, ensuring that the offered meeting locations are relevant for the selected time blocks.
Meeting locations define where your guests can meet with you when scheduling an appointment. These options integrate with your availability settings, ensuring that the offered meeting locations are relevant for the selected time blocks. You can now configure and offer multiple meeting locations **per time block**, giving your guests the flexibility to choose their preferred location for a specific appointment time.
## Meeting Location Types
[Section titled “Meeting Location Types”](#meeting-location-types)
You can offer three types of meeting locations:
### Video Conferencing
[Section titled “Video Conferencing”](#video-conferencing)
* Use connected tools like Zoom or Google Meet to conduct virtual meetings.
* Choose the type of video link you would like to use based on your preferences:
* **Unique Links for Each Booking**: Generate a unique video link for every individual booking, ensuring each meeting has its own dedicated space.
* **Static Link for All Bookings**: Use a single, pre-defined video link provided by your video conferencing tool for all meetings.
* Video links will automatically be added to both the calendar event, as well as the notification emails sent to you and your guest.
### Phone
[Section titled “Phone”](#phone)
* Initiate a phone call with your guest using their provided phone number.
* Guests will automatically be prompted to enter their phone number during booking.
### Physical Location
[Section titled “Physical Location”](#physical-location)
* Specify physical addresses for in-person meetings.
* **User Defined location:** You can offer **multiple physical meeting locations** as selectable options for the **same time block**.
* **Guest Defined Location:** You can allow your guest to provide an address to meet at.
## Defining Availability for Locations
[Section titled “Defining Availability for Locations”](#defining-availability-for-locations)
Meeting locations are set up along with your weekly recurring, or date specific availability, by selecting the location icon next to each availability time slot.
For detailed steps, see the [**Configuring Availability for Booking Calendars**](https://help.oncehub.com/profile-management/availability/configuring-profile-level-availability-for-booking-calendars/) article.
***
## Learn more about Physical Locations and Resource Scheduling
[Section titled “Learn more about Physical Locations and Resource Scheduling”](#learn-more-about-physical-locations-and-resource-scheduling)
Physical meeting locations can be set up to accommodate various scenarios, ranging from a straightforward configuration using a single office calendar room to more complex setups involving shared workspaces.
To learn more about these options and how to manage resource scheduling, read the [**Booking Calendar Room and Resource Scheduling**](https://help.oncehub.com/account-administration/locations-rooms/booking-calendar-room-and-resource-scheduling/) article.
***
## Frequently Asked Questions (FAQs)
[Section titled “Frequently Asked Questions (FAQs)”](#frequently-asked-questions-faqs)
**Can I turn off the **Any Location** option?**
**A:** No. This option is required by the system to show combined availability across all of your offered locations.
# Objects Properties
> Objects Properties documentation and guides.
[Introduction to Objects and Properties](https://help.oncehub.com/account-administration/objects-properties/introduction-to-objects-and-properties/)
[When to Use Object Properties](https://help.oncehub.com/account-administration/objects-properties/when-to-use-object-properties/)
[Managing Object Properties](https://help.oncehub.com/account-administration/objects-properties/managing-object-properties/)
# Introduction to Objects and Properties
> In OnceHub, data is structured into Objects and Properties. An Object acts as a container for a specific category of information (e.g., a booking or a guest), while Object Properties are the individual data points stored within those containers.
In OnceHub, data is structured into **Objects** and **Properties**. An **Object** acts as a container for a specific category of information (e.g., a booking or a guest), while **Object Properties** are the individual data points stored within those containers (e.g., meeting time or email address).
Understanding this structure allows you to capture information accurately and synchronize it across your integrated workflows.
***
## Understanding the Three Types of Objects
[Section titled “Understanding the Three Types of Objects”](#understanding-the-three-types-of-objects)
Before creating **Object Properties**, you must first determine which of the three **Objects** the data should be assigned to: Contact, Meeting, or Conversation. Each **Object** serves a unique purpose in your customer’s data flow and dictates how its properties are managed.
### Contact
[Section titled “Contact”](#contact)
The **Contact object** stores persistent data about an individual. Use this for properties that remain the same regardless of how many times the person interacts with you.
For example:
* Company name
* Job title
* Email address
### Meeting
[Section titled “Meeting”](#meeting)
The **Meeting object** captures data specific to a meeting. Use this when the properties are unique to a particular appointment rather than the person attending.
For example:
* Reason for scheduling
* Specific goals for the session
* Preparation requirements
### Conversation
[Section titled “Conversation”](#conversation)
The **Conversation object** is used for data specific to a conversation, rather than to a person or meeting. It is ideal for qualifying leads or gathering general inquiries.
For example:
* Budget
* Integration needs
* Purchase timeframe
***
## Understanding the Two Types of Object Properties
[Section titled “Understanding the Two Types of Object Properties”](#understanding-the-two-types-of-object-properties)
Once you have selected an Object, you will work with two types of Object Properties: **System Properties** and **Custom Properties**.
### System Properties
[Section titled “System Properties”](#system-properties)
These are the standard data points built into every **Object** by default when you create your OnceHub account. They offer the following core features:
* **Permanent Access:** These properties are permanent and cannot be archived.
* **Native Integration:** System Properties are automatically available on Meeting and Contact Objects for use in the [**API, webhooks**](https://help.oncehub.com/account-integrations/automation/api-and-webhooks/custom-booking-calendar-integrations-with-webhooks-and-apis/), and [**Zapier**](https://help.oncehub.com/account-integrations/automation/zapier/automate-your-scheduling-workflow-by-using-zapier/).
* **CRM Updates:** They are designed to [**update your CRM records automatically**](https://help.oncehub.com/account-integrations/crm/integrating-with-your-crm/).
### Custom Properties
[Section titled “Custom Properties”](#custom-properties)
These are user-defined data points that you add to an **Object** to capture specific information unique to your business. They offer the following core features:
* **Archivable Data:** These properties can be archived as your data requirements change.
* **Data Arrays:** All custom properties are grouped together in a `custom_fields[]` array for use in the [**API, webhooks**](https://help.oncehub.com/account-integrations/automation/api-and-webhooks/custom-booking-calendar-integrations-with-webhooks-and-apis/), and [**Zapier**](https://help.oncehub.com/account-integrations/automation/zapier/automate-your-scheduling-workflow-by-using-zapier/).
* **CRM Updates:** They can be used to [**update your CRM records automatically**](https://help.oncehub.com/account-integrations/crm/integrating-with-your-crm/).
***
For instructions on how to create **Object Properties**, please see our [**Managing Properties**](https://help.oncehub.com/account-administration/objects-properties/managing-object-properties/) article.
# Managing Object Properties
> This article explains how to view, create, and manage properties for your OnceHub Objects. Object Properties allow you to capture and store specific data poi...
[Booking Calendar Timeframe and Timeslot Preferences](https://www.youtube-nocookie.com/embed/ZveX79Fmdqw?wmode=opaque)
This article explains how to view, create, and manage properties for your OnceHub Objects. **Object Properties** allow you to capture and store specific data points, ensuring that it can be used across your workflows.
## Accessing Object Properties
[Section titled “Accessing Object Properties”](#accessing-object-properties)
1. Click the gear icon in the top right.
2. Select **Objects and Properties** from the dropdown.
3. Click an **Object** (e.g. Contact) to view or modify its **Properties**.
***
## How to Create Custom Object Properties
[Section titled “How to Create Custom Object Properties”](#how-to-create-custom-object-properties)
Creating custom properties allows you to capture unique information that isn’t included in the default OnceHub setup.
1. Click **Create \[*object*] property** in the top right.
2. Enter the property’s details:
* **Data Type:** Choose the type of data the property will capture.
* **Name:** Enter the name that will be shown within the OnceHub UI.
* **Unique Identifier:** Provide a distinct identifier, used for API and integration purposes.
* **Description (Optional):** Enter a description of the property that will help users understand its purpose. This will appear as a tooltip when setting up [**Booking Notifications**](https://help.oncehub.com/product/booking-calendars/notifications/booking-calendar-guest-notifications/).
3. Click **Save**.
***
## How to Manage Archived Properties
[Section titled “How to Manage Archived Properties”](#how-to-manage-archived-properties)
If you no longer need to collect data for a specific field, you can archive it. Archiving stops new data collection while preserving your historical records.
## How to Archive Properties
[Section titled “How to Archive Properties”](#how-to-archive-properties)
1. Click the 3 dots to the right of the property you want to archive.
2. Select **Archive** from the dropdown.
3. Click **Archive** Property to confirm
## How to Restore Archived Properties
[Section titled “How to Restore Archived Properties”](#how-to-restore-archived-properties)
1. Click **Manage archived properties** in the top right of the pane to view all archived properties.
2. Click **Restore** to the right of the individual property you wish to restore.
# When to Use Object Properties
> In OnceHub, how you store your data determines how effectively you can use it across your entire workflow.
In OnceHub, how you store your data determines how effectively you can use it across your entire workflow. By using **Object Properties**, you ensure that valuable guest insights are not just captured within OnceHub, but are automatically synced with your other business tools.
We recommend that you always use Object Properties to save data when that data needs to be reused across multiple interactions, forms, or meetings.
For more information on Objects and Properties, please see our [**Introduction to Objects and Properties**](https://help.oncehub.com/account-administration/objects-properties/introduction-to-objects-and-properties/) article.
***
## Examples of Object Properties
[Section titled “Examples of Object Properties”](#examples-of-object-properties)
To help you decide if your data point should be an **Object Property**, consider if it matches these common use cases:
* **Professional Identity:** Job title, Department, or Industry.
* **Business Context:** Company size or Company name.
* **Sales Qualification:** Purchase timeframe, Budget range, or Lead source.
* **Meeting Logistics:** Meeting type or Project code.
By utilizing Object Properties, you ensure that information follows the guest throughout their journey with your company, rather than being restricted to a single activity.
***
## Use Cases of Object Properties
[Section titled “Use Cases of Object Properties”](#use-cases-of-object-properties)
**Object Properties** can be used in the following scenarios:
* **Syncing data with external systems:** Use properties when you need to automatically update records in your CRM, such as [**Salesforce**](https://help.oncehub.com/account-integrations/crm/integrating-oncehub-with-salesforce/) or [**HubSpot**](https://help.oncehub.com/account-integrations/crm/integrating-oncehub-with-hubspot/), or send data to other applications via the [**API, webhooks**](https://help.oncehub.com/account-integrations/automation/api-and-webhooks/custom-booking-calendar-integrations-with-webhooks-and-apis/), or [**Zapier**](https://help.oncehub.com/account-integrations/automation/zapier/integrating-oncehub-with-zapier/).
* **Using data for Custom Guest Notifications:** Use properties when the information needs to appear in Custom Guest Notifications.
* **Capturing long-term insights:** Use properties for persistent information regarding a contact, meeting, or conversation that your team will need to reference later.
# User Attributes
> User Attributes documentation and guides.
[Introduction to User Attributes](https://help.oncehub.com/account-administration/user-attributes/introduction-to-user-attributes/)
[How to Configure User Attributes](https://help.oncehub.com/account-administration/user-attributes/how-to-configure-user-attributes/)
# How to Configure User Attributes
> User Attributes are used to categorize Users based on characteristics such as language, location or area of expertise.
**User Attributes** are used to categorize **Users** based on characteristics such as language, location or area of expertise.
A **User Attribute** is composed of an **Attribute Name** (e.g., Language) that contains specific **Options** (e.g., English), which are then linked to **Associated Users** who possess that characteristic. Proper configuration allows visitors to filter [**Booking Hub**](https://help.oncehub.com/product/booking-hubs/introduction-to-booking-hubs/introduction-to-booking-hubs/) options and connect with the appropriate team member.
To learn more about the practical application, have a look at our [**Introduction to User Attributes**](https://help.oncehub.com/account-administration/user-attributes/introduction-to-user-attributes/) article.
## Navigating to the User Attributes
[Section titled “Navigating to the User Attributes”](#navigating-to-the-user-attributes)
To create or manage attributes, follow the steps below:
1. Click the **gear icon** in the top right corner.
2. Select **User Attributes** from the dropdown.
***
### How to Create a New User Attribute
[Section titled “How to Create a New User Attribute”](#how-to-create-a-new-user-attribute)
Follow these steps to create a new **User Attribute**:
1. Click **Create user attribute** button.
2. Enter an **Attribute Name**.
3. Click **Save and add options**.
4. Enter an **Option Name**.
5. Select the **Associated User(s)** from the dropdown.
6. Click **Done** after selecting the **Associated User(s)**.
7. Click **Save** to finish, or click **Save and add another option** to add more options immediately.
***
### How to Manage Existing User Attributes
[Section titled “How to Manage Existing User Attributes”](#how-to-manage-existing-user-attributes)
**User Attributes** can be updated as your team or requirements change.
## Adding New Options to a User Attribute
[Section titled “Adding New Options to a User Attribute”](#adding-new-options-to-a-user-attribute)
1. Click the **User Attribute** you want to edit.
2. Click **Add new option** in the top right corner.
3. Enter an **Option Name**.
4. Select the **Associated User(s)** using the dropdown.
5. Click **Done** after selecting the **Associated User(s)**.
6. Click **Save** to finish, or **Save and add another option** to continue editing.
## Editing the Options of a User Attribute
[Section titled “Editing the Options of a User Attribute”](#editing-the-options-of-a-user-attribute)
1. Click the **User Attribute** you want to edit.
2. Click the three-dot menu to the right of the **Option**.
3. Select **Edit**.
4. (**Optional**) Change the **Option Name**.
5. (**Optional**) Select the **Associated User(s)** and click **Done**.
6. Click **Save** to confirm the changes.
## Deleting the Options from a User Attribute
[Section titled “Deleting the Options from a User Attribute”](#deleting-the-options-from-a-user-attribute)
1. Click the **User Attribute** you want to edit.
2. Click the three-dot menu to the right of the **Option**.
3. Select **Delete**.
4. Confirm by clicking **Delete** in the pop-up.
## Renaming a User Attribute
[Section titled “Renaming a User Attribute”](#renaming-a-user-attribute)
1. Click the three-dot menu next to the **User Attribute**.
2. Click **Rename**.
3. Enter a new **Attribute Name**.
4. Click **Save** to confirm the changes.
## Deleting a User Attribute
[Section titled “Deleting a User Attribute”](#deleting-a-user-attribute)
1. Click the three-dot menu next to the **User Attribute**.
2. Select **Delete**.
3. Confirm by clicking **Delete** in the pop-up.
# Introduction to User Attributes
> User Attributes allow you to categorize Users based on characteristics such as Language, Location, or Area of Expertise.
[Introduction to User Attributes](https://www.youtube-nocookie.com/embed/vQwKDcVQ08E?wmode=opaque)
**User Attributes** allow you to categorize **Users** based on characteristics such as ***Language***, ***Location***, or ***Area of Expertise***.
By associating **Users** with specific attributes, you allow visitors to filter the options on your [**Booking Hubs**](https://help.oncehub.com/product/booking-hubs/introduction-to-booking-hubs/introduction-to-booking-hubs/) and help them connect with the most suitable team member.
Tip
User Attributes are best suited for non-linear filtering. For example, selecting a ***Language*** or ***Region*** independently. However, if you want visitors to move through a step-by-step or hierarchical flow, such as choosing a ***Department*** first and then a specific ***Field***, we recommend using [**Booking Hub Categories**](https://help.oncehub.com/product/booking-hubs/configuring-bookng-hubs/how-to-group-booking-calendars-with-booking-hubs/) instead.
***
## Components of User Attributes
[Section titled “Components of User Attributes”](#components-of-user-attributes)
A **User Attribute** consists of three components:
1. **Attribute Name:** The label that identifies the category, such as ***Language*** or ***Country***.
2. **Options:** The specific values available within an attribute. For example, under the attribute ***Language***, options might include ***English***, ***Spanish*** or ***French***.
3. **Associated Users:** The **Users** associated with an Option. For instance, if Sarah speaks English, she is associated with the ***English*** option.
***
## Use Case Based Scenario
[Section titled “Use Case Based Scenario”](#use-case-based-scenario)
Consider the scenario of an international law firm where it is essential that potential clients are connected with a lawyer who is based in a specific country and has specialization in the relevant field of law.
### The Team Structure
[Section titled “The Team Structure”](#the-team-structure)
The firm consists of five lawyers located in two different countries, each with a specific area of practice:
* **Maria:** Based in the USA; specializes in Estate Planning.
* **Jolene:** Based in the USA; specializes in Criminal Law.
* **John:** Based in the USA; specializes in Immigration Law.
* **Sarah:** Based in Australia; specializes in Estate Planning and Family Law.
* **Grant:** Based in Australia; specializes in Immigration Law.
### The Setup
[Section titled “The Setup”](#the-setup)
Each lawyer has a specific [**Booking Calendar** ](https://help.oncehub.com/product/booking-calendars/introduction-to-booking-calendars/introduction-to-booking-calendars/)listing their availability. These calendars are grouped into a single **Booking Hub**, which is presented to clients via a ***Book a Consultation*** button on the firm’s website.
To ensure clients find the right lawyer, the administrator creates two **User Attributes**:
**1. Country**
* **USA:** Associates John, Maria, and Jolene.
* **Australia:** Associates Sarah and Grant.
**2. Specialization**
* **Immigration:** Associates John and Grant.
* **Estate Planning:** Associates Sarah and Maria.
* **Family Law:** Associates Sarah.
* **Criminal Law:** Associates Jolene.
### The Result
[Section titled “The Result”](#the-result)
Once these **User Attributes** are configured, the attribute filters are enabled on the **Booking Hub**. When a potential client visits the **Booking Hub**, they can filter by **Country** and **Specialization**.
* If a client selects ***USA*** and ***Immigration***, the system filters the Booking Calendars and displays only ***John***.
* If a client selects ***Australia*** and ***Estate Planning***, the system displays ***Sarah***.
This ensures clients are routed to the appropriate lawyer without manual intervention.
***
## Related Articles
[Section titled “Related Articles”](#related-articles)
* To learn how to configure these settings, read our [**How to Configure User Attributes**](https://help.oncehub.com/account-administration/user-attributes/how-to-configure-user-attributes/) article.
* For details on grouping Booking Calendars, see the [**How to Group Booking Calendars with Booking Hubs**](https://help.oncehub.com/product/booking-hubs/configuring-bookng-hubs/how-to-group-booking-calendars-with-booking-hubs/) article.
* For an explanation on how filters interact with **Teams**, read our [**How Booking Hub Filters Impact Team Availability**](https://help.oncehub.com/product/booking-hubs/configuring-bookng-hubs/how-booking-hub-filters-impact-team-availability/) article.
# User Management
> User Management documentation and guides.
[User Management and Seats](https://help.oncehub.com/account-administration/user-management/user-management-and-seats/)
[User Roles and Their Permissions](https://help.oncehub.com/account-administration/user-management/user-roles-and-their-permissions/)
[User Roles Overview](https://help.oncehub.com/account-administration/user-management/user-roles-overview/)
# User Management and Seats
> This guide details how to manage users within your OnceHub account, including accessing user management and understanding the available administrative options.
This guide details how to manage users within your OnceHub account, including accessing user management and understanding the available administrative options.
***
## Accessing User Management
[Section titled “Accessing User Management”](#accessing-user-management)
### Navigate to Users
[Section titled “Navigate to Users”](#navigate-to-users)
1. Click on the gear icon located in the top right corner.
2. Select **Users** from the dropdown menu.
***
## Adding New Users to Your Account
[Section titled “Adding New Users to Your Account”](#adding-new-users-to-your-account)
### To invite new users to join your account
[Section titled “To invite new users to join your account”](#to-invite-new-users-to-join-your-account)
* Click the **Add Users** button.
* While inviting users, you will be taken through the following steps:
1. Assign them a role (e.g., Administrator, Team Manager, etc.).
2. [**Allocate a seat**](https://help.oncehub.com/billing/managing-seats-in-oncehub/) if they will be engaging with guests.
3. (**Optional**) Add them to a specific team.
4. (**Optional**) Associate them to [**User Attributes**](https://help.oncehub.com/account-administration/user-attributes/introduction-to-user-attributes/).
5. Confirm the user details and send email invitations.
Note
You can also add and delete users [**automatically using Entra ID**](https://help.oncehub.com/account-integrations/security-and-compliance/how-to-integrate-oncehub-with-microsoft-entra-id/).
***
## Managing Existing Users
[Section titled “Managing Existing Users”](#managing-existing-users)
To manage the profiles of existing users, locate the three dots (…) next to the user’s name. This will bring up the following options:
* **Edit user profile:** This allows you to change their profile settings such as their User notifications and [**Availability**](https://help.oncehub.com/profile-management/availability/configuring-profile-level-availability-for-booking-calendars/).
* **Edit Role:** This allows you to change the role currently assigned to the user, based on their responsibilities. For more information on user roles, please check our [**Roles Overview**](https://help.oncehub.com/account-administration/user-management/user-roles-overview/) article.
* **Delete user:** This allows you to permanently remove a user from the account. Note that this action is irreversible.
* **Resend Invitation:** If a user has not signed in within 72 hours of being invited, you can use this option to resend their invitation.
***
## Frequently Asked Questions (FAQs)
[Section titled “Frequently Asked Questions (FAQs)”](#frequently-asked-questions-faqs)
**What happens when a user is deleted?** **A:**
* All of the user’s objects are transferred to the Account Owner.
* All of the user’s Booking Calendars are unpublished.
* Any assigned seat becomes available for reassignment.
* Existing bookings and their linked calendar events remain unaffected.
**Do all users require a seat?**
**A:** No, only users who will be engaging with guests require an assigned seat. Users who only perform administrative tasks in the account do not require a seat.
**Can you update users without needing to log into OnceHub?**
**A:** Yes, you can also update users [**through our API**](https://help.oncehub.com/developers/api/).
# User Roles and Their Permissions
> This guide clarifies the permissions granted to each user role within OnceHub: Account Owner, Administrator, Team Manager, and Member.
This guide clarifies the permissions granted to each user role within OnceHub: Account Owner, Administrator, Team Manager, and Member. Each section details specific functionalities, summarized in easy to understand tables.
***
## The Account Owner: Ultimate Control
[Section titled “The Account Owner: Ultimate Control”](#the-account-owner-ultimate-control)
The Account Owner holds the highest level of access and permissions in OnceHub. While possessing all Administrator capabilities, they also have exclusive rights:
* **Account Deletion:** Only the Account Owner can permanently delete the OnceHub account.
* **Ownership Transfer:** The Account Owner can transfer their role to another user within the account. Upon transfer, the previous Account Owner becomes an Administrator.
* **Non-Transferable Role:** No other user can transfer account ownership, ensuring the Account Owner maintains control until a formal transfer.
These privileges allow the Account Owner to maintain overall authority while delegating responsibilities for operational efficiency.
***
## Subscription Management
[Section titled “Subscription Management”](#subscription-management)
Administrators have full access to manage and alter subscription plans, purchase seats, and add SMS credits, while Team Managers and Members can not make any changes.
| **Role** | **Manage Subscriptions** | **Purchase Seats** | **Purchase SMS Credits** |
| ----------------- | ------------------------ | ------------------ | ------------------------ |
| **Administrator** | Yes | Yes | Yes |
| **Team Manager** | No | No | No |
| **Member** | No | No | No |
***
## Seats Management
[Section titled “Seats Management”](#seats-management)
Seat management permissions control the allocation and removal of seats within the platform.
| **Role** | **Assign Seats** | **Unassign Seats** | **Purchase Additional Seats** |
| ----------------- | ---------------- | ------------------ | ----------------------------- |
| **Administrator** | Yes | Yes | Yes |
| **Team Manager** | Yes (team only) | Yes (team only) | No |
| **Member** | No | No | No |
Note
Team Managers can manage seats for their team members only. Members cannot assign or manage seats.
***
## User Management Permissions
[Section titled “User Management Permissions”](#user-management-permissions)
User management permissions encompass editing roles, assigning team managers, and transferring ownership, as detailed below.
| **Role** | **View All Users** | **Edit User Roles** | **Assign Team Manager Role** | **Delete Users** |
| ----------------- | ------------------ | ------------------- | ---------------------------- | ---------------- |
| **Administrator** | Yes | Yes | Yes | Yes |
| **Team Manager** | Only team members | No | No | No |
| **Member** | No | No | No | No |
Note
Administrators manage roles, Team Managers handle teams, and Members have no user management permissions.
## Contact Management Permissions
[Section titled “Contact Management Permissions”](#contact-management-permissions)
Contact management permissions define the level of access users have to view, edit, delete, and merge guest contact records within OnceHub.
| **Role** | **View Contacts** | **Edit or Manage Contact Details** | **Merge Contacts** | **Delete Contact** |
| ----------------- | ------------------------------------- | ----------------------------------- | ----------------------------------------- | ------------------ |
| **Administrator** | Yes (all contacts across the account) | Yes (all contacts) | Yes (all contacts) | Yes |
| **Team Manager** | Yes (contacts owned by self & team) | Yes (contacts owned by self & team) | Yes (if they have access to both records) | No |
| **Member** | Only contacts they own | Only contacts they own | Yes (if they own both records) | No |
***
## Objects and Properties Permissions
[Section titled “Objects and Properties Permissions”](#objects-and-properties-permissions)
Object and property permissions define the level of access users have to configure, edit, view, and assign properties within OnceHub.
| **Role** | **Manage Object & Property Settings** | **View, Assign & Filter Property Values** |
| ----------------- | ------------------------------------------------------------------------------------------------------------------- | --------------------------------------------------------------------------------------------------------- |
| **Administrator** | **Yes** (Create, edit, rename, and delete object properties, as well as reorder and recolor Contact Status options) | **Yes** (View, assign, and filter property values across all records account wide) |
| **Team Manager** | **No** (Cannot edit object or property settings) | **Yes** (View, assign, and filter property values on contact records associated with their assigned team) |
| **Member** | **No** (Cannot edit object or property settings) | **Yes** (View, assign, and filter property values on owned contact records) |
***
## Integrations
[Section titled “Integrations”](#integrations)
Users can connect and manage integrations, but with varying levels of access based on their role.
| **Role** | **Connect Integrations** | **Manage Settings** | **Disconnect Integrations** |
| ----------------- | ---------------------------------- | ------------------- | ---------------------------------- |
| **Administrator** | Yes (own and account integrations) | Yes | Yes (own and account integrations) |
| **Team Manager** | Yes (own only) | Yes (team only) | Yes (own only) |
| **Member** | Yes (own only) | Yes (own only) | Yes (own only) |
Note
Members can manage their personal integrations but cannot alter settings or disconnect integrations for others.
***
## User Integrations Management
[Section titled “User Integrations Management”](#user-integrations-management)
Account Owners, Administrators, and Team Managers can manage integration settings for other Users within the organization to maintain configuration standards or disconnect external accounts when necessary.
| **Role** | **Modify Other Users’ Configuration Settings** | **Disconnect Other Users’ Integrations** | **Connect Integrations for Others** |
| ---------------------------------- | ---------------------------------------------- | ---------------------------------------- | ----------------------------------- |
| **Account Owner & Administrators** | Yes (All users) | Yes (All users) | No |
| **Team Managers** | Yes (Team members only) | No | No |
| **Members** | No | No | No |
Note
All Users, including Members, retain full permissions to connect, disconnect, and modify configuration settings for their own individual integrations.
***
## Booking Calendars Permissions
[Section titled “Booking Calendars Permissions”](#booking-calendars-permissions)
Booking calendar permissions dictate who can create and manage calendars, including team-specific usage, as detailed below.
| **Role** | **Create Calendars** | **Edit Calendars** | **Delete Calendars** | **Set Hosts** | **Change Owner** |
| ----------------- | -------------------- | -------------------------------------- | -------------------------------------- | --------------- | ----------------------------------- |
| **Administrator** | Yes | Yes | Yes | Yes | Yes |
| **Team Manager** | Yes | Yes (Owned and managed team calendars) | Yes (Owned and managed team calendars) | Yes (team only) | Yes (To any member of managed team) |
| **Member** | Yes | Yes (Owned calendars) | Yes (Owned calendars) | No | No |
Note
Administrators have unrestricted access. Team Managers edit calendars within their team, while Members are limited to calendars they own.
See [**The Booking Calendar Owner**](https://help.oncehub.com/product/booking-calendars/introduction-to-booking-calendars/the-booking-calendar-owner/) article for more information on ownership.
***
## Chatbots Permissions
[Section titled “Chatbots Permissions”](#chatbots-permissions)
Chatbot permissions determine which roles can create, edit, and publish bots.
| **Role** | **Create Chatbots** | **Edit Chatbots** | **Publish Chatbots** | **Delete Chatbots** |
| ----------------- | ------------------- | ----------------- | -------------------- | ------------------- |
| **Administrator** | Yes | Yes | Yes | Yes |
| **Team Manager** | Yes (team only) | Yes (team only) | Yes (team only) | Yes (team only) |
| **Member** | Only own | Only own | Only own | Only own |
Note
Administrators need to give Team Managers and Members access to Chatbots to be able to work with them.
***
## Routing Forms Permissions
[Section titled “Routing Forms Permissions”](#routing-forms-permissions)
Routing form permissions cover who can create, edit, and publish forms for user workflows.
| **Role** | **Create Forms** | **Edit Forms (Team)** | **Publish Forms** | **Delete Forms** |
| ----------------------- | ---------------- | --------------------- | ----------------- | ---------------- |
| **Administrator** | Yes | Yes | Yes | Yes |
| **Team Manager** | Yes (team only) | Yes (team only) | Yes (team only) | Yes (team only) |
| **Requires permission** | Only own | Only own | Only own | Only own |
Note
Administrators need to give Team Managers and Members access to Routing Forms to be able to work with them.
***
## Phone Booking Recording Permissions
[Section titled “Phone Booking Recording Permissions”](#phone-booking-recording-permissions)
A User’s role determines which Phone Call recordings in Activities they are able to access.
| **Role** | **Playback Recording** | **Download Recording** | **View Transcript Summary** |
| ----------------- | ---------------------- | ---------------------- | --------------------------- |
| **Administrator** | All | All | All |
| **Team Manager** | Yes (Team only) | Yes (Team only) | Yes (Team only) |
| **Member** | Only own | Only own | Only own |
***
## Final Notes
[Section titled “Final Notes”](#final-notes)
* **Role-specific Functionality:** Always consider team-specific roles when granting permissions. Team Managers control their teams, but cannot access areas outside of their scope.
* **Support:** For any adjustments or unique setup needs, reach out to your account administrator or technical support.
# User Roles Overview
> This article provides an overview of the various user roles within OnceHub, detailing the core permissions associated with each role.
[User Roles Overview](https://www.youtube-nocookie.com/embed/HMZOBk1UJAg?wmode=opaque)
This article provides an overview of the various user roles within OnceHub, detailing the core permissions associated with each role. Understanding these roles is crucial for effectively assigning permissions and responsibilities.
***
## User Roles
[Section titled “User Roles”](#user-roles)
OnceHub offers four primary user roles: Account Owner, Administrator, Team Manager, and Member.
### Account Owner
[Section titled “Account Owner”](#account-owner)
* Automatically assigned to the user who created the account.
* Can manage all settings and transfer ownership to another user.
* Has the same permissions as an administrator, with additional ownership privileges.
### Administrator
[Section titled “Administrator”](#administrator)
* Can manage users, teams, and account settings.
* Has full access to billing and subscription management.
* Cannot transfer account ownership.
### Team Manager
[Section titled “Team Manager”](#team-manager)
* Manages a specific team of users within the account.
* Can create booking links and edit profiles for team members.
* Has no access to billing or account-wide settings.
### Member
[Section titled “Member”](#member)
* Has limited access to account features.
* Can create and manage their own booking links but are restricted from editing others’ links unless explicitly granted permissions.
For a more detailed view of the permissions each role has, you can view [**User Roles and their Permissions**](https://help.oncehub.com/account-administration/user-management/user-roles-and-their-permissions/).
***
## Frequently Asked Questions (FAQs)
[Section titled “Frequently Asked Questions (FAQs)”](#frequently-asked-questions-faqs)
**Can a user be assigned both Administrator and Team Manager roles?**
**A:** No. A user can only hold one role at a time. However, a Team Manager can manage multiple teams.
**Do all users require a seat?**
**A:** No. Users without a seat can still access many features, such as updating availability or receiving notifications. However, they cannot take bookings or host live engagements.
**Can the Account Owner transfer their ownership role?**
**A:** Yes, the Account Owner can transfer ownership to another user via their profile settings. Upon transfer, the previous Account Owner will become an Administrator.
# Account Integrations
> Connect OnceHub with your CRM, analytics, payment collection, automation tools, and more.
Connect OnceHub with the tools you use every day. Browse integration categories below.
* [Analytics](https://help.oncehub.com/account-integrations/analytics/) — Track OnceHub events in Google Tag Manager and analytics platforms
* [Automation](https://help.oncehub.com/account-integrations/automation/) — Webhooks, APIs, Zapier, Make, Keragon, and other automation tools
* [Corporate Mailbox](https://help.oncehub.com/account-integrations/corporate-mailbox/) — Send scheduling notifications from your own email domain
* [CRM](https://help.oncehub.com/account-integrations/crm/) — Salesforce, HubSpot, and other CRM integrations
* [Payment Collection](https://help.oncehub.com/account-integrations/payment-collection/) — Configure Stripe payment collection on your booking calendars
* [Security And Compliance](https://help.oncehub.com/account-integrations/security-and-compliance/) — Security and compliance-related integrations
# Analytics
> Analytics documentation and guides.
[Connect OnceHub to Your Google Tag Manager](https://help.oncehub.com/account-integrations/analytics/connect-oncehub-to-your-google-tag-manager/)
[Tracking OnceHub Events in Google Tag Manager](https://help.oncehub.com/account-integrations/analytics/tracking-oncehub-events-in-google-tag-manager/)
# Connect OnceHub to Your Google Tag Manager
> Connecting OnceHub to Google Tag Manager gives you a deeper understanding of your entire scheduling funnel.
[Connect OnceHub to Your Google Tag Manager](https://www.youtube-nocookie.com/embed/QiMJYyu17tg?wmode=opaque)
Connecting OnceHub to Google Tag Manager gives you a deeper understanding of your entire scheduling funnel. By connecting to GTM, you can now track every step of the guest’s journey. This allows you to analyze key events, such as booking confirmations and drop-offs from Routing Forms, to better optimize your funnels.
***
## How to Connect OnceHub to Google Tag Manager
[Section titled “How to Connect OnceHub to Google Tag Manager”](#how-to-connect-oncehub-to-google-tag-manager)
Here are the steps to connect OnceHub to your Google Tag Manager account.
### Navigating to Google Tag Manager in OnceHub
[Section titled “Navigating to Google Tag Manager in OnceHub”](#navigating-to-google-tag-manager-in-oncehub)
1. Click on the gear icon in the top-right of the page.
2. Select **Account Integrations** from the dropdown.
3. Filter for **Analytics**.
4. Click on the **Google Tag Manager** tile.
### Finding Your Container ID in Tag Manager
[Section titled “Finding Your Container ID in Tag Manager”](#finding-your-container-id-in-tag-manager)
1. Go to [**https://tagmanager.google.com/#/home**](https://tagmanager.google.com/#/home).
2. Copy your Container ID (GTM-XXXXXXXX).
### Connecting to Tag Manager in OnceHub
[Section titled “Connecting to Tag Manager in OnceHub”](#connecting-to-tag-manager-in-oncehub)
1. Paste the Container ID in OnceHub.
2. Click on **Connect**.
***
Now that you are connected, take a look at our help article on [**Tracking OnceHub Events in Google Tag Manager**](https://help.oncehub.com/account-integrations/analytics/tracking-oncehub-events-in-google-tag-manager/).
# Tracking OnceHub Events in Google Tag Manager
> You can use Google Tag Manager to track visitor actions across your booking calendars, booking hubs, routing forms, and chatbots.
You can use Google Tag Manager to track visitor actions across your booking calendars, booking hubs, routing forms, and chatbots. From GTM, you can send event data to Google Analytics, Google Ads, Meta pixel, Floodlight, and other third-party tags.
***
## How to Track Events for OnceHub Standalone Links
[Section titled “How to Track Events for OnceHub Standalone Links”](#how-to-track-events-for-oncehub-standalone-links)
After you connect OnceHub to Google Tag Manager, event tracking will work automatically for any OnceHub links you share. No additional steps are needed.
***
## How to Track Events for OnceHub Embeds
[Section titled “How to Track Events for OnceHub Embeds”](#how-to-track-events-for-oncehub-embeds)
To track events for any OnceHub products that are embedded on your website, you’ll need to add a specific script to that page.
### Navigating to Google Tag Manager in OnceHub
[Section titled “Navigating to Google Tag Manager in OnceHub”](#navigating-to-google-tag-manager-in-oncehub)
1. Click on the gear icon in the top-right of the page.
2. Select **Account Integrations** from the dropdown.
3. Filter for **Analytics**.
4. Click on the **Google Tag Manager** tile.
### Getting the Script in OnceHub
[Section titled “Getting the Script in OnceHub”](#getting-the-script-in-oncehub)
1. Click on **Set up tracking for embeds**.
2. Click on **Copy & close**.
### Adding the Script to Your Website
[Section titled “Adding the Script to Your Website”](#adding-the-script-to-your-website)
1. Paste the script in the **Head** or **Body** section of the page where you embedded the OnceHub product.
***
## How to Confirm that the Google Tag Manager Integration is Working
[Section titled “How to Confirm that the Google Tag Manager Integration is Working”](#how-to-confirm-that-the-google-tag-manager-integration-is-working)
After you’ve set everything up, it’s important to test that GTM is working correctly.
### Opening the Preview Mode in Google Tag Manager
[Section titled “Opening the Preview Mode in Google Tag Manager”](#opening-the-preview-mode-in-google-tag-manager)
1. Click on **Preview** in the top right of Google Tag Manager.
2. Paste the URL of your OnceHub link or the webpage with the embed into the pop-up window.
3. Click on **Connect**.
4. Click **Continue** to open the OnceHub link or your webpage in a new window.
### Testing to See If Events Are Appearing
[Section titled “Testing to See If Events Are Appearing”](#testing-to-see-if-events-are-appearing)
1. In the new window that opened, perform an action like selecting a time slot to schedule an appointment.
2. Switch back to Google Tag Manager and check if events like **oncehub.booking\_calendar.time\_slot\_selected** are now appearing.
If the events are not appearing, ensure that you followed [**all of the connection steps**](https://help.oncehub.com/account-integrations/analytics/connect-oncehub-to-your-google-tag-manager/). If it still isn’t working, please [**reach out to our support team**](https://help.oncehub.com/contact-us/).
***
## Supported OnceHub Events
[Section titled “Supported OnceHub Events”](#supported-oncehub-events)
For a complete list of supported events and their data, you can visit our developer center:
* [**Supported events and payloads for Booking Calendars and Booking Hubs**](https://help.oncehub.com/developers/client-side-api/embedded-booking-calendar-events/).
* [**Supported events and payloads for Chatbots**](https://help.oncehub.com/developers/client-side-api/embedded-chatbot-events/).
* [**Supported events and payloads for Routing Forms**](https://help.oncehub.com/developers/client-side-api/embedded-form-events/).
***
## How to Use OnceHub Event Data with Google Tag Manager
[Section titled “How to Use OnceHub Event Data with Google Tag Manager”](#how-to-use-oncehub-event-data-with-google-tag-manager)
After successfully integrating OnceHub with Google Tag Manager, you can use OnceHub Event Data to send information to other applications like Google Analytics.
For specific instructions on how to use this event data within other platforms, we recommend referring to [**Google’s official documentation**](https://support.google.com/tagmanager) or reaching out to them for support
# Automation
> Automate your scheduling workflows with webhooks, APIs, Zapier, Make, Keragon, and other integration platforms.
Connect OnceHub with your automation tools and platforms.
* [API Key Security & Management](https://help.oncehub.com/account-integrations/automation/api-and-webhooks/api-key-security-management/) — Manage your API keys securely
* [Creating And Managing Webhooks](https://help.oncehub.com/account-integrations/automation/api-and-webhooks/creating-and-managing-webhooks-via-oncehub/) — Set up and manage webhooks
* [Custom Booking Calendar Integrations](https://help.oncehub.com/account-integrations/automation/api-and-webhooks/custom-booking-calendar-integrations-with-webhooks-and-apis/) — Build custom integrations using webhooks and APIs
* [Integrating OnceHub With Integrately](https://help.oncehub.com/account-integrations/automation/integrating-oncehub-with-integrately/) — Connect OnceHub to Integrately
* [Integrating OnceHub With Keragon](https://help.oncehub.com/account-integrations/automation/integrating-oncehub-with-keragon/) — Connect OnceHub to Keragon
* [Integrating OnceHub With Make](https://help.oncehub.com/account-integrations/automation/integrating-oncehub-with-make/) — Connect OnceHub to Make
* [Integrating OnceHub With Microsoft Copilot Studio](https://help.oncehub.com/account-integrations/automation/integrating-oncehub-with-microsoft-copilot-studio/) — Connect OnceHub to Microsoft Copilot Studio
* [Integrating OnceHub With viaSocket](https://help.oncehub.com/account-integrations/automation/integrating-oncehub-with-viasocket/) — Connect OnceHub to viaSocket
* [Zapier](https://help.oncehub.com/account-integrations/automation/zapier/) — Zapier integration guides and triggers
# API and Webhooks
> API And Webhooks documentation and guides.
[API Key Security & Management](https://help.oncehub.com/account-integrations/automation/api-and-webhooks/api-key-security-management/)
[Creating and Managing Webhooks via OnceHub](https://help.oncehub.com/account-integrations/automation/api-and-webhooks/creating-and-managing-webhooks-via-oncehub/)
[Custom Booking Calendar Integrations With Webhooks And APIs](https://help.oncehub.com/account-integrations/automation/api-and-webhooks/custom-booking-calendar-integrations-with-webhooks-and-apis/)
# API Key Security & Management
> To ensure enterprise grade security, OnceHub utilizes industry standard cryptographic practices to protect your account credentials.
[API Key Security & Management](https://www.youtube-nocookie.com/embed/yokXi5ae26U?wmode=opaque)
To ensure enterprise grade security, OnceHub utilizes industry standard cryptographic practices to protect your account credentials. All API keys are secured using **one-way cryptographic hashing**, ensuring they remain unreadable even in the event of a database breach.
***
## Key Security Features
[Section titled “Key Security Features”](#key-security-features)
* **Hashed Key Storage:** OnceHub does not store API keys in plaintext. Because we only store a secure cryptographic hash, a key is **displayed only once** upon generation. It cannot be retrieved again by any user or by OnceHub Support.
* **Multi-Key Management:** You can generate and maintain up to **25 active API keys** per account to support:
* **Environment Segregation:** Use separate keys for staging and production environments to prevent accidental data leaks.
* **Vendor Management:** Assign unique keys to different third-party integrations to manage access independently.
* **Zero-Downtime Rotation:** Supporting multiple concurrent keys allows you to generate a new key and update your application before revoking the old one, ensuring continuous service.
***
## How to Generate an API Key
[Section titled “How to Generate an API Key”](#how-to-generate-an-api-key)
1. Click the **gear icon** located in the top-right corner of the page.
2. Select **Account Integrations** from the dropdown menu.
3. Select **APIs & Webhooks** tile.
4. In the **API Keys** section, click the **Create API key** button.
5. In the pop-up, enter a descriptive **API Key Name** (e.g. Production CRM).
6. Click Generate key. The **API Key Created Successfully** pop up will appear. **IMPORTANT:** Your API key is displayed here. For security reasons, it will **only be displayed once**.
7. Click **Copy & close** to copy the key to your clipboard and save it in a secure location.
***
## How to Delete an API Key
[Section titled “How to Delete an API Key”](#how-to-delete-an-api-key)
If a key is compromised or no longer needed, you should delete it immediately to protect your data.
1. Locate the specific key in the **API Keys** list.
2. Click the **Delete** link next to the key name. A **Delete Key** confirmation pop up will appear warning that any application using this key will immediately lose access.
3. Click **Delete key** button to permanently delete the credential.
# Creating and Managing Webhooks via OnceHub
> Webhooks enable real-time data synchronization from OnceHub to your external applications. When an event occurs in OnceHub such as a new booking, a data payl...
Webhooks enable real-time data synchronization from OnceHub to your external applications. When an event occurs in OnceHub such as a new booking, a data payload is automatically sent to your designated URL. This allows you to automate workflows by receiving instant updates, eliminating the need for your system to constantly check OnceHub for new data. While webhooks can be managed via the API, you can also configure them directly from your account interface.
***
## How to Create a Webhook
[Section titled “How to Create a Webhook”](#how-to-create-a-webhook)
To create a webhook:
1. Navigate to the **gear icon** in the top-right corner of the page.
2. Select **Account Integrations** from the dropdown menu.
3. Select **APIs & Webhooks** tile.
4. In the **Webhooks** section, click the **Create Webhook** button.
5. In the pop-up, provide the following details:
* **Webhook Name:** A unique, descriptive name for your integration.
* **Webhook URL:** The destination address (starting with https\://) where the data will be sent.
6. Click **Next**.
7. **Select the checkboxes** for the specific events that should trigger the webhook.
8. Click **Create**.
9. A **Webhook Secret** will be displayed. Click **Copy & close** to save this secret immediately. It is required to verify that the received data is authentic.
The webhook is now active and will appear in your **Webhooks** list.
***
## Understanding Supported Webhook Event Triggers
[Section titled “Understanding Supported Webhook Event Triggers”](#understanding-supported-webhook-event-triggers)
When a webhook is triggered, OnceHub sends a data payload containing either a \*\*\*`booking `\*\*\*or ***`conversation object`***. These objects are generated by specific user actions.
### The Booking Object
[Section titled “The Booking Object”](#the-booking-object)
The \*\*\*`booking object `\*\*\*represents a scheduled meeting. It is produced when:
* A guest schedules a meeting through a **Booking Calendar** or **Booking Hub**.
* A meeting is scheduled via a **Chatbot** or a **Routing Form** interaction.
### The Conversation Object
[Section titled “The Conversation Object”](#the-conversation-object)
The `conversation object `represents a digital interaction session. It is produced when:
* A visitor interacts with an automated **Chatbot** or a **Routing Form**.
* A **live engagement** session is initiated with an agent.
## Event Trigger Descriptions
[Section titled “Event Trigger Descriptions”](#event-trigger-descriptions)
The following table describes the specific [**Webhook event**](https://help.oncehub.com/developers/api/#tag/webhook-events) triggers available in the OnceHub interface:
| **Event Trigger** | **Description** |
| ------------------------------------------------------------------ | ------------------------------------------------------------------------------------------------------------------------------- |
| **Booking Scheduled Event** | Triggers when a customer schedules a new booking. |
| **Booking Rescheduled Event** | Triggers when an existing booking is moved to a new time. |
| **Booking Reassigned Event** | Triggers when a booking is moved from one user to another. |
| **Booking Canceled Then Rescheduled Event** | Triggers when a booking is canceled and immediately rescheduled. |
| **Booking Canceled Reschedule Requested Event** | Triggers when a booking is canceled with a request for the customer to reschedule. |
| **Booking Canceled Event** | Triggers when a booking is officially canceled. |
| **Booking Completed Event** | Triggers once the scheduled booking end time has passed. |
| **Booking No Show Event** | Triggers when a user manually marks a completed booking as a No-show. |
| **Conversation Started Event** | Triggers when a new chatbot or live engagement session begins. |
| **Conversation Closed Event** | Triggers when a conversation is successfully concluded. This occurs when:\* The visitor reaches the end of a conversation flow. |
| \* The visitor starts a new conversation with a different chatbot. | |
| **Conversation Abandoned Event** | Triggers when a customer leaves a conversation before it is completed or closed. |
## How to Manage Existing Webhooks
[Section titled “How to Manage Existing Webhooks”](#how-to-manage-existing-webhooks)
You can manage active webhook subscriptions directly from the **APIs & Webhooks** page using the following actions:
* **View Secret:** Click to retrieve the signing secret. Your system uses this secret to **verify that incoming data is authentic** and was sent by OnceHub, preventing unauthorized messages.
* **Delete:** If a webhook is no longer needed, click **Delete** to permanently remove the webhook subscription.
***
## Troubleshooting Common Issues
[Section titled “Troubleshooting Common Issues”](#troubleshooting-common-issues)
If you are unable to complete the setup, verify the following:
* **URL Format:** Ensure the Webhook URL starts with *`https://`*
* **Alphanumeric Name:** The Webhook name must contain at least one alphanumeric character.
# Custom Booking Calendar Integrations With Webhooks And APIs
> The OnceHub API and webhook features empower developers and technically skilled users to create custom integrations for Booking Calendars, allowing seamless ...
The OnceHub API and webhook features empower developers and technically skilled users to create custom integrations for **Booking Calendars**, allowing seamless integration with third-party applications and services.
[Custom Booking Calendar Integrations With Webhooks And APIs](https://www.youtube-nocookie.com/embed/k4yvYI5_sf0?wmode=opaque)
***
## OnceHub API
[Section titled “OnceHub API”](#oncehub-api)
The OnceHub API provides direct and reliable access to your booking data, enabling advanced integrations. With the API, you can:
* **Access Booking Details:** Retrieve information such as meeting times, guest details, and locations.
* **Retrieve Booking Calendars:** Obtain a list of all your **Booking Calendars** for management or reporting.
* **Manage the Meeting Lifecycle:** Create or cancel meetings programmatically to maintain control over bookings.
* **Generate One-Time Links:** Create unique booking links for specific use cases.
* **Pre-Populate Booking Forms:** Use URL parameters to fill in guest details automatically for a faster booking process.
For more details, see our [**API Key Security & Management**](https://help.oncehub.com/account-integrations/automation/api-and-webhooks/api-key-security-management/) article or visit our [**OnceHub Developer Center**](https://help.oncehub.com/developers/overview/authentication/).
***
## Webhooks
[Section titled “Webhooks”](#webhooks)
Webhooks provide automatic data delivery whenever a booking lifecycle event occurs, such as a new meeting, reschedule, or cancellation.
**Examples of What You Can Do with Webhooks:**
* **Send Guest Details:** Automatically transmit guest details to your server when a booking is made.
* **Integrate with Other Systems:** Support integrations with applications, services, or data warehouses to streamline and automate processes.
For more details, see our [**Creating and Managing Webhooks via OnceHub**](https://help.oncehub.com/account-integrations/automation/api-and-webhooks/creating-and-managing-webhooks-via-oncehub/) article or visit our [**Webhooks documentation**](https://help.oncehub.com/developers/webhooks/introduction-to-webhooks/).
***
## Why Use APIs and Webhooks?
[Section titled “Why Use APIs and Webhooks?”](#why-use-apis-and-webhooks)
Custom integrations using the OnceHub API and webhooks enhance flexibility and functionality, enabling you to do things like:
* Add full scheduling capabilities to your apps or agents
* Automation of marketing and sales campaigns
* Automation of customer support workflows
* Reporting and analysis of activity
* Integrate event triggers into workflows
* Develop custom CRM integrations
# Integrating OnceHub with Integrately
> OnceHub utilizes Integrately, an Integration Platform as a Service (iPaaS), to automate data movement between your essential applications.
OnceHub utilizes Integrately, an Integration Platform as a Service (iPaaS), to automate data movement between your essential applications. By connecting OnceHub to Integrately’s extensive network of over 1,200 apps, including CRM, invoicing, and marketing platforms, you can seamlessly integrate OnceHub’s functionalities into your daily workflows.
This integration simplifies processes and ensures data consistency, enhancing your overall operational efficiency.
Note
For a complete list of supported apps and pre-built automated workflows, visit the [**OnceHub integration page on Integrately**](https://integrately.com/integrations/oncehub).
***
## Key Features of Integrately
[Section titled “Key Features of Integrately”](#key-features-of-integrately)
* **Comprehensive Automation Triggers:** Automate workflows based on lifecycle events, such as booking scheduling, completion, rescheduling, or cancellations.
* **Wide App Ecosystem:** Integrate with tools across categories like CRM (e.g., Salesforce, HubSpot), invoicing (e.g., QuickBooks), and marketing (e.g., Mailchimp).
* **Flexible Automation:** Create multi-step automations to handle complex workflows, linking multiple apps in one automation.
* **Dynamic Updates:** Ensure real-time synchronization of booking data across all integrated tools.
* **Customizable Workflows:** Tailor automations to suit unique operational needs, from simple tasks to advanced multi-app processes.
***
## Understanding Integrately’s Automations
[Section titled “Understanding Integrately’s Automations”](#understanding-integratelys-automations)
Integrately enables the creation of automated workflows that connect multiple applications. These automations are built on a simple **Trigger and Action** framework:
* **When This Happens (Trigger):** An event in the source app that initiates the automation.
* **Do This (Action):** The task Integrately performs in the destination app using data from the Trigger.
For example, you can create an automation that adds or updates a contact in your CRM every time a new booking is made, or a visitor engaged with a chatbot.
***
## Connecting OnceHub with Integrately
[Section titled “Connecting OnceHub with Integrately”](#connecting-oncehub-with-integrately)
1. Click the **gear icon** located in the top-right corner of the page.
2. Select **Account Integrations** from the dropdown menu.
3. Filter for **Automation**.
4. Click on the **Integrately** tile.
5. Click on **Set up on Integrately**.
6. Follow the on screen setup instructions.
# Integrating OnceHub with Keragon
> Integrating OnceHub with Keragon, an Integration Platform as a Service (iPaaS) enables you to automate data movement between OnceHub and specialized healthca...
Integrating OnceHub with Keragon, an Integration Platform as a Service (iPaaS) enables you to automate data movement between OnceHub and specialized healthcare applications.
This connection allows you to securely sync scheduling data with Electronic Health Records (EHRs), medical CRMs, and over 300 clinical tools. It is an ideal solution for healthcare organizations looking to automate patient journeys while maintaining the highest security and compliance standards.
Note
For more information on supported workflows and healthcare connectors, visit the [**OnceHub integration page on Keragon**](https://www.keragon.com/integrations/oncehub).
***
## Key Features of the Keragon Integration
[Section titled “Key Features of the Keragon Integration”](#key-features-of-the-keragon-integration)
The OnceHub integration with Keragon enables healthcare-specific automation through the following core capabilities:
* **HIPAA-Compliant Patient Workflow Automation:** Securely automate the movement of sensitive scheduling data between OnceHub and your clinical toolset (EHR/ EMR) on an iPaaS purposely built for healthcare privacy.
* **AI-Assisted Coordination:** Use natural language and AI-powered configuration to build complex automated workflows for patient onboarding, intake, and secure communication without the need for manual coding.
***
## Connecting OnceHub with Keragon
[Section titled “Connecting OnceHub with Keragon”](#connecting-oncehub-with-keragon)
To set up the integration, you will need to authorize the connection using your **OnceHub API Key**.
1. Click the **gear icon** located in the top-right corner of the page.
2. Select **Account Integrations** from the dropdown menu.
3. Filter for **Automation**.
4. Click the **Keragon** tile.
5. Click on **Set up on Keragon**.
6. Follow the on-screen setup instructions to authorize the connection using your [**OnceHub API Key**](https://help.oncehub.com/account-integrations/automation/api-and-webhooks/api-key-security-management/).
***
## Available Actions in the Keragon Platform
[Section titled “Available Actions in the Keragon Platform”](#available-actions-in-the-keragon-platform)
Once connected, you can utilize the following on-demand actions to automate your scheduling and healthcare workflows:
| **Action** | **Description** |
| ---------------- | --------------------------------------------------------------------- |
| **Get Bookings** | Retrieves a list of all scheduled meetings from your OnceHub account. |
| **Get Users** | Retrieves a list of all users from your OnceHub account. |
| **Get Contacts** | Retrieves a list of all contacts from your OnceHub account. |
# Integrating OnceHub with Make
> Integrating OnceHub with Make, a leading Integration Platform as a Service (iPaaS), enables you to automate data movement across your essential tech stack.
[Integrating OnceHub with Make](https://www.youtube-nocookie.com/embed/e25UF18qTDU?wmode=opaque)
Integrating OnceHub with Make, a leading Integration Platform as a Service (iPaaS), enables you to automate data movement across your essential tech stack. By connecting OnceHub to Make’s extensive network of apps, you can seamlessly integrate OnceHub’s scheduling into your workflows, ensuring data consistency across your entire organization.
Note
For more information on available Triggers and Actions (Modules), visit the [**OnceHub (New) integration page on Make**](https://www.make.com/en/integrations/oncehub). If you are using our classic product, refer to the [**ScheduleOnce (Classic) integration page on Make**](https://www.make.com/en/integrations/scheduleonce).
***
## Key Features of the Make Integration
[Section titled “Key Features of the Make Integration”](#key-features-of-the-make-integration)
Integrating OnceHub with Make’s iPaaS provides high-level control over your scheduling data through these key features:
* **Visual Workflow Designer:** Map complex data journeys using a drag and drop interface. This allows you to build and visualize sophisticated, multi-step automations that connect OnceHub to your entire tech stack without writing code.
* **Advanced Logic & Branching:** Scale your scheduling processes using built-in tools like filters, routers, and iterators to create conditional if/then scenarios across thousands of integrated tools.
## Connecting OnceHub with Make
[Section titled “Connecting OnceHub with Make”](#connecting-oncehub-with-make)
To set up the integration, you will need to authorize the connection using your **OnceHub API Key**:
1. Click the **gear icon** located in the top-right corner of the page.
2. Select **Account Integrations** from the dropdown menu.
3. Filter for **Automation**.
4. Click the **Make** tile.
5. Click on **Set up on Make**.
6. Follow the on-screen setup instructions to authorize the connection using your [**OnceHub API Key**](https://help.oncehub.com/account-integrations/automation/api-and-webhooks/api-key-security-management/).
***
## Which Make App Should I Use?
[Section titled “Which Make App Should I Use?”](#which-make-app-should-i-use)
Once the connection is established, ensure you choose the appropriate OnceHub app version in the Make dashboard to match your booking setup.
* **OnceHub (New):** Recommended for all workflows related to Booking Calendars.
* **ScheduleOnce (Classic):** Use only for workflows specifically related to classic Booking Pages.
***
## Understanding Make’s Automations
[Section titled “Understanding Make’s Automations”](#understanding-makes-automations)
Once you select the appropriate OnceHub app in the Make iPaaS, you can build **Scenarios** using a Trigger and Action framework:
* **When This Happens (Trigger):** An event in OnceHub (e.g., a new booking) that initiates the Scenario.
* **Do This (Action):** The task Make performs in a destination app (or back in OnceHub) using the data provided by the Trigger.
### List of Supported Triggers
[Section titled “List of Supported Triggers”](#list-of-supported-triggers)
| **Trigger** | **Description** |
| ----------------------------------------------- | --------------------------------------------------------------------------------------------------------------------------------------------------------------------------- |
| **Watch Bookings** | Triggers whenever a booking status changes (scheduled, rescheduled, reassigned, canceled or no-show). Use this trigger to monitor the entire lifecycle of an appointment. |
| **Watch Booking Scheduled** | Triggers whenever a new meeting is successfully booked. Use this trigger to automatically create new records in your CRM or send customized welcome packets. |
| **Watch Booking Rescheduled** | Triggers whenever an existing appointment is moved to a new time slot. Use this trigger to automatically update your CRM and meeting data on your other platforms and apps. |
| **Watch Booking Canceled** | Triggers when an existing booking is removed from the schedule. Use this trigger to set up automated follow ups or notify stakeholders. |
| **Watch Booking Completed** | Triggers once the scheduled date and time for a booking has passed. Use this trigger to automate post-meeting surveys or status updates. |
| **Watch Booking Canceled Reschedule Requested** | Triggers whenever a booking is canceled by the user and the guest is requested to select a new time. |
| **Watch Booking No Showed** | Triggers when a user manually marks a booking as a No-show, helping you track attendance and engagement. |
| **Watch Booking Reassigned** | Triggers whenever a booking is moved from one user to another, ensuring the new host has all the necessary context and data. |
### Supported Actions
[Section titled “Supported Actions”](#supported-actions)
| **Action** | **Description** |
| -------------------- | -------------------------------------------------------------------------------------------------------------------- |
| **Make an API Call** | Allows you to perform advanced operations using a raw HTTP request to the OnceHub API for features not listed above. |
# Integrating OnceHub with Microsoft Copilot Studio
> Connecting OnceHub with the Copilot Studio allows you to create AI Agents that automate your entire meeting lifecycle.
[Integrating OnceHub with Microsoft Copilot Studio](https://www.youtube-nocookie.com/embed/Z504Q-sZkII?wmode=opaque)
Connecting OnceHub with the Copilot Studio allows you to create **AI Agents** that automate your entire meeting lifecycle. This integration enables you to retrieve real-time availability and book meetings directly within the Microsoft ecosystem.
You can also use the integration along with Microsoft’s other services (Logic Apps, Power Apps, Power Automate) to build custom scheduling applications that use OnceHub’s [**Booking Calendar**](https://help.oncehub.com/product/booking-calendars/introduction-to-booking-calendars/introduction-to-booking-calendars/) scheduling logic.
Note
For more information on the integration, visit the [**OnceHub integration page on Learn Microsoft**](https://learn.microsoft.com/en-us/connectors/oncehub/).
***
## Integration Use Cases
[Section titled “Integration Use Cases”](#integration-use-cases)
Integrating OnceHub with Microsoft Copilot Studio allows you to automate your scheduling workflows and create personalized booking experiences through the following use cases:
* **Copilot Studio AI Agents:** You can build agents that use natural language to find availability or book meetings, allowing users to schedule during the chat with the agent without the need to switch applications.
* **Custom Scheduling Apps:** You can use Microsoft’s Logic Apps, Power Apps, or Power Automate, to build bespoke applications tailored to your business needs while still making use of OnceHub’s robust scheduling engine.
***
## Connecting OnceHub with Microsoft Copilot Studio
[Section titled “Connecting OnceHub with Microsoft Copilot Studio”](#connecting-oncehub-with-microsoft-copilot-studio)
To set up the integration, you will need to authorize the connection using your OnceHub API Key:
1. Click the gear icon located in the top-right corner of the page.
2. Select **Account Integrations** from the dropdown menu.
3. Filter for **Automation**.
4. Click the **Microsoft Copilot Studio** tile.
5. Click **Set up on Copilot Studio**.
6. Follow the on-screen setup instructions to authorize the connection using your **OnceHub API Key**.
***
## Available Actions in Microsoft Copilot Studio
[Section titled “Available Actions in Microsoft Copilot Studio”](#available-actions-in-microsoft-copilot-studio)
Once connected, you can utilize the following actions within your AI Agents:
* **Get available time slots for scheduling:** Fetch real-time availability based on booking rules and participant calendars. Use this operation to display open time slots to users before confirming a meeting.
* **Schedule a meeting in a specified time slot:** Schedule a meeting using a previously selected time slot. This action confirms the booking with participant details and creates the meeting in OnceHub.
# Integrating OnceHub With n8n
> OnceHub integrates with n8n, an extensible Integration Platform as a Service (iPaaS), to automate data movement between OnceHub and hundreds of other applica...
[Integrating OnceHub With n8n](https://www.youtube-nocookie.com/embed/KtYx8VeBFTs?wmode=opaque)
OnceHub integrates with n8n, an extensible Integration Platform as a Service (iPaaS), to automate data movement between OnceHub and hundreds of other applications.
Note
For a complete list of supported apps, available triggers and pre-built automation workflows, visit the [**OnceHub integration page on n8n**](https://n8n.io/integrations/oncehub-trigger/).
***
## Key Benefits of Integrating with n8n
[Section titled “Key Benefits of Integrating with n8n”](#key-benefits-of-integrating-with-n8n)
The OnceHub n8n integration automates your scheduling workflows with these core features:
* **Advanced Logic & Data Transformation:** Go beyond standard no-code limits. n8n allows you to execute custom JavaScript or Python code snippets within your workflow, enabling advanced data transformation and high-volume operations across hundreds of apps.
* **Plug-and-Play Connectivity:** Bridge OnceHub with your existing tech stack without manual API configuration for each endpoint. n8n acts as a centralized hub to maintain data consistency across CRM, marketing, and communication tools instantly.
***
## Connecting OnceHub with n8n
[Section titled “Connecting OnceHub with n8n”](#connecting-oncehub-with-n8n)
To set up the integration, you will need to authorize the connection using your OnceHub API Key.
1. Click the **gear icon** in the top-right corner of the page.
2. Select **Account Integrations** from the dropdown menu.
3. Filter for **Automation**.
4. Click the **n8n** tile.
5. Click on **Set up on n8n**.
6. Follow the on-screen setup instructions to authorize the connection using your [**OnceHub API Key**](https://help.oncehub.com/account-integrations/automation/api-and-webhooks/api-key-security-management/).
***
## Understanding n8n’s Automations
[Section titled “Understanding n8n’s Automations”](#understanding-n8ns-automations)
Once connected, n8n allows you to build powerful, automated workflows by connecting different **Nodes** together. These automations operate on a **Trigger-based framework**:
* **When This Happens (Trigger):** An event in OnceHub (e.g., a new booking) that initiates the workflow node.
* **Workflow Result:** Once the trigger node fires, n8n passes the booking data to other connected nodes (such as your CRM etc.) to complete your desired tasks.
### List of Supported Triggers
[Section titled “List of Supported Triggers”](#list-of-supported-triggers)
| **Trigger** | **Description** |
| --------------------------------- | ------------------------------------------------------------------------------------------------------------------------------------------------------ |
| **Booking Scheduled** | Triggers when a new meeting is successfully created. Use this trigger to instantly sync new meeting data with your CRM or project management tools. |
| **Booking Rescheduled** | Triggers when a meeting is moved to a new date or time. This ensures your downstream applications always reflect the most current appointment details. |
| **Booking Canceled** | Triggers when an appointment is called off by either party, allowing you to automate follow-up tasks or update internal records. |
| **Booking Reassigned** | Triggers when a booking is transferred from one Team member to another. Use this trigger to keep the new host informed with automated notifications. |
| **Booking Completed** | Triggers once the scheduled date and time for a booking has passed. Use this trigger to automate post-meeting surveys or status updates. |
| **Booking No Show** | Triggers when a user manually marks a booking as a no-show. Use this trigger to track attendance and engagement. |
| **Booking Rescheduled Requested** | Triggers when a user initiates a reschedule. This action cancels the existing meeting, allowing the guest to select a new time for the booking. |
# Integrating OnceHub with viaSocket
> OnceHub integrates with viaSocket, an Integration Platform as a Service (iPaaS), to automate data movement between OnceHub and thousands of other applications.
[Integrating OnceHub with viaSocket](https://www.youtube-nocookie.com/embed/PNtxn4qxMvE?wmode=opaque)
OnceHub integrates with viaSocket, an Integration Platform as a Service (iPaaS), to automate data movement between OnceHub and thousands of other applications.
Note
For a complete list of supported apps and pre-built automation workflows, visit the[ **OnceHub integration page on viaSocket**](https://viasocket.com/integrations/oncehub).
***
## Key Features of the viaSocket Integration
[Section titled “Key Features of the viaSocket Integration”](#key-features-of-the-viasocket-integration)
The OnceHub viaSocket integration automates your scheduling workflows with these core features:
* **End-to-End Lifecycle Automation:** Automatically sends data across thousands of other apps based on real-time OnceHub Booking Lifecycle (scheduled bookings, no-shows, etc.) to eliminate manual entry.
* **Advanced Logic & Data Transformation:** Build sophisticated workflow automations that go beyond simple data transfers. viaSocket allows you to execute custom JavaScript or Python code snippets within your workflow, enabling advanced data transformation, complex conditional filtering, and direct interaction with the OnceHub API to meet specific business requirements.
* **Plug-and-Play Connectivity:** Bridge OnceHub with your existing tech stack without manual API configuration for each endpoint. viaSocket acts as a centralized hub to maintain data consistency across CRM, marketing, and communication tools instantly.
***
## Connecting OnceHub with viaSocket
[Section titled “Connecting OnceHub with viaSocket”](#connecting-oncehub-with-viasocket)
To set up the integration, you will need to authorize the connection using your **OnceHub API Key**.
1. Click the **gear icon** in the top-right corner of the page.
2. Select **Account Integrations** from the dropdown menu.
3. Filter for **Automation**.
4. Click the **viaSocket** tile.
5. Click **Set up on viaSocket**.
6. Follow the on-screen setup instructions to authorize the connection using your [**OnceHub API Key**](https://help.oncehub.com/account-integrations/automation/api-and-webhooks/api-key-security-management/).
***
## Understanding viaSocket’s Automations
[Section titled “Understanding viaSocket’s Automations”](#understanding-viasockets-automations)
Once connected, you can automate your workflows by defining Triggers and Actions within viaSocket:
* **When This Happens (Trigger):** An event in OnceHub that initiates the automation.
* **Do This (Action):** The specific task viaSocket executes in your destination app (or back in OnceHub) using data from the trigger.
### List of Supported Triggers
[Section titled “List of Supported Triggers”](#list-of-supported-triggers)
| **Action** | **Description** |
| -------------------------------- | --------------------------------------------------------------------------------------------------------------------------------------------------------------------------------------------------------- |
| **Booking Lifecycle Event** | Triggers whenever a booking status changes (Scheduled, rescheduled, reassigned, canceled or no-show ). Use this trigger to capture updates throughout the booking journey, from scheduling to completion. |
| **Booking Scheduled** | Triggers whenever a new meeting is successfully booked. Use this trigger for automated workflows like sending confirmation emails or adding attendees to a CRM. |
| **Booking Rescheduled** | Triggers when an existing appointment is moved to a new time slot. Use this trigger for actions like updating your CRM or meeting records. |
| **Booking Canceled** | Triggers when an existing booking is removed from the schedule. Use this trigger to set up automated follow ups or notify stakeholders. |
| **Booking Completed** | Triggers once the scheduled date and time for a booking has passed. Use this trigger to automate post-meeting surveys or status updates. |
| **Booking No-Show** | Triggers when a user manually marks a booking as a no-show. Use this trigger to track attendance and send follow ups requesting to reschedule. |
| **Conversation Lifecycle Event** | Triggers when the status of a OnceHub conversation changes (started, closed or abandoned). Use this trigger to capture conversations and build custom analytics. |
| **Conversation Started** | Triggers the moment a visitor begins a new conversation with a chatbot. Use this trigger to track real time user engagement. |
| **Conversation Closed** | Triggers whenever a chat session ends. Use this trigger to archive transcripts or update lead records. |
### List of Supported Actions
[Section titled “List of Supported Actions”](#list-of-supported-actions)
| **Action** | **Description** |
| -------------------------- | ----------------------------------------------------------------------------------------------------------------------------------------------------- |
| **List Users** | Retrieves a list of all users on your OnceHub account, including their names and unique IDs. |
| **List Teams** | Retrieves a list of your teams on your OnceHub account to help you manage group scheduling and routing. |
| **List Contacts** | Retrieves a list of all existing Contacts on your OnceHub account, allowing you to sync customer data across platforms. |
| **Find Contact** | Finds a specific contact on your OnceHub account using their email allowing you to retrieve their details and sync contact details across platforms.. |
| **List Bookings** | Retrieves a detailed list of scheduled appointments, which can be filtered to find specific meeting data. |
| **List Booking Calendars** | Retrieves a list of Booking Calendars on your OnceHub account. |
| **Custom API Call** | Allows you to perform advanced operations using a raw HTTP request to the OnceHub API for features not listed above. |
# OnceHub MCP
> OnceHub MCP documentation and guides.
[OnceHub MCP: How To Connect OnceHub To Your AI Assistant](https://help.oncehub.com/account-integrations/automation/oncehub-mcp/how-to-connect-oncehub-to-your-ai-assistant/)
[OnceHub MCP: List Of Supported Tools](https://help.oncehub.com/account-integrations/automation/oncehub-mcp/list-of-supported-tools/)
[OnceHub MCP: Manage Scheduling with AI Prompts](https://help.oncehub.com/account-integrations/automation/oncehub-mcp/manage-scheduling-with-ai-prompts/)
# OnceHub MCP: How To Connect OnceHub To Your AI Assistant
> The OnceHub MCP (Model Context Protocol) is a secure bridge that allows AI assistants like ChatGPT or Claude to interact directly with your OnceHub schedulin...
[OnceHub MCP: How To Connect OnceHub To Your AI Assistant](https://www.youtube-nocookie.com/embed/nOGyVScHCUY?wmode=opaque)
The **OnceHub MCP (Model Context Protocol)** is a secure bridge that allows AI assistants like **ChatGPT** (via the ChatGPT App Store) or **Claude** to interact directly with your OnceHub scheduling data.
This connection provides a conversational interface, empowering your AI assistant to perform actions on your behalf such as manage meetings, fetch booking links, and update your availability **using natural language**, all without switching apps. To explore what your AI assistant can do, have a look at the [**List Of Supported Tools**](https://help.oncehub.com/account-integrations/automation/oncehub-mcp/list-of-supported-tools/) article.
Note
This is a **user-level** integration. It connects to your individual profile and does not support admin-wide management or Role-Based Access Control (RBAC) for other team members.
***
## Prerequisites
[Section titled “Prerequisites”](#prerequisites)
Before you begin, ensure you are using any supported MCP AI client, such as:
* **ChatGPT:** Works on all plans including the Free plan.
* **Claude:** No special administrative permissions are required to add custom connectors.
## How to Setup the Connection
[Section titled “How to Setup the Connection”](#how-to-setup-the-connection)
Follow the specific configuration steps for your chosen AI clients, then complete the verification process.
### Step 1: Configuration
[Section titled “Step 1: Configuration”](#step-1-configuration)
#### For ChatGPT
[Section titled “For ChatGPT”](#for-chatgpt)
You can connect OnceHub to ChatGPT using either the official ChatGPT Apps Store integration or by configuring a custom MCP URL via Developer Mode. Choose the method that best matches your preferences:
**Via the ChatGPT Apps:**
1. Click on **Apps** in the left-hand sidebar menu.
2. Use the search bar to search for **OnceHub**.
3. Select the OnceHub app and click the **Connect** button.
4. A **OnceHub login** window will appear; **sign in** via OAuth to grant access.
5. Return to the **ChatGPT chat window**. The OnceHub connection is now active and ready to use.
**Via Custom MCP Server URL:**
1. Open ChatGPT and go to **Plugins**.
2. Click the **+** icon on the right to add a New Plugin.
3. Enter the following details:
* **Name:** ``
* **Description:** ``
* **MCP Server URL Connection:** `https://my-mcp.oncehub.com`
4. Click **Create**. A **OnceHub login** window will appear; **sign in** via OAuth to grant access.
5. Once authorized, return to the **ChatGPT chat window** and click the **+ (Plus)** icon.
6. Select your **new app \** to **activate the plugin** for the current chat session.
7. Verify that the active app tag now appears inside your chat box, confirming it is ready to use.
#### For Claude
[Section titled “For Claude”](#for-claude)
A **video tutorial** accompanying these steps is available here: [**How to Connect OnceHub MCP to Claude Desktop**](https://www.youtube.com/watch?v=GHWNAwEVnEg)
1. Open **Claude** and click **Customize** > **Connectors** in the left sidebar.
2. Click the **+ (Plus)** icon and select Add custom connector.
3. Enter the following details:
* **Name:** ``
* **Remote MCP Server URL:** `https://my-mcp.oncehub.com`
4. Click **Add**. Select the **OnceHub MCP** connector from the list and click **Connect** from the right panel.
5. **Sign in** via the OAuth to grant access.
6. Return to the **Claude chat window**, click the **+ (Plus)** icon, and select **Connectors**.
7. Confirm that the OnceHub MCP connector is **enabled** and active.
### Step 2: Verification & Testing
[Section titled “Step 2: Verification & Testing”](#step-2-verification--testing)
To verify that your connection is working on either platform:
1. Type ***Show my upcoming meetings*** into the chat.
2. If successful, the AI assistant will retrieve and display your live OnceHub scheduling data directly in the conversation thread.
Note
Navigation labels, menu locations, and UI elements may vary slightly depending on your specific software version or platform.
***
## Frequently Asked Questions (FAQs)
[Section titled “Frequently Asked Questions (FAQs)”](#frequently-asked-questions-faqs)
#### Q: Why don’t I see Developer Mode in my ChatGPT settings?
[Section titled “Q: Why don’t I see Developer Mode in my ChatGPT settings?”](#q-why-dont-i-see-developer-mode-in-my-chatgpt-settings)
**A:** Developer Mode availability depends on your ChatGPT plan (e.g., Plus, Team, or Enterprise) and platform version. Ensure you are using a supported version and that your workspace administrator has enabled third-party app development.
#### Q: Why did the OnceHub login window fail to appear?
[Section titled “Q: Why did the OnceHub login window fail to appear?”](#q-why-did-the-oncehub-login-window-fail-to-appear)
**A:** This is usually caused by pop-up blockers. Ensure your browser or desktop application allows pop-up windows from ChatGPT or Claude, then click the connection button again.
#### Q: What should I do if my Google or Microsoft sign-in fails?
[Section titled “Q: What should I do if my Google or Microsoft sign-in fails?”](#q-what-should-i-do-if-my-google-or-microsoft-sign-in-fails)
**A:** Please refresh your browser and attempt the login once more. The SSO connection often requires a quick refresh to resolve the handshake and usually succeeds on the second try.
#### Q: My connector is active, but why is it not returning any meeting data?
[Section titled “Q: My connector is active, but why is it not returning any meeting data?”](#q-my-connector-is-active-but-why-is-it-not-returning-any-meeting-data)
**A:** If the connection is active but no data appears, please verify the following:
* **Correct Account:** Ensure you signed into the specific OnceHub account that contains your scheduling data.
* **Active Data:** Confirm you have upcoming meetings or active booking links in your OnceHub profile.
* **Session Status:** Check that the app/connector is still toggled ON or active in your current chat window (via the + menu).
#### Q: Do I need to install any additional software?
[Section titled “Q: Do I need to install any additional software?”](#q-do-i-need-to-install-any-additional-software)
**A:** No. You do not need to install plugins or additional software.
* **For ChatGPT:** You simply search for and activate OnceHub directly from the built-in **Apps** menu.
* **For Claude:** You add the OnceHub MCP Server URL as a custom connector within your Claude settings.
#### Q: Is this connection secure?
[Section titled “Q: Is this connection secure?”](#q-is-this-connection-secure)
**A:** Yes. The connection runs securely using OAuth authentication and industry-standard encryption. For Claude, the integration connects via OnceHub’s secure MCP Server URL, while ChatGPT uses a direct, authenticated app store integration. Under both platforms, sensitive actions require your explicit confirmation before any scheduling changes are executed.
#### Q: Does the AI have access to my entire OnceHub account history?
[Section titled “Q: Does the AI have access to my entire OnceHub account history?”](#q-does-the-ai-have-access-to-my-entire-oncehub-account-history)
**A:** No. Data access is request-based and tool-specific. The AI only retrieves the information needed to complete your current request. For example, if you ask to see upcoming meetings, it retrieves only your upcoming meeting data.
#### Q: Can the AI automate workflows across other apps like HubSpot?
[Section titled “Q: Can the AI automate workflows across other apps like HubSpot?”](#q-can-the-ai-automate-workflows-across-other-apps-like-hubspot)
**A:** Yes. If you have both OnceHub and your CRM (like HubSpot) connected to your AI assistant, you can prompt it to: Summarize my OnceHub meeting and save it to HubSpot. The AI assistant acts as a bridge between the two tools. Just ensure you have authorized the AI assistant to access both apps separately.
#### Q: Can the AI see my teammates’ Booking Calendars or manage someone else’s schedule?
[Section titled “Q: Can the AI see my teammates’ Booking Calendars or manage someone else’s schedule?”](#q-can-the-ai-see-my-teammates-booking-calendars-or-manage-someone-elses-schedule)
**A:** No. The AI assistant operates strictly at the individual user level. Even if you are an Administrator in OnceHub, the **OnceHub app or MCP connection** only has permission to act as you. It cannot access Booking Calendars of other team members or perform actions on their behalf.
#### Q: Why are some OnceHub MCP tools available through the custom MCP Server URL but not in the ChatGPT App?
[Section titled “Q: Why are some OnceHub MCP tools available through the custom MCP Server URL but not in the ChatGPT App?”](#q-why-are-some-oncehub-mcp-tools-available-through-the-custom-mcp-server-url-but-not-in-the-chatgpt-app)
**A:** Some tools may be available through the custom MCP Server URL before they appear in the ChatGPT App. This is because new tools must be reviewed and approved by OpenAI before they can be published in the ChatGPT App. Once approved, they become available in both.
***
To explore example prompts, visit our [**Manage Scheduling with AI Prompts**](https://help.oncehub.com/account-integrations/automation/oncehub-mcp/manage-scheduling-with-ai-prompts/) article.
# OnceHub MCP: List Of Supported Tools
> Once your OnceHub account is connected to an AI assistant, your AI assistant uses specific tools to interact with your OnceHub data.
Once your [**OnceHub account is connected to an AI assistant**](https://help.oncehub.com/account-integrations/automation/oncehub-mcp/how-to-connect-oncehub-to-your-ai-assistant/), your AI assistant uses specific tools to interact with your OnceHub data. These tools define exactly what information the AI assistant can retrieve and what actions it can perform on your behalf. The available tools are categorized into two types:
* **Read-only:** For fetching information
* **Write/Delete:** For making updates to your schedule
## Read-only Tools
[Section titled “Read-only Tools”](#read-only-tools)
These tools allow your AI assistant to see and retrieve information from your OnceHub account to answer your questions without making any changes.
| **Tool Name** | **Description** |
| ----------------------------- | ----------------------------------------------------------------------------------------------------------------------------------------------------------------------------------------------------- |
| **Get booking calendar list** | Returns a list of all Booking Calendars where the User is the Host or Co-Host (either directly or through a team). |
| **Get booking hubs** | Returns a list of all Booking Hubs where the User is the owner. |
| **Get my booking link** | Retrieves Booking Calendar or Booking Hub links of the User. |
| **Get one-time booking link** | Generates a unique, single-use booking link for a specific Booking Calendar that expires after one booking. |
| **Get upcoming meetings** | Retrieves a list of all your upcoming scheduled meetings. |
| **Get my working hours** | Get combined recurring and date-specific availability. For a specific date or upcoming days, effective availability is resolved by applying date-specific overrides on top of recurring availability. |
## Write/Delete Tools
[Section titled “Write/Delete Tools”](#writedelete-tools)
These tools allow your AI assistant to execute changes to meetings, availability, and booking statuses directly through the chat.
| **Tool Name** | **Description** |
| ------------------------------------------------------- | --------------------------------------------------------------------------------------------------------------------------- |
| **Cancel upcoming meeting(s)** | Cancel scheduled meeting(s). |
| **Request the guest to reschedule an upcoming meeting** | Cancels the current meeting and sends a reschedule request notification to a guest to select a new time. |
| **Update date-specific availability** | Updates the Date Specific Override of the User’s profile availability and not of the Booking Calendar. |
| **Mark a meeting as no-show** | Updates a past meeting status to **No-show**. |
| **Manage my pending meetings requests** | Lists the meetings that are currently pending your approval and allows you to approve or decline specific meeting requests. |
***
## Managing Tool Permissions (Claude only)
[Section titled “Managing Tool Permissions (Claude only)”](#managing-tool-permissions-claude-only)
In Claude, you can **define the level of control** your AI assistant has when executing OnceHub tasks.
You can control how Claude executes OnceHub tools by setting its permissions:
* **Always allow:** The AI assistant executes the tool instantly without a confirmation prompt. This is recommended for **Read-only tools**, such as *retrieving a booking link*.
* **Needs approval:** The AI assistant will prompt you for explicit confirmation before performing the action. This is recommended for **Write/delete tools**, such as canceling a meeting, to ensure no changes occur without your consent.
* **Blocked:** The AI assistant is restricted from using that specific tool entirely.
***
To explore example prompts, visit our [**Manage Scheduling with AI Prompts**](https://help.oncehub.com/account-integrations/automation/oncehub-mcp/manage-scheduling-with-ai-prompts/) article.
# OnceHub MCP: Manage Scheduling with AI Prompts
> Once your OnceHub account is connected to an AI assistant and you have reviewed the list of supported tools, you can use natural language to manage your sche...
Once your [**OnceHub account is connected to an AI assistant**](https://help.oncehub.com/account-integrations/automation/oncehub-mcp/how-to-connect-oncehub-to-your-ai-assistant/) and you have reviewed the [**list of supported tools**](https://help.oncehub.com/account-integrations/automation/oncehub-mcp/list-of-supported-tools/), you can use natural language to manage your schedule directly within ChatGPT or Claude. The following prompts demonstrate how to translate technical functions into your daily workflows.
***
## Example AI Prompts
[Section titled “Example AI Prompts”](#example-ai-prompts)
Use these prompts within your AI assistant to **execute scheduling actions** without leaving the conversation.
### Managing your Meetings
[Section titled “Managing your Meetings”](#managing-your-meetings)
| **Goal** | **Example Prompt** |
| --------------------------------- | --------------------------------------------------------------------------------------------------------- |
| **View schedule** | What does my schedule look like for the rest of the week? |
| **View pending meeting requests** | Show me my pending meeting requests. |
| **Approve a meeting request** | Approve the pending meeting request from Jacob. OR Approve all my pending meeting requests for next week. |
| **Decline a meeting request** | Decline the pending meeting request with Jacob. OR Decline all pending meeting requests for this Friday. |
| **Cancel a meeting** | I can’t attend my meeting with Jacob tomorrow. Please cancel it. |
| **Ask guest to reschedule** | Send a reschedule request to Sarah for our call this afternoon. |
| **Mark no-shows** | Olivia didn’t attend our last three sessions. Mark them as no-shows. |
### Sharing your Booking Links
[Section titled “Sharing your Booking Links”](#sharing-your-booking-links)
| **Goal** | **Example Prompt** |
| ---------------------------------- | -------------------------------------------------------------------------- |
| **Get booking link** | Give me my booking link to share with a lead. |
| **Find specific Booking Calendar** | Find the link for my Financial Goals Booking Calendar. |
| **Create a one-time link** | Create a one-time booking link for Sarah so she can book a quick check-in. |
| **List all Booking Calendars** | Show me a list of all my available Booking Calendars and Booking Hubs. |
### Updating your Availability
[Section titled “Updating your Availability”](#updating-your-availability)
| **Goal** | **Example Prompt** |
| --------------------------------- | -------------------------------------------------------------------------------------------------------------- |
| **Block full days** | I’m attending a summit next Thursday and Friday. Mark me as unavailable for both days. |
| **Set specific hours** | For the week of May 25th, only show me as available between 8:00 AM and 10:00 AM. |
| **Check current availability** | What does my availability look like for the next 7 days? |
| **Update permanent weekly hours** | Update my recurring schedule to open up Mondays from 9:00 AM to 5:00 PM and Thursdays from 1:00 PM to 4:00 PM. |
| **Remove a recurring day** | Remove all my recurring availability slots for Wednesdays; I no longer want to take meetings on that day. |
### Advanced Workflow Prompts
[Section titled “Advanced Workflow Prompts”](#advanced-workflow-prompts)
**OnceHub MCP** supports multi step workflows when used with other connected apps in your AI assistant.
| **Workflow Type** | **Example Prompt** | **Connected Apps** |
| -------------------------------------------- | ---------------------------------------------------------------------------------------------------------------------------------------------------------------------------------------------------- | ------------------ |
| **Reschedule & follow-up** | Lydia messaged saying she can’t make our meeting on May 15. Cancel that meeting and draft a polite follow-up email with a new one-time booking link for my **Financial Goals** calendar. | OnceHub + Email |
| **Approval workflow** | Check for all pending meeting requests. Approve the meeting requested by `sarah@example.com`, decline the rest with a reason explaining my schedule is full, and send a confirmation email to Sarah. | OnceHub + Email |
| **Meeting preparation** | I have a meeting with Sean in 10 minutes. Summarize our last OnceHub meeting and include any recent CRM notes if my CRM is connected. | OnceHub + CRM |
| **Attendance tracking** | Look through my meetings from last week, identify anyone who was a no-show, and mark their status. Then, draft a follow-up email for each. | OnceHub + Email |
| **VIP scheduling** | Create a one-time booking link for my **Financial Review** Booking Calendar for a VIP client and send via email. | OnceHub + Email |
| **Follow-up** | I just finished a call with Jacob. Get my booking link and draft a professional email thanking him and inviting him to schedule our next deep dive. | OnceHub + Email |
| **LinkedIn outreach** | I am chatting with a prospect on LinkedIn. Get my Financial Goals booking link and draft a short professional message to send directly on LinkedIn. | OnceHub + LinkedIn |
| **Availability sharing** | Check my working hours for tomorrow and share my open slots in the team-sync Slack channel so we can find a time to connect. | OnceHub + Slack |
| **Recurring schedule update & announcement** | Update my recurring working hours to remove Fridays entirely, then send a message to the team-updates Slack channel letting everyone know I am moving to a 4-day work week. | OnceHub + Slack |
# Zapier
> Zapier documentation and guides.
[Integrating OnceHub with Zapier](https://help.oncehub.com/account-integrations/automation/zapier/integrating-oncehub-with-zapier/)
[Automate Your Scheduling Workflow by using Zapier](https://help.oncehub.com/account-integrations/automation/zapier/automate-your-scheduling-workflow-by-using-zapier/)
[OnceHub Triggers and Actions for Zapier](https://help.oncehub.com/account-integrations/automation/zapier/oncehub-triggers-and-actions-for-zapier/)
[Setting Up a Zap for Booking Calendars Using Contact Properties](https://help.oncehub.com/account-integrations/automation/zapier/setting-up-zap-for-booking-calendars-using-contact-properties/)
[Setting Up a Zap for Booking Calendars Using Meeting Properties](https://help.oncehub.com/account-integrations/automation/zapier/setting-up-zap-for-booking-calendars-using-meeting-properties/)
[Setting up a Zap for Chatbots](https://help.oncehub.com/account-integrations/automation/zapier/setting-up-zap-for-chatbots/)
[Setting Up a Zap for Routing Forms](https://help.oncehub.com/account-integrations/automation/zapier/setting-up-zap-for-routing-forms/)
# Automate Your Scheduling Workflow by using Zapier
> Automating your workflow with Zaps can save you time and reduce repetitive tasks. By connecting OnceHub to Zapier, you can transfer Booking Calendar data to ...
Automating your workflow with Zaps can save you time and reduce repetitive tasks. By connecting OnceHub to Zapier, you can transfer Booking Calendar data to your preferred applications effortlessly. Depending on how you collect and manage guest information, you can set up Zaps using either **Meeting Properties** or **Contact Properties**. Here’s how to get started:
***
## What Are Zaps?
[Section titled “What Are Zaps?”](#what-are-zaps)
Zaps are automation workflows that link different apps through Zapier. For OnceHub users, Zaps allow the automatic transfer of guest information to your tools of choice, ensuring efficient data management.
***
## Automating with Meeting Properties
[Section titled “Automating with Meeting Properties”](#automating-with-meeting-properties)
Meeting Properties are specific to a meeting that was booked during the scheduling process, like meeting details or preferences. If you’re looking to automate data from these Properties, please see our guide on [**Setting up a Zap for Booking Calendars Using Meeting Properties**](https://help.oncehub.com/account-integrations/automation/zapier/setting-up-zap-for-booking-calendars-using-meeting-properties/).
***
## Automating with Contact Properties
[Section titled “Automating with Contact Properties”](#automating-with-contact-properties)
Contact Properties contain guest-specific information, such as names and email addresses, rather than details tied to a single meeting. To automate processes using Contact Properties, please see our guide on [**Setting up a Zap for Booking Calendars Using Contact Properties**](https://help.oncehub.com/account-integrations/automation/zapier/setting-up-zap-for-booking-calendars-using-contact-properties/).
# Integrating OnceHub with Zapier
> OnceHub utilizes Zapier, an Integration Platform as a Service (iPaaS), to automate data movement between your essential applications.
[Integrating OnceHub with Zapier](https://www.youtube-nocookie.com/embed/LYWHEHQm4wc?wmode=opaque)
OnceHub utilizes Zapier, an Integration Platform as a Service (iPaaS), to automate data movement between your essential applications. By connecting OnceHub to Zapier’s extensive network of over 1,000 apps, including CRM, invoicing, and marketing platforms, you can seamlessly integrate OnceHub’s functionalities into your daily workflows.
This integration simplifies processes and ensures data consistency, enhancing your overall operational efficiency.
***
## Understanding Zapier’s Automated Workflows (Zaps)
[Section titled “Understanding Zapier’s Automated Workflows (Zaps)”](#understanding-zapiers-automated-workflows-zaps)
Zaps are automated workflows that connect two or more applications through Triggers and Actions:
* **Trigger:** An event in one app that initiates the Zap.
* **Action:** The task Zapier performs in a second app using data from the Trigger.
For example, you can create a Zap that automatically adds or updates a contact in your CRM every time a new booking is made, or a visitor engaged with a chatbot.
Please see our[ **OnceHub Triggers and Actions for Zapier**](https://help.oncehub.com/account-integrations/automation/zapier/oncehub-triggers-and-actions-for-zapier/) article to see a complete list of all available Triggers and Actions.
***
## Connecting OnceHub with Zapier
[Section titled “Connecting OnceHub with Zapier”](#connecting-oncehub-with-zapier)
### Navigate to Zapier Settings
[Section titled “Navigate to Zapier Settings”](#navigate-to-zapier-settings)
1. Click the gear icon located in the top-right corner of the page.
2. Select **Account Integrations** from the dropdown menu.
3. Filter for **Automation**.
4. Click on the **Zapier** tile.
### Link Your Zapier Account
[Section titled “Link Your Zapier Account”](#link-your-zapier-account)
1. Go to the **Manage Zaps** tab.
2. Click **Connect** to link your Zapier account.
## Key Features of Zapier Integration
[Section titled “Key Features of Zapier Integration”](#key-features-of-zapier-integration)
* **Comprehensive Triggers:** Automate workflows based on lifecycle events, such as booking scheduling, completion, rescheduling, or cancellations.
* **Wide App Ecosystem:** Integrate with tools across categories like CRM (e.g., Salesforce, HubSpot), invoicing (e.g., QuickBooks), and marketing (e.g., Mailchimp).
* **Flexible Automation:** Create multi-step Zaps to handle complex workflows, linking multiple apps in one automation.
* **Dynamic Updates:** Ensure real-time synchronization of booking data across all integrated tools.
* **Customizable Workflows:** Tailor Zaps to suit unique operational needs, from simple tasks to advanced multi-app processes.
## Recommended Zapier Triggers for OnceHub
[Section titled “Recommended Zapier Triggers for OnceHub”](#recommended-zapier-triggers-for-oncehub)
Zapier offers a variety of Triggers to meet your specific needs:
* **Booking Triggers:** Use these to initiate Actions based on Booking Lifecycle events, such as bookings scheduled or canceled.
* **Conversation Triggers:** Use these to trigger Actions when someone interacts with your Routing Forms or Chatbots.
***
## Setting up Zaps for OnceHub Features
[Section titled “Setting up Zaps for OnceHub Features”](#setting-up-zaps-for-oncehub-features)
Each OnceHub feature requires a tailored Zap setup process. Refer to these guides for specific instructions:
* [Creating Zaps for Booking Calendars](https://help.oncehub.com/account-integrations/automation/zapier/setting-up-zap-for-booking-calendars-using-contact-properties/)
* [Creating Zaps for Routing Forms and Chatbots](https://help.oncehub.com/account-integrations/automation/zapier/setting-up-zap-for-chatbots/)
* [Creating Zaps for Routing Forms](https://help.oncehub.com/account-integrations/automation/zapier/setting-up-zap-for-routing-forms/)
# OnceHub Triggers and Actions for Zapier
> This article provides a comprehensive overview of the available Triggers and Actions when using OnceHub with Zapier.
This article provides a comprehensive overview of the available **Triggers** and **Actions** when using OnceHub with Zapier. By understanding these components, you can automate workflows between OnceHub and thousands of other apps, saving time and ensuring your data remains consistent across your tech stack.
***
## Triggers
[Section titled “Triggers”](#triggers)
Triggers are events that occur within OnceHub that tell Zapier to start a specific workflow (a “Zap”).
### Booking Triggers
[Section titled “Booking Triggers”](#booking-triggers)
| **Trigger** | **Description** |
| ------------------------------------- | ----------------------------------------------------------------------------------------------------------------- |
| **Booking Scheduled** | Triggers when a new booking is confirmed. |
| **Booking Rescheduled** | Triggers when an existing booking is moved to a new time. |
| **Booking Canceled** | Triggers when an existing booking is removed from the schedule. |
| **Booking Cancelled and Rescheduled** | Triggers when a booking is canceled and immediately replaced by a new appointment. |
| **Booking Completed** | Triggers once the scheduled date and time for a booking has passed. |
| **Booking No-Show** | Triggers when a host manually marks the status of a booking as “No-show.” |
| **Reassigned Booking** | Triggers when a booking created via a Booking Calendar is assigned to a different team member. |
| **Booking Lifecycle Event** | Triggers whenever a booking status changes (Scheduled, Rescheduled, Reassigned, Canceled, Completed, or No-show). |
### Contact Triggers
[Section titled “Contact Triggers”](#contact-triggers)
| **Trigger** | **Description** |
| --------------------- | -------------------------------------------------------------------- |
| **Contact Captured** | Triggers the moment a new contact’s details are recorded in OnceHub. |
| **Contact Updated** | Triggers whenever the details of an existing contact are modified. |
| **Contact Lifecycle** | Triggers whenever a contact type changes (Captured or Updated) |
### Conversation Triggers
[Section titled “Conversation Triggers”](#conversation-triggers)
| **Trigger** | **Description** |
| -------------------------------- | -------------------------------------------------------------------------------------------- |
| **Conversation Started** | Triggers as soon as a website visitor begins interacting with your chatbot. |
| **Conversation Abandoned** | Triggers when a visitor stops interacting with the chatbot before finishing the flow. |
| **Conversation Closed** | Triggers when a chatbot interaction reaches a conclusion or the visitor starts a new chat. |
| **Conversation Lifecycle Event** | Triggers whenever a conversation status changes (Reached Out, Started, Closed, or Abandoned) |
***
## Actions
[Section titled “Actions”](#actions)
After a Trigger happens, Zapier executes Actions, which are the resulting tasks.
| **Action** | **Description** |
| --------------------------------- | ------------------------------------------------------------------------------------------------ |
| **Find Contact** | Searches your OnceHub account for an existing contact using the contact ID or email. |
| **Get Contact’s Future Meetings** | Retrieves up to 50 upcoming meetings for a specific contact. |
| **Get Booking Details** | Retrieves meeting details for a specific booking. |
| **Cancel Booking** | Cancel a booking on your OnceHub account. |
| **Request Reschedule** | Cancel a booking and automatically initiate a request for the guest to reschedule. |
| **Mark Booking as No-Show** | Set a booking as No-Show and stop further guest notifications from being sent for the booking. |
| **API Request (Beta)** | An advanced option to make raw HTTP requests using your OnceHub authentication for custom tasks. |
# Setting Up a Zap for Booking Calendars Using Contact Properties
> In this guide, you will learn how to automate guest information transfer from Booking Calendar Contact Properties to your preferred applications via a Zap.
In this guide, you will learn how to automate guest information transfer from Booking Calendar Contact Properties to your preferred applications via a Zap.
For information on how to capture guest data in Contact Properties, please take a look at our [**Mapping Booking Calendar Questions to Object Properties**](https://help.oncehub.com/product/booking-calendars/booking-forms/mapping-booking-calendar-questions-to-object-properties/) article.
***
## Setting up the Zap
[Section titled “Setting up the Zap”](#setting-up-the-zap)
After mapping your data in OnceHub, follow these steps to create a Zap that retrieves the correct contact when a guest interacts with you.
### Step 1: Opening the Zapier pop-up
[Section titled “Step 1: Opening the Zapier pop-up”](#step-1-opening-the-zapier-pop-up)
1. **Navigating to Zapier Settings:**
* Click the gear icon located in the top-right corner of the page.
* Select **Account Integrations** from the dropdown menu.
* Filter for **Automation.**
* Click on the **Zapier** tile.
2. **Initiating Zap Creation:**
* Go to the **Add Zaps** section.
* Search for the application with which you want to create a Zap.
### Step 2: Choosing a Template
[Section titled “Step 2: Choosing a Template”](#step-2-choosing-a-template)
1. A list of Zapier templates will appear below. Select the one that best fits your needs.
2. Click **Add Zap** to use your chosen template.
### Step 3: Configuring the Trigger Step
[Section titled “Step 3: Configuring the Trigger Step”](#step-3-configuring-the-trigger-step)
1. Confirm the **Trigger event** and OnceHub account that should be used.
* For example, you can use the **Booking Lifecycle Event** trigger to have the Zap trigger whenever a change to a booking is made.
2. Complete the test step to ensure the trigger functions correctly.
### Step 4: Adding a New Zap Step
[Section titled “Step 4: Adding a New Zap Step”](#step-4-adding-a-new-zap-step)
1. In the flowchart, click on the **+** (Add step) button to introduce a new step.
2. Choose **OnceHub** from the list of applications.
### Step 5: Adding the Find Contact Action
[Section titled “Step 5: Adding the Find Contact Action”](#step-5-adding-the-find-contact-action)
1. Select **Find Contact** from the Action event dropdown.
2. Click **Continue** to proceed to the Configure step.
3. Select **Contact email** from the **Find Contact by** dropdown.
4. Click the **+** and select **Contact - Email** for the **Value** field.
5. Complete the test step to verify the action.
### Step 6: Mapping Data to Your Application
[Section titled “Step 6: Mapping Data to Your Application”](#step-6-mapping-data-to-your-application)
1. In the Action for the destination application, proceed to its **Configure** step.
2. Add values to required fields by clicking the **+**.
* Select **Find Contact in OnceHub**, to map data from the corresponding OnceHub Contact Properties.
* Or **Booking Scheduled in OnceHub**, to map booking related data such as Meeting time.
3. Click **Continue** once you are done mapping data to your application.
4. Complete the test step to ensure the data is successfully sent to your application.
### Step 5: Publishing the Zap
[Section titled “Step 5: Publishing the Zap”](#step-5-publishing-the-zap)
Once you are happy with your configuration, click on **Publish** to turn on the Zap.
# Setting Up a Zap for Booking Calendars Using Meeting Properties
> In this guide, you will learn how to automate guest information transfer from Booking Calendar Meeting Properties to your preferred applications via a Zap.
[Setting Up a Zap for Booking Calendars Using Meeting Properties](https://www.youtube-nocookie.com/embed/sJ0RNEYkT7c?wmode=opaque)
In this guide, you will learn how to automate guest information transfer from Booking Calendar Meeting Properties to your preferred applications via a Zap.
For information on how to capture guest data in Meeting Properties, please take a look at our [**Mapping Booking Calendar Questions to Object Properties**](https://help.oncehub.com/product/booking-calendars/booking-forms/mapping-booking-calendar-questions-to-object-properties/) article.
***
## Setting up the Zap
[Section titled “Setting up the Zap”](#setting-up-the-zap)
After mapping your data in OnceHub, follow these steps to create a Zap that retrieves the correct contact when a guest interacts with you.
### Step 1: Opening the Zapier pop-up
[Section titled “Step 1: Opening the Zapier pop-up”](#step-1-opening-the-zapier-pop-up)
1. **Navigating to Zapier Settings:**
* Click the gear icon located in the top-right corner of the page.
* Select **Account Integrations** from the dropdown menu.
* Filter for **Automation.**
* Click on the **Zapier** tile.
2. **Initiating Zap Creation:**
* Go to the **Add Zaps** section.
* Search for the application with which you want to create a Zap.
### Step 2: Choosing a Template
[Section titled “Step 2: Choosing a Template”](#step-2-choosing-a-template)
1. A list of Zapier templates will appear below. Select the one that best fits your needs.
2. Click **Add Zap** to use your chosen template.
### Step 3: Configuring the Trigger Step
[Section titled “Step 3: Configuring the Trigger Step”](#step-3-configuring-the-trigger-step)
1. Confirm the **Trigger event** and OnceHub account that should be used. For example, you can use the **Booking Lifecycle Event** trigger to have the Zap trigger whenever a change to a booking is made.
2. Complete the test step to ensure the trigger functions correctly.
### Step 4: Mapping Data to Your Application
[Section titled “Step 4: Mapping Data to Your Application”](#step-4-mapping-data-to-your-application)
1. In the Action for the destination application, proceed to its **Configure** step.
2. Add values to required fields by clicking the **+** to insert data.
3. Click **Continue** once you are done mapping data to your application.
4. Complete the test step to ensure the data is successfully sent to your application.
### Step 5: Publishing the Zap
[Section titled “Step 5: Publishing the Zap”](#step-5-publishing-the-zap)
Once you are happy with your configuration, click on **Publish** to turn on the Zap.
# Setting up a Zap for Chatbots
> Setting up a Zap can help automate your workflows by connecting your Chatbots and Routing Forms with other applications.
[Setting up a Zap for Chatbots](https://www.youtube-nocookie.com/embed/6H84yS1LuK8?wmode=opaque)
Setting up a Zap can help automate your workflows by connecting your Chatbots and Routing Forms with other applications. Follow the instructions below to set up your Zap efficiently:
***
## Saving Chatbot data to a Contact
[Section titled “Saving Chatbot data to a Contact”](#saving-chatbot-data-to-a-contact)
To ensure your visitor’s data is passed to Zapier, you must first map each **Interaction** to a specific **Contact** Prperty. Follow these steps to configure it properly:
### Step 1: Access the Flow Builder
[Section titled “Step 1: Access the Flow Builder”](#step-1-access-the-flow-builder)
* Open the **Chatbots Lobby** by using the left-hand navigation.
* Edit the relevant **Chatbot** and navigate to the **Flow Builder** tab.
### Step 2: Save the Data to a Contact Property
[Section titled “Step 2: Save the Data to a Contact Property”](#step-2-save-the-data-to-a-contact-property)
* Select the specific **Interaction** you want to map.
* In the panel on the right:
* Choose the option to save the data **In the conversation and as a contact field**.
* Select the appropriate contact field from the dropdown menu for storing the data.
By completing these steps, your visitors’ data will be properly mapped and ready to flow into Zapier for seamless automation.
***
## Setting up the Zap
[Section titled “Setting up the Zap”](#setting-up-the-zap)
After mapping your data in OnceHub, follow these steps to create a Zap that retrieves the correct contact when a visitor engages with you.
### Step 1: Open the Zapier pop-up
[Section titled “Step 1: Open the Zapier pop-up”](#step-1-open-the-zapier-pop-up)
1. **Navigate to Zapier Settings:**
1. Click the gear icon located in the top-right corner of the page.
2. Select **Account Integrations** from the dropdown menu.
3. Filter for **Automation**.
4. Click on the **Zapier** tile.
2. **Initiate Zap Creation:**
1. Go to the **Add Zaps** section.
2. Search for the application with which you want to create a Zap.
### Step 2: Choose a Template
[Section titled “Step 2: Choose a Template”](#step-2-choose-a-template)
1. A list of Zapier templates will appear below. Select the one that best fits your needs.
2. Click **Add Zap** to use your chosen template.
### Step 3: Configure the Trigger Step
[Section titled “Step 3: Configure the Trigger Step”](#step-3-configure-the-trigger-step)
1. Confirm the **Trigger event** and OnceHub account that should be used.
* For example, you can use the **Conversation Closed** trigger to have the Zap trigger whenever a visitor is finished engaging with a Routing Form.
2. Complete the test step to ensure the trigger functions correctly.
### Step 4: Add a New Zap Step
[Section titled “Step 4: Add a New Zap Step”](#step-4-add-a-new-zap-step)
1. In the flowchart, click on the + (Add step) button to introduce a new step.
2. Choose **OnceHub** from the list of applications.
### Step 5: Add the Find Contact Action
[Section titled “Step 5: Add the Find Contact Action”](#step-5-add-the-find-contact-action)
1. Select **Find Contact** from the Action event dropdown.
2. Click **Continue** to proceed to the Configure step .
3. Select **Contact ID** from the Find Contact by dropdown.
4. Click the **+** and select **Conversation Contact** for the **Value** field.
5. Complete the test step to verify the action.
### Step 6: Mapping Data in the Final Action
[Section titled “Step 6: Mapping Data in the Final Action”](#step-6-mapping-data-in-the-final-action)
1. In the Action for the app where you’re sending the contact data, go to its Configure step .
2. Add values to any fields you need by clicking the **+**.
3. Select **Find Contact in OnceHub**, then map the data to the corresponding OnceHub contact fields.
**Completion**
By following these steps, you’ll successfully connect your Chatbots so that you can use the retrieved contact data to streamline your workflows in Zapier.
# Setting Up a Zap for Routing Forms
> In this guide, you will learn how to automate visitor information transfer from your Routing Forms to your preferred applications via a Zap.
[Setting Up a Zap for Routing Forms](https://www.youtube-nocookie.com/embed/yUmhZ5qU2JU?wmode=opaque)
In this guide, you will learn how to automate visitor information transfer from your Routing Forms to your preferred applications via a Zap.
For information on how to capture visitor data in Conversation Properties, please take a look at [**this article**](https://help.oncehub.com/product/routing-forms/contact-data-management/mapping-routing-form-questions-to-object-properties/).
***
## Setting up the Zap
[Section titled “Setting up the Zap”](#setting-up-the-zap)
After mapping your data in OnceHub, follow these steps to create a Zap that retrieves the correct contact when a visitor interacts with you.
### Step 1: Opening the Zapier pop-up
[Section titled “Step 1: Opening the Zapier pop-up”](#step-1-opening-the-zapier-pop-up)
1. **Navigating to Zapier Settings:**
* Click the gear icon located in the top-right corner of the page.
* Select **Account Integrations** from the dropdown menu.
* Filter for **Automation**.
* Click on the **Zapier** tile.
2. **Initiating Zap Creation:**
* Go to the **Add Zaps** section.
* Search for the application with which you want to create a Zap.
### Step 2: Choosing a Template
[Section titled “Step 2: Choosing a Template”](#step-2-choosing-a-template)
1. A list of Zapier templates will appear below. Select the one that best fits your needs.
2. Click **Add Zap** to use your chosen template.
### Step 3: Configuring the Trigger Step
[Section titled “Step 3: Configuring the Trigger Step”](#step-3-configuring-the-trigger-step)
1. Confirm the **Trigger event** and OnceHub account that should be used.
* For example, you can use the **Conversation Closed** trigger to have the Zap trigger when a visitor has finished interacting with your routing form.
2. Complete the test step to ensure the trigger functions correctly.
### Step 4: Mapping Data to Your Application
[Section titled “Step 4: Mapping Data to Your Application”](#step-4-mapping-data-to-your-application)
1. In the Action for the destination application, proceed to its **Configure** step.
2. Add values to required fields by clicking the **+** to insert data.
3. Click **Continue** once you are done mapping data to your application.
4. Complete the test step to ensure the data is successfully sent to your application.
### Step 5: Publishing the Zap
[Section titled “Step 5: Publishing the Zap”](#step-5-publishing-the-zap)
Once you are happy with your configuration, click on **Publish** to turn on the Zap.
# Corporate Mailbox
> Corporate Mailbox documentation and guides.
[Sending Scheduling Notifications from a Corporate Amazon SES Account](https://help.oncehub.com/account-integrations/corporate-mailbox/sending-scheduling-notifications-from-corporate-amazon-ses-account/)
[Sending Scheduling Notifications from a Corporate Gmail Account](https://help.oncehub.com/account-integrations/corporate-mailbox/sending-scheduling-notifications-from-corporate-gmail-account/)
[Sending Scheduling Notifications from a Corporate Office 365 Account](https://help.oncehub.com/account-integrations/corporate-mailbox/sending-scheduling-notifications-from-corporate-office-365-account/)
[Sending Scheduling Notifications from a Custom Corporate SMTP Server](https://help.oncehub.com/account-integrations/corporate-mailbox/sending-scheduling-notifications-from-custom-corporate-smtp-server/)
# Sending Scheduling Notifications from a Corporate Amazon SES Account
> Use the Corporate Mailbox feature to send OnceHub notifications from your company's corporate Amazon SES account instead of the default mailer@oncehub.com.
Use the **Corporate Mailbox** feature to send OnceHub notifications from your company’s corporate Amazon SES account instead of the default . This brands your email communications, providing a more professional experience for your guests and users.
Note
Depending on your plan type, you may need to purchase the **Security and Compliance Add-On** to make use of this feature.
***
## Impact of Enabling the Corporate Mailbox Feature for Your Account
[Section titled “Impact of Enabling the Corporate Mailbox Feature for Your Account”](#impact-of-enabling-the-corporate-mailbox-feature-for-your-account)
Once connected, all scheduling notifications sent to Guests and Hosts will originate from the designated corporate email account.
Only an Administrator or the Account Owner is authorized to configure this feature. Once configured, it will apply to all Users within the account.
***
## How to Set Up Corporate Mailbox
[Section titled “How to Set Up Corporate Mailbox”](#how-to-set-up-corporate-mailbox)
Follow these steps to connect your corporate email account to OnceHub:
### Accessing the Corporate Mailbox Settings
[Section titled “Accessing the Corporate Mailbox Settings”](#accessing-the-corporate-mailbox-settings)
1. Click the gear icon located in the top-right corner of the page.
2. Select **Account Integrations** from the dropdown menu.
3. Filter for **Corporate Mailbox**.
4. Click on the **Amazon SES** tile.
5. Click **Connect** to begin setup
### Providing Email Account Credentials
[Section titled “Providing Email Account Credentials”](#providing-email-account-credentials)
Once you click **Connect**, you’ll be prompted to enter your account credentials as follows:
* **Sending Email Address:** Specify the email address that will be used to send notifications.
* **User name:** Enter your Amazon Simple Email Service (SES) SMTP username.
* **Password:** Enter your SMTP password.
* **Sending Email Name Label:** Enter the name label that will appear on emails sent to recipients.
* **SMTP Server:** Provide the URL of your SMTP server (e.g., email-smtp.us-east-1.amazonaws.com).
* **Port:** Specify the SMTP server port number (e.g., 587 for secure connections).
### Finalizing the Setup
[Section titled “Finalizing the Setup”](#finalizing-the-setup)
After entering all required credentials:
* Double-check your configuration settings for accuracy.
* Click **Connect** to complete the setup.
# Sending Scheduling Notifications from a Corporate Gmail Account
> Use the Corporate Mailbox feature to send OnceHub notifications from your company's corporate Gmail account instead of the default mailer@oncehub.com.
Use the **Corporate Mailbox** feature to send OnceHub notifications from your company’s corporate Gmail account instead of the default . This brands your email communications, providing a more professional experience for your guests and users.
Note
Depending on your plan type, you may need to purchase the **Security and Compliance Add-On** to make use of this feature.
***
## Impact of Enabling the Corporate Mailbox Feature for Your Account
[Section titled “Impact of Enabling the Corporate Mailbox Feature for Your Account”](#impact-of-enabling-the-corporate-mailbox-feature-for-your-account)
Once connected, all scheduling notifications sent to Guests and Hosts will originate from the designated corporate email account.
Only an Administrator or the Account Owner is authorized to configure this feature. Once configured, it will apply to all Users within the account.
***
Caution
You cannot use your regular Gmail password to set up Corporate Mailbox. You will need to enable **2-Step Verification** on your Google account and then generate an App Password. For detailed steps, see the Google support article on [**how to generate an App Password**](https://support.google.com/accounts/answer/185833).
**Important:** You can not use your regular Gmail password to set up Corporate Mailbox. You will need to enable **2-Step Verification** on your Google account and then generate an App Password. For detailed steps, see the Google support article on [**How to generate an App Password**]().
Once you have generated an App Password, follow these steps to connect your corporate email account to OnceHub:
### Accessing the Corporate Mailbox Settings
[Section titled “Accessing the Corporate Mailbox Settings”](#accessing-the-corporate-mailbox-settings)
1. Click the gear icon located in the top-right corner of the page.
2. Select **Account Integrations** from the dropdown menu.
3. Filter for **Corporate Mailbox**.
4. Click on the **Gmail** tile.
5. Click **Connect** to begin setup
### Providing Email Account Credentials
[Section titled “Providing Email Account Credentials”](#providing-email-account-credentials)
Once you click **Connect**, you’ll be prompted to enter your account credentials as follows:
* **Sending Email Address:** Specify the Gmail address that will be used to send notifications.
* **User name:** Enter your Amazon Simple Email Service (SES) SMTP username.
* **Password:** Enter the 16-digit **App Password** generated from your Google account.
* **Sending Email Name Label:** Enter the name label that will appear on emails sent to recipients.
* **SMTP Server:** Provide the URL of your SMTP server (e.g., smtp.gmail.com).
* **Port:** Specify the SMTP server port number (e.g., 587 for secure connections).
### Finalizing the Setup
[Section titled “Finalizing the Setup”](#finalizing-the-setup)
After entering all required credentials:
* Double-check your configuration settings for accuracy.
# Sending Scheduling Notifications from a Corporate Office 365 Account
> Use the Corporate Mailbox feature to send OnceHub notifications from your company's corporate Office 365 account instead of the default mailer@oncehub.com.
Use the **Corporate Mailbox** feature to send OnceHub notifications from your company’s corporate Office 365 account instead of the default . This brands your email communications, providing a more professional experience for your guests and users.
Note
Depending on your plan type, you may need to purchase the **Security and Compliance Add-On** to make use of this feature.
***
## Impact of Enabling the Corporate Mailbox Feature for Your Account
[Section titled “Impact of Enabling the Corporate Mailbox Feature for Your Account”](#impact-of-enabling-the-corporate-mailbox-feature-for-your-account)
Once connected, all scheduling notifications sent to Guests and Hosts will originate from the designated corporate email account.
Caution
Microsoft is discontinuing the basic authentication protocol necessary for Corporate Email functionality with Office 365. Should connection via SMTP prove unsuccessful, it is recommended that each user utilize the alternative option detailed at the conclusion of this article.
***
## How to Set Up Corporate Mailbox
[Section titled “How to Set Up Corporate Mailbox”](#how-to-set-up-corporate-mailbox)
Follow these steps to connect your corporate email account to OnceHub:
### Configuring Your Mail Server Settings
[Section titled “Configuring Your Mail Server Settings”](#configuring-your-mail-server-settings)
* If you use an internally-hosted mail server, you must grant access to OnceHub by allowing specific server IP addresses. Please reach out to our [**Support Team**](https://www.oncehub.com/live-chat-support) for assistance.
* If your organization uses Microsoft Exchange, ensure relaying is enabled for specific IP addresses. Please reach out to our [**Support Team**](https://www.oncehub.com/live-chat-support) for assistance.
### Accessing the Corporate Mailbox Settings
[Section titled “Accessing the Corporate Mailbox Settings”](#accessing-the-corporate-mailbox-settings)
1. Click the gear icon located in the top-right corner of the page.
2. Select **Account Integrations** from the dropdown menu.
3. Filter for **Corporate Mailbox**.
4. Click on the **Microsoft 365** tile.
5. Click **Connect** to begin setup.
### Providing Email Account Credentials
[Section titled “Providing Email Account Credentials”](#providing-email-account-credentials)
Once you click **Connect**, you’ll be prompted to enter your account credentials as follows:
* **Sending Email Address:** Specify the email address that will be used to send notifications.
* **Password:** Enter your Office 365 account password.
* **Sending Email Name Label:** Enter the name label that will appear on emails sent to recipients.
* **SMTP Server:** Provide the URL of your SMTP server (e.g., smtp.office365.com).
* **Port:** Specify the SMTP server port number (e.g., 587 for secure connections).
### Finalizing the Setup
[Section titled “Finalizing the Setup”](#finalizing-the-setup)
After entering all required credentials:
* Double-check your configuration settings for accuracy.
* Click **Connect** to complete the setup.
## Alternative: Email From Meeting Host Mailbox
[Section titled “Alternative: Email From Meeting Host Mailbox”](#alternative-email-from-meeting-host-mailbox)
Alternatively, hosts can configure OnceHub to send email notifications from their personal mailboxes. This setting is managed individually for each host. For instructions on how to set this up, please refer to our [**Connect OnceHub to Your Microsoft Office 365 article**](https://help.oncehub.com/user-integrations/ms-office365-calendar-connection/connect-oncehub-to-your-microsoft-office-365/).
# Sending Scheduling Notifications from a Custom Corporate SMTP Server
> Use the Corporate Email feature to send OnceHub notifications from your company's Custom SMTP server's mailbox instead of the default mailer@oncehub.com.
[Sending Scheduling Notifications from a Custom Corporate SMTP Server](https://www.youtube-nocookie.com/embed/xzT7ciSw33g?wmode=opaque)
Use the **Corporate Email** feature to send OnceHub notifications from your company’s Custom SMTP server’s mailbox instead of the default . This brands your email communications, providing a more professional experience for your guests and users.
Note
Depending on your plan type, you may need to purchase the **Security and Compliance Add-On** to make use of this feature.
***
## Impact of Enabling the Corporate Email Feature for Your Account
[Section titled “Impact of Enabling the Corporate Email Feature for Your Account”](#impact-of-enabling-the-corporate-email-feature-for-your-account)
Once connected, all scheduling notifications sent to Guests and Hosts will originate from the designated corporate email account.
Only an Administrator or the Account Owner is authorized to configure this feature. Once configured, it will apply to all Users within the account.
***
## How to Set Up Corporate Email
[Section titled “How to Set Up Corporate Email”](#how-to-set-up-corporate-email)
Follow these steps to connect your corporate email account to OnceHub:
### Configuring Your Mail Server Settings
[Section titled “Configuring Your Mail Server Settings”](#configuring-your-mail-server-settings)
* If you use an internally-hosted mail server, you must grant access to OnceHub by allowing specific server IP addresses. Please reach out to our [Support Team](https://www.oncehub.com/live-chat-support) for assistance.
### Accessing the Corporate Email Settings
[Section titled “Accessing the Corporate Email Settings”](#accessing-the-corporate-email-settings)
1. Click the gear icon located in the top-right corner of the page.
2. Select **Account Integrations** from the dropdown menu.
3. Filter for **Corporate Email**.
4. Click on the **SMTP Server** tile.
5. Click **Connect** to begin setup.
### Providing Email Account Credentials
[Section titled “Providing Email Account Credentials”](#providing-email-account-credentials)
Once you click **Connect**, you’ll be prompted to enter your account credentials as follows:
* **Sending Email Address:** Specify the email address that will be used to send notifications.
* **User name:** If your email server requires SMTP credentials, enter your SMTP username. If not, use the same email address as the Sending Email Address.
* **Password:** If your SMTP server requires credentials, provide the SMTP password. If no credentials are needed, enter the password for your email account.
* **Sending Email Name Label:** Enter the name label that will appear on emails sent to recipients.
* **SMTP Server:** Provide the URL of your SMTP server (e.g., smtp.office365.com).
* **Port:** Specify the SMTP server port number (e.g., 587 for secure connections).
### Finalizing the Setup
[Section titled “Finalizing the Setup”](#finalizing-the-setup)
After entering all required credentials:
* Double-check your configuration settings for accuracy.
* Click **Connect** to complete the setup.
# CRM
> CRM documentation and guides.
[Integrating with your CRM](https://help.oncehub.com/account-integrations/crm/integrating-with-your-crm/)
[Integrating OnceHub with Salesforce](https://help.oncehub.com/account-integrations/crm/integrating-oncehub-with-salesforce/)
[Integrating OnceHub with Your Salesforce Sandbox Environment](https://help.oncehub.com/account-integrations/crm/integrating-oncehub-with-your-salesforce-sandbox-environment/)
[How To Assign Meetings To The CRM Contact Owner](https://help.oncehub.com/account-integrations/crm/how-to-assign-meetings-to-the-crm-contact-owner/)
[Integrating OnceHub with HubSpot](https://help.oncehub.com/account-integrations/crm/integrating-oncehub-with-hubspot/)
[Troubleshooting CRM Integration Issues](https://help.oncehub.com/account-integrations/crm/troubleshooting-crm-integration-issues/)
# How To Assign Meetings To The CRM Contact Owner
> Override standard meeting distribution rules to have visitors schedule directly with their assigned contact owners from your integrated Salesforce or HubSpot account.
[How To Assign Meetings To The CRM Contact Owner](https://www.youtube-nocookie.com/embed/r8zNE_wiv4s?wmode=opaque)
You can override standard meeting distribution rules to have visitors schedule directly with their assigned contact owners. OnceHub prioritizes owners from your integrated [**Salesforce**](https://help.oncehub.com/account-integrations/crm/integrating-oncehub-with-salesforce/) or [**HubSpot**](https://help.oncehub.com/account-integrations/crm/integrating-oncehub-with-hubspot/) account, using the OnceHub contact owner as a fallback if no CRM is connected.
This is done by enabling the **Schedule with CRM Contact Owner** toggle located within the **Booking Calendar** action of your [**Routing Forms**](https://help.oncehub.com/product/routing-forms/introduction-to-routing-forms/introduction-to-routing-forms/).
***
## How Meeting Assignment Priority Works
[Section titled “How Meeting Assignment Priority Works”](#how-meeting-assignment-priority-works)
When a visitor engages with a Routing Form, OnceHub identifies them by their provided email address. OnceHub then determines which team member should host the meeting based on a strict priority hierarchy:
* **CRM Contact Owner:** If a CRM contact owner is found that belongs to the [**Team selected as the host on your Booking Calendar**](https://help.oncehub.com/product/booking-calendars/booking-settings/booking-calendar-meeting-distribution-options/), the visitor will schedule with them.
* **OnceHub Contact Owner Fallback:** If no CRM contact owner is found, the system checks for an existing OnceHub contact owner and schedules the meeting with them instead.
* **Standard Availability Fallback:** If neither a CRM owner nor a OnceHub contact owner exists, the standard distribution rules set on the Booking Calendar will be used.
***
## How to Enable Contact Owner Meeting Assignment
[Section titled “How to Enable Contact Owner Meeting Assignment”](#how-to-enable-contact-owner-meeting-assignment)
Follow the steps below to enable this functionality in your Routing Form:
1. Click **Routing Forms** in the left-hand navigation menu.
2. Select the Routing Form you wish to edit.
3. Select the **Booking Calendar** action that will be used to schedule with contact owners.
4. Enable **Schedule with CRM Contact Owner**.
5. Click **Save** to apply the changes.
***
## Frequently Asked Questions (FAQs)
[Section titled “Frequently Asked Questions (FAQs)”](#frequently-asked-questions-faqs)
**Q: What happens if the contact owner has no available time slots?**
**A:** If the contact owner has no open time slots, a message stating that no times are available will be displayed to the visitor while scheduling.
**Q: What happens if a contact has different owners assigned in OnceHub compared to the CRM?**
**A:** OnceHub prioritizes the contact owner listed in your integrated CRM to ensure your source-of-truth data remains accurate.
# Integrating OnceHub with HubSpot
> Integrating OnceHub with HubSpot CRM enables you to automate data movement across your entire engagement funnel.
[Integrating OnceHub with HubSpot](https://www.youtube-nocookie.com/embed/vVRH5Ur8PqE?wmode=opaque)
Integrating OnceHub with HubSpot CRM enables you to automate data movement across your entire engagement funnel. This native integration ensures that data from Booking Calendars, Routing Forms, and Chatbots is synchronized with your HubSpot CRM, keeping your Contact and Meeting records up to date without manual entry.
***
## Key Features of the HubSpot Integration
[Section titled “Key Features of the HubSpot Integration”](#key-features-of-the-hubspot-integration)
The OnceHub HubSpot integration provides high-level control over your lead management through these core capabilities:
* **Sync Data Effortlessly:** Automatically send information captured across all OnceHub tools including Booking Calendars, Routing Forms, and Chatbots directly to your HubSpot Contact database.
* **Track Meetings Automatically:** Ensure that any meeting booked via OnceHub is automatically recorded as a Meeting Activity on the associated HubSpot Contact timeline.
* **Intelligent Record Matching:** Use a built in identification hierarchy to find existing HubSpot records and prevent duplicates, ensuring a single source of truth for every customer.
* **Contact Owner Routing**: Have guests schedule directly with their Salesforce or HubSpot contact owner by enabling the [**Schedule with CRM Contact Owner**](https://help.oncehub.com/account-integrations/crm/how-to-assign-meetings-to-the-crm-contact-owner/) option in your Routing Forms.
***
## Prerequisites
[Section titled “Prerequisites”](#prerequisites)
To establish the integration, a HubSpot Super Administrator with full authorization permissions must connect the account.
***
To set up and configure the integration, follow the steps below:
## Step 1: Connect OnceHub to HubSpot
[Section titled “Step 1: Connect OnceHub to HubSpot”](#step-1-connect-oncehub-to-hubspot)
Follow the steps below to connect your OnceHub account to HubSpot:
1. Click the **gear icon** located in the top-right corner of the page.
2. Select **Account Integrations** from the dropdown menu.
3. Filter for **CRM**.
4. Click the **HubSpot** tile.
5. Click **Connect** and follow the instructions in the pop-up to complete the integration process.
***
## Step 2: Configure Behavior of New Contacts and Meetings
[Section titled “Step 2: Configure Behavior of New Contacts and Meetings”](#step-2-configure-behavior-of-new-contacts-and-meetings)
Once connected, remain on the HubSpot integration page to review how new Contacts and Meetings are created:
* **New Contacts:** When a new Contact is created in OnceHub, a corresponding Contact record is created in HubSpot.
* **New Meetings:** In the **When New Meetings are Scheduled in OnceHub** section, new OnceHub meetings will automatically create a **Meeting** in HubSpot.
### HubSpot Contact Identification Logic
[Section titled “HubSpot Contact Identification Logic”](#hubspot-contact-identification-logic)
To maintain data integrity and prevent duplicates, OnceHub uses a specific identification hierarchy (matching by Email first, then Phone/Mobile) before creating or updating records in HubSpot. For details, see [**How contacts are identified in OnceHub**](https://help.oncehub.com/contact-management/how-contacts-are-identified-in-oncehub/).
***
## Step 3: Map OnceHub Object Properties to HubSpot
[Section titled “Step 3: Map OnceHub Object Properties to HubSpot”](#step-3-map-oncehub-object-properties-to-hubspot)
Click **Configure properties mapping** next to **Contacts** or **Meetings** to configure how OnceHub properties are mapped to HubSpot properties.
### Before You Begin Mapping
[Section titled “Before You Begin Mapping”](#before-you-begin-mapping)
Before initiating the mapping process in OnceHub, ensure you complete the following prerequisites:
* **Create Custom Properties First:** Ensure any destination properties exist in HubSpot (on Contact objects, including custom properties) and any custom properties you plan to map are created in OnceHub (**Gear icon > Objects and Properties**). You cannot create new properties directly within the integration mapping screen. For details, see [**Managing Object Properties**](https://help.oncehub.com/account-administration/objects-properties/managing-object-properties/).
* **Set Up Contact Statuses:** If you plan to map the OnceHub Contact Status property to a HubSpot picklist field (such as Lifecycle Stage), ensure the corresponding picklist values are created in OnceHub first. Matching is not case-sensitive (*Active Client* in OnceHub matches *active client* in HubSpot). For step-by-step instructions, see [**How to Manage and Customize Contact Statuses**](https://help.oncehub.com/contact-management/how-to-manage-and-customize-contact-statuses/) article.
* **Map Properties in Interacting Products:** To capture and update answers from your Booking Calendars, Routing Forms, or Chatbots, ensure those specific form questions are mapped to Object Properties.
### Mapping Contact Properties
[Section titled “Mapping Contact Properties”](#mapping-contact-properties)
1. Navigate to the **Contacts** tab and click **+ Add mapping**.
2. In the **OnceHub** dropdown, select the property to push (e.g., *Status*, *Mobile Phone*, *Job Title*).
3. In the **HubSpot** dropdown, select the corresponding target property. *(For OnceHub **Status**, select **Lifecycle Stage**).*
4. Toggle **Overwrite** ON or OFF to control whether existing HubSpot data should be overwritten.
5. Click **Save**.
To remove a mapping, click the **X** icon next to the row and click **Save**.
Note
Only HubSpot contact properties compatible with the selected OnceHub Contact property type appear in the dropdown for mapping. Since status options are defined in HubSpot, map your OnceHub Contact Status directly to your corresponding HubSpot Lifecycle Stage (or target picklist) values. If you rename or change Contact Status values in OnceHub after setting up your mapping, ensure your HubSpot picklist values remain aligned.
### Mapping Meetings Properties
[Section titled “Mapping Meetings Properties”](#mapping-meetings-properties)
1. Navigate to the **Meetings** tab and click **+ Add mapping**.
2. Select the **OnceHub Meeting Property** (e.g., *Calendar event title*, *Meeting location*, *Meeting start time*).
3. Map it to the corresponding **HubSpot Meeting Property** (e.g., *Title*, *Attendee description*, *Meeting start time*).
4. Click **Save**.
5. **Optional:** Remove mappings by clicking the **X** icon next to the row you want to delete and click Save.
Tip
You can select the **Calendar event title** from the OnceHub Meeting Properties dropdown and map it to **Title** in HubSpot Meeting Properties to sync the [**calendar event title configured in your Booking Calendar.**](https://help.oncehub.com/product/booking-calendars/notifications/calendar-events-in-booking-calendars/) You can also assign a default **Fallback** value (e.g., *Meeting Title*). This allows for more dynamic and descriptive meeting subjects that automatically update based on individual event details.
Note
Only HubSpot properties compatible with the specific OnceHub Meeting Properties you select will be available in the dropdown for mapping.
# Integrating OnceHub with Salesforce
> Integrating OnceHub with Salesforce CRM enables you to automate data movement across your entire engagement funnel.
[Integrating OnceHub with Salesforce](https://www.youtube-nocookie.com/embed/WNUSSXGT0OY?wmode=opaque)
Integrating OnceHub with Salesforce CRM enables you to automate data movement across your entire engagement funnel. This native integration ensures that data from Booking Calendars, Routing Forms, and Chatbots is synchronized with your Salesforce CRM, keeping your Lead, Contact, Event, and Case records up to date without manual entry.
## Key Features of the Salesforce Integration
[Section titled “Key Features of the Salesforce Integration”](#key-features-of-the-salesforce-integration)
The OnceHub Salesforce integration provides high-level control over your CRM data through these core technical capabilities:
* **Sync Data Effortlessly:** Automatically capture information from Booking Calendars, Routing Forms, or Chatbots and map it directly to Salesforce Lead and Contact objects.
* **Track Meetings Automatically:** Ensure every meeting booked through OnceHub is automatically recorded in Salesforce as an Event or Case, linked to the appropriate record.
* **Intelligent Record Matching:** Use a built-in identification hierarchy to find existing Salesforce records and prevent duplicates, ensuring a single source of truth for every customer.
* **Contact Owner Routing**: Have guests schedule directly with their Salesforce or HubSpot contact owner by enabling the [**Schedule with CRM Contact Owner**](https://help.oncehub.com/account-integrations/crm/how-to-assign-meetings-to-the-crm-contact-owner/) option in your Routing Forms.
***
## Prerequisites
[Section titled “Prerequisites”](#prerequisites)
To establish the integration, a **Salesforce System Administrator** with full authorization permissions must connect the account.
***
To set up and configure the integration, follow the steps below:
## Step 1: Connect OnceHub to Salesforce
[Section titled “Step 1: Connect OnceHub to Salesforce”](#step-1-connect-oncehub-to-salesforce)
Follow the steps below to connect your OnceHub account to Salesforce:
1. Click the **gear icon** located in the top-right corner of the page.
2. Select **Account Integrations** from the dropdown menu.
3. Filter for **CRM**.
4. Click on the **Salesforce** tile.
5. Click **Connect** and follow the instructions in the pop-up to complete the integration process.
***
## Step 2: Configure Behavior of New Contacts and Meetings
[Section titled “Step 2: Configure Behavior of New Contacts and Meetings”](#step-2-configure-behavior-of-new-contacts-and-meetings)
Once connected, remain on the Salesforce integration page to configure what should happen whenever new Contacts are created and Meetings are scheduled.
### Choosing What Happens for New Contacts
[Section titled “Choosing What Happens for New Contacts”](#choosing-what-happens-for-new-contacts)
In the **When New Contacts are Created in OnceHub** section, select whether new OnceHub contacts should create **leads** or **contacts** in Salesforce.
#### Salesforce Contact Identification Logic
[Section titled “Salesforce Contact Identification Logic”](#salesforce-contact-identification-logic)
To maintain data integrity and prevent duplicates, OnceHub uses a specific identification hierarchy to find existing Salesforce records, matching by Email first and Phone/Mobile if an email match is unavailable. For details, see [**How contacts are identified in OnceHub**](https://help.oncehub.com/contact-management/how-contacts-are-identified-in-oncehub/) article.
### Choosing What Happens for New Meetings
[Section titled “Choosing What Happens for New Meetings”](#choosing-what-happens-for-new-meetings)
In the **When New Meetings are Scheduled in OnceHub** section, choose how meetings should be recorded in Salesforce:
* **Create events in Salesforce for all Meetings:** Automatically creates a Salesforce Event record for every booked meeting.
* **Create cases in Salesforce for meetings booked from specific or all Booking Calendars:** Creates a Salesforce Case record instead. Select specific or all Booking Calendars from the dropdown menu to apply this rule.
***
## Step 3: Map OnceHub Object Properties to Salesforce
[Section titled “Step 3: Map OnceHub Object Properties to Salesforce”](#step-3-map-oncehub-object-properties-to-salesforce)
Click **Configure properties mapping** to configure how OnceHub properties are mapped to Salesforce fields.
### Before You Begin Mapping
[Section titled “Before You Begin Mapping”](#before-you-begin-mapping)
Before initiating the mapping process in OnceHub, ensure you complete the following prerequisites:
* **Create Custom Properties First:** Ensure any destination fields exist in Salesforce (on Lead or Contact objects) and any custom properties you want to map are created in OnceHub (**Gear icon > Objects and Properties**). You cannot create new properties directly within the integration mapping screen. For details, see [**Managing Object Properties**](https://help.oncehub.com/account-administration/objects-properties/managing-object-properties/).
* **Set Up Contact Statuses:** If you intend to map the OnceHub Contact Status property to a Salesforce picklist field (such as Lead Status), ensure the corresponding picklist values are created in OnceHub first. Matching is not case-sensitive (*Active Client* in OnceHub matches *active client* in Salesforce). For step-by-step instructions, see [**How to Manage and Customize Contact Statuses**](https://help.oncehub.com/contact-management/how-to-manage-and-customize-contact-statuses/) article.
* **Map Properties in Interacting Products:** To capture and update answers from your Booking Calendars, Routing Forms, or Chatbots, ensure those specific form questions are mapped to Object Properties.
### Contacts and Leads
[Section titled “Contacts and Leads”](#contacts-and-leads)
In the **Contacts** and **Leads** tabs you can use the dropdown fields to map the OnceHub Contact properties including Contact Status to the relevant Salesforce fields:
1. Add properties by clicking the **+ Add mapping** icon.
2. In the OnceHub dropdown, select the property you wish to push, such as **Contact Status**, **Mobile Phone**, or **Job Title**.
3. In the Salesforce dropdown, select the target destination field.
4. Use the **Overwrite** toggle to choose whether existing Salesforce data should be overwritten.
5. Click **Save** to apply your changes.
To remove a mapping, click the X icon next to the mapping and click **Save**.
To sync answers from your Booking Calendars, Routing Forms, or Chatbots, ensure that those corresponding questions are mapped to a Salesforce Contact Field.
Note
Only Salesforce fields compatible with the selected OnceHub Contact property type appear in the dropdown for mapping. Since picklist values are defined in Salesforce, map your OnceHub Contact Status directly to your corresponding Salesforce Lead Status (or target picklist) values. If you rename or change Contact Status values in OnceHub after setting up your mapping, ensure your Salesforce picklist values remain aligned.
### Events and Cases
[Section titled “Events and Cases”](#events-and-cases)
In the **Events and Cases** tabs, use the dropdown fields to map OnceHub Meeting properties to the relevant Salesforce fields:
1. Click **+ Add mapping**.
2. In the OnceHub dropdown, select the Meeting property you want to push.
3. In the Salesforce dropdown, select the target Salesforce field.
4. Click **Save** to apply your changes.
To remove a mapping, click the **X** icon next to the mapping and click **Save**.
Note
Only Salesforce fields compatible with the selected OnceHub Meeting properties are available in the dropdown for mapping.
***
## Step 4: Configure Fallback Values in CRM Property Mapping
[Section titled “Step 4: Configure Fallback Values in CRM Property Mapping”](#step-4-configure-fallback-values-in-crm-property-mapping)
Fallback values ensure your Salesforce records stay complete even if a guest leaves a non-required OnceHub field blank that is **Required** in Salesforce.
### How Fallback Values Work
[Section titled “How Fallback Values Work”](#how-fallback-values-work)
When your Salesforce instance includes required fields, OnceHub automatically identifies them and allows you to assign a default fallback value during the mapping setup. If the guest doesn’t provide this data, the fallback value is used, preventing a sync error and ensuring the record is created successfully.
# Integrating OnceHub with Your Salesforce Sandbox Environment
> Integrating OnceHub with your Salesforce sandbox allows you to test your booking workflows and data mapping in a safe environment before going live with your...
Integrating OnceHub with your Salesforce sandbox allows you to test your booking workflows and data mapping in a safe environment before going live with your production account. This allows you to test your setup without impacting your live Salesforce data.
Caution
Once you connect to your production environment after testing, do not disconnect it. Doing so will result in the loss of all of your mapping settings.
For detailed information on mapping, we recommend reading our primary [**Integrating OnceHub with Salesforce**](https://help.oncehub.com/account-integrations/crm/integrating-oncehub-with-salesforce/) article.
***
## How to Integrate OnceHub with Your Salesforce Sandbox
[Section titled “How to Integrate OnceHub with Your Salesforce Sandbox”](#how-to-integrate-oncehub-with-your-salesforce-sandbox)
Follow these steps to authorize the connection between OnceHub and your Salesforce Sandbox environment:
1. Click the gear icon in the top-right corner.
2. Select **Account Integrations** from the dropdown.
3. Filter for **CRM**.
4. Click the **Salesforce** tile.
5. Click **Connect to Sandbox** and follow the instructions in the pop-up to complete the integration process.
Note
The integration must be completed by the System Administrator of your Salesforce account. Only users with this role have the necessary permissions to authorize and configure the integration between Salesforce and OnceHub.
***
## Frequently Asked Questions (FAQs)
[Section titled “Frequently Asked Questions (FAQs)”](#frequently-asked-questions-faqs)
**What should I do if I want to disconnect my production environment to connect the sandbox for testing?**
**A:** We recommend creating a separate OnceHub account specifically for your Salesforce Sandbox environment. This allows you to test new workflows and mapping configurations in isolation without interfering with your live production data or current OnceHub settings.
If you have any questions about creating a new account, please [**contact our Support team**](https://help.oncehub.com/contact-us/) for guidance.
# Integrating with your CRM
> Integrating your CRM with OnceHub ensures that as soon as a guest has interacted with any of our product features, a contact is created/updated in OnceHub wi...
Integrating your CRM with OnceHub ensures that as soon as a guest has interacted with any of our product features, a contact is created/updated in OnceHub with their captured information. This is then used to automatically update the corresponding record in your CRM.
By integrating your CRM, you can streamline data management and enhance the accuracy of your records.
***
## Benefits of CRM Integration
[Section titled “Benefits of CRM Integration”](#benefits-of-crm-integration)
By integrating your CRM with OnceHub, you can:
* **Centralize Data Management:** Automatically sync booking details, keeping all client information in one place.
* **Update Contact Records:** Enrich CRM profiles with new bookings to provide a comprehensive view of client interactions.
* **Automate Lead Tracking:** Create or update leads automatically whenever a guest books a meeting.
* **Save Time:** Eliminate manual data entry by syncing OnceHub data to your CRM effortlessly.
Integrating OnceHub with your CRM not only streamlines data flow but also ensures your team has the latest client insights at their fingertips.
***
## Supported CRMs
[Section titled “Supported CRMs”](#supported-crms)
OnceHub offers native integrations with two leading CRMs:
* [**Salesforce**](https://help.oncehub.com/account-integrations/crm/integrating-oncehub-with-salesforce/)
* [**HubSpot**](https://help.oncehub.com/account-integrations/crm/integrating-oncehub-with-hubspot/)
If you’re using a different CRM, you can still connect OnceHub via **Zapier** or the **OnceHub API**. These options let you automate workflows and push booking data directly to your system.
# Troubleshooting CRM Integration Issues
> CRM integrations play a crucial role in ensuring seamless data synchronization between systems. When issues arise, they can disrupt workflows and affect prod...
CRM integrations play a crucial role in ensuring seamless data synchronization between systems. When issues arise, they can disrupt workflows and affect productivity. Addressing these issues promptly helps ensure your data sync is smooth and uninterrupted.
***
## Token Expired
[Section titled “Token Expired”](#token-expired)
**Symptoms:**
* The integration stops syncing.
* You may see an error message indicating the token has expired.
**Resolution:**
1. Click the gear icon located in the top-right corner of the page.
2. Select **Account Integrations** from the dropdown menu.
3. Filter for **CRM**.
4. Click on the tile of your CRM.
5. Click the **Reconnect** button.
6. Follow the authentication process as prompted to reestablish the connection.
***
## Access Revoked
[Section titled “Access Revoked”](#access-revoked)
**Symptoms:**
* The integration stops syncing.
* An error message states that access has been removed or revoked.
**Resolution:**
1. Log in to your CRM account.
2. Check your admin settings or permissions to ensure the integration has the required access rights.
3. Reauthorize the integration connection through OnceHub.
***
## Too Many Accounts Connected (Salesforce-specific)
[Section titled “Too Many Accounts Connected (Salesforce-specific)”](#too-many-accounts-connected-salesforce-specific)
**Symptoms:**
* Error message about exceeding the 5-account limit in Salesforce.
**Resolution:**
1. Review the connected accounts in Salesforce.
2. Disconnect unnecessary accounts to free up a slot for OnceHub.
Click [**here**](https://help.salesforce.com/s/articleView?id=sf.remoteaccess_request_manage.htm\&type=5) to learn more about this restriction in Salesforce.
***
## API Access Disabled (Salesforce-specific)
[Section titled “API Access Disabled (Salesforce-specific)”](#api-access-disabled-salesforce-specific)
**Symptoms:**
* Error message indicating API access is not enabled.
**Resolution:**
1. Verify that the connected Salesforce account has API access enabled.
2. If API access is not available, connect a different Salesforce account that includes this permission.
***
## Field Mapping Errors
[Section titled “Field Mapping Errors”](#field-mapping-errors)
**Symptoms:**
* Data sync fails due to missing or incorrect field mapping.
**Resolution:**
1. Navigate to the field mapping section in OnceHub.
2. Review and adjust the mappings to align with your CRM’s fields.
3. Save changes and test the connection.
***
## Best Practices for CRM Integration Maintenance
[Section titled “Best Practices for CRM Integration Maintenance”](#best-practices-for-crm-integration-maintenance)
To prevent integration issues from occurring in the future, follow these best practices:
* **Use a dedicated admin account:** Always use an admin account for integrations to avoid permission conflicts.
* **Monitor integration logs regularly:** These logs can help you identify and address potential issues early on.
* **Keep your CRM updated:** Ensure that your CRM version and permissions are compatible with OnceHub.
***
## Frequently Asked Questions
[Section titled “Frequently Asked Questions”](#frequently-asked-questions)
Here are answers to some of the most common questions about CRM integrations:
* **What should I do if my integration is still not working?** Double-check that both your CRM and OnceHub configurations are correct. If problems persist, please [**reach out to our support team**](https://help.oncehub.com/contact-us/) to assist.
* **How do I find out if my Salesforce account has API access?** Salesforce API access is typically included with Enterprise Editions and higher. You can verify this in your Salesforce account under “System Administrator” permissions.
* **Can I connect multiple CRM accounts to OnceHub?** Yes, OnceHub supports multiple CRM integrations, provided the correct permissions and account configurations are in place.
# Payment Collection
> Payment Collection documentation and guides.
[Stripe](https://help.oncehub.com/account-integrations/payment-collection/stripe/)
# Stripe
> Stripe documentation and guides.
[Introduction to the Stripe Integration](https://help.oncehub.com/account-integrations/payment-collection/stripe/introduction-to-stripe-integration/)
[How to Connect OnceHub with Stripe](https://help.oncehub.com/account-integrations/payment-collection/stripe/how-to-connect-oncehub-with-stripe/)
[How to Configure Payment Collection on your Booking Calendar](https://help.oncehub.com/account-integrations/payment-collection/stripe/how-to-configure-payment-collection-on-your-booking-calendar/)
[How Payment Transaction Details are Sent to Your Guests](https://help.oncehub.com/account-integrations/payment-collection/stripe/how-payment-transaction-details-are-sent-to-your-guests/)
[How OnceHub Handles Reassigned, Rescheduled, and Canceled Paid Meetings](https://help.oncehub.com/account-integrations/payment-collection/stripe/how-oncehub-handles-reassigned-rescheduled-and-canceled-paid-meetings/)
# How OnceHub Handles Reassigned, Rescheduled, and Canceled Paid Meetings
> When a paid meeting is modified (reassigned, rescheduled or canceled), the payment transaction details always remain associated with the original meeting act...
When a paid meeting is modified (reassigned, rescheduled or canceled), the payment transaction details always remain associated with the original meeting activity. This allows you to easily reference them when needed.
This article further details what happens to the meeting activities when they are modified.
***
## What Happens When a Paid Meeting is Reassigned
[Section titled “What Happens When a Paid Meeting is Reassigned”](#what-happens-when-a-paid-meeting-is-reassigned)
When a paid meeting is reassigned to another user, only the host changes in the meeting activity.
To learn more about how you reassign a meeting, take a look at [**Reassigning Meetings Made with Booking Calendars**](https://help.oncehub.com/activities-analytics/activity-management/meeting-management/reassigning-meetings-made-with-booking-calendars/).
***
## What Happens When a Paid Meeting is Rescheduled
[Section titled “What Happens When a Paid Meeting is Rescheduled”](#what-happens-when-a-paid-meeting-is-rescheduled)
A paid meeting can be rescheduled in two ways:
### 1. Rescheduled by the User Within their Account or by the Guest
[Section titled “1. Rescheduled by the User Within their Account or by the Guest”](#1-rescheduled-by-the-user-within-their-account-or-by-the-guest)
When a paid meeting is rescheduled by the user within OnceHub, or by the guest, this action creates a new meeting activity and automatically marks the original one as “Canceled”.
Caution
The payment transaction details will always remain associated with the original, “Canceled” activity and will not reflect in the newly created activity.
### 2. Rescheduled on Behalf of the Guest by Moving the Calendar Event
[Section titled “2. Rescheduled on Behalf of the Guest by Moving the Calendar Event”](#2-rescheduled-on-behalf-of-the-guest-by-moving-the-calendar-event)
When the meeting is rescheduled by moving the associated calendar event in the host’s connected calendar, the original activity status is updated to “Rescheduled” and it displays the new meeting time.
To learn more about how you rescheduling a meeting, take a look at [**Rescheduling Meetings Made with Booking Calendars**](https://help.oncehub.com/activities-analytics/activity-management/meeting-management/rescheduling-meetings-made-with-booking-calendars/).
***
## What Happens When a Paid Meeting is Canceled
[Section titled “What Happens When a Paid Meeting is Canceled”](#what-happens-when-a-paid-meeting-is-canceled)
When a paid meeting is canceled, the original meeting activity status is updated to “Canceled”.
Caution
Any potential refunds must be handled manually via Stripe.
To learn more about how you cancel a meeting, take a look at [**Cancelling Meetings Made with Booking Calendars**](https://help.oncehub.com/activities-analytics/activity-management/meeting-management/cancelling-meetings-made-with-booking-calendars/).
# How Payment Transaction Details are Sent to Your Guests
> When a paid meeting is scheduled, guests can receive the payment transaction details in two ways:
[How Payment Transaction Details are Sent to Your Guests](https://www.youtube-nocookie.com/embed/itmVua6tIco?wmode=opaque)
When a paid meeting is scheduled, guests can receive the payment transaction details in two ways:
1. Via an invoice sent by Stripe.
2. Via transaction details added to the guest notification.
***
## Invoice Sent by Stripe
[Section titled “Invoice Sent by Stripe”](#invoice-sent-by-stripe)
When a paid meeting is scheduled, an invoice is automatically emailed to your guests through Stripe.
***
## Adding the Transaction Details to Guest Notifications
[Section titled “Adding the Transaction Details to Guest Notifications”](#adding-the-transaction-details-to-guest-notifications)
To ensure that guests receive a complete record of the meeting and the transaction in one place, we recommend adding the transaction details to the guest notifications sent by OnceHub using the following steps:
### Navigating to the Guest Notification Template
[Section titled “Navigating to the Guest Notification Template”](#navigating-to-the-guest-notification-template)
1. Click the gear icon in the top-right corner.
2. Select **Guest Notifications** from the dropdown.
3. Select the template that you are using on your Booking Calendar.
### Adding the Transaction Details to the Guest Notification Template
[Section titled “Adding the Transaction Details to the Guest Notification Template”](#adding-the-transaction-details-to-the-guest-notification-template)
1. Click **Customize email** to expand the email editor.
2. Left click where you want to add the transaction details.
3. Type **@** to bring up the list of variables you can add.
4. Add the **Payment amount** and **Payment transaction ID** variables as shown in the image below. 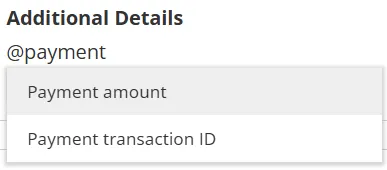
5. Click **Save** to confirm the changes.
For more detailed guide on guest notifications, please read [**Booking Calendar Guest Notifications**](https://help.oncehub.com/product/booking-calendars/notifications/booking-calendar-guest-notifications/).
# How to Configure Payment Collection on your Booking Calendar
> Each of your Booking Calendars can have their own unique payment collection settings, depending on the service you are charging for.
Each of your **Booking Calendars** can have their own unique payment collection settings, depending on the service you are charging for.
Follow the steps below to configure these settings.
## Navigating to the Booking Calendar
[Section titled “Navigating to the Booking Calendar”](#navigating-to-the-booking-calendar)
1. Click **Booking Calendars** in the left menu.
2. Select the Booking Calendar you want to enable payment collection for.
## Configuring the Payment Collection Settings
[Section titled “Configuring the Payment Collection Settings”](#configuring-the-payment-collection-settings)
1. Scroll to **Payment Collection** in the **Bookings Settings** tab.
2. Select **Collect payments via Stripe**.
3. Set the **Price** for any meeting made with this Booking Calendar.
4. (**Optional**) Provide a **Payment Terms** message to be displayed to guests while scheduling.
5. Click **Save** to confirm.
Note
OnceHub does not automatically collect VAT/ sales tax for bookings paid via Stripe. You are responsible for paying any taxes required by law and you are advised to include any applicable taxes within the price set on the Booking Calendar. For more information on how guests receive payment details after booking a paid meeting, please read [**How Payment Transaction Details are Sent to Your Guest**](https://help.oncehub.com/account-integrations/payment-collection/stripe/how-payment-transaction-details-are-sent-to-your-guests/).
# How to Connect OnceHub with Stripe
> This article describes how to connect your OnceHub account to Stripe to enable payment collection for your Booking Calendars.
[How to Connect OnceHub with Stripe](https://www.youtube-nocookie.com/embed/W_AblqK0jvo?wmode=opaque)
This article describes how to connect your OnceHub account to Stripe to enable payment collection for your **Booking Calendars**.
## Navigating to Stripe in OnceHub
[Section titled “Navigating to Stripe in OnceHub”](#navigating-to-stripe-in-oncehub)
1. Click the gear icon in the top-right corner.
2. Select **Account Integrations** from the dropdown.
3. Click the **Payment** Category.
4. Click the **Stripe** tile.
## Connecting OnceHub with Stripe
[Section titled “Connecting OnceHub with Stripe”](#connecting-oncehub-with-stripe)
1. Click **Connect**. 
2. Follow the instructions in the Stripe portal.
* **For an Existing Stripe Account**: Log in with your existing Stripe credentials and complete the integration process.
* **For a New Stripe Account**: Connecting to a new Stripe account requires extensive business verification information which may take some time to verify. Once your Stripe account is fully verified, please re-initiate the integration using OnceHub, or it will lead to a failed connection status. display the email ID of the Stripe account in the integration window.
***
Once the integration is complete, you will be automatically redirected to your OnceHub account. It will display the email ID of the Stripe account in the integration window.
After integrating OnceHub with Stripe, the next step is to configure your Booking Calendars to collect payments from your guests.
For more details, please read [**How to Configure Payment Collection on your Booking Calendar**](https://help.oncehub.com/account-integrations/payment-collection/stripe/how-to-configure-payment-collection-on-your-booking-calendar/).
# Introduction to the Stripe Integration
> Connecting your OnceHub account with Stripe allows you to accept payments from your guests directly on your Booking Calendar during the booking process.
Connecting your OnceHub account with Stripe allows you to accept payments from your guests directly on your Booking Calendar during the booking process.
This upfront payment helps you **automate revenue collection** and **reduce costly no-shows**.
All payment processing is handled securely by Stripe.
Caution
Currently, OnceHub only supports **card payments,** even if other payment methods are configured in your Stripe dashboard.
***
## Prerequisites
[Section titled “Prerequisites”](#prerequisites)
Before you begin the integration process, you must have the following:
1. A Paid OnceHub account.
2. A Verified Stripe account.
Note
Payment Collection via Stripe integration is not supported for bookings made through Routing Forms, Chatbots or Phone Booking.
***
## Supported Currencies
[Section titled “Supported Currencies”](#supported-currencies)
Our integration supports all currencies available in your Stripe account, based on your [**business’s registered country**](https://docs.stripe.com/currencies?presentment-currency=US#presentment-currencies).
***
## Key Steps to Set Up Paid Meetings
[Section titled “Key Steps to Set Up Paid Meetings”](#key-steps-to-set-up-paid-meetings)
To begin collecting payments during the scheduling process, follow these steps:
1. [**Connect OnceHub with Stripe**](https://help.oncehub.com/account-integrations/payment-collection/stripe/how-to-connect-oncehub-with-stripe/): Integrate OnceHub with your Stripe account to secure your payment setup.
2. [**Configure Payment Settings**](https://help.oncehub.com/account-integrations/payment-collection/stripe/how-to-configure-payment-collection-on-your-booking-calendar/): Configure payment collection for each individual **Booking Calendar**.
***
## Handling Reassigned, Rescheduled and Canceled Paid Meetings in OnceHub
[Section titled “Handling Reassigned, Rescheduled and Canceled Paid Meetings in OnceHub”](#handling-reassigned-rescheduled-and-canceled-paid-meetings-in-oncehub)
When a paid meeting is modified (reassigned, rescheduled or canceled), the payment transaction details always remain associated with the original meeting activity. This allows you to easily reference them when needed.
For more details, please read [**How OnceHub Handles Reassigned, Rescheduled and Canceled Paid Meetings**](https://help.oncehub.com/account-integrations/payment-collection/stripe/how-oncehub-handles-reassigned-rescheduled-and-canceled-paid-meetings/).
# Security and Compliance
> Security And Compliance documentation and guides.
[How To Integrate OnceHub With Microsoft Entra ID](https://help.oncehub.com/account-integrations/security-and-compliance/how-to-integrate-oncehub-with-microsoft-entra-id/)
[How To Add And Delete OnceHub Users With Microsoft Entra ID](https://help.oncehub.com/account-integrations/security-and-compliance/how-to-add-and-delete-oncehub-users-with-microsoft-entra-id/)
# How To Add And Delete OnceHub Users With Microsoft Entra ID
> You can manage your OnceHub users by provisioning and deprovisioning them directly within Microsoft Entra ID.
You can manage your OnceHub users by provisioning and deprovisioning them directly within Microsoft Entra ID.
This article explains how to use Entra ID to automatically sync users to OnceHub.
***
## Prerequisites
[Section titled “Prerequisites”](#prerequisites)
Before you can begin managing users with Entra ID, ensure the following two requirements are met:
### 1. OnceHub is Integrated with Entra ID
[Section titled “1. OnceHub is Integrated with Entra ID”](#1-oncehub-is-integrated-with-entra-id)
Complete the initial integration between OnceHub and Entra ID. For detailed instructions, see our [**How to Integrate OnceHub with Microsoft Entra ID**](https://help.oncehub.com/account-integrations/security-and-compliance/how-to-integrate-oncehub-with-microsoft-entra-id/) article.
### 2. Required User Properties in Entra ID are Populated
[Section titled “2. Required User Properties in Entra ID are Populated”](#2-required-user-properties-in-entra-id-are-populated)
Verify that the following user properties are correctly completed in Entra ID to enable successful OnceHub user management:
* Email ID: This acts as the unique identifier that links user profiles between OnceHub and Microsoft Entra ID.
* First name
* Last name
If you need to verify or update user information, follow these steps within Entra ID:
1. Select **users** from the left navigation menu.
2. Select the user.
3. Click **Edit properties** in the top left of the screen.
***
## How to Add and Delete OnceHub Users in Entra ID
[Section titled “How to Add and Delete OnceHub Users in Entra ID”](#how-to-add-and-delete-oncehub-users-in-entra-id)
In Entra ID, you have several options for managing your OnceHub user base:
### Adding a OnceHub User within Entra ID
[Section titled “Adding a OnceHub User within Entra ID”](#adding-a-oncehub-user-within-entra-id)
Follow the steps below to add a user or group of users in OnceHub by provisioning them in Entra ID:
1. Select **Enterprise apps** from the left navigation menu.
2. Open the application you created for OnceHub.
3. Click **Users and groups** from the left navigation menu of the created app.
4. Click **Add user/group** in the top left of the screen.
5. Under **Users**, click **None Selected**.
6. Select the user.
7. Click **Select**.
8. Click **Assign**.
Note
Adding users to a group assigned to the OnceHub Application will also provision the added user on OnceHub.
Once provisioned, the user will be added to your OnceHub account as a member user without an assigned seat. They will receive an email invite with a link they must use to sign in for the first time.
### Deleting a OnceHub User within Entra ID
[Section titled “Deleting a OnceHub User within Entra ID”](#deleting-a-oncehub-user-within-entra-id)
Follow the steps below to delete a user in OnceHub by deprovisioning them in Entra ID:
1. Select **Enterprise apps** from the left navigation menu.
2. Open the application you created for OnceHub.
3. Click **Users and groups** from the left navigation menu of the create app.
4. Select the checkbox next to the user.
5. Click **Remove assignment** at the top of the screen.
6. Click **Yes**.
Once the user has been deprovisioned in Entra ID, they will be deleted from your OnceHub account and will receive an email to notify them.
### How to Immediately Sync Users to OnceHub
[Section titled “How to Immediately Sync Users to OnceHub”](#how-to-immediately-sync-users-to-oncehub)
In Entra ID, provisioning and deprovisioning happens every 40 minutes. This means that users may not be synced to OnceHub immediately. To instantly make the changes:
1. Select **Enterprise apps** from the left navigation menu.
2. Open the application you created for OnceHub.
3. Click **Provisioning** from the left navigation menu of the create app.
4. Click **Provision on demand**.
5. Use **Select a user or group** to search for the user.
6. Click **Provision**.
***
## Frequently Asked Questions (FAQs)
[Section titled “Frequently Asked Questions (FAQs)”](#frequently-asked-questions-faqs)
**Which user details can be modified in OnceHub directly from Microsoft Entra ID?**
**A:** When using Microsoft Entra ID to manage your users, you can synchronize and update the following information:
* First Name
* Last Name
**What is the result of provisioning an Entra ID user who already possesses a OnceHub account?**
**A:** Profiles will be automatically linked if the email ID in Entra matches the existing OnceHub email. This allows you to manage the user via Entra ID as if they were originally added through that system.
**How do I assign a seat to a newly added user?**
**A:** You can assign a seat to them within the Users section in OnceHub. For detailed instructions on this process, see our [**Managing Seats in OnceHub**](https://help.oncehub.com/billing/managing-seats-in-oncehub/) article.
**How do I make a newly added member an Administrator or Team Manager?**
**A:** If you need to give a user the Administrator or Team Manager roles, you can update their role within the Users section in OnceHub. To learn more, read our [**User Management and Seats**](https://help.oncehub.com/account-administration/user-management/user-management-and-seats/) article.
# How To Integrate OnceHub With Microsoft Entra ID
> Automatically add and delete users in OnceHub directly from Entra ID using SCIM. This provides real-time synchronization ensuring that user access is always ...
Automatically add and delete users in OnceHub directly from Entra ID using SCIM. This provides real-time synchronization ensuring that user access is always up to date, reducing administrative overhead and enhancing security.
This article guides you through the process of establishing a SCIM integration between OnceHub and Entra ID.
[How To Integrate OnceHub With Microsoft Entra ID](https://www.youtube-nocookie.com/embed/fZLaQy4G2qA?wmode=opaque)
***
## Step 1: Create a New OnceHub Application in Entra ID
[Section titled “Step 1: Create a New OnceHub Application in Entra ID”](#step-1-create-a-new-oncehub-application-in-entra-id)
In Entra ID, follow the steps below to create a new SCIM application integration:
1. Select **Enterprise apps** from the left navigation menu.
2. Click **New application** in the top left of the screen.
3. Click **Create your own application** in the top left of the screen.
4. Provide a name for the app.
5. Select **Integrate any other application you don’t find in the gallery (Non-gallery)**.
6. Click **Create**.
***
## Step 2: Configure the OnceHub Application Settings in Entra ID
[Section titled “Step 2: Configure the OnceHub Application Settings in Entra ID”](#step-2-configure-the-oncehub-application-settings-in-entra-id)
Next, you will need to add your OnceHub details to the application you created in Entra ID.
### Finding the Integration Details within OnceHub
[Section titled “Finding the Integration Details within OnceHub”](#finding-the-integration-details-within-oncehub)
In OnceHub, follow these steps to open the **Entra ID** integration view with the required details:
1. Click the gear icon in the top right corner.
2. Select **Account Integrations** from the dropdown
3. Filter for **Security and Compliance**.
4. Click the **Microsoft Entra ID** tile.
Note
Keep the view open for the steps below.
### Add the Integration Details within Entra ID
[Section titled “Add the Integration Details within Entra ID”](#add-the-integration-details-within-entra-id)
In Entra ID, follow the steps below to complete the configuration:
1. Click **Provisioning** from the left navigation menu of the created app.
2. Click **Connect your application**.
3. Copy over the following details from OnceHub:
| | |
| --------------- | ------------------------------------------ |
| **In Entra ID** | **In OnceHub** |
| Tenant URL | Base URL |
| Secret Token | Secret Key (Click **Generate secret key**) |
4. Click Test connection.
5. Click Create to finish configuring the application.
With your integration complete, you can begin using Entra ID to automate your OnceHub user management.
***
Next Up: [**How to Add and Delete OnceHub Users with Entra ID**](https://help.oncehub.com/account-integrations/security-and-compliance/how-to-add-and-delete-oncehub-users-with-microsoft-entra-id/)
# Activities Analytics
> Activities Analytics documentation and guides.
[Reporting Analytics](https://help.oncehub.com/activities-analytics/reporting-analytics/)
[Activity Management](https://help.oncehub.com/activities-analytics/activity-management/)
# Activity Management
> Activity Management documentation and guides.
[Meeting Management](https://help.oncehub.com/activities-analytics/activity-management/meeting-management/)
[Managing Guest Activities](https://help.oncehub.com/activities-analytics/activity-management/managing-guest-activities/)
[Exporting Your OnceHub Activities](https://help.oncehub.com/activities-analytics/activity-management/exporting-your-oncehub-activities/)
[Filtering Your OnceHub Activities](https://help.oncehub.com/activities-analytics/activity-management/filtering-your-oncehub-activities/)
[Phone Booking Conversation Summary and Recording](https://help.oncehub.com/activities-analytics/activity-management/phone-booking-conversation-summary-and-recording/)
[Understanding Test Activity Behavior in Chatbots and Routing Forms](https://help.oncehub.com/activities-analytics/activity-management/understanding-test-activity-behavior-in-chatbots-and-routing-forms/)
[Alert Center](https://help.oncehub.com/activities-analytics/activity-management/alert-center/)
# Alert Center
> The Alert Center is designed to keep you informed about all booking activities within your account, including new bookings, cancellations, and reschedules.
The Alert Center is designed to keep you informed about all booking activities within your account, including new bookings, cancellations, and reschedules. By setting up alerts, you can ensure that the right people are notified at every stage of the booking process, allowing for better oversight and management.
[Alert Center](https://www.youtube-nocookie.com/embed/Nrr9fmc_JDI?wmode=opaque)
***
## Accessing the Alert Center
[Section titled “Accessing the Alert Center”](#accessing-the-alert-center)
### To access the Alert Center:
[Section titled “To access the Alert Center:”](#to-access-the-alert-center)
1. Click on the gear icon in the top-right corner of your account.
2. Select **Alert Center** from the dropdown menu.
## Creating a New Alert
[Section titled “Creating a New Alert”](#creating-a-new-alert)
### Creating a new alert allows you to customize notifications based on specific booking events and users. Here’s how to set one up:
[Section titled “Creating a new alert allows you to customize notifications based on specific booking events and users. Here’s how to set one up:”](#creating-a-new-alert-allows-you-to-customize-notifications-based-on-specific-booking-events-and-users-heres-how-to-set-one-up)
1. Click on **Create alert** in the Alert Center interface.
2. **Define alert criteria** in the **Criteria** section of the pop-up window:
* **Event:** Select the **Event** for which you want to receive alerts. Options include booking cancellations, confirmations, and reschedules.
* **Scope:** Choose the **Scope** of the alert. You can select alerts for a specific user or Booking Calendar. Then, choose the specific item from the dropdown menu.
3. Specify alert recipients in the **Notify** section:
* Use the **Recipients** dropdown to select the users who should receive the alert emails.
## Managing Existing Alerts
[Section titled “Managing Existing Alerts”](#managing-existing-alerts)
You can easily modify, duplicate, or delete existing alerts to keep your notifications up-to-date and relevant. To manage an alert:
1. Locate the alert you wish to manage within the Alert Center.
2. Click the three dots (…) next to the alert.
3. Choose one of the following options:
* **Edit:** Modify the alert’s settings, such as event type, scope, or recipients.
* **Duplicate:** Create a new alert with the same settings as the existing one, allowing for quick setup of similar alerts.
* **Delete:** Permanently remove the alert from your account.
Note
If the user who has been scheduled for a booking has their email notifications turned off, then users on the global alert will not receive any notifications either.
# Exporting Your OnceHub Activities
> Our export feature allows you to generate a dataset of all guest activities in your account, with optional filtering to help you refine the data as needed.
Our export feature allows you to generate a dataset of all guest activities in your account, with optional filtering to help you refine the data as needed. This guide will detail the export process, providing you with a valuable dataset that can serve as the foundation for creating comprehensive reports.
***
## Available Export Formats
[Section titled “Available Export Formats”](#available-export-formats)
Reports can be exported in the following formats:
* CSV
* Excel
***
## Refining Your Dataset Before Exporting
[Section titled “Refining Your Dataset Before Exporting”](#refining-your-dataset-before-exporting)
To ensure your exported dataset includes only the data you need, you can apply filters to narrow down the records. For more details on filtering options, refer to our [**Filtering Your OnceHub Activities article**](https://help.oncehub.com/activities-analytics/activity-management/filtering-your-oncehub-activities/).
***
## Data Included in Your Exports
[Section titled “Data Included in Your Exports”](#data-included-in-your-exports)
When you export your OnceHub activities, the data will include:
* Activity Details
* UTM parameters
* Contact Details
* Meeting Details
* [Mapped Custom Meeting Properties](https://help.oncehub.com/product/booking-calendars/booking-forms/mapping-booking-calendar-questions-to-object-properties/)
* [Mapped Custom Conversation Properties](https://help.oncehub.com/product/routing-forms/contact-data-management/mapping-routing-form-questions-to-object-properties/)
***
## How to Export Activities
[Section titled “How to Export Activities”](#how-to-export-activities)
### Navigating to the Activities
[Section titled “Navigating to the Activities”](#navigating-to-the-activities)
1. Click on **Activities** in the left-hand navigation menu
### Applying Filters (Optional)
[Section titled “Applying Filters (Optional)”](#applying-filters-optional)
1. Apply filters or select a Custom filter as required.
### Exporting the Activities
[Section titled “Exporting the Activities”](#exporting-the-activities)
1. Click on **Export** at the top of the **All Activity** list.
2. Select your preferred export format from the dropdown menu (e.g., CSV or Excel).
# Filtering Your OnceHub Activities
> OnceHub provides a powerful filtering feature that enables you to easily find and analyze the activities of your guests who have interacted with your OnceHub...
[Filtering Your OnceHub Activities](https://www.youtube-nocookie.com/embed/dfVnGZB2YQ8?wmode=opaque)
OnceHub provides a powerful filtering feature that enables you to easily find and analyze the activities of your guests who have interacted with your OnceHub products. Use filters to narrow down your search and save time by focusing on the most relevant activities.
**Activities** can be accessed by clicking on **Activities** in the left-hand navigation menu
***
## Free Text Filter
[Section titled “Free Text Filter”](#free-text-filter)
The Free Text filter, located in the top-left corner of the **Activities**, allows you to search for activities like meetings or form submissions that include specific text.
### How to Use the Free Text Filter
[Section titled “How to Use the Free Text Filter”](#how-to-use-the-free-text-filter)
* Simply type any text into the filter box to find activities that match your query.
* For more precise filtering, use specific search operators as described below:
**Search Operators for Free Text Filter:**
* **OR Operator:** Use **OR** to search for multiple terms. Results will include activities containing either or both terms. Example: “ **OR** ” will return matches for activities involving either email address.
- **AND Operator:** Use **AND** to combine filters and retrieve activities that meet all specified conditions. Example: “Scheduled **AND** Reassigned” will return activities that are both scheduled and reassigned.
***
## Advanced Filter Options
[Section titled “Advanced Filter Options”](#advanced-filter-options)
Advanced filters offer more specific criteria to narrow down your search.
### How to Use Advanced Filters
[Section titled “How to Use Advanced Filters”](#how-to-use-advanced-filters)
1. Click the filter box next to the Free Text filter.
2. Select one or more filters to limit the results according to the chosen parameters.
**Note:** You can further refine your search by combining multiple advanced filters or applying the Free Text filter alongside them.
***
## Custom Filters
[Section titled “Custom Filters”](#custom-filters)
If you frequently use certain filter combinations, you can save them as Custom Filters for quick access in the future. Saved filters allow you to reproduce the same search criteria without needing to manually re-enter the details every time.
### Saving a Custom Filter:
[Section titled “Saving a Custom Filter:”](#saving-a-custom-filter)
1. Apply the desired filters in Activities.
2. Click the **Save as** link next to the applied filters.
3. Enter a name for your new filter in the pop-up window.
4. Click **Save new filter** to finalize.
### Accessing Custom Filters:
[Section titled “Accessing Custom Filters:”](#accessing-custom-filters)
Your saved filters are stored in the Custom Filters section on the left-hand menu of the Activities page.
# Managing Guest Activities
> Activities is the centralized hub where you can manage all guests’ activities. It provides advanced filtering options to quickly locate the information you need and create valuable datasets that can serve as the foundation for creating comprehensive reports.
**Activities** is the centralized hub where you can manage all guests’ activities. It provides advanced filtering options to quickly locate the information you need and create valuable datasets that can serve as the foundation for creating comprehensive reports.
Furthermore, **Activities** allows you to execute various actions, including managing meetings, reviewing chatbot conversations, and viewing routing form responses.
***
## Accessing Activities and Viewing Details
[Section titled “Accessing Activities and Viewing Details”](#accessing-activities-and-viewing-details)
To access **Activities**, click on **Activities** in the left-hand navigation menu.
Once inside the **Activities** section, you’ll see a list of all guest interactions. Each activity contains details such as activity type, time, and status.
* By clicking on any activity, you’ll open the Details pane, which shows all information captured for that specific activity.
* Any attachments uploaded by your guests will appear here and can be downloaded as a zip file in the Details pane.
* The Contact Details pane on the right displays a summary of the guest’s information along with their recent activity history.
***
## Viewing Related Activities
[Section titled “Viewing Related Activities”](#viewing-related-activities)
Sometimes you’ll need to trace how an interaction evolved, such as seeing a rescheduled meeting or a cancellation associated with a specific activity. Here’s how to do that:
1. Click on the activity you’d like to investigate.
2. Click on the three-dot menu at the top of the activity’s Details pane.
3. Select **View related activities** from the dropdown menu.
This will display any connected activities, providing you with a clearer context of the guest’s interaction timeline.
***
## Managing Meetings in Activities
[Section titled “Managing Meetings in Activities”](#managing-meetings-in-activities)
**Activities** allows you to take several important actions to manage your meetings efficiently. For more information about each action, please take a look at the articles linked below:
* [**Cancel Meetings**](https://help.oncehub.com/activities-analytics/activity-management/meeting-management/cancelling-meetings-made-with-booking-calendars/): Cancel a meeting directly from the Activities section if the meeting is no longer needed.
* [**Reschedule Meetings**](https://help.oncehub.com/activities-analytics/activity-management/meeting-management/rescheduling-meetings-made-with-booking-calendars/): Either reschedule a meeting on behalf of the guest or send them a request to choose a new time.
* [**Reassign Meetings**](https://help.oncehub.com/activities-analytics/activity-management/meeting-management/reassigning-meetings-made-with-booking-calendars/): Assign the meeting to another user on your account to ensure the right team member handles the interaction.
* [**Allow Meeting Overlap**](https://help.oncehub.com/activities-analytics/activity-management/meeting-management/allowing-for-meeting-overlaps-with-booking-calendars/): Select whether a specific meeting can be scheduled over to accommodate double bookings.
* **Mark Meetings as No-Show:** If a guest misses a meeting, you can mark it as a no-show to maintain accurate attendance and reporting records.
***
## Deleting Activities
[Section titled “Deleting Activities”](#deleting-activities)
If you no longer need to track a specific interaction, you can delete individual or multiple activities separately from the Activities.
To delete activities:
* **Single activity:** Click on a specific activity, click the three-dot menu, and click **Move to trash**.
* **Multiple activities:** Select the checkboxes next to the activities you want to remove, and click the Delete icon that appears at the top of the list.
Deleted activities are **moved to the trash for 30 days** before being permanently removed.
Note
Manually deleting an activity does not automatically cancel the associated meeting or remove the event from your connected calendar. To cancel the actual meeting event for both the host and guest, you must use the Cancel Meeting action instead.
***
## Using Activities for Reporting
[Section titled “Using Activities for Reporting”](#using-activities-for-reporting)
**Activities** isn’t just for managing interactions, it’s also a powerful tool for reporting. Make use of the following features to generate and export data:
* [**Advanced Filtering**](https://help.oncehub.com/activities-analytics/activity-management/filtering-your-oncehub-activities/): Apply filters to narrow down activities based on criteria like meeting type, date range, or status. This helps you focus on specific data quickly.
* [**Export Datasets**](https://help.oncehub.com/activities-analytics/activity-management/exporting-your-oncehub-activities/): After applying filters, export a dataset containing all the relevant activities. You can use this for reports, record-keeping, or sharing with team members.
***
## Frequently Asked Questions (FAQs)
[Section titled “Frequently Asked Questions (FAQs)”](#frequently-asked-questions-faqs)
**Can I change my guest’s contact information (email or phone number) after they make a booking?**
**A:** Yes, you can update these details directly from the Contact Details pane on the right side of the Activities after selecting the relevant interaction. Updating this information ensures that all future notifications and calendar updates reflect the correct details.
**Can I update guest details for a scheduled meeting?**
**A:** Yes, you do not need to cancel the meeting. Simply select the activity, open the Contact Details pane on the right, and update the guest’s information directly.
**Do Test activities appear within Activities?**
**A:** Yes, they are visible within Activities and are clearly marked within OnceHub. Please see [**Understanding Test Activity Behavior in Chatbots and Routing Forms**](https://help.oncehub.com/activities-analytics/activity-management/understanding-test-activity-behavior-in-chatbots-and-routing-forms/) article for more details on how these activities interact with your integrations and reporting.
# Meeting Management
> Meeting Management documentation and guides.
[Cancelling Meetings Made with Booking Calendars](https://help.oncehub.com/activities-analytics/activity-management/meeting-management/cancelling-meetings-made-with-booking-calendars/)
[Reassigning Meetings Made with Booking Calendars](https://help.oncehub.com/activities-analytics/activity-management/meeting-management/reassigning-meetings-made-with-booking-calendars/)
[Rescheduling Meetings Made with Booking Calendars](https://help.oncehub.com/activities-analytics/activity-management/meeting-management/rescheduling-meetings-made-with-booking-calendars/)
[Allowing for Meeting Overlaps with Booking Calendars](https://help.oncehub.com/activities-analytics/activity-management/meeting-management/allowing-for-meeting-overlaps-with-booking-calendars/)
# Allowing for Meeting Overlaps with Booking Calendars
> The Meeting Overlap feature empowers you to accept new meetings, even if they occur simultaneously with existing scheduled meetings.
[Allowing for Meeting Overlaps with Booking Calendars](https://www.youtube-nocookie.com/embed/fCENJ5d5xXo?wmode=opaque)
The **Meeting Overlap** feature empowers you to accept new meetings, even if they occur simultaneously with existing scheduled meetings. This functionality provides enhanced flexibility, productivity, and booking efficiency. Below, we outline the benefits, functionality, and steps to enable meeting overlaps either directly within OnceHub or through your connected calendar.
***
## Benefits of Meeting Overlap
[Section titled “Benefits of Meeting Overlap”](#benefits-of-meeting-overlap)
* **Maximize Productivity and Revenue:** Keep your calendar optimized by addressing no-shows and increasing the number of qualified meetings you conduct.
* **Enhanced Flexibility:** Dynamically manage your schedule by accepting meetings, even when slots are occupied.
* **Increased Booking Capacity:** By freeing up overlapping time slots, you can boost the total meetings booked.
* **Seize Opportunities:** Never miss a potential meeting simply because a time slot appears occupied.
***
## How it works
[Section titled “How it works”](#how-it-works)
The Meeting Overlap feature gives you control over whether already existing scheduled meetings can be booked over or not. This setting determines if new meetings can be scheduled during overlapping time slots.
* You can configure overlap settings on a per-meeting basis within the **Activities** section in OnceHub.
* If your account uses the **Two-Way Sync** integration with a connected calendar, status updates (such as marking an event as Free or Busy) will be automatically synced to OnceHub.
**Note:** This feature only works with one-on-one Meetings.
***
## How to Allow for Meeting Overlaps from Within OnceHub
[Section titled “How to Allow for Meeting Overlaps from Within OnceHub”](#how-to-allow-for-meeting-overlaps-from-within-oncehub)
You can easily allow for meeting overlaps directly in OnceHub through the following steps:
### Navigating to the Meeting
[Section titled “Navigating to the Meeting”](#navigating-to-the-meeting)
1. Click on [**Activities**](https://help.oncehub.com/activities-analytics/activity-management/managing-guest-activities/) in the left-hand navigation menu.
2. Select the meeting you want to reschedule from your list of activities.
### Setting the Overlap Meeting preference
[Section titled “Setting the Overlap Meeting preference”](#setting-the-overlap-meeting-preference)
Use the **Meeting Overlap** feature within the meeting’s details pane to choose if the overlap is allowed.
* **Not Allowed:** Disallow meetings from overlapping with the existing meeting.
* **Allowed:** Allow new meetings to be scheduled even if they overlap with the existing meeting.
***
## How to Allow for Meeting Overlaps from Your Connected Calendar Application
[Section titled “How to Allow for Meeting Overlaps from Your Connected Calendar Application”](#how-to-allow-for-meeting-overlaps-from-your-connected-calendar-application)
If you are using the Two-Way Sync feature found within **User Integrations** in your account, you can allow for overlaps directly from within your connected calendar.
### Toggling on Two-Way Sync in OnceHub
[Section titled “Toggling on Two-Way Sync in OnceHub”](#toggling-on-two-way-sync-in-oncehub)
1. Click on the gear icon in the top-right.
2. Select **User Integrations** from the dropdown.
3. Click on your primary calendar integration tile.
4. In the **Two-Way Sync** section, toggle on **Updating the meeting in \[calendar application] updates the meeting in OnceHub**.
### Updating the Event in Your Calendar Application
[Section titled “Updating the Event in Your Calendar Application”](#updating-the-event-in-your-calendar-application)
1. Open your calendar application.
2. Locate the scheduled event for the meeting.
3. Change the event’s status to update the meeting.
* **Busy:** Disallow meetings to overlap with the existing meeting.
* **Free:** Allow new meetings to be scheduled even if they overlap with the existing meeting.
The change will sync automatically with OnceHub.
**Note:** This feature is not available for hosts that make use of iCloud Calendars.
***
## Planned Overbooking with Concurrent Sessions
[Section titled “Planned Overbooking with Concurrent Sessions”](#planned-overbooking-with-concurrent-sessions)
If you want to allow multiple guests to book for the same time slot with the same host(s) automatically without manual intervention, you can use [**Concurrent Sessions**](https://help.oncehub.com/product/booking-calendars/booking-settings/booking-calendar-concurrent-sessions/).
This feature is ideal for high-volume teams who want to maximize calendar efficiency by planning for potential no-shows or managing queues.
# Cancelling Meetings Made with Booking Calendars
> Managing meeting cancellations effectively ensures that all parties are informed and updated. This article will help you to understand the effects of cancell...
[Cancelling Meetings Made with Booking Calendars](https://www.youtube-nocookie.com/embed/ol251Eat_m0?wmode=opaque)
Managing meeting cancellations effectively ensures that all parties are informed and updated. This article will help you to understand the effects of cancelling meetings and how to properly cancel them.
***
## Effects of Cancelling a Meeting
[Section titled “Effects of Cancelling a Meeting”](#effects-of-cancelling-a-meeting)
When a meeting that was made using a Booking Calendar is cancelled:
* **Calendar Update:** The calendar event’s status changes to **free**, and **CANCELLED** is added to the event title for easy identification.
* **Guest Notification:** Cancelation notifications are sent to the guest based on the [**Guest notification template**](https://help.oncehub.com/product/booking-calendars/notifications/booking-calendar-guest-notifications/) that was used by the Booking Calendar.
* **User Notification:** Cancellations notifications are sent to the hosts based on their [**User Notifications**](https://help.oncehub.com/profile-management/booking-calendar-user-notifications/) settings.
***
## How to Cancel a Meeting from Your Connected Calendar Application
[Section titled “How to Cancel a Meeting from Your Connected Calendar Application”](#how-to-cancel-a-meeting-from-your-connected-calendar-application)
If you are using the Two-Way Sync feature found within **User Integrations** in your account, you can cancel a meeting directly from your connected calendar.
1. Open your calendar application.
2. Locate the scheduled event for the meeting.
3. Delete the event to cancel the meeting.
Once deleted, the cancellation will sync automatically with OnceHub and notify the relevant parties.
Note
This feature is not available for hosts that make use of iCloud Calendars.
***
## How to Cancel a Meeting from Within OnceHub
[Section titled “How to Cancel a Meeting from Within OnceHub”](#how-to-cancel-a-meeting-from-within-oncehub)
You can also cancel a meeting directly in OnceHub through the following steps:
### Navigating to the Meeting
[Section titled “Navigating to the Meeting”](#navigating-to-the-meeting)
1. Click on **Activities** in the left-hand navigation menu.
2. Select the meeting you want to cancel from your list of activities.
### Canceling the Meeting
[Section titled “Canceling the Meeting”](#canceling-the-meeting)
1. Click the **Cancel** button near the top of the meeting information pane.
2. Enter a **Cancellation Reason** in the pop-up.
3. Click **Cancel the meeting** to confirm.
# Reassigning Meetings Made with Booking Calendars
> Managing meeting reassignments effectively ensures that all parties are informed and updated. This article will help you to understand the effects of reassig...
[Reassigning Meetings Made with Booking Calendars](https://www.youtube-nocookie.com/embed/bplBzPvTFcc?wmode=opaque)
Managing meeting reassignments effectively ensures that all parties are informed and updated. This article will help you to understand the effects of reassigning meetings and how to properly reassign them.
Note
Meeting reassignment is only available on selected plans.
## Effects of Reassigning a Meeting
[Section titled “Effects of Reassigning a Meeting”](#effects-of-reassigning-a-meeting)
When you reassign a meeting that was made using a Booking Calendar, several updates occur automatically. Here’s what to expect:
* **Calendar Update:** The original calendar event is deleted, and a new calendar event is created using the new host’s integrated calendar.
* **Guest Notification:** Reassignment notifications are sent to the guest based on the [**Guest notification template**](https://help.oncehub.com/product/booking-calendars/notifications/booking-calendar-guest-notifications/) that was used by the Booking Calendar.
* **User Notification:** Reassignment notifications are sent to the hosts based on their [**User Notifications**](https://help.oncehub.com/profile-management/booking-calendar-user-notifications/) settings.
***
## How to Reassign a Meeting to a New Host
[Section titled “How to Reassign a Meeting to a New Host”](#how-to-reassign-a-meeting-to-a-new-host)
Follow these steps to smoothly reassign a meeting to a new host while ensuring all relevant details are updated.
### Navigating to the Meeting
[Section titled “Navigating to the Meeting”](#navigating-to-the-meeting)
1. Click on **Activities** in the left-hand navigation menu.
2. Select the meeting you want to reassign from your list of activities.
### Reassigning the Meeting to a new Host
[Section titled “Reassigning the Meeting to a new Host”](#reassigning-the-meeting-to-a-new-host)
1. Click the **Reassign** button near the top of the meeting information pane.
2. Select the new host in the pop-up.
3. Click on **Next**.
### Updating the Meeting Location
[Section titled “Updating the Meeting Location”](#updating-the-meeting-location)
When reassigning you can decide how to manage the Meeting location:
* Keep the original location
* Generate a new meeting link using the new host’s video conferencing integrations.
### Confirming the Reassignment
[Section titled “Confirming the Reassignment”](#confirming-the-reassignment)
Once you’ve selected your preferred location option, click **Reassign** to confirm the changes.
# Rescheduling Meetings Made with Booking Calendars
> Managing meeting reschedules effectively ensures that all parties are informed and updated. This article will help you to understand the effects of reschedul...
[Rescheduling Meetings Made with Booking Calendars](https://www.youtube-nocookie.com/embed/gba54BSFiqw?wmode=opaque)
Managing meeting reschedules effectively ensures that all parties are informed and updated. This article will help you to understand the effects of rescheduling meetings and how to properly reschedule them.
***
## Effects of Rescheduling a Meeting
[Section titled “Effects of Rescheduling a Meeting”](#effects-of-rescheduling-a-meeting)
When you reschedule a meeting that was made using a Booking Calendar, several updates occur automatically. Here’s what to expect:
* **Calendar Update:** The calendar event is updated to the new time slot.
* **Guest Notification:** Notifications about the reschedule are sent to the guest based on the [**Guest notification template**](https://help.oncehub.com/product/booking-calendars/notifications/booking-calendar-guest-notifications/) that was used by the Booking Calendar.
* **User Notification:** Notifications are sent to the hosts based on their [**User Notifications**](https://help.oncehub.com/profile-management/booking-calendar-user-notifications/) settings.
***
## How to Reschedule a Meeting on Behalf of the Guest
[Section titled “How to Reschedule a Meeting on Behalf of the Guest”](#how-to-reschedule-a-meeting-on-behalf-of-the-guest)
OnceHub simplifies rescheduling meetings. If you’ve already discussed a new time or are currently on a call with your guest, you can easily reschedule on their behalf.
### Rescheduling a Meeting from Within OnceHub
[Section titled “Rescheduling a Meeting from Within OnceHub”](#rescheduling-a-meeting-from-within-oncehub)
You can reschedule a meeting directly in OnceHub by following these steps:
**Navigating to the Meeting**
1. Click on **Activities** in the left-hand navigation menu.
2. Select the meeting you want to reschedule from your list of activities.
**Rescheduling the Meeting**
1. Click the **Reschedule** button near the top of the meeting information pane.
2. Select **Reschedule on behalf of the guest**.
3. Click on **Next**.
4. Select the new date and time for the meeting.
5. Provide the **Reschedule reason**.
6. Click on **Reschedule** to confirm.
### Rescheduling a Meeting from Your Connected Calendar Application
[Section titled “Rescheduling a Meeting from Your Connected Calendar Application”](#rescheduling-a-meeting-from-your-connected-calendar-application)
If you are using the Two-Way Sync feature found within **User Integrations** in your account, you can reschedule a meeting directly from your connected calendar.
1. Open your calendar application.
2. Locate the scheduled event for the meeting.
3. Move the event to the desired time slot to update the meeting.
The change will sync automatically with OnceHub and notify the relevant parties.
**Note:** This feature is not available for hosts that make use of iCloud Calendars.
***
## How to Send a Reschedule Request to your Guest
[Section titled “How to Send a Reschedule Request to your Guest”](#how-to-send-a-reschedule-request-to-your-guest)
Note
This feature is not available for hosts that make use of iCloud Calendars.
Should you need to reschedule a meeting with your guest and are unsure of their availability, you can send them a reschedule request, allowing them to choose a new time at their convenience.
### Navigating to the Meeting
[Section titled “Navigating to the Meeting”](#navigating-to-the-meeting)
1. Click on **Activities** in the left-hand navigation menu.
2. Select the meeting you want to reschedule from your list of activities.
### Rescheduling the Meeting
[Section titled “Rescheduling the Meeting”](#rescheduling-the-meeting)
1. Click the **Reschedule** button near the top of the meeting information pane.
2. Select **Ask the guest to reschedule**.
3. Click on **Next**.
4. Provide the **Reschedule Reason**.
5. Click on **Cancel and request reschedule** to send the request to them.
After the request is sent, the original meeting will be cancelled and the calendar event updated. A new meeting will be created once the guest books using the request notification that was sent to them. Reschedule notifications are sent using the contact information currently stored in OnceHub. SMS updates will only be delivered if the customer opted into receiving them during the initial booking process.
Reschedule notifications are sent using the contact information currently stored in OnceHub. SMS updates will only be delivered if the customer opted into receiving them during the initial booking process.
# Phone Booking Conversation Summary and Recording
> Reviewing your Phone Booking recordings can provide valuable information on guest preferences, such as preferred services or times slots.
Reviewing your Phone Booking recordings can provide valuable information on guest preferences, such as preferred services or times slots. This allows you to identify gaps in your current setup and make adjustments to better facilitate successful bookings.
***
## Managing Phone Booking Recordings and Transcripts
[Section titled “Managing Phone Booking Recordings and Transcripts”](#managing-phone-booking-recordings-and-transcripts)
Navigate to **Activities** in the left-hand menu and select **Phone Calls**.
Once you select a Phone Call activity, the following capabilities are provided to analyze the conversation:
* **Transcript Summary:** A high level summary of the call’s outcome, including its success status and details on scheduling results or messages left. 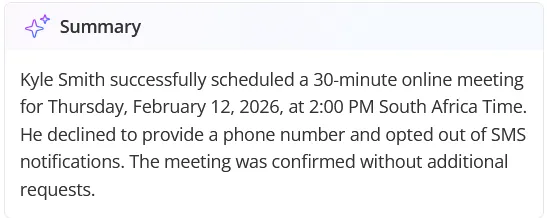
* **Recording Playback:** A two-channel recording with a visual display of the phone call audio that distinguishes between the AI assistant and the caller. 
* **Transcript Sync:** As you play the recording, the activity pane highlights the corresponding transcript text in real-time.
* **.OGG Export:** You can download any recording in a standard .ogg format for external review or training purposes.
# Understanding Test Activity Behavior in Chatbots and Routing Forms
> When you test your Chatbots and Routing Forms, the activities generated are specifically flagged as Test Activity within your Activities.
When you test your [**Chatbots**](https://help.oncehub.com/product/chatbots/introduction-to-chatbots/) and [**Routing Forms**](https://help.oncehub.com/product/routing-forms/introduction-to-routing-forms/introduction-to-routing-forms/), the activities generated are specifically flagged as **Test Activity** within your [**Activities**](https://help.oncehub.com/activities-analytics/activity-management/managing-guest-activities/). Understanding how these test activities interact with your integrations and reporting tools is crucial for maintaining accurate data.
**Tip:** We recommend always using the same email address for test activities . Doing so will allow you to easily identify it within exports and your integrations.
***
## How Test Activities Interact with Integrations (CRM, Zapier, and Webhooks)
[Section titled “How Test Activities Interact with Integrations (CRM, Zapier, and Webhooks)”](#how-test-activities-interact-with-integrations-crm-zapier-and-webhooks)
When you run a test, your integrations will process some information, but they **will not** mark the activity as a test.
* **Meeting details** are sent to your integration.
* **Contact information** is **not** sent to your integration.
* The activity will **not** be labeled as **Test Activity** within the integration.
***
## How Test Activities Interact with Email and SMS Notifications
[Section titled “How Test Activities Interact with Email and SMS Notifications”](#how-test-activities-interact-with-email-and-sms-notifications)
All notifications that you have configured will be sent out when a test activity occurs. This helps you confirm that your notification settings are working correctly.
***
## How Test Activities Interact with Booking Analytics and Exports
[Section titled “How Test Activities Interact with Booking Analytics and Exports”](#how-test-activities-interact-with-booking-analytics-and-exports)
Test activities are included in your Booking Analytics and analytics exports. However, these reports do not label test activities as **Test Activity**.
# Reporting Analytics
> Reporting Analytics documentation and guides.
[Where Are My Guests Booking From](https://help.oncehub.com/activities-analytics/reporting-analytics/where-are-my-guests-booking-from/)
[Booking Analytics](https://help.oncehub.com/activities-analytics/reporting-analytics/booking-analytics/)
[Capacity Planning for Optimizing Staffing Level](https://help.oncehub.com/activities-analytics/reporting-analytics/capacity-planning-for-optimizing-staffing-level/)
# Booking Analytics
> The Booking analytics page allows you to view all bookings associated with your account, providing a clear and organized display of your booking data.
The Booking analytics page allows you to view all bookings associated with your account, providing a clear and organized display of your booking data. With various filtering and viewing options, you can easily view and analyze trends. Whether you’re looking to track recent activity or historical data, this page offers the flexibility and control you need to stay on top of your booking analytics.
## Restrictions based on [user roles](https://help.oncehub.com/account-administration/user-management/user-roles-overview/)
[Section titled “Restrictions based on user roles”](#restrictions-based-on-user-roles)
**Administrators:** OnceHub administrators can see all the bookings in the account with no restrictions
**Team managers:** Team managers can see their own bookings and those owned by team members that they manage, but can’t see bookings outside of that.
**Member users:** Members can see only their own bookings. Certain steps, such as filtering by booking owner, are not available to them.
***
**Viewing your Booking Analytics**
## View Bookings by Creation date
[Section titled “View Bookings by Creation date”](#view-bookings-by-creation-date)
You can view bookings based on their creation date.
**How to use:**
* In the **View by** section, choose **Creation date**.
* From the **Time range** drop-down menu, set your preferred date range to view bookings created within that time frame. You can create a custom date range under the Specific dates option.
* Click **Done** once you have made your selection.
## View Bookings by Meeting date
[Section titled “View Bookings by Meeting date”](#view-bookings-by-meeting-date)
You can also view bookings based on the date they are scheduled to occur.
**How to use:**
* In the **View by** section, choose Meeting date.
* From the **Time range** drop-down menu, set your preferred date range to view bookings scheduled within that time frame.
* Click **Done** once you have made your selection.
* Note that you can view past meetings, as well as upcoming meetings, or create a custom date range under the Specific dates option.
## **Set the Chart Time Range**
[Section titled “Set the Chart Time Range”](#set-the-chart-time-range)
Once you’ve set the creation or meeting date, the results will be displayed in a chart. At the top of the chart, you can select the time frame you want your data to be displayed in:
* Last 7 days
* Last 30 days
* Last 90 days
* Specific dates
***
## Filtering the Results
[Section titled “Filtering the Results”](#filtering-the-results)
The Booking analytics page also offers a wide range of filtering options to help you make a deeper analysis of your bookings . You can filter results by booking status (e.g., completed, canceled, or rescheduled), by the scheduling tools, and meeting host. You can also enter in UTM parameters and filter results by them.
These filters allow you to refine your data view to focus on the exact information you need, helping you understand the performance of a specific event type, tracking bookings from different booking links, or analyzing the schedules of individual meeting hosts.
**Adding filters:**
* Click on the Filter drop-down menu below the View by section.
* Select the category you want to filter by, then select the specific filter you want to add.
* Click **Done** to add the filter.
* The added filter will appear alongside the drop-down menu.
* Click the pencil icon to edit it, or the **X** icon to remove it.
* You can add as many filters as you need to refine your analytics results.
***
### Viewing and Saving your Results
[Section titled “Viewing and Saving your Results”](#viewing-and-saving-your-results)
Once you have adjusted the View by dates, set a time range, and added filters, all of the relevant data will be displayed in a chart. At the top right of the chart, you can select the time frame you want your data to be displayed in: Quarterly, Monthly, Weekly, or Daily.
**If you want to save the current filter configuration:**
1. Click on **Save as** next to the applied filters.
2. Enter a **View Name**.
3. Click on **Save**.
When you hover over sections of the chart, a tooltip will appear, providing specific insights into that column of data. When you click View inside the tooltip, you will be taken to the [**activity stream**](https://help.oncehub.com/activities-analytics/activity-management/managing-guest-activities/), where the specific bookings included in the column of data will be displayed. Here, you can see more specifics about the bookings and [**manage them**](https://help.oncehub.com/activities-analytics/activity-management/meeting-management/).
***
### Exporting your Booking Analytics Data
[Section titled “Exporting your Booking Analytics Data”](#exporting-your-booking-analytics-data)
You can export the data of any of the tables by using the **Export** option located at the top-right of the individual tables.
The data can be exported in the following formats:
* CSV
* Excel spreadsheet
***
## Practical use cases
[Section titled “Practical use cases”](#practical-use-cases)
### 1. Monitor recent booking activity
[Section titled “1. Monitor recent booking activity”](#1-monitor-recent-booking-activity)
If you’re interested in monitoring your booking trends, use the “Last 7 days” or “Last month” time range. This is particularly helpful if you’ve been running a promotion or marketing campaign and want to track its impact on bookings.
### 2. Identify seasonal trends
[Section titled “2. Identify seasonal trends”](#2-identify-seasonal-trends)
Use the quarterly view to look for patterns and trends in your bookings over time. This can help you understand seasonality in your business, allowing you to plan resources, staffing, or marketing efforts accordingly.
## Frequently Asked Questions (FAQs)
[Section titled “Frequently Asked Questions (FAQs)”](#frequently-asked-questions-faqs)
**Can I see canceled or rescheduled bookings in the analytics?**
**A:** Yes, the Booking analytics page allows you to filter by booking status, including completed, canceled, no-show, or rescheduled bookings. (Note that rescheduled bookings will only retain that status from the time that they are rescheduled until they are completed, at which point the status will change). This helps you get a full picture of your booking activity, even for appointments that didn’t go as planned.
**How far back can I view my booking history?**
**A:** You can view your entire booking history from the moment you started using our platform. Simply adjust the date range to include the desired timeframe.
# Capacity Planning for Optimizing Staffing Level
> The Capacity Planning report helps you to analyze gaps, anticipate demand, and optimize your staffing levels by allowing you to:
The **Capacity Planning** report helps you to analyze gaps, anticipate demand, and optimize your staffing levels by allowing you to:
* View the upcoming capacity of a Booking Calendar.
* Compare the upcoming capacity to past demand of a Booking Calendar.
This feature is especially useful for team scheduling scenarios such as consulting, sales, healthcare, or customer success, where managing staff availability and meeting capacity is critical.
***
## How to View Upcoming Booking Calendar Capacity
[Section titled “How to View Upcoming Booking Calendar Capacity”](#how-to-view-upcoming-booking-calendar-capacity)
**Navigating to Capacity Planning**
1. Click **Analytics** in the left-hand navigation menu.
2. Select **Capacity Planning**.
**Capacity Planning** displays estimated available booking slots for the selected Booking Calendar. Each color-coded block represents a time frame (based on the selected View) and reflects utilization.
Hovering over a block shows detailed metrics, such as:
* Utilization percentage.
* The number of bookings made vs. the total available capacity.
Note
This is only an estimation of available capacity and may change depending on the actual booking times and calendar settings such as [**Workload rules**](https://help.oncehub.com/product/booking-calendars/booking-settings/booking-calendar-workload-management/), [**Starting, and Buffer Times**](https://help.oncehub.com/product/booking-calendars/booking-settings/booking-calendar-timeframe-and-timeslot-preferences/).
## How to Adjust the View of Capacity Planning Report
[Section titled “How to Adjust the View of Capacity Planning Report”](#how-to-adjust-the-view-of-capacity-planning-report)
### Selecting the Booking Calendar
[Section titled “Selecting the Booking Calendar”](#selecting-the-booking-calendar)
Use the **Booking Calendar** dropdown at the top of **Capacity Planning** to choose which Booking Calendar’s capacity you want to view.
### Choosing a Time Range
[Section titled “Choosing a Time Range”](#choosing-a-time-range)
Use the **View by** toggle at the top of the pane to switch between the following 2 views:
* **Day:** Shows daily capacity for the upcoming week in hourly blocks.
* **Week:** Shows weekly capacity for the upcoming month in daily blocks.
### Adjusting the Display Hours (Day View Only)
[Section titled “Adjusting the Display Hours (Day View Only)”](#adjusting-the-display-hours-day-view-only)
1. Click **Display Hours** on the left side of the pane.
2. Select the hours you want to display.
3. Click **Apply** to update the view.
Note
The display hours you select persist in your browser for future sessions.
## How to Compare Booking Calendar Capacity to Past Demand
[Section titled “How to Compare Booking Calendar Capacity to Past Demand”](#how-to-compare-booking-calendar-capacity-to-past-demand)
You can compare your upcoming booking capacity to similar historical booking data for a specific time frame. This helps you identify potential staffing gaps and adjust availability.
**Enabling the Comparison**
1. Select the **Compare with** checkbox.
2. Choose the past time range to compare, from the adjacent dropdown.
3. Click **Done** to apply the comparison.
When enabled, each block shows a comparison indicator, to help you compare past demand with current capacity.
* **Red Indicator:** **Under Capacity -** Your Booking Calendar has received **at least 20% more** meetings in the past compared to the capacity you have now.
* **Blue Indicator:** **Over Capacity** - Your Booking Calendar has received **at least 20% less** meetings in the past compared to the capacity you have now
* **No Indicator:** Your Booking Calendar has received meetings **within the 20% range** in the past compared to the capacity you have now.
# Where Are My Guests Booking From
> To get the most out of your marketing, it's important to know where your bookings originate.
To get the most out of your marketing, it’s important to know where your bookings originate.
Using OnceHub’s **Booking Analytics** feature combined with **UTM parameters**, you can better understand your booking traffic, identify visitor sources, and make data-driven decisions.
***
## Booking Analytics
[Section titled “Booking Analytics”](#booking-analytics)
The [**Booking Analytics**](https://help.oncehub.com/activities-analytics/reporting-analytics/booking-analytics/) feature, found in the left-hand menu of your OnceHub account, provides detailed insights into your booking traffic and visitor sources. Using filters, you can analyze data and identify trends.
### Using UTM Parameters with Booking Analytics
[Section titled “Using UTM Parameters with Booking Analytics”](#using-utm-parameters-with-booking-analytics)
Combine Booking Analytics with UTM parameters for even more powerful tracking.
UTM parameters are tags added to your booking URLs that track the source, medium, and campaign of each visitor. This allows you to pinpoint the exact origin of each booking.
Learn how to add [**UTM parameters**](https://help.oncehub.com/product/booking-calendars/sharing-embedding/adding-utms-to-your-booking-calendar/) to your Booking Calendar.
### Benefits of Using UTM Parameters
[Section titled “Benefits of Using UTM Parameters”](#benefits-of-using-utm-parameters)
* Gain insights into which campaigns and platforms drive the most bookings.
* Evaluate the success of your marketing efforts.
* Make data-driven decisions to optimize your strategies.
***
## Tracking Bookings with External Redirects
[Section titled “Tracking Bookings with External Redirects”](#tracking-bookings-with-external-redirects)
You can also track booking sources using external tools. Redirect guests to an external URL after they book, such as a “Thank You” page on your website.
OnceHub automatically adds any captured UTM parameters to this URL, allowing you to use your own analytics tools to track booking sources.
See our [**Booking Calendar redirect guide** ](https://help.oncehub.com/product/booking-calendars/booking-forms/booking-calendar-redirect/)for more information.
***
## Tracking Bookings with Duplicate Booking Objects
[Section titled “Tracking Bookings with Duplicate Booking Objects”](#tracking-bookings-with-duplicate-booking-objects)
If you have a simple setup using one or two booking links and prefer not to use UTM parameters for tracking, duplicating booking links can be an effective alternative.
You can duplicate booking calendars to track bookings from specific sources or campaigns.
1. ### Duplicate Your Booking Calendar
[Section titled “Duplicate Your Booking Calendar”](#duplicate-your-booking-calendar)
* Navigate to the **Booking Calendars Lobby** using the left-hand menu.
* Find the booking calendar you wish to duplicate, click on the three dots (…), and select **Duplicate**.
2. ### Assign Meaningful Names
[Section titled “Assign Meaningful Names”](#assign-meaningful-names)
* Name each duplicated calendar based on its purpose or source. For example, “John’s Booking Calendar – Website Visitors” or “Marketing Campaign Calendar” can help you easily identify their origin.
3. ### Share Your Booking Calendars
[Section titled “Share Your Booking Calendars”](#share-your-booking-calendars)
* Use **Page Designer** to copy the URL for sharing your calendar as a standalone page.
* Alternatively, use **Embed Designer** to generate the embed code to place on your website.
Once you’ve shared your duplicated Booking objects and have started receiving bookings, you can use Booking Analytics to monitor performance. Navigate to Booking Analytics in your account and filter by the names you assigned to your calendars or pages to see booking insights for each object.
# Billing
> Billing documentation and guides.
[Managing Your Subscription](https://help.oncehub.com/billing/managing-your-subscription/)
[Managing Seats in OnceHub](https://help.oncehub.com/billing/managing-seats-in-oncehub/)
[Managing Phone Numbers](https://help.oncehub.com/billing/managing-phone-numbers/)
[Managing Payment Methods](https://help.oncehub.com/billing/managing-payment-methods/)
[SMS Credits in OnceHub](https://help.oncehub.com/billing/sms-credits-in-oncehub/)
[SMS Delivery: Statuses, Troubleshooting, and Regional Guidelines](https://help.oncehub.com/billing/sms-delivery-statuses-troubleshooting-and-regional-guidelines/)
[Accessing and Exporting Your Centralized SMS Logs](https://help.oncehub.com/billing/accessing-and-exporting-your-centralized-sms-logs/)
[Canceling your Subscription](https://help.oncehub.com/billing/canceling-your-subscription/)
[Deleting Your Account](https://help.oncehub.com/billing/deleting-your-account/)
# Accessing and Exporting Your Centralized SMS Logs
> The SMS Logs screen provides a centralized record of all SMS notifications sent from your OnceHub account.
The **SMS Logs** screen provides a centralized record of all SMS notifications sent from your OnceHub account.
## How To View SMS Logs
[Section titled “How To View SMS Logs”](#how-to-view-sms-logs)
You can access your consolidated SMS transaction logs using the following steps:
1. Click the **gear icon** in the top-right corner.
2. Select **Billing/ Subscription** from the menu.
3. In the SMS section, click the **View SMS log** link.
4. The SMS log screen displays all transactions, defaulting to the **last 7 days**.
Use the available **Time Range** selector and/ or **Filter By (phone number)** to quickly filter specific transactions.
## How To Export SMS Logs
[Section titled “How To Export SMS Logs”](#how-to-export-sms-logs)
Full SMS message content is **not displayed** in the SMS Logs view. To view the complete message text, you must export the SMS logs using the following steps:-
1. Click **Export CSV** link in the top-right corner to download the filtered results as a CSV file.
While the on-screen log provides a quick summary, the exported CSV file contains a comprehensive record for auditing and compliance. Every export includes:
* **Timeline & Status:** Date, time and delivery status.
* **Sender Information:** Sender name and sender email.
* **Recipient Information:** Recipient name, phone number and email.
* **Message Details:** Full SMS content, total characters and SMS credits used.
## Programmatic Access to SMS Logs (API)
[Section titled “Programmatic Access to SMS Logs (API)”](#programmatic-access-to-sms-logs-api)
OnceHub supports programmatic access to SMS notification logs for organizations that need automated or large-scale retrieval of SMS data. Integrating with our API allows you to sync SMS records directly with your internal systems.
This allows you to:
* Retrieve SMS logs directly from your OnceHub account
* Filter results by **date**, **recipient** and **recipient type**
* Access **full SMS message content** to meet compliance and auditing requirements
For endpoint specifications, authentication headers and code samples, please visit the [**OnceHub Developer Documentation**](https://help.oncehub.com/developers/api/#tag/notifications/GET/notifications/sms).
# Canceling your Subscription
> This guide explains how to cancel your paid subscription. If you're on a free trial or the basic plan, you'll need to delete your account instead.
This guide explains how to cancel your paid subscription. If you’re on a free trial or the basic plan, you’ll need to delete your account instead.
***
## Important Things to Know Before Canceling
[Section titled “Important Things to Know Before Canceling”](#important-things-to-know-before-canceling)
Before you cancel, here are some key details to keep in mind:
**Account Ownership**
Only the Account Owner has the ability to cancel the subscription.
**Account Retention Timeline**
If you cancel your subscription or a payment fails, your account will be **suspended for 30 days**. After this period, it will be permanently deleted.
**Billing and Adjustments**
Even if you cancel, any outstanding charges for **added seats or prorated adjustments** will still be processed.
**Resuming Your Subscription**
You can resume your subscription at any time before the end of the billing cycle.
***
## How to Cancel Your Subscription
[Section titled “How to Cancel Your Subscription”](#how-to-cancel-your-subscription)
Follow these steps to cancel your paid plan:
**Navigating to Billing**
1. Click on the gear icon in the top right.
2. Select **Billing**.
**Cancelling the subscription**
1. Scroll to the bottom of **Billing**.
2. Click on **Cancel subscription**.
On the cancellation page, you’ll see important information, including:
* How long your account will remain active (you can continue using it until the end of your billing cycle).
* When your account will be permanently deleted if not reactivated.
**Confirming the cancellation**
1. Check the box labeled **Yes, I want to cancel** to confirm your intent to cancel.
2. Provide feedback as to why you are cancelling your subscription (optional).
3. Click the **Cancel subscription** button to finalize the process.
***
## After Canceling Your Subscription
[Section titled “After Canceling Your Subscription”](#after-canceling-your-subscription)
Here’s what happens after you cancel:
**Account Suspended State**
After the billing cycle ends, your account enters a 30-day suspended state. During this time, you can reactivate the subscription by clicking **Reactivate subscription** and selecting the number of seats you need. The payment method linked to your account will then be charged.
**Account Deletion**
If the subscription is not reactivated during the 30-day suspension period, your account will be permanently deleted.
***
## For Free Trial or Basic Plan Users
[Section titled “For Free Trial or Basic Plan Users”](#for-free-trial-or-basic-plan-users)
If you are on the free trial or basic plan and wish to stop using our services, you will need to delete your account instead of canceling a subscription. Please see our [**Delete Your Account**](https://help.oncehub.com/billing/deleting-your-account/) article for a detailed guide.
# Deleting Your Account
> This guide explains how to delete your account if you are on a free trial or the basic plan. If you're on a paid plan, you'll need to cancel your subscriptio...
[Deleting your Account](https://www.youtube-nocookie.com/embed/cJqwKoCGNcc?wmode=opaque)
This guide explains how to delete your account if you are on a free trial or the basic plan. If you’re on a paid plan, you’ll need to cancel your subscription instead.
You can delete your account through either the **Settings and Permissions** or the **Billing** sections of your account settings.
## Deletion via Settings and Permissions
[Section titled “Deletion via Settings and Permissions”](#deletion-via-settings-and-permissions)
1. Click the gear icon located in the top-right corner.
2. Select **Account Permissions**.
3. Click **Delete account**.
4. Follow the on-screen prompts to complete the deletion process.
## Deletion via Billing
[Section titled “Deletion via Billing”](#deletion-via-billing)
1. Click the gear icon in the top-right corner.
2. Select **Billing**.
3. Click the three horizontal dots positioned near Billing in the top-left corner.
4. Click **Delete account**.
5. Follow the on-screen prompts to finalize the account deletion.
***
## Important Considerations Before Deleting
[Section titled “Important Considerations Before Deleting”](#important-considerations-before-deleting)
### Account deletion permanently removes
[Section titled “Account deletion permanently removes”](#account-deletion-permanently-removes)
* All data stored within OnceHub.
* Booking Calendars, Chatbots and Routing forms.
* Stored credit card and billing information.
* All user accounts and associated personal data.
Note
Scheduled meetings that have already synced with external calendars, such as Google Calendar, will remain unaffected.
***
## Alternative to Deleting Your Account
[Section titled “Alternative to Deleting Your Account”](#alternative-to-deleting-your-account)
If you’d like to preserve the account but you are not actively using it, you can reduce your Seats to 1 to reduce the monthly charge while keeping the account active.
This can be done from the **Billing** section found by clicking on the gear icon, then **Billing**.
***
## For Paid Plan Users
[Section titled “For Paid Plan Users”](#for-paid-plan-users)
If you are on the paid plan and wish to stop using our services, you will need to cancel your subscription instead of deleting your account. Please see our [**Cancelling Your Subscription**](https://help.oncehub.com/billing/canceling-your-subscription/) article for a detailed guide.
***
## Frequently Asked Questions (FAQs)
[Section titled “Frequently Asked Questions (FAQs)”](#frequently-asked-questions-faqs)
**Can I recover my data after deleting my account?**
**A:** No, account deletion is permanent. All data, including Booking Calendars and personal information, will be permanently erased.
**Will scheduled meetings still take place if I delete my account?**
**A:** Yes, any scheduled meetings already synced with external calendars (e.g., Google Calendar, Outlook) will remain unaffected. However, OnceHub will no longer manage these events.
**Can I delete my account if I am not the Account Owner?**
**A:** No. Only the Account Owner can delete the account. If you’re a regular user, contact your Account Owner for assistance.
**How long is my account data retained after the account is deleted?**
**A:** Your account data is retained for:
* 30 days after the free trial has expired.
* 6 months of no activity in the free Basic plan.
# Managing Payment Methods
> OnceHub supports a variety of payment methods, giving you the flexibility to update them as needed. However, if you’re using PayPal, keep in mind that subscr...
[Managing Payment Methods](https://www.youtube-nocookie.com/embed/1LxBqHe4bq0?wmode=opaque)
OnceHub supports a variety of payment methods, giving you the flexibility to update them as needed. However, if you’re using PayPal, keep in mind that subscription changes cannot be made within 7 days of your renewal date.
***
## Accepted Payment Methods
[Section titled “Accepted Payment Methods”](#accepted-payment-methods)
* Credit Cards (e.g., Visa, MasterCard, etc.)
* PayPal
***
## How to Access and Manage Payment Methods
[Section titled “How to Access and Manage Payment Methods”](#how-to-access-and-manage-payment-methods)
**Follow these simple steps to manage your payment methods**
1. Click the gear icon in the top-right corner of your OnceHub account, then select **Billing**.
2. From the left-hand menu, choose **Payment Methods**.
***
## Adding a New Payment Method
[Section titled “Adding a New Payment Method”](#adding-a-new-payment-method)
**To add a new payment method**
1. Go to the **Payment Methods** section.
2. Click the **Add payment method** button.
***
## Managing Multiple Payment Methods
[Section titled “Managing Multiple Payment Methods”](#managing-multiple-payment-methods)
If you’ve added more than one payment method, one will serve as your primary payment method, which will be used for all payments. Secondary payment methods act as backups in case your primary method fails, ensuring uninterrupted service.
### To change your Primary Payment Method
[Section titled “To change your Primary Payment Method”](#to-change-your-primary-payment-method)
1. Click the three dots (… ) next to the payment method you want to set as primary.
2. Select **Make primary** from the dropdown menu.
### Removing a Payment Method
[Section titled “Removing a Payment Method”](#removing-a-payment-method)
* You can remove any payment method except the primary one.
* To remove it, click the three dots (… ) next to the payment method and select **Remove**.
***
## Benefits of Storing Multiple Payment Methods
[Section titled “Benefits of Storing Multiple Payment Methods”](#benefits-of-storing-multiple-payment-methods)
**Storing multiple payment methods offers**
* Uninterrupted subscription payment if your primary payment fails.
* Convenience when switching payment methods for purchases.
* Peace of mind that your account remains active without interruptions.
# Managing Phone Numbers
> Phone numbers can be used with Booking Calendars and Booking Hubs to handle inbound calls via Phone Booking.
Phone numbers can be used with **Booking Calendars** and **Booking Hubs** to handle inbound calls via **Phone Booking**. By assigning a phone number to your booking links, you can automate scheduling through your voice channels.
***
## Accessing Phone Numbers
[Section titled “Accessing Phone Numbers”](#accessing-phone-numbers)
1. Click the gear icon in the top right.
2. Select **Phone Numbers** from the dropdown.
***
## Prerequisites for Generating a Phone Number
[Section titled “Prerequisites for Generating a Phone Number”](#prerequisites-for-generating-a-phone-number)
In order to generate phone numbers you will need to:
* Have the appropriate amount of Phone number licenses.
* Have the Account Owner enable **AI Agent.**
***
## Enabling AI Agent on Your Account
[Section titled “Enabling AI Agent on Your Account”](#enabling-ai-agent-on-your-account)
1. Click the **gear icon** in the top-right corner.
2. Select **Account Permissions** from the menu.
3. Toggle on **AI Agent**.
***
## How to Generate New Phone Numbers
[Section titled “How to Generate New Phone Numbers”](#how-to-generate-new-phone-numbers)
To generate and assign a new phone number, follow these steps:
1. Click **Generate new number** in the top right.
2. Use the dropdown on the left to select your country code.
3. Use the search option to filter the list of available numbers.
* The filtering will only show numbers that start with what you entered in the search.
4. Select the preferred number from the filtered list.
5. Click **Select and assign** to confirm the number.
6. **Optional**: Use the **Assign to** dropdown to select the Booking Calendar or Booking Hub that will use the number.
7. Click **Assign**.
Caution
Member Users can also generate and assign available phone numbers from within their Booking Calendars.
***
## How to Manage Existing Phone Numbers
[Section titled “How to Manage Existing Phone Numbers”](#how-to-manage-existing-phone-numbers)
Existing numbers can be reassigned to different booking links or marked for deletion as your business needs change.
### Assigning Phone Numbers
[Section titled “Assigning Phone Numbers”](#assigning-phone-numbers)
1. Click the 3 dots to the right of the phone number.
2. Select **Assign** from the dropdown.
3. Use the **Assign to** dropdown to select the Booking Calendar or Booking Hub that will use the number.
4. Click **Assign**.
Tip
You can also unassign Phone Numbers at any time and then assign them to a different Booking Calendar or Booking Hub.
### Deleting Phone Numbers
[Section titled “Deleting Phone Numbers”](#deleting-phone-numbers)
1. Click the 3 dots to the right of the phone number.
2. Select **Delete number** from the dropdown.
3. Click **Confirm** to mark the number for deletion.
Note
Numbers marked for deletion will only be deleted at the end of your current billing cycle.
### Keeping Phone Numbers Marked for Deletion
[Section titled “Keeping Phone Numbers Marked for Deletion”](#keeping-phone-numbers-marked-for-deletion)
You are able to cancel the deletion process of any phone number that was marked for deletion within your current billing cycle using the following steps:
1. Click the 3 dots to the right of the phone number.
2. Select **Keep number** from the dropdown.
# Managing Seats in OnceHub
> Seats provide access to OnceHub’s scheduling and live engagement tools, required for users who directly interact with guests or accept booking appointments.
Seats provide access to OnceHub’s scheduling and live engagement tools, required for users who directly interact with guests or accept booking appointments.
Users who manage administrative tasks, such as account settings or user profiles, do not require allocated seats.
***
## How to Add or Remove Seats
[Section titled “How to Add or Remove Seats”](#how-to-add-or-remove-seats)
Follow these steps to adjust the number of seats in your subscription:
1. Click the gear icon in the top-right corner.
2. Select **Billing** from the dropdown menu.
3. Click on **Add/remove seats**.
4. Use the **-** and **+** icons to set the desired number of seats for your account.
5. When finished, click **Update subscription** to save your changes.
***
## Adjusting the Number of Seats: Subscription Effects
[Section titled “Adjusting the Number of Seats: Subscription Effects”](#adjusting-the-number-of-seats-subscription-effects)
You can modify the number of seats in your subscription at any time. Here’s how billing works based on your subscription type:
### Adding seats
[Section titled “Adding seats”](#adding-seats)
* **For Monthly Subscriptions:** Costs for additional seats will be prorated and applied during your next billing cycle.
* **For Annual Subscriptions:** You will pay a prorated adjustment immediately for any added seats.
### Removing seats
[Section titled “Removing seats”](#removing-seats)
* When removing seats, changes will take effect in future billing cycles.
* Refunds are not provided for charges that have already been processed.
***
## Assigning Seats to Users
[Section titled “Assigning Seats to Users”](#assigning-seats-to-users)
There are three ways to assign seats to users:
1. ### While Adding Users
[Section titled “While Adding Users”](#while-adding-users)
* Seats can be assigned to a user at the time they are added to your account.
2. ### From the Users Section
[Section titled “From the Users Section”](#from-the-users-section)
* Click the gear icon in the top-right corner.
* Select **Users** from the dropdown menu.
* Click **Assign seats**, then use the dropdown menu to assign a seat to the desired user.
3. ### From the User Profile
[Section titled “From the User Profile”](#from-the-user-profile)
* Click the gear icon in the top-right corner.
* Select **Users** from the dropdown menu.
* Click on the user you want to assign a seat to. This will open their user profile.
* Click **Assign seat** to allocate a seat to them.
***
## Unassigning Seats from Users
[Section titled “Unassigning Seats from Users”](#unassigning-seats-from-users)
**To unassign a seat from a specific user**
* Follow the above steps to access the **User Profile**.
* Once in their profile, click **Unassign seat** to remove their seat.
# Managing Your Subscription
> This article explains how you can manage your subscription in OnceHub, including steps to change your plan, adjust the number of seats, and understand the ef...
This article explains how you can manage your subscription in OnceHub, including steps to change your plan, adjust the number of seats, and understand the effects of these changes.
***
## How to Change Your Subscription Plan
[Section titled “How to Change Your Subscription Plan”](#how-to-change-your-subscription-plan)
Follow these steps to upgrade or downgrade your subscription plan:
1. ### Access the Billing Page
[Section titled “Access the Billing Page”](#access-the-billing-page)
* Click the gear icon in the top-right corner of the page and select **Billing** from the menu.
2. ### Select Change Plan
[Section titled “Select Change Plan”](#select-change-plan)
* Locate your current plan name on the Billing page and click on **Change plan**.
3. ### Review Plan Options
[Section titled “Review Plan Options”](#review-plan-options)
* You will see a detailed breakdown of all available subscription plans, including the features and benefits of each.
4. ### Select the plan you would like to move to and confirm your choice:
[Section titled “Select the plan you would like to move to and confirm your choice:”](#select-the-plan-you-would-like-to-move-to-and-confirm-your-choice)
* If upgrading , you’ll gain immediate access to your new plan’s features.
* If downgrading , changes will take effect at the start of the next billing cycle.
Please note that once you upgrade to a paid plan you will not be able to downgrade to the free Basic plan. You will have to cancel your subscription and sign up again.
***
## Adding or Removing Seats
[Section titled “Adding or Removing Seats”](#adding-or-removing-seats)
Seats are assigned to users to allow them to engage with guests through OnceHub’s scheduling and live engagement features.
* **For monthly subscriptions:** The cost for additional seats will be prorated and billed during your next billing cycle.
* **For annual subscriptions:** You’ll immediately pay a prorated adjustment for the added seats.
* **Removing seats:** It will only take effect in future billing cycles. Refunds are not provided for charges that have already been processed.
You can make adjustments to the number of seats in your subscription at any time. For more information on seats, please see our [**Managing Seats in OnceHub**](https://help.oncehub.com/billing/managing-seats-in-oncehub/) article.
***
## Adding or Removing Phone Number Licenses
[Section titled “Adding or Removing Phone Number Licenses”](#adding-or-removing-phone-number-licenses)
Phone number licenses are required to generate phone numbers that can be used with **Booking Calendars** and **Booking Hubs** to handle inbound calls via Phone Booking.
* **For monthly subscriptions**: The cost for additional licenses will be prorated and billed during your next billing cycle.
* **For annual subscriptions:** You’ll immediately pay a prorated adjustment for the added licenses.
* **Removing phone number licenses:** It will only take effect in future billing cycles. Refunds are not provided for charges that have already been processed.
You can make adjustments to the number of phone number licenses in your subscription at any time. For information on managing phone numbers, please see our [**Managing Phone Numbers**](https://help.oncehub.com/billing/managing-phone-numbers/) article.
***
## Switching Between Annual and Monthly Subscriptions
[Section titled “Switching Between Annual and Monthly Subscriptions”](#switching-between-annual-and-monthly-subscriptions)
You can switch between annual and monthly subscriptions at any time by navigating to the Subscription section under Billing.
### Here are a few important details to keep in mind
[Section titled “Here are a few important details to keep in mind”](#here-are-a-few-important-details-to-keep-in-mind)
* **Timing of Changes:** The switch will take effect on your next renewal date, not immediately upon making the change.
* **Discount for Annual Plans:** Annual subscriptions offer a 10% discount compared to monthly plans, providing cost savings if you choose this option.
Consider your needs and budget before making the change to ensure the plan best suits you.
***
## Effects of Changing Your Subscription
[Section titled “Effects of Changing Your Subscription”](#effects-of-changing-your-subscription)
Here’s what happens when you make changes to your subscription:
1. ### Billing Adjustment
[Section titled “Billing Adjustment”](#billing-adjustment)
* If you upgrade or add seats during a billing cycle, prorated adjustments will apply.
* Downgrading a plan or reducing seats takes effect in the following billing cycle.
2. ### Feature Availability
[Section titled “Feature Availability”](#feature-availability)
* Upgrading grants instant access to additional features.
* Downgrading means features only available in the higher-tier plan will be disabled at the end of your current billing period.
3. ### Payment Timing
[Section titled “Payment Timing”](#payment-timing)
* If you’re on an annual plan, you’ll be immediately charged for any upgrades made mid-cycle. Monthly subscribers will see such charges reflected in their next bill.
***
If you have any questions, please feel free to [**reach out to us**](https://help.oncehub.com/contact-us/).
# SMS Credits in OnceHub
> In this article, you’ll learn everything about SMS credits, including how they work, the pricing structure, and step-by-step instructions to purchase them.
In this article, you’ll learn everything about SMS credits, including how they work, the pricing structure, and step-by-step instructions to purchase them.
***
## What Are SMS Credits?
[Section titled “What Are SMS Credits?”](#what-are-sms-credits)
SMS credits allow you to send text-message notifications (e.g., booking reminders) to users and guests. Here’s what you need to know:
* **Initial Credits:** Each account starts out with 25 free credits that can be used at any time.
* **Standard SMS Definition:** One credit is deducted per SMS message, defined as a message containing 160 characters or fewer.
* **Global Pricing:** The cost per SMS is the same worldwide. No additional charges or credits are deducted based on the recipient’s location.
***
## Pricing for SMS Credits
[Section titled “Pricing for SMS Credits”](#pricing-for-sms-credits)
SMS credits are available in flexible packages to suit your needs. Below is the pricing breakdown:
| **SMS Credits** | **Cost (USD)** | **Cost Per Credit (USD)** |
| --------------- | -------------- | ------------------------- |
| 100 | $15.00 | $0.15 |
| 200 | $25.00 | $0.125 |
| 500 | $50.00 | $0.10 |
| 1,000 | $90.00 | $0.09 |
| 2,000 or more | TBD | $0.08 |
***
## How to Purchase SMS Credits
[Section titled “How to Purchase SMS Credits”](#how-to-purchase-sms-credits)
[SMS Credits in OnceHub](https://www.youtube-nocookie.com/embed/fvbakKovync?wmode=opaque)
Follow these steps to buy SMS credits for sending booking notifications via text messages:
1. ### Access Billing Settings
[Section titled “Access Billing Settings”](#access-billing-settings)
* Click the gear icon located in the top-right corner of your account dashboard.
* Select **Billing** from the dropdown menu.
2. ### Initiate the Purchase
[Section titled “Initiate the Purchase”](#initiate-the-purchase)
* Click on **Add credits** to start the purchasing process.
3. ### Choose Credit Amount
[Section titled “Choose Credit Amount”](#choose-credit-amount)
* From the dropdown menu, select the number of SMS credits you would like to purchase.
4. ### Confirm and Pay
[Section titled “Confirm and Pay”](#confirm-and-pay)
* Click **Proceed to payment**.
* You will be directed to the payment confirmation screen to complete the transaction.
# SMS Delivery: Statuses, Troubleshooting, and Regional Guidelines
> All SMS notifications sent through your OnceHub account are recorded in your SMS logs. Use this article to help you understand delivery statuses, resolve com...
All SMS notifications sent through your OnceHub account are recorded in your [**SMS logs**](https://help.oncehub.com/billing/accessing-and-exporting-your-centralized-sms-logs/ "Accessing and Exporting Your Centralized SMS Logs"). Use this article to help you understand delivery statuses, resolve common delivery failures, identify sender information and ensure compliance with regional carrier requirements.
***
## Understanding SMS Delivery Status Definitions
[Section titled “Understanding SMS Delivery Status Definitions”](#understanding-sms-delivery-status-definitions)
Your SMS logs display one of the following statuses for every message sent:
* **Delivered:** The message has reached the recipient’s device.
* **Sent:** The message was sent but a delivery receipt is pending. This is usually a temporary status while the message is in transit.
* **Rejected:** The message was not sent because the phone number was identified as invalid.
* **Failed:** The message was sent but could not be delivered to the recipient.
## Troubleshooting Delivery Failures
[Section titled “Troubleshooting Delivery Failures”](#troubleshooting-delivery-failures)
When an SMS fails, OnceHub provides a specific error message to help you identify the cause.
| **Error Message** | **Meaning** | **Recommended Resolution** |
| ---------------------------------------- | ----------------------------------------------------------------------- | --------------------------------------------------------------------------------------------------------------------------------------------------------------------------------------------------------------------------------------------------------------------------------------------------------------------------------------------- |
| **Illegal Number** | Invalid phone format. | Verify the recipient’s number and country code. |
| **Absent Subscriber** | The number is disconnected/ inactive. | Confirm the mobile number with your customer. |
| **Call Barred by User** | Recipient blocked incoming SMS. | Recipients must contact their carrier to unblock. |
| **Portability Error** | The number recently moved between carriers. | Database sync issue; usually resolves within 24–48 hours. |
| **Anti-Spam Rejection/ Invalid Message** | Carrier rejected the message because of the message content / sender ID | 1. Ensure the message doesn’t contain high-risk keywords (e.g., “loan”, “debt”). 2. See [**How to Manage Regional Limitations (Singapore & Turkey)**](https://help.oncehub.com/billing/sms-delivery-statuses-troubleshooting-and-regional-guidelines/#how-to-manage-regional-limitations-singapore--turkey) section below for specific rules. |
| **Handset Busy** | Device unable to receive (e.g., full inbox). | The system will automatically retry. If the error persists, manually try sending the message again later. |
| **Network Error** | Carrier network congestion or outage. | This is usually a temporary carrier issue. Wait a few minutes and manually resend the message. |
| **Unroutable** | Carrier cannot route to this number. | Check for regional limitations or verify the number. |
| **Destination Unreachable** | General routing failure. | Verify the recipient’s number is correct. If it is, attempt to resend the message after a short delay. |
| **Number Blocked by Carrier** | Carrier-level block on the device. | Recipients must contact their carrier to enable SMS. |
| **Subscriber Opt-Out** | The user has unsubscribed. | See [**How Guests can Opt-Out of SMS Notifications (US & Canada)**](https://help.oncehub.com/billing/sms-delivery-statuses-troubleshooting-and-regional-guidelines/#how-guests-can-opt-out-of-sms-notifications-us--canada) section below. |
| **Prepaid - Insufficient funds** | Prepaid plans cannot accept SMS. | The receiver must top up their balance or check their mobile plan. |
| **General Error** | Unknown carrier or internal error. | Wait for 15–30 minutes, then manually resend the notification from the SMS logs. If the error persists, [**Contact OnceHub Support**](https://help.oncehub.com/contact-us/) for technical investigation. |
***
## How to Identify OnceHub Sender Information
[Section titled “How to Identify OnceHub Sender Information”](#how-to-identify-oncehub-sender-information)
OnceHub uses consistent Sender IDs to ensure high deliverability. You can share these Sender IDs with your customers so they can whitelist them or save them as a contact to prevent messages from being flagged as spam.
* **United States:** 1-844-200-5585
* **Canada:** 1-204-272-8408
* **India:** Random Numeric Sender ID (e.g., 59039465)
* **Rest of World:** Appear with the Sender ID **OnceHub**
***
## How to Manage Regional Limitations (Singapore & Turkey)
[Section titled “How to Manage Regional Limitations (Singapore & Turkey)”](#how-to-manage-regional-limitations-singapore--turkey)
Carrier policies in certain regions may impact delivery even when a **Sent** status is displayed.
### Singapore
[Section titled “Singapore”](#singapore)
SMS deliverability is highly restricted by local authorities. Automated messages are frequently blocked at the carrier level. **Recommendation:** Because OnceHub does not differentiate notifications by region, you cannot enable email alerts for specific countries. If you have customers based in Singapore, we recommend **enabling Email Notifications** in your **Booking Calendars** to ensure they receive meeting details.
### Turkey
[Section titled “Turkey”](#turkey)
Turkish carriers strictly filter messages containing URLs, often leading to immediate delivery failure. **Requirement:** Because OnceHub does not differentiate notifications by region, you cannot apply specific SMS templates to different countries. If you have customers based in Turkey, you must ensure your **SMS templates are plain-text only** and do not include links (e.g., Cancel or Reschedule links) to avoid carrier blocks.
***
## How Guests can Opt-Out of SMS Notifications (US & Canada)
[Section titled “How Guests can Opt-Out of SMS Notifications (US & Canada)”](#how-guests-can-opt-out-of-sms-notifications-us--canada)
In compliance with carrier regulations, recipients in the US and Canada can unsubscribe from all OnceHub notifications at any time using some standard Keywords. To opt-out, recipients can reply to any SMS with: **STOP**, **END**, **QUIT**, **CANCEL**, **UNSUBSCRIBE**, **REVOKE**, or **OPT OUT**. These keywords are **not case-sensitive**.
Caution
Opting out adds the recipient to a blocklist, preventing them from receiving any further SMS alerts from your OnceHub account.
# Chatbots
> Chatbots documentation and guides.
[Configuring Your Chatbot](https://help.oncehub.com/chatbots/configuring-your-chatbot/)
# Configuring Your Chatbot
> Configuring Your Chatbot documentation and guides.
[Mapping Chatbot Questions to Object Properties](https://help.oncehub.com/chatbots/configuring-your-chatbot/mapping-chatbot-questions-to-object-properties/)
# Mapping Chatbot Questions to Object Properties
> Each Question in your Chatbot can be mapped to a Contact Property to save their responses within a OnceHub Contact, as well as use it to send the data to thi...
Each Question in your Chatbot can be mapped to a Contact Property to save their responses within a OnceHub Contact, as well as use it to send the data to third party integrations such as CRMs and Zapier.
For information on creating Contact Properties, please take a look at our [**Managing Object Properties**](https://help.oncehub.com/account-administration/objects-properties/managing-object-properties/) article.
***
## Mapping a Question to a Contact Property
[Section titled “Mapping a Question to a Contact Property”](#mapping-a-question-to-a-contact-property)
Each Chatbot allows you to configure which Questions will be saved into a Contact Property using the following steps:
1. Open the **Flow Builder Tab** of the Chatbot.
2. Select the **Question** you want to save to a Contact Property.
3. Select **In the conversation and as a contact field** under **Where do you want to save the answer to this question?** in the pane on the right.
4. Select the desired **Contact Field** from the dropdown.
5. Click on **Save**.
# Contact Management
> Contact Management documentation and guides.
[Introduction To Contacts In OnceHub](https://help.oncehub.com/contact-management/introduction-to-contacts-in-oncehub/)
[The Contacts Page](https://help.oncehub.com/contact-management/the-contacts-page/)
[Managing Contacts In OnceHub](https://help.oncehub.com/contact-management/managing-contacts-in-oncehub/)
[How to Manage and Customize Contact Statuses](https://help.oncehub.com/contact-management/how-to-manage-and-customize-contact-statuses/)
[How To Import And Export Contacts In OnceHub](https://help.oncehub.com/contact-management/how-to-import-contacts-into-oncehub/)
[The Contact Detail Page](https://help.oncehub.com/contact-management/the-contact-detail-page/)
[How Contacts Are Identified In OnceHub](https://help.oncehub.com/contact-management/how-contacts-are-identified-in-oncehub/)
[How OnceHub Handles Duplicate Contacts](https://help.oncehub.com/contact-management/how-oncehub-handles-duplicate-contacts/)
[Scheduling Without An Email: What You Need To Know](https://help.oncehub.com/contact-management/scheduling-without-an-email-what-you-need-to-know/)
# How Contacts Are Identified In OnceHub
> Learn how OnceHub automatically identifies contacts using email, mobile phone, and name to prevent duplicate records and maintain accurate guest data.
OnceHub automatically checks your contact records whenever a contact is created, updated or imported. This verification process occurs when information is submitted through Booking Calendars, Routing Forms, Chatbots, phone calls, bulk CSV imports, manual updates, or the OnceHub API. This process ensures your contact data stays accurate and prevents duplicate entries.
***
## How Contact Identification Works
[Section titled “How Contact Identification Works”](#how-contact-identification-works)
OnceHub identifies contacts by checking information in a specific order to match incoming activities to an existing Contact before creating a new one:
1. **Email address (Primary identifier):** If an email address is provided, it serves as the primary identifier. OnceHub searches for a matching email address across existing records. If a match is found, the incoming information or activity is automatically linked to that contact record.
2. **Mobile phone number (Secondary identifier):** If no email address is provided, OnceHub uses the guest’s mobile phone number to look for a matching record. This ensures that information identified by a mobile phone number is correctly associated with the same contact record.
3. **Name only (New contact creation):** If a guest provides only their name without an email address or mobile phone, OnceHub cannot identify them. In this case, a **new contact record** is created to prevent incorrect data merging.
***
## How Notifications Work with Contact Identification
[Section titled “How Notifications Work with Contact Identification”](#how-notifications-work-with-contact-identification)
OnceHub streamlines guest notifications by using existing contact information to maintain a reliable communication flow.
* **Email Notifications:** If email notifications are enabled for your guest, OnceHub automatically uses the email address stored in the contact record, even if the guest leaves the email field blank during a subsequent booking. This ensures they continue to receive booking confirmations and reminder notifications.
* **SMS Notifications:** Unlike email, SMS notifications require explicit guest consent. To remain compliant with communication regulations, OnceHub does not use previously stored consent to send SMS notifications. Guests must provide SMS consent for each scheduled meeting before OnceHub sends SMS notifications.
# How OnceHub Handles Duplicate Contacts
> Learn how OnceHub detects and merges duplicate contact records to maintain a single, accurate record for each guest.
If you update a guest’s email address or mobile phone number to one that is already associated with another contact record, OnceHub displays the **Merge Contacts** prompt. This allows you to merge duplicate contacts into a single record, helping maintain one complete record for each guest.
For an overview of how contacts are managed in OnceHub, see [**Managing Contacts in OnceHub**](https://help.oncehub.com/contact-management/managing-contacts-in-oncehub/) article.
***
## How Contacts are Identified
[Section titled “How Contacts are Identified”](#how-contacts-are-identified)
To prevent duplicate records, OnceHub automatically runs a matching process whenever an activity, import, or manual update occurs. OnceHub checks for matching record using the following sequence:
1. **Email address (Primary identifier):** OnceHub searches for a matching email address across existing records.
2. **Mobile phone number (Secondary identifier):** If no matching email address is found, OnceHub checks for a matching mobile phone number.
If a match is found, OnceHub flags the record as a duplicate, initiates the merge process, and updates the existing record with the incoming information.
For more details, see [**How Contacts Are Identified In OnceHub**](https://help.oncehub.com/contact-management/how-contacts-are-identified-in-oncehub/) article.
***
## Understanding the Merge Process
[Section titled “Understanding the Merge Process”](#understanding-the-merge-process)
When the **Merge Contacts** prompt appears, OnceHub combines information from both contact records using the following rules:
* **Add missing values:** If the new contact record contains a value for a field that is blank in the existing record, that value is added.
* **Update existing values:** If both contact records contain a value for the same field, the new value replaces the existing value after you confirm the merge.
* **Keep existing values:** Blank fields in the new contact record never overwrite existing values.
Note
Always review the merge details carefully in the Merge contacts prompt before confirming the action.
**Permission requirements:** You can only merge contact records only if you have permission to access both records. For more information, see [**User Roles and Their Permissions**](https://help.oncehub.com/account-administration/user-management/user-roles-and-their-permissions/) article.
# How To Import And Export Contacts In OnceHub
> Learn how to import and export contact records in OnceHub using CSV files, including step-by-step instructions for importing, viewing, and exporting contacts.
You can import and export contacts from/to a CSV file using the **Import / Export** dropdown on the **Contacts** page.
***
## How to Import Contacts
[Section titled “How to Import Contacts”](#how-to-import-contacts)
Follow the steps below to import up to **7,000 contact records** at a time using a standard CSV file.
### Step 1: Select the File to Import
[Section titled “Step 1: Select the File to Import”](#step-1-select-the-file-to-import)
1. Navigate to **Contacts** from the left navigation menu.
2. Click the **Import / Export** dropdown in the top right corner.
3. Select **Import CSV**.
4. Drag and drop your CSV file into the upload area, or click **Select CSV File** to browse for the file.
### Step 2: Map the CSV Column Headers to Contact Properties
[Section titled “Step 2: Map the CSV Column Headers to Contact Properties”](#step-2-map-the-csv-column-headers-to-contact-properties)
Once your CSV upload is complete, OnceHub automatically matches your **CSV columns** to **Contact Properties** based on the column headers. If a column is not matched properly, select the appropriate contact property from the dropdown or create a new contact property.
### Step 3: Start the Import
[Section titled “Step 3: Start the Import”](#step-3-start-the-import)
Click **Start Import** from the bottom right corner to begin importing your records.
Note
If a contact record already exists in OnceHub, the imported information updates the existing contact record instead of creating a duplicate record.
To learn more about how OnceHub recognizes duplicate contacts, see [**How Contacts Are Identified In OnceHub**](https://help.oncehub.com/contact-management/how-contacts-are-identified-in-oncehub/) article.
***
## How to View Imported Contacts
[Section titled “How to View Imported Contacts”](#how-to-view-imported-contacts)
After the import is complete, you can view the newly added contact records by following these steps:
1. Expand **Imports** in the left sidebar.
2. Select the specific import file you want to view.
***
## How to Export Contacts
[Section titled “How to Export Contacts”](#how-to-export-contacts)
You can export your contact records to a CSV file for backup, import them into a third-party application, or use the data for reporting and analysis. Follow these steps to export your records:
1. Navigate to **Contacts** from the left navigation menu.
2. Click the **Import / Export** dropdown in the top right corner.
3. Select **Export CSV**.
Your contact records will download automatically as a CSV file.
***
## How to Export a Filtered List
[Section titled “How to Export a Filtered List”](#how-to-export-a-filtered-list)
To export a specific filtered list of contact records, apply your filters on the **Contacts page** before clicking **Export CSV**.
Note
Your exported CSV file will only include the contact records matching your applied filters.
***
To learn how to manage contact properties, review past interactions, and view AI-generated insights, read [**The Contact Detail Page**](https://help.oncehub.com/contact-management/the-contact-detail-page/) article.
# How to Manage and Customize Contact Statuses
> Learn how to create, rename, reorder, recolor, and delete Contact Statuses in OnceHub to match your business lifecycle stages and integrate with CRM systems.
[How to Set Up Custom Contact Statuses in OnceHub](https://www.youtube-nocookie.com/embed/pGnAQUv8jCw?wmode=opaque)
**Contact Statuses** allow you to define key contact lifecycle stages such as *Prospect*, *Discovery*, *Onboarding*, or *Active Client* to match your business needs throughout the customer journey. By integrating Contact Statuses into your Routing Forms and Chatbots, you can automatically update lifecycle milestones and execute smart routing rules in real time.
If OnceHub is integrated with your CRM, align your Contact Statuses with your corresponding CRM values (such as **Salesforce Lead Status** or **HubSpot Lifecycle Stage**) to maintain accurate lifecycle tracking between OnceHub and your CRM.
***
## Accessing Contact Status Settings
[Section titled “Accessing Contact Status Settings”](#accessing-contact-status-settings)
Account Owners and Admins can access the **Edit Property** window for Contact Statuses in two ways:
* **From Account Settings**
1. Click the **gear icon** in the top right corner and select **Objects and Properties**.
2. Locate the **Contact** object row and click the **three dots menu** (…) on the right, and select **Edit Properties**.
3. In the Contact Properties list, locate **Status**, click the **three dots menu** (…) select **Edit**.
* **Directly from the Contacts Lobby**
1. Go to **Contacts** from the left navigation menu.
2. Click on the **Status** column for any contact in the table (or *Select a value* if unassigned).
3. Select **Edit** at the bottom of the dropdown menu to configure status settings.
**Note on Permissions:** Only Account Owners and Admins can create, edit, rename, reorder, recolor, or delete property options. Team Managers and Members can view, assign, and filter statuses within their assigned team or owned contact scope.
***
## How Status Updates Push to Integrated CRMs
[Section titled “How Status Updates Push to Integrated CRMs”](#how-status-updates-push-to-integrated-crms)
Understanding how status changes flow from OnceHub to your CRM helps prevent data mismatches across your workflows:
* **OnceHub Platform & API Updates:** Creating, renaming, reordering, recoloring, or deleting statuses update immediately within OnceHub filter dropdowns, historical records, and the Public API.
* **Downstream CRM Push Rules:** Renaming, reordering, or deleting status labels does not automatically push updates or trigger webhooks to your downstream CRMs (e.g., Salesforce or HubSpot).
* **Triggering a Downstream CRM Update:** An updated Contact Status is only pushed downstream to your CRM when direct activity occurs on an individual contact record, such as:
* Manual edits to an individual contact record within OnceHub
* Chatbot or Routing Form submissions
* Booking Calendar activity (e.g., a scheduled meeting)
***
## Managing Contact Statuses
[Section titled “Managing Contact Statuses”](#managing-contact-statuses)
You can create, rename, reorder, recolor and delete Contact Statuses to match your organization’s lifecycle phases.
### Creating a Status
[Section titled “Creating a Status”](#creating-a-status)
1. Open the **Edit Property** window for the **Status** field.
2. In the **Define Values** section, click **+ New option**.
3. Type your custom label in the **Status Value** text box. A default color is automatically assigned.
4. Click **Save**.
### Renaming a Status
[Section titled “Renaming a Status”](#renaming-a-status)
1. Open the **Edit Property** window.
2. Under **Define Values**, click directly inside any **Status Value** text box.
3. Type the new label for your status.
4. Click **Save**.
**Impact of Renaming a Status:** Renaming a Contact Status instantly updates historical records, filter views, and the Public API within OnceHub. However, it does not update existing records in your CRM until a new activity occurs on that contact and matching picklist values exist in your CRM.
### Reordering Statuses
[Section titled “Reordering Statuses”](#reordering-statuses)
1. Open the **Edit Property** window for the **Status** field.
2. Under **Define Values**, click and hold the **drag handle icon** next to the status value you want to move.
3. Drag the status up or down to your preferred position.
4. Click **Save**.
**Impact of Reordering:** Reordering Contact Statuses updates the display sequence across filter dropdowns, Routing Forms, Chatbots, and manual selection menus in OnceHub. It has no effect on CRM integrations and does not trigger downstream events.
### Recoloring Statuses
[Section titled “Recoloring Statuses”](#recoloring-statuses)
1. Open the **Edit Property** window for the **Status** field.
2. Under **Define Values**, hover over or click the color swatch under the **Color** column next to the status value.
3. Select a new shade from the 14 available color options.
4. Click **Save**.
### Deleting a Status
[Section titled “Deleting a Status”](#deleting-a-status)
Before removing a Contact Status, verify how many active records or workflows are using it.
1. In the **Edit Property** window, locate the status you want to remove.
2. Click the link in the **Used By** column (for example, *2 contacts*) to view and reassign affected contacts in a new tab.
3. Click the **x icon** on the right side of the status row.
4. Click **Save**.
**Deletion Rules and Impact of Deleting a Status**
**Minimum Requirement:** Your account must maintain at least **two active status values**. You cannot delete a status if only two values remain.
**Impact on Contacts:** Any contacts currently assigned to the deleted status will have their Status field reset to blank.
**Impact on Routing Forms & Chatbots:** The deleted Contact Status is immediately removed from any active routing conditions in Routing Forms and Chatbots. Affected rules will revert to blank, and the flow will fall back to the next logical step or rule.
**Impact on CRMs:** Deleting a status updates OnceHub, but it does not send updates to your CRM or remove status values from external CRM records.
# Introduction To Contacts In OnceHub
> Learn what contacts are in OnceHub, why they matter, and what information is stored in a contact record for guest management and engagement.
Contacts are at the **core** of how OnceHub manages guest data. The **Contacts page** provides a centralized view of all your guest information. Easily accessible from the left navigation menu, it displays your **contact records** in a tabular view, allowing you to view, [**edit**](https://help.oncehub.com/contact-management/managing-contacts-in-oncehub/#how-to-edit-a-contact), filter, [**import**](https://help.oncehub.com/contact-management/how-to-import-contacts-into-oncehub/), [**export**](https://help.oncehub.com/contact-management/how-to-import-contacts-into-oncehub/#how-to-export-contacts), and bulk [**delete**](https://help.oncehub.com/contact-management/managing-contacts-in-oncehub/#how-to-delete-contacts) records all from one central location.
***
## What is a Contact?
[Section titled “What is a Contact?”](#what-is-a-contact)
A **Contact** represents a single, unified view of your guest. It brings together information captured across Booking Calendars, Routing Forms, Chatbots, and phone calls into a single record.
***
## Why Contacts Matter
[Section titled “Why Contacts Matter”](#why-contacts-matter)
A contact record gives your team a complete view of the information collected about a guest, along with their interaction history and upcoming meetings. This helps your team understand the guest’s history and any contextual information needed for the next interaction.
Having a contact record eliminates repetitive data collection and improves the guest experience when interacting with:
* **Phone Agents:** Phone Agents can instantly identify returning callers and schedule meetings without repeatedly collecting known information.
* **Routing Forms:** Routing Forms can recognize existing guests and use their stored information during qualification to route guests to the appropriate team member.
* **Chatbots:** Chatbots can recognize returning guests and reuse available contact information when supported by the guest’s browser and session.
***
## What Information is Stored in a Contact
[Section titled “What Information is Stored in a Contact”](#what-information-is-stored-in-a-contact)
Each contact record stores information collected about your guest including:
* **Contact details:** All information captured through [**mapped Contact Properties**](https://help.oncehub.com/account-administration/objects-properties/introduction-to-objects-and-properties/) in Booking Calendars, Routing Forms and Chatbots.
* **Contact status:** The contact’s current qualification or engagement status based on their interactions within OnceHub.
* **Recent activity:** A chronological timeline of every interaction the guest has had with your account.
If the [**AI Contact Summary**](https://help.oncehub.com/account-administration/account-permissions/managing-account-permissions/#ai-contact-summary) is enabled for your account, contact records also provide AI-generated insights to help you quickly understand recent guest interactions and identify recommended next steps.
***
To learn how to navigate to the Contacts page, read **[The Contacts Page](https://help.oncehub.com/contact-management/the-contacts-page/)** article.
# Managing Contacts In OnceHub
> Learn how contacts are created, updated, and deleted in OnceHub, and how duplicate handling and related meetings, notifications, calendar events, and integrations are affected.
This article explains how contacts are created, updated, and deleted across OnceHub. It also covers how OnceHub handles duplicate records and how these changes affect your meetings, notifications, calendar events, and integrations.
***
## How Contacts Are Created
[Section titled “How Contacts Are Created”](#how-contacts-are-created)
Contacts in OnceHub cannot be created manually one by one. Instead, new contacts are created using one of the following methods:
* **Automatic creation:** OnceHub automatically creates a new contact when a customer schedules a meeting, interacts with a Chatbot, or submits a Routing Form.
* **Bulk import:** You can import contacts in bulk by importing a CSV file using the [**Import CSV**](https://help.oncehub.com/contact-management/how-to-import-contacts-into-oncehub/#how-to-import-contacts) option from the Contacts page.
* **Via the OnceHub API:** Contact records can be created programmatically via the [**OnceHub API**](https://help.oncehub.com/developers/api/#tag/contacts/POST/contacts).
### How OnceHub Prevents Duplicate Contacts During Creation
[Section titled “How OnceHub Prevents Duplicate Contacts During Creation”](#how-oncehub-prevents-duplicate-contacts-during-creation)
To prevent duplicate records, OnceHub automatically runs a matching process before creating a new contact record from an activity or an import.
1. OnceHub checks for an existing contact record using their **email address** (primary identifier) or **mobile phone number** (secondary identifier).
2. **If a match is found:** OnceHub automatically links the new activity to the existing contact record and updates it with the incoming information.
3. **If no match is found:** OnceHub treats this as a first-time interaction and creates a new contact record.
To learn how OnceHub identifies existing contacts, see [**How Contacts Are Identified In OnceHub**](https://help.oncehub.com/contact-management/how-contacts-are-identified-in-oncehub/) article.
***
## How to Edit a Contact
[Section titled “How to Edit a Contact”](#how-to-edit-a-contact)
You can update an existing contact record using any of the following methods:
* **From the Contacts page:** Select any editable field, update the value, and press **Enter** to save.
* **From the Contact Detail page:** Select a contact to open its specific detailed page, update the necessary fields in the **Contact Details** pane on the left, and press **Enter** to save.
* **From the Activities:** Select an activity to open the **Contact Details** pane on the right, update the necessary fields, and press **Enter** to save.
* **From the Scheduled Meetings page:** Select a scheduled meeting to open the **Contact Details** pane on the right, update the necessary fields, and press **Enter** to save.
* **From the Live Engagements page:** Select an active chat or historical interaction to open the **Contact Details** pane on the right, update the necessary fields, and press **Enter** to save.
* **Via the OnceHub API:** Update contact records programmatically via the [**OnceHub API**](https://help.oncehub.com/developers/api/#tag/contacts/PATCH/contacts/%7Bid%7D).
***
## Impact of Editing a Contact
[Section titled “Impact of Editing a Contact”](#impact-of-editing-a-contact)
Updating a contact ensures scheduled meetings, notifications, calendar events, and supported integrations use the latest contact information.
* **Notifications:** All upcoming meeting notifications are sent to the updated email address or mobile phone number of the guest.
* **CRM Integrations:** If you have connected a CRM integration, such as HubSpot or Salesforce, OnceHub automatically syncs your updates to the matching CRM record. This keeps your information consistent across platforms. To learn how OnceHub identifies matching CRM contacts, see the **Contact Identification Logic** for [**HubSpot**](https://help.oncehub.com/account-integrations/crm/integrating-oncehub-with-hubspot/) and [**Salesforce**](https://help.oncehub.com/account-integrations/crm/integrating-oncehub-with-salesforce/).
* **Calendar Events:** For future meetings synchronized with Google Calendar or Microsoft Exchange, OnceHub updates the existing calendar event with the latest contact information.
Note
Calendar events on other calendar platforms are not updated automatically to prevent duplicate or unnecessary notifications.
To prevent data fragmentation, OnceHub automatically identifies duplicate contact records during updates or new activities.
To learn how contact records get merged, see [**How OnceHub Handles Duplicate Contacts**](https://help.oncehub.com/contact-management/how-oncehub-handles-duplicate-contacts/) article.
***
## How to Delete Contacts
[Section titled “How to Delete Contacts”](#how-to-delete-contacts)
You can permanently remove contact records from the **Contacts page** or programmatically via the [**OnceHub API**](https://help.oncehub.com/developers/api/#tag/contacts/DELETE/contacts/%7Bid%7D).
1. Select the checkbox next to one or more contact records on the **Contacts** page.
2. Click **Delete**, which will appear at the bottom of the screen after selecting your contact record(s).
3. Review the summary details inside the pop-up, then click **Delete contact** to confirm.
Note
You can delete up to **500 contact records** in a single action.
***
## Impact of Deleting Contacts
[Section titled “Impact of Deleting Contacts”](#impact-of-deleting-contacts)
Deleting a contact record removes it from OnceHub and affects related meetings and integrations as follows:
* **Contact record:** The contact record is permanently removed.
* **Activities:** All past and future activities, including meetings and chats, are retained in your account for reporting.
Note
Individual activities or chats can be deleted separately from the Activities page. For more details, see the [**Managing Guest Activities**](https://help.oncehub.com/activities-analytics/activity-management/managing-guest-activities/) article.
* **Meeting reminders:** Scheduled reminders for existing meetings continue to be sent.
* **CRM integration:** Deleting a contact record in OnceHub does not delete the corresponding contact from your connected CRM.
# Scheduling Without An Email: What You Need To Know
> While OnceHub allows you to set email collection as not required or remove the email question entirely, this is generally not recommended.
While OnceHub allows you to set email collection as **not required** or remove the email question entirely, **this is generally not recommended.** This configuration is specifically designed for **Phone Booking** or high-volume **D2C retail** use cases where the friction of providing an email address may cause high drop-off rates.
Before setting email collection to **not mandatory**, it is essential to understand the consequences this has on your scheduling workflow and guest notifications.
***
## Consequences of Not Collecting an Email
[Section titled “Consequences of Not Collecting an Email”](#consequences-of-not-collecting-an-email)
When an email address is not collected, the standard automated booking process is significantly affected, resulting in the following impacts:
* **Loss of Automated Calendar Invites:** Without an associated email address, OnceHub cannot send calendar invitations (.ics files). Guests will not receive a calendar event and must manually add the meeting to their digital calendar, significantly increasing the risk of no-shows.
* **No Email Notifications or Reminders:** All email-based confirmations, reminders, and follow-ups will not be delivered to your guest.
* **Dependency on SMS for Notifications:** To maintain a reliable communication bridge when email collection is not mandatory, ensure that your SMS notifications are fully optimized to handle all guest interactions.This requires:
* Setting the **Phone** field as mandatory on your **Booking Form**.
* Maintaining a [**sufficient SMS credit balance**](https://help.oncehub.com/billing/sms-credits-in-oncehub/) to prevent delivery failure of automated messages.
* Configuring SMS notifications to include all necessary meeting details.
Note
**NOTE for iPhone Users:** iOS devices can often detect meeting dates and times from SMS texts, allowing guests to add events directly to their calendar from the text message.
# The Contact Detail Page
> Learn how to use the Contact Detail page in OnceHub to view guest information, activity history, and AI-generated summaries.
The **Contact page** provides a complete view of a guest’s information, full activity history, and AI-generated summaries. This detailed page helps you quickly review past engagements, analyze customer intent, and effectively prepare for future meetings.
To open a **Contact page**:
1. Select **Contacts** from the left navigation menu.
2. Click the specific contact’s name.
This page contains three functional panes:
* **Contact Details pane (left):** View and update contact details, and manage the visibility of contact properties.
* **Activities pane (center):** Review a chronological timeline of all past activities and future scheduled meetings.
* **AI Contact Summary pane (right):** Access automated, AI-generated insights and recommended next steps.
Tip
Every contact in OnceHub has a unique Contact page URL. You can copy this URL from your browser address bar and save it in your CRM’s contact record for quick access to the corresponding **Contact page** in OnceHub.
***
## The Contact Details Pane
[Section titled “The Contact Details Pane”](#the-contact-details-pane)
The Contact Details pane displays the contact’s information, from here you can:
* **Manage displayed properties:** Click the **Manage Properties** (sliders) icon on the right side of the **Contact Details** pane to select which properties are displayed.
* **Edit contact properties:** Update information directly inside the visible fields. Your changes are saved automatically as soon as you update a value.
***
## The Activities Pane
[Section titled “The Activities Pane”](#the-activities-pane)
The **Activities pane** provides a complete timeline of the contact’s interaction history to help you review previous engagements. It includes:
* **Upcoming Meetings:** Displays all upcoming scheduled meetings, including the meeting subject, host, date and time, attendees, and virtual meeting links.
* **Past Activities:** Displays the previous interactions, including meetings, Chatbot conversations, Routing Form submissions, and phone calls.
***
## The AI Contact Summary Pane
[Section titled “The AI Contact Summary Pane”](#the-ai-contact-summary-pane)
The **AI Contact Summary pane** uses the contact’s information and activity history to generate insights that help you quickly understand the contact’s intent and prepare for your next interaction. It includes:
* **Contact Overview:** A summary of the guest and their intent.
* **Upcoming Meeting:** A summary of the next scheduled meeting.
* **Key Interests:** Topics the guest has shown interest in based on their interactions through Booking Calendars, Routing Forms, Chatbots, and phone calls.
* **Recommended Actions:** Suggested immediate and follow-up actions based on the recent activities.
The AI Contact Summary displays the exact date and time it was last generated. If new interactions occur, click the **Refresh** icon to generate an updated summary.
Note
Account Owners can enable the **AI Contact Summary** feature from the [**Account Permissions**](https://help.oncehub.com/account-administration/account-permissions/managing-account-permissions/#ai-contact-summary) page.
# The Contacts Page
> Learn how to navigate and use the Contacts page in OnceHub to view, edit, filter, import, export, and delete contact records from one central location.
The **Contacts page** is the centralized repository for your contact records. It displays your contact records in a tabular view, allowing you to view, [**edit**](https://help.oncehub.com/contact-management/managing-contacts-in-oncehub/#how-to-edit-a-contact), filter, import, export, and [**delete**](https://help.oncehub.com/contact-management/managing-contacts-in-oncehub/#how-to-delete-contacts) records from a single location.
To access the **Contacts page**, log in to your OnceHub account and select **Contacts** from the left navigation menu.
***
## Key Features
[Section titled “Key Features”](#key-features)
* **Inline Grid Editing:** [**Edit contact properties**](https://help.oncehub.com/contact-management/managing-contacts-in-oncehub/#how-to-edit-a-contact) directly from the table without opening individual contact records.
* **Filter and Save Contact Lists:** Filter contacts using any contact property and save the results as dynamic Contact lists for quick access. For example, if you save a Contact list for records with a status of Sales qualified, the list updates automatically whenever you update the status.
* **Quick Navigation:** Use the left navigation panel to switch between All Contacts, saved Contact lists, and your imported records under Imports.
* [**Bulk Import & Export**](https://help.oncehub.com/contact-management/how-to-import-contacts-into-oncehub/): Import and export multiple contacts using the Import / Export dropdown at the top right of the page.
* [**Bulk Delete**](https://help.oncehub.com/contact-management/managing-contacts-in-oncehub/#how-to-delete-contacts): Select multiple contacts to delete them in a single action.
***
## Customize the Grid View
[Section titled “Customize the Grid View”](#customize-the-grid-view)
Click the Customize columns icon next to the Import / Export dropdown to personalize your tabular view. From here, you can:
* Show or hide columns
* Reorder visible columns
* Add a new property to the table on the fly
***
To learn more about managing contacts, see [**Managing Contacts in OnceHub**](https://help.oncehub.com/contact-management/managing-contacts-in-oncehub/).
# Contact Us
> Get in touch with the OnceHub support team.
## How can we help?
[Section titled “How can we help?”](#how-can-we-help)
Our team is available 24/7 to provide quick answers and hands-on troubleshooting.
**Before you reach out:** Check our [**Status Page**](https://status.oncehub.com/) for real-time updates on system performance and service availability.
## Support Channels
[Section titled “Support Channels”](#support-channels)
* [**Live Chat**](https://www.oncehub.com/live-chat-support): Connect instantly with a support agent.
* [**Schedule a Meeting**](https://oncehub.com/schedulesupport): Book a time that fits your schedule.
* [**Log a Ticket**](https://service.support.oncehub.com/servicedesk/customer/portal/7/group/10/create/170): Submit a formal request through our support portal.
* **Email Support:** Contact us anytime at .
# Developers
> OnceHub developer documentation including API reference, webhooks, client-side API, MCP server, and integration recipes.
Welcome to the OnceHub developer docs. Browse the sections below to get started with building on OnceHub.
[FAQs](https://help.oncehub.com/developers/faq/)
[Client Side API](https://help.oncehub.com/developers/client-side-api/)
[MCP Server](https://help.oncehub.com/developers/mcp-server/)
[Overview](https://help.oncehub.com/developers/overview/)
[Recipes](https://help.oncehub.com/developers/recipes/)
[Webhooks](https://help.oncehub.com/developers/webhooks/)
# Client Side API
> Client Side API documentation and guides.
[Embed events](https://help.oncehub.com/developers/client-side-api/embed-events/)
[Embedded booking events](https://help.oncehub.com/developers/client-side-api/embedded-booking-calendar-events/)
[Embedded chatbot events](https://help.oncehub.com/developers/client-side-api/embedded-chatbot-events/)
[Embedded form events](https://help.oncehub.com/developers/client-side-api/embedded-form-events/)
[Introduction to Client-Side API](https://help.oncehub.com/developers/client-side-api/introduction/)
# Embed events
> Subscribe to client-side JavaScript events from embedded OnceHub booking calendars and chatbot widgets to track user interactions.
Integrate OnceHub more deeply with your website by subscribing to client-side events from the embedded booking calendar or chatbot widget using JavaScript. These events function much like standard DOM events, notifying your code about important occurrences within the widget.
```javascript
function oncehubEvent(e) {
return (
e.origin === "https://oncehub.com" &&
e.data.type &&
e.data.type.indexOf("oncehub.") === 0
);
}
window.addEventListener("message", function (e) {
if (oncehubEvent(e)) {
/* Get the event name */
console.log("Event name:", e.data.type);
/* Get the event payload */
console.log("Event details:", e.data.payload);
// Add your custom code to handle the event payload
}
});
```
Note
The `oncehubEvent` function in the example verifies two things:
1. The event originates from .
2. The event data includes a type field starting with `oncehub`.
This filtering ensures you only process events specifically sent by OnceHub, preventing conflicts with other message events on your page.
All client-side events dispatched by OnceHub consistently use the `oncehub.` prefix, making this check effective. Verifying the origin is also recommended for security and robustness.
# Embedded booking events
> Track embedded booking calendar events including calendar loaded, time slot selection, and booking completion with detailed payload data.
Subscribe to events from embedded booking calendars to track visitor interactions and booking completions.
## List of supported events
[Section titled “List of supported events”](#list-of-supported-events)
| Event name | Fires when |
| --------------------------------------------- | ------------------------------------------------------------------------------------------- |
| `oncehub.booking_calendar.loaded` | Booking calendar is first loaded, on page load. |
| `oncehub.booking_calendar.time_slot_selected` | Visitor selects a time slot and confirms it. |
| `oncehub.booking.scheduled` | Visitor successfully completes the final step of the booking, and the meeting is scheduled. |
## Events payloads
[Section titled “Events payloads”](#events-payloads)
### `oncehub.booking_calendar.loaded`
[Section titled “oncehub.booking\_calendar.loaded”](#oncehubbooking_calendarloaded)
Payload example:
```json
{
"type": "oncehub.booking_calendar.loaded",
"payload": {
"id": "BKC-8DJNDNL86G",
"subject": "Introductory Sales Call",
"host": "USR-FN1DQZ5UTP",
"url": "https://oncehub.com/PAGE-DFFBCE6467",
"name": "Introductory Call With Sales",
"duration_minutes": 30
}
}
```
### `oncehub.booking_calendar.time_slot_selected`
[Section titled “oncehub.booking\_calendar.time\_slot\_selected”](#oncehubbooking_calendartime_slot_selected)
Payload example:
```json
{
"type": "oncehub.booking_calendar.time_slot_selected",
"payload": {
"id": "BKC-8DJNDNL86G",
"subject": "Introductory Sales Call",
"host": "USR-FN1DQZ5UTP",
"url": "https://oncehub.com/PAGE-DFFBCE6467",
"name": "Introductory Call With Sales",
"duration_minutes": 30,
"starting_time": "2026-06-15T14:45:00.000Z",
"customer_timezone": "America/New_York"
}
}
```
### `oncehub.booking.scheduled`
[Section titled “oncehub.booking.scheduled”](#oncehubbookingscheduled)
Payload example:
```json
{
"type": "oncehub.booking.scheduled",
"payload": {
"id": "BKNG-YZ7MEBLJFRV8",
"subject": "Introductory Sales Call",
"status": "scheduled",
"creation_time": "2026-06-18T10:17:50.141Z",
"starting_time": "2026-06-18T13:00:00.000Z",
"customer_timezone": "America/New_York",
"host": "USR-8YB4TL0VW9",
"duration_minutes": 30,
"location_description": "",
"attendees": [
"henryhostmeeting@gmail.com",
"donaldmembermeeting@hotmail.com",
"markmembermeeting@outlook.com"
],
"booking_calendar": "BKC-8DJNDNL86G",
"cancel_url": "https://oncehub.com/m/BKNG-YZ7MEBLJFRV8/cancel",
"reschedule_url": "https://oncehub.com/m/BKNG-YZ7MEBLJFRV8",
"utm_campaign": "",
"utm_content": "",
"utm_medium": "",
"utm_source": "",
"utm_term": "",
"ics_url": "https://oncehub.com/api/bookings/ics/e193123e-3ca9-4cad-bd4d-5ed4f75c2550-ljfrv8",
"custom_fields": [
{
"name": "name",
"value": "Mark"
},
{
"name": "email",
"value": "mark@outlook.com"
}
]
}
}
```
# Embedded chatbot events
> Listen to real-time events from embedded OnceHub chatbot widgets including loaded, opened, started, closed, and button click events.
## List of supported events
[Section titled “List of supported events”](#list-of-supported-events)
| Event name | Fires when |
| -------------------------------- | ------------------------------------------------------------------------------ |
| `oncehub.chatbot.loaded` | Chatbot widget is first loaded, on page load. |
| `oncehub.chatbot.opened` | Visitor clicks anywhere to interact with the chatbot. |
| `oncehub.chatbot.started` | Visitor starts interacting with the chatbot. |
| `oncehub.chatbot.closed` | Visitor closes the chatbot widget. |
| `oncehub.chatbot.button_clicked` | Visitor submits an answer in the chatbot (by clicking send or pressing enter). |
## Events payloads
[Section titled “Events payloads”](#events-payloads)
### `oncehub.chatbot.loaded`
[Section titled “oncehub.chatbot.loaded”](#oncehubchatbotloaded)
Payload example:
```json
{
"type": "oncehub.chatbot.loaded",
"payload": {
"bot_id": "BOT-1234",
"bot_name": "example bot"
}
}
```
### `oncehub.chatbot.opened`
[Section titled “oncehub.chatbot.opened”](#oncehubchatbotopened)
Payload example:
```json
{
"type": "oncehub.chatbot.opened",
"payload": {
"bot_id": "BOT-1234",
"bot_name": "example bot"
}
}
```
### `oncehub.chatbot.started`
[Section titled “oncehub.chatbot.started”](#oncehubchatbotstarted)
Payload example:
```json
{
"type": "oncehub.chatbot.started",
"payload": {
"bot_id": "BOT-1234",
"bot_name": "example bot"
}
}
```
### `oncehub.chatbot.closed`
[Section titled “oncehub.chatbot.closed”](#oncehubchatbotclosed)
Payload example:
```json
{
"type": "oncehub.chatbot.closed",
"payload": {
"bot_id": "BOT-1234",
"bot_name": "example bot"
}
}
```
### `oncehub.chatbot.button_clicked`
[Section titled “oncehub.chatbot.button\_clicked”](#oncehubchatbotbutton_clicked)
Payload example:
```json
{
"type": "oncehub.chatbot.button_clicked",
"payload": {
"bot_id": "BOT-1234",
"bot_name": "example bot",
"button_text": "confirm",
"interaction_label": "single_choice",
"question_text": "Sales Team Calendar",
"answer": "100-500"
}
}
```
Note
This event triggers whenever a visitor submits an answer in the chatbot (e.g., selecting an option, typing a response, or confirming), but does not trigger for AI-generated responses or live chat sessions with human agents.
# Embedded form events
> Track user interactions with embedded OnceHub forms through events including loaded, started, button clicked, and completed events.
## List of supported events
[Section titled “List of supported events”](#list-of-supported-events)
| Event name | Fires when |
| ----------------------------- | -------------------------------------------------------------- |
| `oncehub.form.loaded` | Form is first loaded. |
| `oncehub.form.started` | Visitor starts interacting with the form. |
| `oncehub.form.button_clicked` | Visitor clicks on a button during the form submission process. |
| `oncehub.form.completed` | Visitor successfully completes the form. |
## Events payloads
[Section titled “Events payloads”](#events-payloads)
### `oncehub.form.loaded`
[Section titled “oncehub.form.loaded”](#oncehubformloaded)
This event fires when the form is first loaded, before the user has interacted with it.
Payload example:
```json
{
"type": "oncehub.form.loaded",
"payload": {
"form_id": "BOT-1033739F74",
"form_name": "Example Form"
}
}
```
### `oncehub.form.started`
[Section titled “oncehub.form.started”](#oncehubformstarted)
This event fires when the visitor begins interacting with the form. This trigger varies based on the form’s welcome message setting:
* **Title only:** The event fires when the visitor answers the first question.
* **Welcome message card:** The event fires when the visitor clicks the “Get Started” button.
Payload example:
```json
{
"type": "oncehub.form.started",
"payload": {
"form_id": "BOT-1033739F74",
"form_name": "Example Form"
}
}
```
### `oncehub.form.button_clicked`
[Section titled “oncehub.form.button\_clicked”](#oncehubformbutton_clicked)
This event fires whenever a visitor clicks a button within an interaction. The payload will include standard fields and may also contain custom fields if they have been mapped to the form question.
Payload example:
```json
{
"type": "oncehub.form.button_clicked",
"payload": {
"form_id": "BOT-1033739F74",
"form_name": "Example Form",
"button_text": "Next",
"interaction_label": "single_choice",
"question_text": "Sales Team Calendar",
"company_size": "100-500"
}
}
```
### `oncehub.form.completed`
[Section titled “oncehub.form.completed”](#oncehubformcompleted)
This event is triggered only when the form is successfully completed by the visitor.
Payload example:
```json
{
"type": "oncehub.form.completed",
"payload": {
"form_id": "BOT-1033739F74",
"form_name": "Example Form"
}
}
```
# Introduction to Client-Side API
> Build direct integrations using booking confirmation data via URL parameters and JavaScript for Booking Pages and Booking Calendars.
## What is the OnceHub client-side API?
[Section titled “What is the OnceHub client-side API?”](#what-is-the-oncehub-client-side-api)
Our client-side API is a collection of advanced features that can be used to build direct integrations with third party applications, using booking confirmation data sent via URL parameters and JavaScript. It is suitable for developers or technically savvy users with scripting or programming knowledge. You can use the OnceHub client-side API to develop custom integrations with your own web applications, services, or data warehouse.
The client-side API is available for **Booking Calendars**, allowing you to integrate scheduling data seamlessly into your applications.
## Use Cases
[Section titled “Use Cases”](#use-cases)
### Redirecting booking confirmation data
[Section titled “Redirecting booking confirmation data”](#redirecting-booking-confirmation-data)
Using Automatic redirect, you can send booking confirmation data to the redirect page via URL parameters. This feature can be used to personalize the scheduling process by displaying a custom thank you message, or help you streamline your customer pipeline by enabling client-side integrations such as pre-populating a form, among other client-side API use cases.
### Collecting data from an embedded Booking Calendar
[Section titled “Collecting data from an embedded Booking Calendar”](#collecting-data-from-an-embedded-booking-calendar)
If you have published your Booking Calendar using Website embed, you can collect booking confirmation data from an embedded Booking Calendar by adding a JavaScript function to your embed code. Use cases include:
* Enriching your customer data repository with high-value personal information submitted at the time of booking
* Displaying a custom confirmation message inside the embedding frame or a pop-up
* Triggering custom analytics or tracking events
* Integrating with your own application workflows
# FAQs
> Frequently asked questions
**Why isn’t my API key working?**
**A:** There may be a typo in the key.\
An account administrator might have regenerated the key.
**How can I test that the webhook subscription is configured correctly?**
**A:** You can use a service like [Webhook Tester](https://webhook.site/) to test your endpoint and make sure you are configured correctly to start receiving booking data.
**How can I sign up for a trial account?**
**A:** To use the API you will need a OnceHub account. If you don’t have an account yet, you can [sign up for a trial account here](https://account.oncehub.com/signup).
**Why am I not receiving a data payload from my webhook subscription?**
**A:** Check that you have enabled the correct event triggers when creating your webhook subscription. Check that your endpoint is set up correctly. [Learn more about configuring your webhook subscriptions](https://help.oncehub.com/developers/webhooks/using-webhooks/)
**Why am I seeing `null` fields in the webhook payload?**
**A:** The Webhook payload returns a consistent data structure no matter what booking event type triggered it. For any given booking event type, some of the fields in the data object of the webhook payload will not be relevant. Fields with no values will appear as `null`.
**If my server is down will you send the payload again?**
**A:** Yes. If for some reason your endpoint does not successfully receive the webhook payload, we will continue trying to send the HTTP POST message every hour, for up to three days.
# MCP Server
> MCP Server documentation and guides.
[Getting Started with OnceHub Platform MCP Server](https://help.oncehub.com/developers/mcp-server/getting-started/)
[Introduction to the Model Context Protocol (MCP) Server](https://help.oncehub.com/developers/mcp-server/introduction/)
[MCP Server Tools](https://help.oncehub.com/developers/mcp-server/tools/)
# Getting Started with OnceHub Platform MCP Server
> Step-by-step guide to configure your AI Agent with the OnceHub Platform MCP Server for automated meeting scheduling.
This section guides you through setting up your environment to use the OnceHub Platform MCP Server. The MCP Server is intended for developers and users familiar with the Model Context Protocol.
To begin, configure your AI Agent with the required server details and API key.
## Step 1: Get your API Key
[Section titled “Step 1: Get your API Key”](#step-1-get-your-api-key)
1. Log in to your OnceHub account.
2. Click the gear icon in the top-right corner.
3. Select **Account Integrations** from the dropdown menu.
4. Click the **APIs & Webhooks** section to generate a unique API Key.
Your AI Agent will use this API Key for authentication.
## Step 2: Configure your MCP Client
[Section titled “Step 2: Configure your MCP Client”](#step-2-configure-your-mcp-client)
Point your MCP-compatible AI Agent or application to the OnceHub Platform MCP Server endpoint:
```plaintext
https://mcp.oncehub.com/sse
```
Your AI Agent must include your API key in the request header as follows:
| Header Name | Value |
| ----------- | ---------------- |
| `API-Key` | `[Your API Key]` |
Example MCP configuration:
```json
{
"servers": {
"oncehub": {
"url": "https://mcp.oncehub.com/sse",
"type": "http",
"headers": {
"authorization": "Bearer YOUR_ONCEHUB_API_KEY"
}
}
}
}
```
Replace `YOUR_ONCEHUB_API_KEY` with your actual OnceHub API Key.
For details on generating and managing API keys, see [Authentication](https://help.oncehub.com/developers/overview/authentication/).
## Step 3: Start scheduling by integrating the tool calls
[Section titled “Step 3: Start scheduling by integrating the tool calls”](#step-3-start-scheduling-by-integrating-the-tool-calls)
Integrate the two MCP tools into your AI Agent’s normal conversation flow. To ensure the Agent interacts with the correct Booking Calendar, you must include the specific Booking Calendar ID in the Agent’s system prompt or tool configuration.
* Use **Get available time slots** (`get_booking_time_slots`) to retrieve available meeting slots for your specific Booking Calendar ID.
* Once a time is confirmed, call **Schedule a meeting** (`schedule_meeting`) to create the appointment.
Once configured, your AI Agent can check availability and schedule meetings entirely through natural-language interaction with you.
**Prompting Tip** In your AI Agent’s system instructions, specify which Booking Calendar it should work with. For example:
> “If the user needs to meet with a specialist, offer to schedule a meeting using the MCP scheduling tools with Booking Calendar ID: BKC-XXXXXXXX.”
# Introduction to the Model Context Protocol (MCP) Server
> Learn how to use the OnceHub Platform MCP Server to enable AI agents to automate meeting scheduling through natural language interaction.
**What is the OnceHub Platform MCP Server?**
The OnceHub Platform MCP Server provides a standardized way for AI models and agents to interact directly with your OnceHub scheduling API. Rather than sending users a booking link and asking them to schedule manually, an AI Agent can retrieve availability and schedule meetings on the user’s behalf using MCP tools, through a natural language flow.
This solution enables external AI Agents to access OnceHub scheduling APIs within AI-driven workflows using the standardized Model Context Protocol (MCP) remote server.
## Use Cases
[Section titled “Use Cases”](#use-cases)
The OnceHub Platform MCP Server is ideal for organizations that:
* Enable AI Agents to automate the meeting scheduling process by calling specialized tools to fetch available slots and schedule meetings during a live conversation.
## Primary Endpoint
[Section titled “Primary Endpoint”](#primary-endpoint)
AI Agents communicate with the OnceHub scheduling system through the following public MCP endpoint:
```plaintext
https://mcp.oncehub.com/sse
```
You must configure this endpoint in your MCP compatible AI Agent to begin interacting with the scheduling tools.
# MCP Server Tools
> Reference documentation for the Get available time slots and Schedule a meeting tools.
The MCP Server exposes a set of tools that follow the same logic and rules as the existing OnceHub Booking API, but are accessed through the standardized MCP layer.
## 1. Get Available Time Slots
[Section titled “1. Get Available Time Slots”](#1-get-available-time-slots)
The **Get available time slots** (`get_booking_time_slots`) tool allows an AI Agent to retrieve a list of bookable times for a specific Booking Calendar.
### Function
[Section titled “Function”](#function)
Retrieves a list of valid bookable time slots within a specified date range.
### How It Works
[Section titled “How It Works”](#how-it-works)
The tool queries your Booking Calendar’s configuration to identify valid available time slots. It respects all supported scheduling settings found on the Booking Settings tab, including:
* Availability
* Busy times from connected calendar
* Buffer settings
Note
The only exception to the Booking Settings tab is Bookable days; instead the search window is determined by the specific date range provided in the tool request.
### Date Range Rules
[Section titled “Date Range Rules”](#date-range-rules)
* The date range (start → end) must be less than or equal to 30 days.
* If no range is provided, the tool searches the next 7 days by default.
* The start date cannot be in the past.
### Usage
[Section titled “Usage”](#usage)
This tool must be the first step in a conversational booking process.
For example, you might ask an AI Agent:
> “Find me a time slot next Tuesday morning.”
The AI Agent calls this tool to obtain available times for you to choose from.
## 2. Schedule A Meeting
[Section titled “2. Schedule A Meeting”](#2-schedule-a-meeting)
The **Schedule a meeting** (`schedule_meeting`) tool allows an AI Agent to book a specific time slot on a Booking Calendar.
### Function
[Section titled “Function”](#function-1)
Creates a new booking on a Booking Calendar at a time selected from the available slots.
### How It Works
[Section titled “How It Works”](#how-it-works-1)
Once you choose a time slot from the results of **Get available time slots**, the AI Agent calls this tool and sends the required details:
* Guest name
* Guest email
* Selected Date: Format: `YYYY-MM-DDTHH:MM:SSZ`
* Start Time: Must be provided in ISO 8601 format
* Time Zone: Must be provided in IANA Time Zone format (e.g., `America/New_York`)
* Location (must match with the one returned from previous step)
The tool then finalizes and creates the booking for you.
### Usage
[Section titled “Usage”](#usage-1)
After presenting time options and receiving user confirmation, the AI Agent calls this tool to book the appointment.
# Overview
> Overview documentation and guides.
[Overview](https://help.oncehub.com/developers/overview/introduction/)
[Error Handling](https://help.oncehub.com/developers/overview/error-handling/)
[Authentication](https://help.oncehub.com/developers/overview/authentication/)
[Expanding Responses](https://help.oncehub.com/developers/overview/expanding-responses/)
[Pagination](https://help.oncehub.com/developers/overview/pagination/)
[Rate Limits](https://help.oncehub.com/developers/overview/rate-limits/)
[Request IDs](https://help.oncehub.com/developers/overview/request-ids/)
[API Versioning](https://help.oncehub.com/developers/overview/api-versioning/)
[Deleted Resources](https://help.oncehub.com/developers/overview/deleted-resources/)
# API Versioning
> Understand OnceHub API versioning strategy, how to specify versions in requests, and manage backward compatibility.
When updates are made to our API that are not compatible with the previous version, a new version is released.
The most recent version is **v2.0.0** and it is the default version to use when starting a new integration.
## Version History
[Section titled “Version History”](#version-history)
Current Version
**v2.0.0** is the current and recommended version for all new integrations. This version includes the latest features and improvements.
## Backward Compatibility
[Section titled “Backward Compatibility”](#backward-compatibility)
When breaking changes are necessary, we release a new API version to ensure existing integrations continue to work without interruption. Previous versions remain supported to give you time to migrate at your own pace.
Migration Advice
When planning to migrate to a newer API version, we recommend:
1. Review the changelog for breaking changes
2. Test your integration thoroughly in a development environment
3. Update your API calls gradually
4. Monitor your integration after migration
# Authentication
> Generate and use API keys to authenticate requests to the OnceHub API with secure bearer token authentication.
To interact with the **OnceHub REST API and MCP Server**, you must authenticate every request using a unique **API Key**. For your security, all communication must occur over **HTTPS**; requests made over plain HTTP will be rejected.
OnceHub utilizes industry-standard cryptographic practices to protect your credentials.
* **Hashed Key Storage:** OnceHub does not store API keys in plaintext. Because we only store a secure cryptographic hash, your key is **displayed only once** upon generation. It cannot be retrieved again by any user or by OnceHub Support.
* **Multi-Key Management:** You can maintain up to **25 active API keys** per account to support:
* **Environment Segregation:** Use separate keys for staging and production environments to prevent accidental data leaks.
* **Vendor Management:** Assign unique keys to different third-party integrations to manage or revoke access independently.
* **Zero-Downtime Rotation:** Supporting multiple concurrent keys allows you to generate a new key and update your application before revoking the old one, ensuring continuous service.
## Generate an API Key
[Section titled “Generate an API Key”](#generate-an-api-key)
1. Log in to your OnceHub account and click the **gear icon** located in the top-right corner of the page.
2. Select **Account Integrations** from the dropdown menu.
3. Select the **APIs & Webhooks** tile.
4. In the **API Keys** section, click the **Create API key** button.
5. In the pop-up, enter a descriptive **API Key Name** (e.g., “Production CRM”).
6. Click **Generate key**. The **API Key Created Successfully** pop-up will appear.
Note
Your API key is displayed here. For security reasons, it will only be displayed once.
7. Click **Copy & close** to copy the key to your clipboard and save it in a secure location.
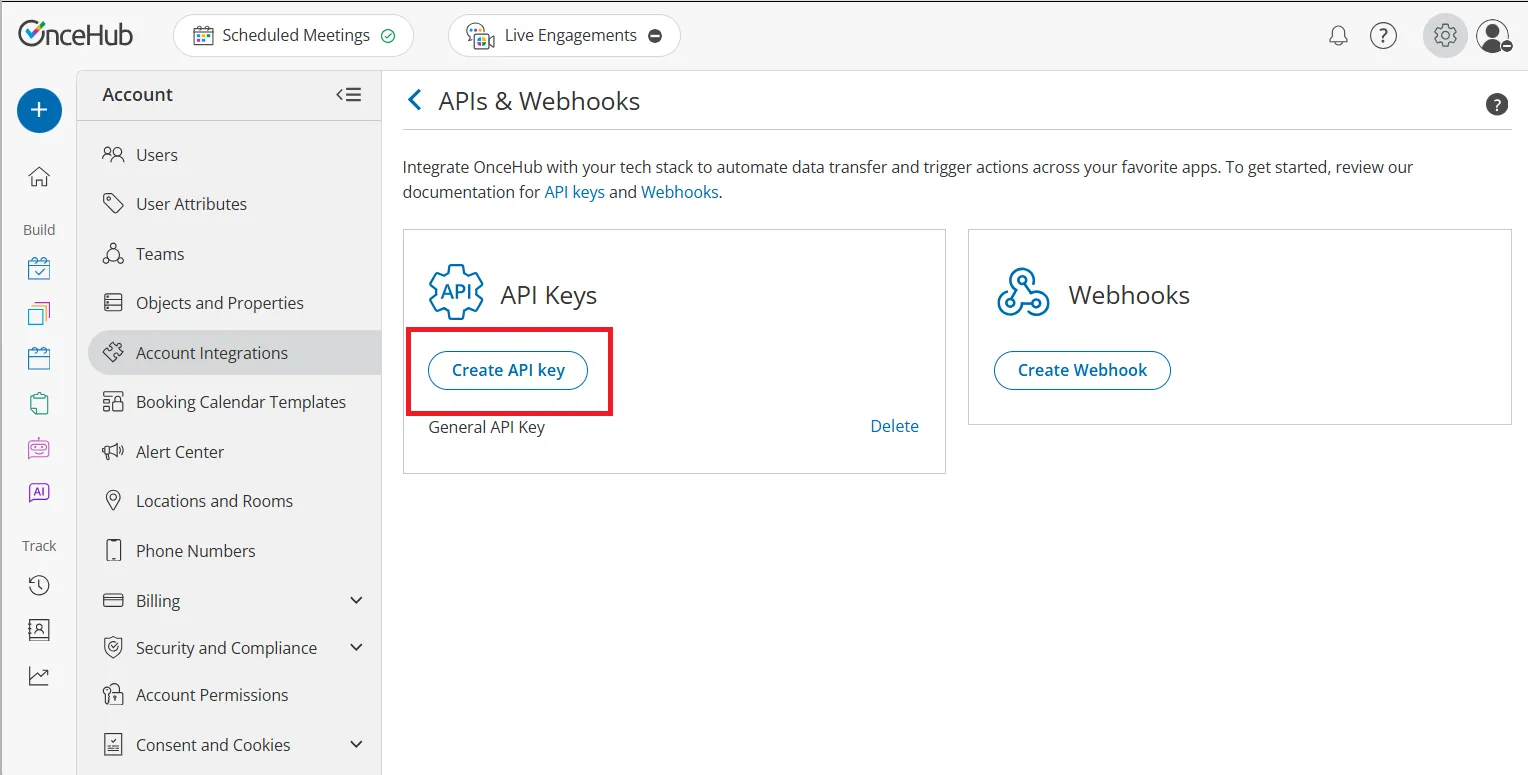
## Delete an API Key
[Section titled “Delete an API Key”](#delete-an-api-key)
If a key is compromised or no longer needed, you should delete it immediately to protect your data.
1. Locate the specific key in the **API Keys** list.
2. Click the **Delete** link next to the key name.
3. A **Delete Key** confirmation pop-up will appear warning that any application using this key will immediately lose access.
4. Click **Delete key** button to permanently delete the credential.
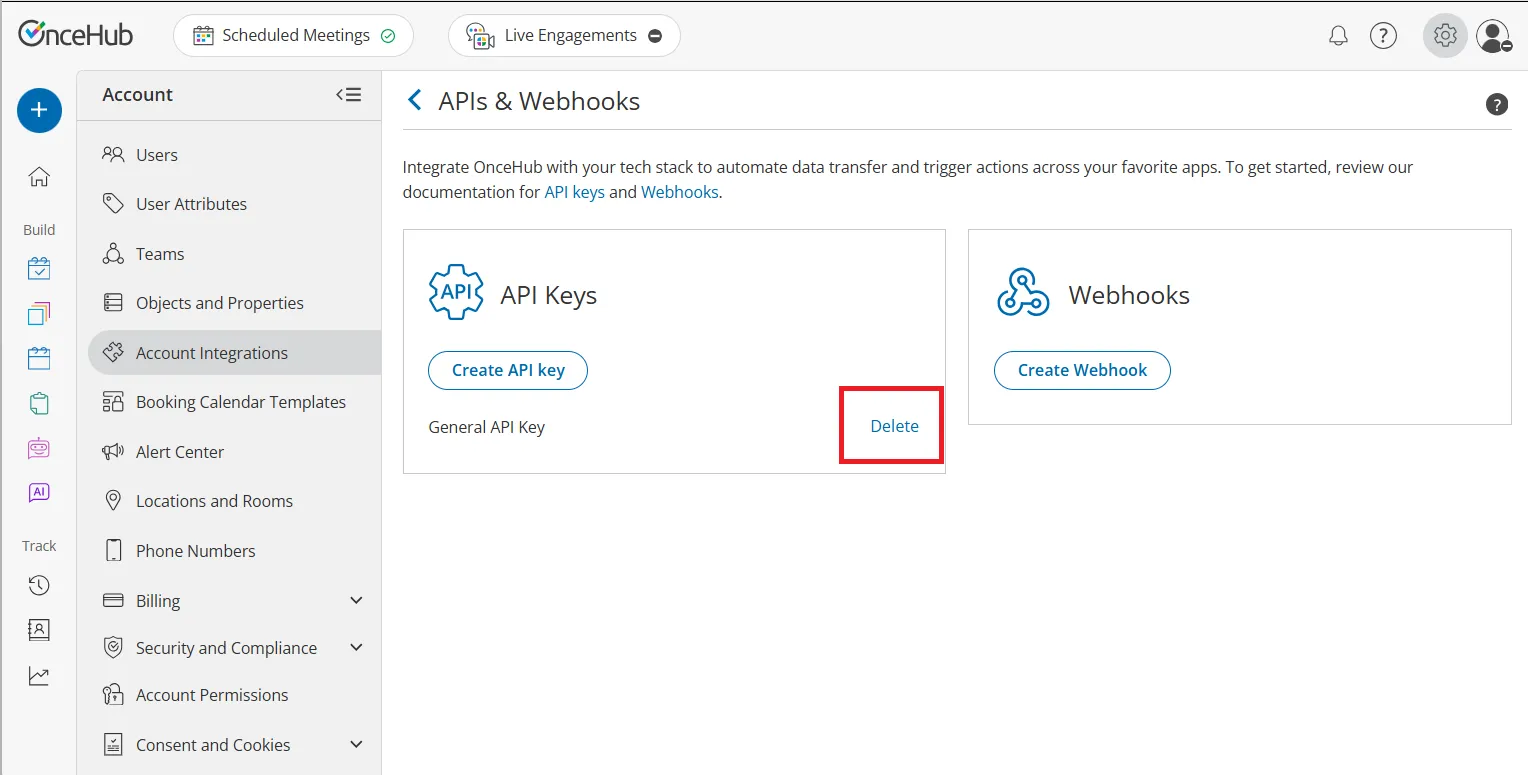
## Using your API Key
[Section titled “Using your API Key”](#using-your-api-key)
Include your API key in the API-Key header of every HTTP request. If the key is missing or invalid, the API will return an error response to assist with troubleshooting. [**Learn more about error responses**](https://help.oncehub.com/developers/overview/error-handling/).
### Example Request
[Section titled “Example Request”](#example-request)
```http
GET /bookings HTTP/1.1
Host: api.oncehub.com
API-Key: your-api-key-here
Content-Type: application/json
```
## Testing your API Key
[Section titled “Testing your API Key”](#testing-your-api-key)
Once you have your key, test it by making a request to our [**validation endpoint**](https://help.oncehub.com/developers/api/#tag/authentication/GET/test) to confirm your connection is active. If the key is missing or invalid, the API will return a 401 Unauthorized error.
## Security Best Practices
[Section titled “Security Best Practices”](#security-best-practices)
Your API key grants significant access to your account data. Protect it by following these standards:
* **Server-Side Only:** Never expose your API key in client-side code (JavaScript), public GitHub repositories, or mobile app binaries.
* **Environment Variables:** Store keys in secure environment variables rather than hard-coding them into your source code.
* **Lost Keys:** If you lose an API key, OnceHub support team cannot recover it for you. You must delete the lost key, generate a new one, and update your integration.
* **Key Rotation:** As a proactive security measure, rotate your API keys at least every 6 months. If you suspect a key has been compromised, rotate it immediately by generating a new one and deleting the old key to ensure uninterrupted service during the transition.
# Deleted Resources
> Understand how OnceHub API handles deleted resources in redacted mode and how they appear in responses and expansions.
Deleted resources are usually still accessible after deletion in *redacted* mode:
1. The deleted resource will not be returned in any list request.
2. If the resource is requested specifically, it will be returned but will only contain the `id`, `object`, and an additional `deleted` field with the value of `true`.
For example, a call to
```http
GET /booking-calendars/BKC-X0LCRU5LES
```
Will return the object in redacted mode:
```json
{
"id": "BKC-X0LCRU5LES",
"object": "booking_calendar",
"deleted": true
}
```
However, `BKC-X0LCRU5LES` booking calendar will not be returned when listing all booking calendars via
```http
GET /booking-calendars
```
## Deleted Resources in Expansions
[Section titled “Deleted Resources in Expansions”](#deleted-resources-in-expansions)
The same is true for expanded responses. When expanded, deleted objects will return in *redacted* mode as well.
This behavior ensures that your application can gracefully handle references to deleted resources without breaking, while still providing feedback that the resource has been deleted.
# Error Handling
> Handle API errors effectively with standard HTTP status codes, error types, and detailed error messages for troubleshooting.
**Overview of Error Responses**
OnceHub uses conventional [HTTP response codes](https://httpstatuses.com/) to indicate the success or failure of an API request.
Successful requests are given status codes in the `2xx` range, while unsuccessful requests have status codes in the `4xx` or `5xx` range.
`4xx` codes indicate an error that failed given the information provided (e.g., an invalid parameter, object not found, etc.); `5xx` codes indicate an error with OnceHub servers.
## Error Structure
[Section titled “Error Structure”](#error-structure)
| Field | Type | Description |
| --------- | -------- | -------------------------------------------------------------------------------- |
| `type` | *string* | The type of error returned. See the list below for the possible types of errors. |
| `message` | *string* | A human-readable message providing more details about the error. |
| `param` | *string* | If the error is parameter-specific, the parameter related to the error. |
The API returns error responses in JSON format, with the following structure:
```json
{
"type": "error_type",
"message": "Human-readable error description",
"param": "parameter_name"
}
```
## Error Types
[Section titled “Error Types”](#error-types)
Error responses are categorized into four different types, corresponding to the following situations:
| Type | Description |
| ----------------------- | ---------------------------------------------------------------------------------------------------------------------------------------------------------------------------------------------------- |
| `authentication_error` | The server could not authenticate your request. Check to make sure you have entered a valid API key in the correct format, in the `API-Key` header. |
| `invalid_request_error` | One or more of the input parameters is not valid. Check that you have entered the correct values for all required parameters. URLs must be entered in full, and they must use the `https://` prefix. |
| `rate_limit_error` | The amount of API requests per second has exceeded the allowed amount. |
| `api_error` | There was an error on the OnceHub servers. |
## Error Messages
[Section titled “Error Messages”](#error-messages)
In addition to the standard HTTP codes and error type specified in the table above, each error response includes a human-readable message that provides additional details that can help you troubleshoot why the request failed.
Here are a few examples:
404 Not Found
```json
{
"type": "invalid_request_error",
"message": "No such booking: '123'",
"param": "id"
}
```
409 Conflict
```json
{
"type": "invalid_request_error",
"message": "A webhook subscription with this name already exists: 'New Bookings'",
"param": "name"
}
```
429 Too Many Requests
```json
{
"type": "rate_limit_error",
"message": "Request rate limit exceeded"
}
```
# Expanding Responses
> Retrieve expanded nested objects in API responses using the expand parameter to reduce additional API calls.
By default, objects embedded in other objects are referenced by their object ID. For example, a booking contains a reference to the Booking Calendar:
```json
{
"object": "booking",
"id": "BKNG-J4FR05BKEWEX",
// ...
"booking_calendar": "BKC-8DJNDNL86G"
}
```
You can ask to *expand* the `booking_calendar` object by passing an `expand` query parameter to the API:
```http
GET /bookings/BKNG-J4FR05BKEWEX?expand=booking_calendar
```
And the API will return the *expanded* object:
```json
{
"object": "booking",
"id": "BKNG-J4FR05BKEWEX",
// ...
"booking_calendar": {
"id": "BKC-8DJNDNL86G",
"object": "booking_calendar",
"name": "Andrea Hartie",
"label": "AndreaHartie",
"url": "https://go.oncehub.com/andreahartie",
"active": true
}
}
```
Note
Expandable properties are listed in this API documentation as *expandable*.
## Multiple Expansions
[Section titled “Multiple Expansions”](#multiple-expansions)
You can pass multiple objects to expand in the response using comma separated values. For example, to expand both `booking_calendar` and `user` you could request:
```http
GET /bookings/BKNG-J4FR05BKEWEX?expand=booking_calendar,user
```
## Expansions in Lists
[Section titled “Expansions in Lists”](#expansions-in-lists)
Expansions on list requests start with the `data` property. For example, you would expand `data.booking_calendar` on a request to list bookings and associated Booking Calendars:
```http
GET /bookings/?expand=data.booking_calendar
```
Expansions on list requests can result in a slower response time.
Since expanding specific data in the response causes additional lookups to multiple data tables, it may result in a slower response time. Only expand data if you have a need for it.
Expansions have a maximum depth of two levels.
To avoid circular calls there is a hard limit to expand to a maximum of two levels.
## Expansions and Webhooks
[Section titled “Expansions and Webhooks”](#expansions-and-webhooks)
Included objects in Webhooks are expanded by default, but additional objects in these payloads cannot be expanded. If you need the fully expanded object, you could trigger a call to the appropriate API upon receiving the webhook.
# Overview
> Learn how to integrate with the OnceHub REST API to access booking data, manage calendars, and automate scheduling workflows.
## OnceHub Developer Center
[Section titled “OnceHub Developer Center”](#oncehub-developer-center)
**The OnceHub Developer Center** provides tools and APIs for integrating OnceHub scheduling and booking capabilities into your websites, business workflows and AI agents. Our platform is designed for everyone who wants to build robust integrations that securely access booking data, manage scheduling and automate complex workflows using server-side **REST APIs**, **client-side APIs**, and **Model Context Protocol (MCP)** integrations.
## Integration Options
[Section titled “Integration Options”](#integration-options)
OnceHub offers a variety of integration approaches. Users can select the method that best aligns with their specific use case and technical environment:
* **Server-Side REST APIs:** Best for synchronizing booking data, managing scheduling resources, and automating backend workflows following REST principles.
* **Webhooks:** Essential for receiving real-time, event-driven notifications for booking lifecycle events, digital conversation interactions (Chatbots/ Live engagement), and cancellation events to keep your external systems synchronized.
* **Client-Side APIs:** Use these to embed OnceHub interfaces directly into web applications and interact with them using client-side event listeners. This approach supports capturing real-time events for Chatbots, Routing Forms and Booking Calendars.
* **URL Parameters & Embedding:** A powerful mechanism to **fetch data from** (pre-filling booking forms) or **pass information to** redirect parameters after a booking is completed.
* **MCP Server:** Designed for integrating OnceHub into Model Context Protocol (MCP) environments for AI-driven scheduling and automation workflows.
## Developer Center Structure
[Section titled “Developer Center Structure”](#developer-center-structure)
The OnceHub Developer Center is organized into two sections:
### Dev Docs
[Section titled “Dev Docs”](#dev-docs)
Covers shared concepts across all integration types:
* Authentication and API keys
* Client configuration and embedded components
* URL parameter reference
* API versioning, rate limits, pagination, and error handling
* MCP integration guidelines
* Webhook event delivery and validation
### API Reference
[Section titled “API Reference”](#api-reference)
Provides detailed endpoint documentation for OnceHub products:
* [**Booking Calendars API:**](https://help.oncehub.com/developers/api/) Manage bookings, Booking Calendars, webhook event types, users, teams and scheduling resources.
The API reference includes supported endpoints, parameters, authentication requirements and example responses.
## Getting Started
[Section titled “Getting Started”](#getting-started)
Select your preferred integration method to begin. Most methods require an active OnceHub account and valid API credentials.
### To Use REST API or MCP Server
[Section titled “To Use REST API or MCP Server”](#to-use-rest-api-or-mcp-server)
1. [**Sign up**](https://account.oncehub.com/signup) for a OnceHub account if you don’t have one.
2. Create your API keys using the [**Authentication guide**](https://help.oncehub.com/developers/overview/authentication/). You can maintain up to 25 active keys to segregate environments (Staging vs. Production) and manage third-party vendors securely.
3. Choose between REST APIs for standard integrations or the MCP Server for AI-driven workflows.
### To Use Client-Side API
[Section titled “To Use Client-Side API”](#to-use-client-side-api)
* Use the Website embed feature to publish your Booking Calendar directly on your site.
* Add a [**JavaScript function**](https://help.oncehub.com/developers/client-side-api/embed-events/) to your embed code to collect real-time booking confirmation data or trigger custom analytics.
### To Use Webhooks
[Section titled “To Use Webhooks”](#to-use-webhooks)
Webhooks can be configured through the OnceHub application interface for a quick setup or via the API.
* To configure your webhooks directly in the OnceHub Application, define your webhook URL (must be `https://`), select your triggers from the provided list, and save your Webhook Secret to verify data authenticity.
* Use the [**Webhooks API**](https://help.oncehub.com/developers/api/#tag/webhooks/POST/webhooks) to create a new subscription (via POST request). You must define your destination `url` and an array of [**event types**](https://help.oncehub.com/developers/api/#tag/webhook-events) (e.g., `booking.scheduled`) within the JSON request body. Once created, retrieve the `signing_secret` from the API response to implement signature verification on your server.
### To Use URL Parameters & Embedding
[Section titled “To Use URL Parameters & Embedding”](#to-use-url-parameters--embedding)
* Map your custom field names in the Booking Calendar’s form settings to ensure data is correctly identified.
* Append parameters to your OnceHub URL to push data and pre-fill guest information in both [**Booking Forms**](https://help.oncehub.com/product/booking-calendars/sharing-embedding/prefilling-guest-information-in-your-booking-calendar/) and [**Routing Forms**](https://help.oncehub.com/product/routing-forms/sharing-embedding/embedding-your-routing-form-on-your-website/) for a frictionless scheduling experience.
# Pagination
> Navigate large result sets using cursor-based pagination with before, after, and limit parameters in list API methods.
All API resources have support for bulk fetches via “list” API methods. For instance, you can list `bookings` and `booking-calendars`. These list API methods share a common structure, using at least these three parameters: `limit`, `after`, and `before`.
OnceHub utilizes cursor-based pagination by making use of the `after` and `before` parameters. Both parameters take an existing object ID value (see below) and return objects in reverse chronological order. The `before` parameter returns objects listed before the named object. The `after` parameter returns objects listed after the named object. These parameters are mutually exclusive - only one of `after` or `before` may be used.
## Navigation Parameters
[Section titled “Navigation Parameters”](#navigation-parameters)
To retrieve the next page of results, you can use the `after` parameter with the object ID of the last object that was returned in the list.
To retrieve the previous page of results, you can use the `before` parameter with the object ID of the first object that was returned in the list.
The `limit` parameter determines the number of objects that will be returned on each page. It will default to 10 if not specified and has a maximum limit of 100 objects per page.
## Link Header
[Section titled “Link Header”](#link-header)
The [Link header](https://developer.mozilla.org/en-US/docs/Web/HTTP/Headers/Link) includes a `rel` parameter, where relation-types describes the relation of the linked page to the current page of results. The value can either be `previous` or `next`.
If your initial request doesn’t return enough records to generate an additional page of results, then the response won’t have a link header.
For example:
```http
Link: ; rel="next",
; rel="previous"
```
*The example includes a line break for readability.*
## Parameters Reference
[Section titled “Parameters Reference”](#parameters-reference)
The URL in the link header can include up to three parameters:
1. **`limit`**: A limit on the number of objects to be returned, between 1 and 100. Defaults to 10.
2. **`after`**: An object ID that defines your place in the list. For instance, if you make a list request and receive 30 objects, ending with `OBJ-XXXX`, your subsequent call can include `after=OBJ-XXXX` in order to fetch the next page of the list.
3. **`before`**: An object ID that defines your place in the list. For instance, if you make a list request and receive 30 objects, starting with `OBJ-YYYY`, your subsequent call can include `before=OBJ-YYYY` in order to fetch the previous page of the list.
Tip
Use the `Link` header to easily traverse the list of results.
# Rate Limits
> Learn about OnceHub API rate limits, including per-account and per-IP restrictions, and best practices to avoid hitting limits.
To ensure fair usage and maintain API stability, requests are subject to rate limiting based on both the account and the originating IP address:
* **Per Account**: You are limited to **5 requests per second**.
* **Per IP Address**: You are limited to **200 requests per 5 minutes**.
## Rate Limit Errors
[Section titled “Rate Limit Errors”](#rate-limit-errors)
When you exceed the rate limits, the API will respond with a `429 Too Many Requests` status code and a `rate_limit_error` type:
429 Too Many Requests
```json
{
"type": "rate_limit_error",
"message": "Request rate limit exceeded"
}
```
## Best Practices
[Section titled “Best Practices”](#best-practices)
Tip
Avoid periodically fetching entire resource collections just to check for updates. This can quickly consume your rate limit allowance. Instead, utilize our [Webhooks](https://help.oncehub.com/developers/webhooks/introduction-to-webhooks/) to receive notifications proactively when data changes, leading to more efficient integration.
## Additional Recommendations
[Section titled “Additional Recommendations”](#additional-recommendations)
* **Implement exponential backoff**: When you receive a rate limit error, wait before retrying the request
* **Cache responses**: Store frequently accessed data locally to reduce API calls
* **Use webhooks**: Subscribe to relevant events instead of polling for changes
* **Batch operations**: Group multiple operations into single requests when possible
# Request IDs
> Track and troubleshoot API requests using unique Request-Id headers included in all OnceHub API responses.
# Request IDs
[Section titled “Request IDs”](#request-ids)
Each API request has an associated request identifier. You can find this value in the response headers, under `Request-Id`. If you need to contact us about a specific request, providing the request identifier will ensure the fastest possible resolution.
## Finding the Request ID
[Section titled “Finding the Request ID”](#finding-the-request-id)
The `Request-Id` header is included in all API responses:
```http
HTTP/1.1 200 OK
Content-Type: application/json
Request-Id: req_1234567890abcdef
...
```
Tip
When reporting issues or requesting support, always include the `Request-Id` from the problematic API call. This helps our support team quickly locate and investigate the specific request in our logs.
# Recipes
Practical how-to guides to help you build common workflows with the OnceHub APIs.
## [Fetch Bookings Periodically](https://help.oncehub.com/developers/recipes/fetch-bookings-periodically/)
[Section titled “Fetch Bookings Periodically”](#fetch-bookings-periodically)
Learn how to poll the API for new or updated bookings with automatic pagination.
## [Dynamic Co-Host Selection](https://help.oncehub.com/developers/recipes/dynamic-co-host-selection/)
[Section titled “Dynamic Co-Host Selection”](#dynamic-co-host-selection)
Dynamically adjust your booking interface based on team availability.
**To Get Started**
All recipes assume you have:
* A OnceHub API Key
* Node.js 18+ or a modern development environment
For authentication details, refer to the [API Reference](https://help.oncehub.com/developers/overview/authentication/).
# Dynamic Co-Host Selection
> Add checkboxes that update an embedded OnceHub calendar to include co-hosts.
This recipe shows how to dynamically update the OnceHub Booking Calendar to show availability for specific team members based on user-selected checkboxes at runtime. It’s useful when you want guests to pick one or more team members and only show availability for the chosen co‑hosts.
## Prerequisites
[Section titled “Prerequisites”](#prerequisites)
* A primary OnceHub Booking Calendar, which determines the meeting’s base configuration, defining the duration, location, and meeting type. Additional team members are appended as co-hosts via the `co_hosts` parameter.
* Each team member must have an active seat and configured availability within OnceHub.
* A list of team member email addresses (exactly as configured in OnceHub) to map to your HTML checkbox values.
* The standard OnceHub embed script integrated into your host page.
## Example HTML
[Section titled “Example HTML”](#example-html)
This implementation uses a list of checkboxes to dynamically update the Booking Calendar by appending the `co_hosts` parameter to the iframe URL. The JavaScript listens for selection changes and refreshes the iframe content in real-time.
```html
Select Team Members
Choose who you would like to meet with:
```
The code below uses a placeholder. Replace YOUR-BOOKING-CALENDAR-ID with your actual booking calendar ID to initialize the embed correctly. Ensure the custom script is placed after the OnceHub embed script so the target container is available in the DOM.
## How It Works
[Section titled “How It Works”](#how-it-works)
1. **Capture Base State:** The script identifies the OnceHub iframe and saves its initial URL.
2. **Filter Logic:** When a user toggles a checkbox, the script aggregates the selected email addresses.
3. **URL Update:** The `co_hosts` query parameter is appended to the iframe URL, triggering an automatic refresh of the calendar with filtered availability.
## Tips
[Section titled “Tips”](#tips)
* **Case Sensitivity:** While the email address itself is not case-sensitive, the `co_hosts` parameter and checkbox `value` attributes are. Ensure these exactly match the OnceHub user’s email; if the case or spelling is incorrect, the parameter will be ignored.
* **Asynchronous Loading:** Because the OnceHub script injects the iframe asynchronously, the script includes a safety check (if (!iframe)) to ensure the calendar is present before attempting an update.
* **URL Integrity:** The script uses a `baseIframeSrc` variable to store the original URL. This prevents query parameters from “stacking” or duplicating during multiple selections.
* **Availability Logic:** Selecting multiple `co_hosts` will only display time slots where all chosen team members are simultaneously free.
***
See also:
* [Embedding a calendar](https://help.oncehub.com/developers/client-side-api/embedded-booking-calendar-events/)
# Fetch Bookings Periodically
> Learn how to periodically fetch updated bookings from the OnceHub API using pagination
This recipe demonstrates how to periodically poll the OnceHub API to fetch bookings that have been updated since your last fetch. It handles pagination automatically and can be customized to run at your desired interval.
## Prerequisites
[Section titled “Prerequisites”](#prerequisites)
* Node.js version >= 18.0.0 (for native `fetch` support)
* An OnceHub API key
* The `parse-link-header` npm package
Node.js Version
This recipe uses native `fetch` in Node.js. If you’re using an older version of Node.js (< 18.0.0), you can use the [node-fetch](https://github.com/node-fetch/node-fetch) library instead.
## Installation
[Section titled “Installation”](#installation)
First, install the required dependency:
```bash
npm install parse-link-header
```
## Complete Example
[Section titled “Complete Example”](#complete-example)
```javascript
import parse from "parse-link-header";
const baseUrl = "https://api.oncehub.com";
const apiKey = "YOUR_API_KEY"; // Replace with your actual API key
const headers = { "api-key": apiKey };
let lastFetchTime = new Date();
/**
* Fetches all bookings updated since the specified date
* Automatically handles pagination
*/
async function fetchBookingsSince(date) {
let results = [];
async function fetchNextPage(url) {
const res = await fetch(url, { headers });
const data = await res.json();
results = results.concat(data.data);
// Check if there's a next page
const nextUrl = parse(res.headers.get("link"))?.next?.url;
if (nextUrl) {
await fetchNextPage(nextUrl);
}
}
// Initial fetch with filter
const res = await fetch(
`${baseUrl}/v2/bookings?limit=10&last_updated_time.gt=${date.toISOString()}`,
{ headers },
);
const data = await res.json();
results = results.concat(data.data);
// Handle pagination
const nextUrl = parse(res.headers.get("link"))?.next?.url;
if (nextUrl) {
await fetchNextPage(nextUrl);
}
return results;
}
/**
* Main polling function that runs periodically
*/
async function fetchPeriodically() {
try {
const data = await fetchBookingsSince(lastFetchTime);
if (data.length) {
lastFetchTime = new Date();
// Process the bookings
console.log(`Fetched ${data.length} updated booking(s)`);
console.log(data);
// Add your custom logic here:
// - Update your database
// - Send notifications
// - Sync with other systems
} else {
console.log("No new booking updates");
}
} catch (error) {
console.error("Error fetching bookings:", error);
}
// Schedule next fetch (60 seconds)
setTimeout(fetchPeriodically, 60 * 1000);
}
// Start polling
fetchPeriodically();
```
## Key Configuration Options
[Section titled “Key Configuration Options”](#key-configuration-options)
### API Key
[Section titled “API Key”](#api-key)
Replace `YOUR_API_KEY` with your actual OnceHub API key:
```javascript
const apiKey = "YOUR_API_KEY";
```
### Initial Fetch Time
[Section titled “Initial Fetch Time”](#initial-fetch-time)
By default, the script fetches bookings updated since it started running. To fetch all historical bookings, set:
```javascript
let lastFetchTime = new Date(0); // Fetches from the beginning of time
```
Or fetch bookings from a specific date:
```javascript
let lastFetchTime = new Date("2024-01-01"); // Fetches from January 1, 2024
```
### Polling Interval
[Section titled “Polling Interval”](#polling-interval)
Change the polling frequency by modifying the timeout value (in milliseconds):
```javascript
setTimeout(fetchPeriodically, 60 * 1000); // 60 seconds (default)
// Examples:
// 30 seconds: 30 * 1000
// 5 minutes: 5 * 60 * 1000
// 1 hour: 60 * 60 * 1000
```
### Page Size
[Section titled “Page Size”](#page-size)
Adjust the number of bookings fetched per page:
```javascript
const res = await fetch(
`${baseUrl}/v2/bookings?limit=100&last_updated_time.gt=${date.toISOString()}`,
{ headers },
);
```
Valid values: 1-100 (default: 10)
## How It Works
[Section titled “How It Works”](#how-it-works)
1. **Pagination**: The script automatically follows pagination links in the API response headers to fetch all pages of results.
2. **Filtering**: Uses the `last_updated_time.gt` query parameter to only fetch bookings updated after the last successful fetch.
3. **Polling**: Runs continuously on a timer, checking for updates at your specified interval.
4. **Error Handling**: Includes try-catch to handle API errors gracefully without stopping the polling loop.
## API Response Example
[Section titled “API Response Example”](#api-response-example)
```json
{
"data": [
{
"id": "abc123",
"status": "completed",
"start_time": "2024-11-21T10:00:00Z",
"last_updated_time": "2024-11-21T09:55:00Z"
// ... other booking fields
}
],
"has_more": false,
"object": "list"
}
```
## Best Practices
[Section titled “Best Practices”](#best-practices)
* **Rate Limits**: Be mindful of API rate limits. Don’t set the polling interval too low.
* **Error Handling**: Add robust error handling for network issues and API errors.
* **Logging**: Implement proper logging for production environments.
* **Webhooks**: Consider using [webhooks](https://help.oncehub.com/developers/webhooks/introduction-to-webhooks/) instead of polling for real-time updates.
## See Also
[Section titled “See Also”](#see-also)
* [Bookings API Reference](https://help.oncehub.com/developers/api/#tag/bookings)
* [Pagination](https://help.oncehub.com/developers/overview/pagination/)
* [Rate Limits](https://help.oncehub.com/developers/overview/rate-limits/)
* [Webhooks](https://help.oncehub.com/developers/webhooks/introduction-to-webhooks/)
# Webhooks
> Webhooks documentation and guides.
[Introduction to Webhooks](https://help.oncehub.com/developers/webhooks/introduction-to-webhooks/)
[Managing Webhook Subscriptions](https://help.oncehub.com/developers/webhooks/managing-webhook-subscriptions/)
[Setting Up and Using Webhooks](https://help.oncehub.com/developers/webhooks/using-webhooks/)
[Webhook Signatures](https://help.oncehub.com/developers/webhooks/webhook-signatures/)
# Introduction to Webhooks
> Learn how to use OnceHub webhooks to receive real-time notifications about booking and conversation events in your account.
## What are Webhooks?
[Section titled “What are Webhooks?”](#what-are-webhooks)
Our Webhooks API is an advanced feature that can be used to build integrations with third party applications. It is suitable for developers or technically savvy users with scripting or programming knowledge. Using webhooks, you can develop custom integrations with your own web applications, services, or data warehouse.
## The Webhooks API
[Section titled “The Webhooks API”](#the-webhooks-api)
The Webhooks API is used to communicate with third-party web services. Webhook subscriptions are configured with a POST URL and an array of User-specified event triggers representing different booking lifecycle events.
Multiple webhook subscriptions can be associated with the same OnceHub account. This lets you create different triggers for different booking and conversation lifecycle events.
An HTTP POST message is used to push relevant booking or conversation data to the webhook URL, and is triggered whenever the defined lifecycle event occurs. The data is sent as JSON key-value pairs (KVPs) to your receiving server when a booking lifecycle event occurs in your OnceHub account. For example, you can create a webhook that sends customer details whenever a new booking is scheduled. [View all available webhook events](https://help.oncehub.com/developers/api/#tag/webhook-events).
## Managing your Webhooks
[Section titled “Managing your Webhooks”](#managing-your-webhooks)
Webhook subscriptions can be created, deleted, and retrieved via the webhooks API. You can also create, view and delete your webhooks from the [API & Webhooks Integration](https://app.oncehub.com/integrations/api) page. [Learn more about managing Webhook subscriptions](https://help.oncehub.com/developers/webhooks/managing-webhook-subscriptions/)
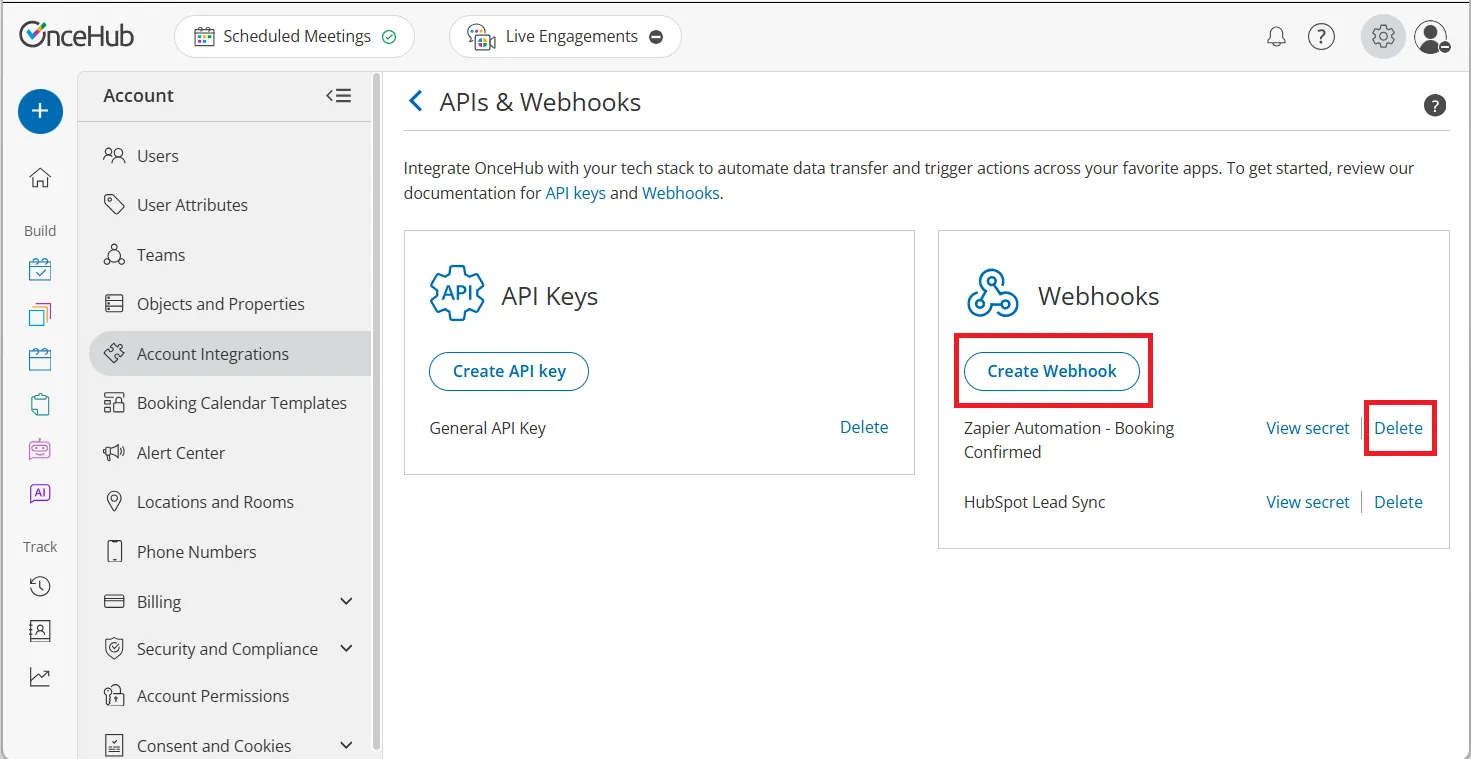 *Figure 1: API & Webhooks Integration page with navigation menu*
# Managing Webhook Subscriptions
> Create, retrieve, and delete webhook subscriptions via the API or OnceHub application to manage your event notifications.
## Managing Webhook Subscriptions via the API
[Section titled “Managing Webhook Subscriptions via the API”](#managing-webhook-subscriptions-via-the-api)
The Webhook API allows you to create, retrieve, and delete your webhook subscriptions.
Create new webhook subscriptions by sending a POST request to the **/webhooks** endpoint. The User must specify the name of the webhook subscription; no two webhooks associated with the same account can share the same name. Each webhook is also assigned a unique and secure alphanumeric ID when it is created. [Learn more about creating Webhooks via the API](https://help.oncehub.com/developers/api/#tag/webhooks/POST/webhooks)
You can retrieve a list of all webhook subscriptions associated with your account by passing a GET request to the **/webhooks** endpoint. You can also retrieve a single webhook subscription by passing the ID of the desired webhook object. [Learn more about retrieving Webhooks via the API](https://help.oncehub.com/developers/api/#tag/webhooks/GET/webhooks)
If for some reason you need to delete your webhook subscriptions, you can do so by sending a DELETE request to the **/webhooks** endpoint, along with the ID of the webhook you wish to delete. [Learn more about deleting Webhooks via the API](https://help.oncehub.com/developers/api/#tag/webhooks/DELETE/webhooks/%7Bid%7D)
## Managing Webhook Subscriptions via the OnceHub Application
[Section titled “Managing Webhook Subscriptions via the OnceHub Application”](#managing-webhook-subscriptions-via-the-oncehub-application)
Administrators can create and manage webhook subscriptions through the APIs & Webhooks section of the OnceHub application.
Once created, you can view, manage, or delete these subscriptions directly on the [API & Webhooks Integration page](https://app.oncehub.com/integrations/api).
### Create a Webhook
[Section titled “Create a Webhook”](#create-a-webhook)
1. Click the gear icon (top-right) and select **Account Integrations**.
2. Select the **APIs & Webhooks** tile.
3. In the Webhooks section, click the **Create Webhook** button.
4. In the pop-up, provide the following details:
* **Webhook Name:** A unique, descriptive name (must contain at least one alphanumeric character).
* **Webhook URL:** The destination address (must start with `https://`).
5. Click **Next** and select the specific events that should trigger the payload.
6. Click **Create**. A **Webhook Secret** will be displayed. Click **Copy & close** to save this secret immediately. It is required to verify that the received data is authentic.
 *Figure 1: API & Webhooks integration page - Webhook subscription list*
# Setting Up and Using Webhooks
> Set up and configure webhook integrations to automatically receive booking and conversation data from OnceHub when lifecycle events occur.
## What Can I Do With Webhooks?
[Section titled “What Can I Do With Webhooks?”](#what-can-i-do-with-webhooks)
Webhooks are a useful tool if you want to receive automatic notifications whenever a booking or conversation event occurs in your OnceHub account.
For example, you can use a webhook subscription to automatically send guest details to your server whenever a new booking is made.
You can register webhooks to send an HTTP POST request for specific types of booking or conversation events, or register a webhook to let you know when any booking or conversation lifecycle event takes place. [See all available webhook events and their payloads](https://help.oncehub.com/developers/api/#tag/webhook-events).
POST messages may contain sensitive customer data. Always use HTTPS when providing the receiving POST URL.
## Webhook Delivery Retries
[Section titled “Webhook Delivery Retries”](#webhook-delivery-retries)
If your endpoint does not return a successful `2xx` status code, the delivery is treated as failed and OnceHub retries it automatically.
Retries use exponential backoff, so the time between attempts increases over time.
Retries continue for up to about 3 days. If delivery still does not succeed within that retry window, the webhook is automatically disabled.
To avoid missed events, make sure your endpoint:
* Returns a `2xx` response as soon as the payload is accepted.
* Handles temporary errors and downtime gracefully.
* Logs failed deliveries so you can investigate and recover quickly.
## Check That Your Webhook is Configured Correctly
[Section titled “Check That Your Webhook is Configured Correctly”](#check-that-your-webhook-is-configured-correctly)
Once you have created your webhook subscription, you can check that it is configured correctly by using a service like [Webhook Tester](https://webhook.site/).
Simply configure your webhook subscription with a URL generated by one of these services, and create a sample booking in your account. The request testing tool lets you collect the HTTP requests you send to the specified URL, so that you can easily confirm, inspect, or debug the responses.
## Setting Up Webhook Integration With a SaaS Application
[Section titled “Setting Up Webhook Integration With a SaaS Application”](#setting-up-webhook-integration-with-a-saas-application)
Webhooks can be used to easily integrate OnceHub with a SaaS application. Once you have [registered a OnceHub account](https://account.oncehub.com/signup), setting up webhook integration with a SaaS application is simple:
1. [Create a webhook subscription](https://help.oncehub.com/developers/api/#tag/webhooks/POST/webhooks) by sending a POST request to the **/webhooks** endpoint, configured with the relevant event triggers and the URL where you want to receive data.
2. Receive booking or conversation data every time a booking or conversation lifecycle event is triggered.
3. Integrate OnceHub booking or conversation data into your application.
# Webhook Signatures
> Verify the events that OnceHub sends to your webhook endpoints.
OnceHub can sign all webhook events sent to your endpoints with a signature. This signature appears in each event’s `Oncehub-Signature` header. It allows you to verify that the events were sent by OnceHub rather than a third party.
Before you can verify signatures, you need to retrieve your endpoint’s secret from your OnceHub dashboard’s webhooks settings in the [Webhook & API integration section](https://app.oncehub.com/integrations/api). Find the relevant webhook and click *View secret*.
OnceHub generates a unique secret key for each endpoint separately. If the webhook was created in v2 of the API, each event will be signed with the secret. If you don’t see the *View secret* option, this means you are using v1 of the API. Any new endpoints will be created using v2.
## Verifying Signatures
[Section titled “Verifying Signatures”](#verifying-signatures)
The `Oncehub-Signature` header included in each signed webhook event contains a timestamp and a signature. The timestamp is prefixed by `t=`, and the signature is prefixed `s=`:
```plaintext
t=1611144604,s=22b3f46eed16d8a41b492334b626dcf04aca47232102208e2d3424051402adcc
```
OnceHub generates signatures using a hash-based message authentication code ([HMAC](https://en.wikipedia.org/wiki/Hash-based_message_authentication_code)) with [SHA-256](https://en.wikipedia.org/wiki/SHA-2).
#### Step 1: Extract the Timestamp and Signatures from the Header
[Section titled “Step 1: Extract the Timestamp and Signatures from the Header”](#step-1-extract-the-timestamp-and-signatures-from-the-header)
Split the header, using the `,` character as the separator, to get a list of elements. Next, split each element, using the `=` character as the separator, to get a prefix and value pair.
The value for the prefix `t` corresponds to the timestamp and `s` corresponds to the signature
#### Step 2: Prepare the `signed_payload` String
[Section titled “Step 2: Prepare the signed\_payload String”](#step-2-prepare-the-signed_payload-string)
The `signed_payload` string is created by concatenating:
* The timestamp (as a string)
* The character `.`
* The actual JSON payload (i.e., the request body)
For example, given the following payload:
```json
{
"id": "EVNT-2AB8RJY3LF",
"object": "event",
"creation_time": "2021-01-20T12:10:03.140Z",
"type": "booking.scheduled",
"api_version": "v2",
"data": {
"object": "booking",
"id": "BKNG-YNMGHKQ24XV5",
"tracking_id": "BKNG-YNMGHKQ24XV5",
"subject": "15-minute meeting",
"status": "scheduled",
"in_trash": false,
"creation_time": "2021-01-20T12:10:02.487Z",
"starting_time": "2021-01-20T16:45:00.000Z",
"last_updated_time": "2021-01-20T12:10:02.753Z",
"owner": {
"id": "USR-YX0J4ANZTV",
"object": "user",
"first_name": "Michael",
"last_name": "",
"email": "michael@example.com",
"status": "active"
},
"duration_minutes": 15,
"virtual_conferencing": { "join_url": "" },
"location_description": "",
"rescheduled_booking_id": "",
"cancel_reschedule_information": {
"reason": "",
"actioned_by": "",
"user_id": ""
},
"form_submission": {
"name": "Carrie",
"email": "carrie@customer.com",
"phone": "",
"mobile_phone": "",
"note": "",
"company": "",
"guests": [],
"custom_fields": []
},
"booking_calendar": {
"id": "BKC-LDJ878496X",
"object": "booking_calendar",
"name": "Andrea Hartie booking calendar",
"subject": "Meeting with Andrea Hartie",
"url": "https://oncehub.com/andreahartie",
"published": true
},
"external_calendar": {
"type": "none",
"name": "",
"id": "",
"event_id": ""
}
}
}
```
The `signed_payload` string is created by concatenating the timestamp, a dot (`.`), and the raw (single-line) JSON payload:
```plaintext
1611144604.{"id":"EVNT-2AB8RJY3LF","object":"event","creation_time":"2021-01-20T12:10:03.140Z","type":"booking.scheduled","api_version":"v2","data":{"object":"booking","id":"BKNG-YNMGHKQ24XV5","tracking_id":"BKNG-YNMGHKQ24XV5","subject":"15-minute meeting","status":"scheduled","in_trash":false,"creation_time":"2021-01-20T12:10:02.487Z","starting_time":"2021-01-20T16:45:00.000Z","last_updated_time":"2021-01-20T12:10:02.753Z","owner":{"id":"USR-YX0J4ANZTV","object":"user","first_name":"Michael","last_name":"","email":"michael@example.com","status":"active"},"duration_minutes":15,"virtual_conferencing":{"join_url":""},"location_description":"","rescheduled_booking_id":"","cancel_reschedule_information":{"reason":"","actioned_by":"","user_id":""},"form_submission":{"name":"Carrie","email":"carrie@customer.com","phone":"","mobile_phone":"","note":"","company":"","guests":[],"custom_fields":[]},"booking_calendar":{"id":"BKC-LDJ878496X","object":"booking_calendar","name":"Andrea Hartie booking calendar","subject":"Meeting with Andrea Hartie","url":"https://oncehub.com/andreahartie","published":true},"external_calendar":{"type":"none","name":"","id":"","event_id":""}}}
```
Don’t apply any formatting on the request body payload; take it as it is. If you apply formatting, it will add white-space characters that will result in a wrong signature construction. The signed\_payload must be constructed as a single continuous string without spaces or line breaks.
#### Step 3: Determine the Expected Signature
[Section titled “Step 3: Determine the Expected Signature”](#step-3-determine-the-expected-signature)
Compute an HMAC with the SHA256 hash function. Use the endpoint’s signing secret as the key, and use the `signed_payload` string as the message.
```javascript
const crypto = require("crypto");
const toBeSignedPayload = time + "." + body;
const expected = crypto
.createHmac("sha256", secret)
.update(toBeSignedPayload)
.digest("hex");
```
```csharp
using System;
using System.Security.Cryptography;
using System.Text;
class MainClass {
public static void Main (string[] args) {
string toBeSignedPayload = timestamp + "." + body;
Encoding encoding = new UTF8Encoding();
byte[] secretBytes = encoding.GetBytes(secret);
byte[] messageBytes = encoding.GetBytes(toBeSignedPayload);
HMACSHA256 cryptographer = new HMACSHA256(secretBytes);
byte[] expectedBytes = cryptographer.ComputeHash(messageBytes);
string expected = BitConverter.ToString(expectedBytes).Replace("-", "").ToLower();
Console.WriteLine(expected);
}
}
```
#### Step 4: Compare the Signatures
[Section titled “Step 4: Compare the Signatures”](#step-4-compare-the-signatures)
Compare the signature in the header to the expected signature. For an equality match, compute the difference between the current timestamp and the received timestamp, then decide if the difference is within your tolerance.
# Getting Started
> Getting Started documentation and guides.
[Introduction to OnceHub](https://help.oncehub.com/getting-started/introduction-oncehub/)
# Introduction to OnceHub
> Introduction OnceHub documentation and guides.
[Signing Up With OnceHub](https://help.oncehub.com/getting-started/introduction-oncehub/signing-up-with-oncehub/)
[Your OnceHub Trial Account](https://help.oncehub.com/getting-started/introduction-oncehub/your-oncehub-trial-account/)
[Joining Your Organization's OnceHub Account](https://help.oncehub.com/getting-started/introduction-oncehub/joining-your-organizations-oncehub-account/)
[Introduction To OnceHub](https://help.oncehub.com/getting-started/introduction-oncehub/introduction-to-oncehub/)
[OnceHub Service and Support Information](https://help.oncehub.com/getting-started/introduction-oncehub/oncehub-service-and-support-information/)
[Using OnceHub from Your Mobile](https://help.oncehub.com/getting-started/introduction-oncehub/using-oncehub-from-your-mobile/)
# Introduction To OnceHub
> Welcome to OnceHub! Our platform simplifies scheduling, streamlines interactions, and boosts productivity by offering tools for booking meetings, engaging vi...
Welcome to **OnceHub**! Our platform simplifies scheduling, streamlines interactions, and boosts productivity by offering tools for booking meetings, engaging visitors, and routing inquiries efficiently. This guide will help you get started with the essential features.
***
## Essential Setup Steps
[Section titled “Essential Setup Steps”](#essential-setup-steps)
If you haven’t already done so during your onboarding, get started quickly by following these steps:
1. **Connect Your Calendar and Video Conferencing Tools:**
* Click your **Profile Menu**.
* Go to **User Integrations** and connect your calendar and video conferencing tools for seamless scheduling.
2. **Set Up Meeting Locations and Availability:**
* Define meeting locations and availability in the **Scheduled Meeting Availability** section under the Profile Menu.
* Ensure your correct **Time Zone** is selected by clicking **Edit** in the top-right corner.
***
## Discovering Product Features
[Section titled “Discovering Product Features”](#discovering-product-features)
When you log in, you’ll see that a personalized **Booking Calendar**, **Chatbot**, and **Routing Form** have been auto-created to help you get started.
* **Booking Calendars:** Simplify meeting scheduling by allowing you to customize meeting details such as subject, duration, and host availability.
* **Routing Forms:** Screen and direct visitors based on their responses, improving efficiency and personalization.
* **AI-Driven Chatbots:** Engage dynamically with visitors and provide tailored assistance based on their needs.
We recommend setting up your **Booking Calendar** first, as it serves as the foundation for scheduling and simplifies the onboarding process. For detailed guidance, check out our [**Getting Started with Booking Calendars**](https://help.oncehub.com/product/booking-calendars/introduction-to-booking-calendars/introduction-to-booking-calendars/) guide.
***
## Finding Help
[Section titled “Finding Help”](#finding-help)
Need assistance? Click the **Help Menu** in the top-right corner to access:
* **Support Center:** Browse articles and guides.
* **Chat with Support:** Connect with a live support agent instantly.
* **Contact Support:** Submit a ticket for complex inquiries.
For a more hands-on experience, book a **step-by-step setup call** with our expert support agents. We’ll guide you through setting up your account and answer any questions to ensure a smooth start.
[**Book your session here**](https://go.oncehub.com/SetupOH)
***
## You’re Ready to Get Started!
[Section titled “You’re Ready to Get Started!”](#youre-ready-to-get-started)
You’re now ready to explore OnceHub’s features! Start with your Booking Calendar for a smooth scheduling experience and explore our other tools for even more ways to engage clients effectively.
# Joining Your Organization's OnceHub Account
> Joining your organization's OnceHub account is straightforward. This guide will walk you through every step, explain common pitfalls, and answer frequently a...
Joining your organization’s **OnceHub** account is straightforward. This guide will walk you through every step, explain common pitfalls, and answer frequently asked questions to ensure a smooth onboarding experience.
***
## Step 1: Invitation Email
[Section titled “Step 1: Invitation Email”](#step-1-invitation-email)
Your **administrator** will send you an email invitation from OnceHub with the subject line ***Invitation to Join.*** This email contains a link to join your organization’s OnceHub account.
* If you don’t see the email in your inbox, check your **spam** or **junk mail** folder, and make sure the invitation was sent to the **correct email address**.
* If you still can’t find it, ask your **administrator** to resend the invitation.
***
## Step 2: Sign-In Link
[Section titled “Step 2: Sign-In Link”](#step-2-sign-in-link)
Click the **Sign in to your account** button or link in the invitation email. This opens the OnceHub sign-in page.
**IMPORTANT:** The link is only valid for **72** **hours**. If it expires, ask your administrator to resend the invitation.
***
## Step 3: Onboarding Process
[Section titled “Step 3: Onboarding Process”](#step-3-onboarding-process)
After signing in, you’ll be guided through an onboarding process where you can set your **availability** and connect your **productivity suites** and **video conferencing tools**.
We recommend checking out our **[Introduction to OnceHub](https://help.oncehub.com/getting-started/introduction-oncehub/introduction-to-oncehub/)** article. This guide will walk you through the initial setup process and help you get the most out of OnceHub.
***
## Frequent Asked Questions (FAQs)
[Section titled “Frequent Asked Questions (FAQs)”](#frequent-asked-questions-faqs)
**Can someone else set up my profile for me?**
**A:** An **administrator** can change your profile settings, but you **must** connect your **productivity suite** and any standalone integrations yourself.
We recommend that you complete the onboarding process yourself and then notify your account administrator so that they may make any necessary changes.
**Can I delete my profile?**
**A:** Only an **administrator** can delete user profiles. Even administrators can not delete their own profiles; another administrator must do it.
**My admin is trying to add me to the account, but they see an alert that an account with my email ID already exists.**
**A:** To use that email ID, you must first delete your **existing OnceHub account**. Follow these steps:
1. **Sign in** to OnceHub with that email.
2. Click the **gear** **icon** in the top navigation menu.
3. Select **Settings and permissions** and click **Delete account**. This will free up the email ID.
Your admin can now invite you to their account. This will send you an email with a sign-up link to join the account.
# OnceHub Service and Support Information
> We offer multiple channels of support to assist you in starting and maintaining your OnceHub Account. Read on to learn about how to utilize OnceHub service a...
We offer multiple channels of support to assist you in starting and maintaining your OnceHub Account. Read on to learn about how to utilize OnceHub service and support.
## Introduction to OnceHub Support
[Section titled “Introduction to OnceHub Support”](#introduction-to-oncehub-support)
### Instant answers
[Section titled “Instant answers”](#instant-answers)
Our knowledge base maintains hundreds of articles and a video library, curated to introduce the features available to you and how to use them. If you have a question, there’s a high likelihood the answer is in our knowledge base.
### New account? Make the most of it!
[Section titled “New account? Make the most of it!”](#new-account-make-the-most-of-it)
Just signed up for an account? We hope you enjoy this opportunity to test drive the full functionality of OnceHub. Feel free to play around and get acquainted with no limits and no obligation.
### Want step-by-step setup assistance?
[Section titled “Want step-by-step setup assistance?”](#want-step-by-step-setup-assistance)
If you’re interested in having us take you through the process of setting up your account step-by-step, until you are completely configured and ready to start, or training your employees in using OnceHub, we’re happy to help. We offer [setup assistance packages](https://go.oncehub.com/setupoh "Setup assistance packages") for step-by-step help and training, priced at $125/hour. During the session(s), we will discuss your requirements, make suggestions for efficient implementation, and be right there with you as you set up your account, every step of the way.
### Do you have security and compliance questions?
[Section titled “Do you have security and compliance questions?”](#do-you-have-security-and-compliance-questions)
OnceHub has a comprehensive security program that meets internationally recognized standards. We’re experienced in handling strict security and compliance requirements from corporate organizations and various industry sectors. You can find an overview of our security at the [OnceHub Trust Center](https://www.oncehub.com/trustcenter) or contact our security department for additional questions at .
[Learn more about Security, Privacy & Compliance](https://help.oncehub.com/security-compliance/security/ "Security, Privacy & Compliance")
## System requirements
[Section titled “System requirements”](#system-requirements)
OnceHub uses advanced HTML and JavaScript technologies. Therefore, it performs best on modern browsers that support the latest internet standards.
### On the desktop
[Section titled “On the desktop”](#on-the-desktop)
* **Google Chrome:** Latest versions
* **Mozilla Firefox:** Latest versions
* **Microsoft Edge:** Latest versions
* **Apple Safari on a Mac\*:** version 5 and above
\*We recommend not to use Safari on Windows. Apple has stopped its development and it may contain bugs.
Note
Microsoft Internet Explorer is not supported.
### On mobile devices
[Section titled “On mobile devices”](#on-mobile-devices)
* The OnceHub customer application fully supports mobile browsers on iOS and Android devices.
* The OnceHub administration side is limited on mobile. We are currently working on creating a mobile app so that you can stay connected on the go. In the meantime, we recommend you continue using the desktop application.
If you are using a browser that is not on this list, you may still be able to work with OnceHub, but it is not recommended as performance and presentation may not be optimal.
## Customer application accessibility
[Section titled “Customer application accessibility”](#customer-application-accessibility)
OnceHub is committed to providing a solution that is accessible to everyone. It is our top priority to design and engineer products with a focus on usability and accessibility for all our users and their customers, with or without a disability. Our value for compliance is a differentiating factor in the scheduling market. Organizations that are obligated by law to meet accessibility standards can safely use our products, knowing they meet those requirements.
### The standards we meet
[Section titled “The standards we meet”](#the-standards-we-meet)
* A and AA levels of the [Web Content Accessibility Guidelines (WCAG) 2.0](http://www.w3.org/TR/2008/REC-WCAG20-20081211/)
* [Section 508](http://www.section508.gov/) as published in 2017
* [ADA Standards for Accessible Design](https://www.ada.gov/) (Americans with Disabilities Act)
The OnceHub Customer application fully meets these standards. Our User application, where account holders setup their accounts, partially meets these standards. We continue to make improvements to the accessibility of our products.
### The principles we follow
[Section titled “The principles we follow”](#the-principles-we-follow)
* **Design best practices** - We follow UX and UI gold standards such as: readability, consistency, structured navigation, orientation order, clear hierarchy, semantic content, code validation and more.
* **Inclusive design approach** - We operate according to the principles of universal design, understood and used by all people regardless of age, ability, or circumstance. From the conceptual mental model to the last tooltip, we always consider equality and diversity.
* **Screen readers** - Users who are blind or visually impaired can make full use of OnceHub thanks to our comprehensive support for screen readers.
* **Keyboard-only usage** - Customers can easily schedule bookings, all with just the use of a keyboard and no mouse.
Learn more in our [Accessibility Conformance Report or VPAT](https://www.oncehub.com/trustcenter/legal/vpat "Accessibility Conformance Report") (Voluntary Product Accessibility Template).
## Setup assistance packages
[Section titled “Setup assistance packages”](#setup-assistance-packages)
You have access to our [free onboarding webinars](https://www.oncehub.com/resources/onboardingwebinars/) which are run daily to provide you with all the training you need to get the most out of the platform. All products also come with a comprehensive getting started guide that includes short videos that give you a full overview of the application and its capabilities. Learn more about [Getting started with Chatbots](https://help.oncehub.com/product/chatbots/introduction-to-chatbots/ "Building a chatbot") and [Introduction to OnceHub.](https://help.oncehub.com/getting-started/introduction-oncehub/introduction-to-oncehub/ "Introduction to OnceHub")
If you’re interested in having us walk you through setting up your account or require that all your employees will be trained on using OnceHub, we’re happy to help. We offer setup assistance packages for step-by-step help and training, priced at $125/hour. [Book your session now](https://go.oncehub.com/setupoh).
During the session(s), we will discuss your requirements, make suggestions for efficient implementation, and be right there with you as you set up your account, every step of the way.
### What will we do during our session(s)?
[Section titled “What will we do during our session(s)?”](#what-will-we-do-during-our-sessions)
### OnceHub
[Section titled “OnceHub”](#oncehub)
* Set up multiple Event types
* Implement calendar integration
* Customize email templates
* Set up CRM integration
* Help you add and manage Zaps within OnceHub
* Create multiple User accounts for employees
* An hour or more of training with all your employees on board, learning how to use OnceHub (session can be recorded at request)
* Anything else we’ve agreed upon after consulting with you
### Is a setup assistance package right for you?
[Section titled “Is a setup assistance package right for you?”](#is-a-setup-assistance-package-right-for-you)
Possibly, if you:
* Don’t feel comfortable implementing software configurations on your own, without direction from a professional
* Want to save time by paying a professional to configure OnceHub faster than you’d be able to on your own
* Want all your employees to be introduced to OnceHub fast and effectively, providing them with all the resources and knowledge they require to get started
To purchase a setup assistance package, simply [book your session(s)](https://go.oncehub.com/setupoh). You will be required to pay for the package through our PayPal integration in order to submit the booking.
## The OnceHub Service Level Agreement (SLA)
[Section titled “The OnceHub Service Level Agreement (SLA)”](#the-oncehub-service-level-agreement-sla)
At OnceHub, we understand the importance of data access and service availability. Scheduling is a critical business process and there is never a good time for downtime. Built with a top-tier infrastructure, OnceHub provides the reliability and performance our customers have come to expect. Nonetheless, as with any cloud software, downtime still occurs. There are two types of downtime.
### Planned downtime
[Section titled “Planned downtime”](#planned-downtime)
Planned downtime is typically required for new releases so we can deploy our latest features. Planned downtime is always performed during off-peak hours and published in advance to prepare our customers for the downtime. Planned downtime usually lasts 30 - 60 minutes and typically occurs on Saturdays, between 12:00 AM – 6:00 AM Eastern Time. Planned downtime occurs 6 - 8 times a year in line with the frequency of our releases.
### Unplanned downtime
[Section titled “Unplanned downtime”](#unplanned-downtime)
Even with the best intentions, unplanned downtime and service issues can sometimes occur. Unplanned downtime is usually the result of a third-party service failure or unexpected complications in our releases. In these cases, we report such incidents to our customers as quickly as possible (usually within a few minutes) and make every effort to resolve them as fast as we can. During unplanned downtime, we continually update our customers on the progress that is being made towards a resolution. Not all unplanned downtime is equal. Unplanned downtime varies, depending on how it affects OnceHub Users (severity level) and also its cause.
### Severity levels
[Section titled “Severity levels”](#severity-levels)
Unplanned downtime is divided into severity levels. The level of severity depends on the impact to the usability of OnceHub. Each level has its own formal definition.
* **Severity 1:** The service is down, inoperable, inaccessible, or unavailable. The performance or nonperformance of the service prevents all useful work from being accomplished.
* **Severity 2:** The service is severely limited or degraded. Major functions are not performing properly, causing a significant impact to User’s operations or productivity.
* **Severity 3:** The service has a minor issue with minimal impact to business operations; the issue is localized or has isolated impact; or the problem is any other issue that is not Severity 1 or 2.
Only Severity level 1 is applicable to the OnceHub SLA commitments.
### Force majeure
[Section titled “Force majeure”](#force-majeure)
When unplanned downtime happens due to acts of god, such as earthquakes, fires, or floods, or things like wars, government sanctions, embargos, or riots, this is considered force majeure. Since force majeure can’t be anticipated, it is excluded from the OnceHub SLA commitments.
### Third-party applications
[Section titled “Third-party applications”](#third-party-applications)
Occasionally, unplanned downtime is beyond the control of OnceHub. This occurs when a third-party application, such as an integrated calendar or CRM, is not operating at normal service levels. Typically, the effect of this can be quickly worked around by disconnecting the affected system from OnceHub. Since service issues with third-party applications do not affect the functionality of the core OnceHub platform and OnceHub does not have responsibility for external systems, unplanned downtime resulting from third-party integrations is excluded from the OnceHub SLA commitments.
### Uptime Service Level Agreement (SLA)
[Section titled “Uptime Service Level Agreement (SLA)”](#uptime-service-level-agreement-sla)
As part of our commitment to customers, we aim to provide 99.9% uptime. The OnceHub SLA only includes unplanned downtime of severity level 1. It does not include other types of downtime—specifically, the following downtime is excluded from the SLA:
* Planned downtime
* Unplanned downtime at severity levels 2 and 3
* Unplanned downtime resulting from force majeure
* Unplanned downtime resulting from third-party applications.
When calculating our monthly uptime, only unplanned downtime of severity level 1 should be considered. Our 99.9% uptime commitment is equivalent to 43.8 minutes per month or 8.76 hours per year of unplanned downtime. As part of our service level commitments, all types of downtime are published. This type of transparency ensures we meet our uptime goals. To monitor our system status or planned downtime, visit [our status page](http://status.oncehub.com/) or subscribe to status notifications on our dedicated [twitter feed](https://twitter.com/statusonce). [Learn more about the status page](https://help.oncehub.com/getting-started/introduction-oncehub/oncehub-service-and-support-information/#understanding-the-status-page "Understanding the Status page")
## Understanding the Status page
[Section titled “Understanding the Status page”](#understanding-the-status-page)
The Status page provides real time and historic updates on the current status of the OnceHub products, the website and third-party integrations. The Status page reports information for both planned and unplanned downtime. The Status page is located at [status.oncehub.com](http://status.scheduleonce.com/).
**Planned downtime** OnceHub may perform planned system maintenance and upgrades for the service from time to time. Typical duration of planned downtime lasts 30 - 60 minutes. Planned downtime will commonly occur on a Saturday, between 1:00 AM – 6:00 AM Eastern Time. Any planned downtime within this maintenance window, as well as any planned downtime outside of it, will be communicated via the Status page.
**Unplanned downtime** While extremely rare, OnceHub sometimes experiences unplanned downtime or service disruptions. We report such incidences to our Customers as quickly as possible and make every effort resolve them as quickly as possible. The Status page will always reflect the most up-to-date information available about service disruptions.
**Subscribe to updates** You can subscribe to status updates via RSS feed or Twitter. The links to subscribe are located in the upper-right corner of the Status page. The Twitter account is [@StatusOnce](https://twitter.com/intent/follow?screen_name=statusonce\&original_referer=http://status.scheduleonce.com/). All planned and unplanned downtime will be reported simultaneously with the Status page updates.
**Understanding service statuses** The Status page displays an overview of OnceHub service performance for the last five days. You can see a full performance history of a service by clicking on the individual service, for example [the Corporate website](https://status.oncehub.com/service/OnceHub-Website).
The Status page uses icons to communicate if a service is running as normal, if there is an interruption or if a reported incident was resolved:
|  | The service is up and functioning as normal. |
| ------------------------------------------------------------------------ | --------------------------------------------------------------------------------------------------------------------------------------------------------------------------------------------------------- |
|  | The service is running but not performing optimally. The service can still be used but there may be some limitations. |
|  | The service is down and cannot be used. |
|  | An incident was reported, has been resolved and the service is functioning as normal. If an incident was resolved on the current date, you will see this icon overlapping with the green checkmark above. |
## Generating your support code
[Section titled “Generating your support code”](#generating-your-support-code)
Read on to learn how to generate your support code.
Your support code enables us to access your account if necessary. All OnceHub accounts have a support code. You may be asked to provide your support code if you contact us through one of our support channels.
Your generated support code is valid for 30 days only. After this, you must generate a new support code if you require further assistance (if account access is required for reviewing and/or resolving the issue).
#### To generate your support code:
[Section titled “To generate your support code:”](#to-generate-your-support-code)
1. In the top right menu, click on the question mark icon.
2. Select **Generate support code**.
3. **Copy**.
# Signing Up With OnceHub
> Sign up using your existing GSuite or Office 365 account, or with an email address.
There are two ways to sign up using OnceHub:
## 1. Create Your Own Account
[Section titled “1. Create Your Own Account”](#1-create-your-own-account)
* Go to the OnceHub [**signup page**](https://oncehub.com/signup?).
* Sign up using your existing **GSuite** or **Office 365** account, or with an email address.
* This automatically starts a **14-day free trial** with access to most of the OnceHub features. [**Learn more about what’s included in the free trial**](https://help.oncehub.com/getting-started/introduction-oncehub/your-oncehub-trial-account/#whats-included).
## 2. Join Your Organization’s Account
[Section titled “2. Join Your Organization’s Account”](#2-join-your-organizations-account)
If your organization already uses OnceHub, your administrator will create an account for you and send you an email invitation with a link to join.
Follow [**Join Your Organization’s Account Guide**](https://help.oncehub.com/getting-started/introduction-oncehub/joining-your-organizations-oncehub-account/) for step-by-step instructions.
***
### Getting Started
[Section titled “Getting Started”](#getting-started)
Once you’ve signed up and logged in, we recommend checking out our [**Introduction to OnceHub**](https://help.oncehub.com/getting-started/introduction-oncehub/introduction-to-oncehub/) article. This guide will walk you through the initial setup process and help you get the most out of OnceHub.
***
## Upgrading During the 14-day Free Trial
[Section titled “Upgrading During the 14-day Free Trial”](#upgrading-during-the-14-day-free-trial)
[How to Upgrade your account during the Free Trial](https://www.youtube-nocookie.com/embed/As2oQ4-oQ80?wmode=opaque)
You can upgrade your trial account to a paid plan at any time during your 14-day free trial.
### To upgrade from the 14-day free trial
[Section titled “To upgrade from the 14-day free trial”](#to-upgrade-from-the-14-day-free-trial)
1. Click on **Purchase Now**, located in the top-right corner of your account.
2. Select the plan you’d like to purchase (e.g., **Schedule**, **Route**, or **Engage**).
3. Customize your upgrade by deciding on the number of seats, billing cycle, and any other preferences.
Note
Once you upgrade to a paid plan, you will not be able to downgrade to the Basic plan.
***
## How to Switch to the Basic Plan
[Section titled “How to Switch to the Basic Plan”](#how-to-switch-to-the-basic-plan)
If you prefer to use OnceHub’s basic scheduling features without paying for a subscription, you can switch to the Basic plan at the end of your 14-day free trial.
### To downgrade from the trial
[Section titled “To downgrade from the trial”](#to-downgrade-from-the-trial)
1. Click on **See all options** in the popup that appears at the end of your trial.
2. Select the **Basic** plan.
3. Click on **Confirm downgrade**.
Note
This is the only way to downgrade to the Basic plan. If you upgrade to a paid plan, you will not be able to downgrade to the free plan in the future.
***
[**Let us know**](https://help.oncehub.com/contact-us/) if you need additional help!
# Using OnceHub from Your Mobile
> OnceHub provides an easy way to manage your scheduling, meetings, and availability directly from your mobile device.
OnceHub provides an easy way to manage your scheduling, meetings, and availability directly from your mobile device. This guide explains how to maximize your mobile experience.
***
## Manage Meetings
[Section titled “Manage Meetings”](#manage-meetings)
* **View Meeting Details:** Access information about canceled, rescheduled, and upcoming meetings, including participant details.
* **Filter Meetings:** Use filters such as:
* My upcoming meetings
* All meetings
* **Update Meetings:** Cancel, reschedule, reassign, or mark meetings as *No-Show* directly from the mobile interface.
***
## Manage Your Availability
[Section titled “Manage Your Availability”](#manage-your-availability)
* **Weekly Working Hours:** Customize your standard working hours.
* **Date-Specific Overrides:** Adjust availability for specific dates to accommodate changes.
* **Meeting Location Preferences:** Set availability based on meeting location or type (e.g., video, phone, in-person).
***
## Object Sharing
[Section titled “Object Sharing”](#object-sharing)
Easily copy links directly from the Home page for:
* Booking Calendars
* Routing Forms
* Chatbots
***
## Create a Shortcut for Quick Mobile Access
[Section titled “Create a Shortcut for Quick Mobile Access”](#create-a-shortcut-for-quick-mobile-access)
Set up a Home screen shortcut for faster access to OnceHub on your mobile device:
**For Android Devices:**
1. Open OnceHub in your mobile browser (e.g., Chrome).
2. Tap the **menu (three dots)** in the top-right corner.
3. Select **Add to Home Screen**.
4. Name the shortcut and tap **Add**.
**For iOS Devices:**
1. Open OnceHub in Safari.
2. Tap the **Share** **icon** (a square with an upward arrow).
3. Select **Add to Home Screen**.
4. Customize the shortcut name and tap **Add**.
# Your OnceHub Trial Account
> Your 14-day trial helps you understand whether OnceHub is a good fit for your organization. You will have nearly all functionality during the trial.
[Your OnceHub Trial Account](https://www.youtube-nocookie.com/embed/raSfc7Iel90?wmode=opaque)
Your 14-day trial helps you understand whether OnceHub is a good fit for your organization. You will have nearly all functionality during the trial. This allows you to explore and utilize the platform’s capabilities to meet your scheduling and engagement needs.
***
## What’s included
[Section titled “What’s included”](#whats-included)
OnceHub’s trial period grants you access to a wide range of features. Here’s an overview of what to expect:
* **Features:** Many key features, such as scheduling, phone agent, reminders, video conferencing integration, and calendar integration, are fully available. This allows you to test capabilities that align with your business needs. You will also receive 25 SMS credits to test [**SMS notifications**](https://help.oncehub.com/billing/sms-credits-in-oncehub/).
* **Duration:** The trial lasts for 14 days, giving you ample time to explore the platform, test integrations, and assess how OnceHub can streamline your scheduling and engagement workflows.
* **Limitations:** While the trial offers broad access, there are some restrictions. The features of the security and [**compliance**](https://help.oncehub.com/security-compliance/compliance/) add-on are only for paid accounts. This includes email from your corporate account, email notifications Bcc’d to an internal address at your organization, single sign-on (SSO), CAPTCHA for booking actions, support for specific industry compliance frameworks, and more.
***
## Getting Started
[Section titled “Getting Started”](#getting-started)
Getting started with OnceHub is straightforward, thanks to the resources and support available to all trial users.
* **Help center:** OnceHub offers a variety of [**getting started articles**](https://help.oncehub.com/getting-started/introduction-oncehub/) that walk you through setting up your account, creating [**Booking Calendars**](https://help.oncehub.com/product/booking-calendars/introduction-to-booking-calendars/introduction-to-booking-calendars/), [**building Chatbots**](https://help.oncehub.com/product/chatbots/introduction-to-chatbots/) and [**Routing Forms**](https://help.oncehub.com/product/routing-forms/introduction-to-routing-forms/introduction-to-routing-forms/), and more.
* **Support during trial:** The trial includes access to a robust support system, including [**live chat**](https://help.oncehub.com/contact-us/), [**email support**](https://help.oncehub.com/contact-us/), and detailed help articles. The support team is available to help with any technical questions or issues you encounter as you explore the platform.
* **Purchasing extra support:** For users who want additional guidance, OnceHub offers premium support services, including [**personalized onboarding sessions**](https://help.oncehub.com/getting-started/introduction-oncehub/oncehub-service-and-support-information/) and [**dedicated account managers**](https://help.oncehub.com/contact-us/). These services can help accelerate your setup process and maximize the platform’s potential.
***
## Data retention policies
[Section titled “Data retention policies”](#data-retention-policies)
Understanding how your data is managed during and after the trial period is important. Here’s what happens to your data:
* **Account trial expires:** If you do not take any action after the trial ends, your account will be paused, and your data will be retained for 30 days from the expiration of your trial. During this period, you have the option to downgrade to the free plan or purchase a subscription to reactivate your account while retaining all your information.
* **Account deletion:** If you delete your account, OnceHub will retain your data for a short period according to our data retention policies. However, you will no longer have access to your account or this data. After 30 days, it is deleted from our production databases.
## End of your trial
[Section titled “End of your trial”](#end-of-your-trial)
Your OnceHub account will be paused at the end of your 14-day trial period. To continue using our services, you will need to take action by choosing your desired plan.
OnceHub provides various billing options tailored to different business sizes and needs. You can review detailed information on pricing and available plans in the [**billing and subscription guidance**](https://help.oncehub.com/billing/managing-your-subscription/).
If you need more time to explore our features after your trial has ended, please [**contact our sales team**](https://help.oncehub.com/contact-us/) for assistance.
# Product
> Human Engagement documentation and guides.
[Booking Calendars](https://help.oncehub.com/product/booking-calendars/)
[Booking Hubs](https://help.oncehub.com/product/booking-hubs/)
[Chatbots](https://help.oncehub.com/product/chatbots/)
[Routing Forms](https://help.oncehub.com/product/routing-forms/)
# Booking Calendars
> Booking Calendars documentation and guides.
[Introduction to Booking Calendars](https://help.oncehub.com/product/booking-calendars/introduction-to-booking-calendars/)
[Booking Settings](https://help.oncehub.com/product/booking-calendars/booking-settings/)
[Booking Forms](https://help.oncehub.com/product/booking-calendars/booking-forms/)
[Notifications](https://help.oncehub.com/product/booking-calendars/notifications/)
[Sharing Embedding](https://help.oncehub.com/product/booking-calendars/sharing-embedding/)
[Phone Booking](https://help.oncehub.com/product/booking-calendars/phone-booking/)
# Booking Forms
> Booking Forms documentation and guides.
[Booking Calendar Booking Forms](https://help.oncehub.com/product/booking-calendars/booking-forms/booking-calendar-booking-forms/)
[Collecting Email and Mobile Phone Number: What You Need To Know](https://help.oncehub.com/product/booking-calendars/booking-forms/collecting-email-and-mobile-phone-number-what-you-need-to-know/)
[Mapping Booking Calendar Questions to Object Properties](https://help.oncehub.com/product/booking-calendars/booking-forms/mapping-booking-calendar-questions-to-object-properties/)
[How to Pass Booking Data using Hidden Fields](https://help.oncehub.com/product/booking-calendars/booking-forms/how-to-pass-booking-data-using-hidden-fields/)
[Booking Calendar Redirect](https://help.oncehub.com/product/booking-calendars/booking-forms/booking-calendar-redirect/)
# Booking Calendar Booking Forms
> The Booking Form serves as a crucial interface for gathering essential guest information, but its functionality extends beyond simple data collection.
[Booking Calendar Booking Forms](https://www.youtube-nocookie.com/embed/FgfEXHHhaAs?wmode=opaque)
The **Booking Form** serves as a crucial interface for gathering essential guest information, but its functionality extends beyond simple data collection. It not only allows you to define what information you collect from guests, but also how that data is utilized and passed along to streamline your scheduling process and integrate with other systems. By default, it includes fields for **Full Name** and **Email**, as well as conditional fields for **Meeting Location** and **SMS notifications**. The form is also highly customizable, allowing you to collect additional information and manage how that data flows in and out of your Booking Calendar.
***
## Customizing Field Order and Labels
[Section titled “Customizing Field Order and Labels”](#customizing-field-order-and-labels)
You can customize the **Booking Form** to better suit your needs by:
* **Editing Field Labels:** Change both the internal and guest-facing labels to clarify the type of information required.
* **Reordering Fields:** Drag and drop fields to rearrange their order.
* **Marking Required Fields:** Mark fields as required, which will display an asterisk (\*) next to the field to indicate it must be completed.
***
## Conditional Questions
[Section titled “Conditional Questions”](#conditional-questions)
Conditional Questions only appear on the Booking Form when specific settings are enabled in your account or Booking Calendar.
* **Location:** Appears when multiple [**meeting location options**](https://help.oncehub.com/account-administration/locations-rooms/offering-multiple-meeting-locations-per-time-block/) (e.g., physical address, phone call, virtual meeting) are configured for the host. You have the option to present these choices to your guests as either a dropdown list or radio buttons while they complete the booking form.
* **SMS Notifications:** Displays when **SMS notifications** are enabled in [**Guest Notifications**](https://help.oncehub.com/product/booking-calendars/notifications/booking-calendar-guest-notifications/), giving guests the option to opt in for text message updates.
***
## Adding Additional Guests
[Section titled “Adding Additional Guests”](#adding-additional-guests)
You can allow guests to add up to 10 additional guests during the booking process. These additional guests will receive guest notification emails and be invited to the meeting.
**To Enable Additional Guests**
1. Open the **Booking Calendar** you wish to edit.
2. Select the **Booking Form** tab.
3. Click the **+ Add Questions** pane in the top left.
4. Click or Drag & drop the **Additional Guests** question from the pane into the form.
5. In the right toolbar, select fields to collect information from Additional Guests. When adding additional guest, the guest will be prompted for the following information:
* Email address (Required)
* Full name
* Relationship
***
## Adding Custom Questions
[Section titled “Adding Custom Questions”](#adding-custom-questions)
You can add extra question fields to collect more information from your guests.
**To Add a Question**
1. Open the **Booking Calendar** you wish to edit.
2. Select the **Booking Form** tab.
3. Click the **+ Add Questions** pane in the top left.
4. Click or Drag & drop the desired Questions from the pane into the form.
5. From the right toolbar, configure the question’s settings.
6. Click **Save**.
***
## Common Question Settings
[Section titled “Common Question Settings”](#common-question-settings)
You can add as many questions as needed and customize each one using the following common settings:
* **Question Text:** The visible text displayed to guests on the **Booking Calendar**.
* **Field Mapping:** Used to map the hidden field to an existing Global field. This ensures that data can be used in downstream integration.
* **Answer Required:** Decide if the question must be answered before the booking can be completed.
***
## Question Types Specific Settings
[Section titled “Question Types Specific Settings”](#question-types-specific-settings)
Different question types have their own specific settings:
* **Free Text:**
* **Character Limit:** Set the maximum number of characters allowed in the answer.
* **Single Select and Multi-Select:**
* **Answer Options:** Provide a list of options for guests to choose from.
* **Question Style:** Choose whether the options appear as a **Dropdown List** or **Buttons**.
* **Phone:** Use this to collect a guest’s phone number.
* **Attachment:**
* **Button Text:** Add it to ask the guest to upload up to five documents (limit: 10 MB per file).
***
## Prefilling Information in Your Booking Calendar
[Section titled “Prefilling Information in Your Booking Calendar”](#prefilling-information-in-your-booking-calendar)
After mapping your questions to fields, you can create customized booking links to prefill your guests’ details. Prefilled booking forms save time and reduce errors by avoiding the need for manual data entry. Within OnceHub you have 2 options for how to prefill Booking Calendars for your guests:
* **For a specific guest:** Manually enter guest information into the booking link. Use this option if you already have the guest details available.
* **Via third party tool:** Toggle on placeholders for specific fields in the booking link. Then, use a mail merge or similar feature in your third-party tool (e.g., a CRM or email platform) to dynamically insert guest details.
Please take a look at our [**Prefilling Guest Information in Your Booking Calendar**](https://help.oncehub.com/product/booking-calendars/sharing-embedding/prefilling-guest-information-in-your-booking-calendar/) article for a detailed guide.
***
## Redirecting Guests to an External URL After Booking
[Section titled “Redirecting Guests to an External URL After Booking”](#redirecting-guests-to-an-external-url-after-booking)
You can redirect clients to an external URL after they complete their booking, which can be useful for:
* **Thank You Pages:** Redirect clients to a confirmation or thank you page.
* **Data Capture:** Pass booking information to the redirected page via URL parameters.
* **Payment Pages:** Direct clients to complete payment after booking.
* **Survey Forms:** Collect feedback or additional details through a post-booking survey.
For steps on how to redirect to an external URL, please [**click here**](https://help.oncehub.com/product/booking-calendars/booking-forms/booking-calendar-redirect/).
# Booking Calendar Redirect
> The Booking Calendar redirect feature allows you to redirect guests to an external URL after they complete a booking. This is useful for:
[Booking Calendar Redirect](https://www.youtube-nocookie.com/embed/9YMy7GvXHfI?wmode=opaque)
The **Booking Calendar redirect** feature allows you to redirect guests to an external URL after they complete a booking. This is useful for:
* **Thank You Pages:** Redirect guests to a confirmation page after booking.
* **Payment Pages:** Direct guests to complete payment after booking.
* **Survey Forms:** Collect feedback or additional information post-booking.
***
## How to Set Up Redirects
[Section titled “How to Set Up Redirects”](#how-to-set-up-redirects)
### To Set Up a Redirect After Booking
[Section titled “To Set Up a Redirect After Booking”](#to-set-up-a-redirect-after-booking)
1. Click **Booking Calendars** in the left-hand menu.
2. Select the **Booking Calendar** you want to edit.
3. Go to the **Booking Form Tab**.
4. Scroll to the bottom and locate **Redirect to an External URL**.
5. Toggle the option **On** to enable redirection.
***
### Specify a Custom URL for Each Scenario
[Section titled “Specify a Custom URL for Each Scenario”](#specify-a-custom-url-for-each-scenario)
In the right-side toolbar, you can specify unique URLs for the following actions:
* **After guest schedules:** Direct guests to a confirmation page.
* **After guest reschedules:** Redirect guests to a page confirming the updated meeting time.
* **After guest cancels:** Guide guests to a cancellation confirmation page.
***
### Send Meeting Information to the Redirected Page
[Section titled “Send Meeting Information to the Redirected Page”](#send-meeting-information-to-the-redirected-page)
You can use the **Include saved answers on redirect page** toggle in the right-side toolbar to send the following data via URL to the page that is redirected to:
* Booking Calendar ID
* Meeting subject
* Meeting status
* Meeting creation time
* Meeting starting time
* Guest name and email
* Responses to Booking Form Questions.
* Any URL parameters originally passed to the Booking Calendar URL
***
By using **Booking Calendar redirects**, you can guide guests seamlessly to the next steps after booking, improving the overall scheduling experience and ensuring follow-up actions are completed smoothly.
# Collecting Email and Mobile Phone Number: What You Need To Know
> In OnceHub, the Email and Phone fields are more than just contact methods, they are unique identifiers.
In OnceHub, the **Email** and **Phone** fields are more than just contact methods, they are **unique identifiers**. These fields allow OnceHub to recognize a contact and determine if they are a new visitor or an existing contact in your **Contact Database**.
OnceHub provides **full flexibility** to choose which identifiers you collect across both web-based (GUI) and Phone Booking channels. Your choice of identifier typically depends on your booking channel:
* **Web-based Scheduling (GUI):** By default, Email is set as a mandatory field to ensure guests receive calendar invites and automated notifications.
* **Phone Booking:** The Phone field should be used as the contact identifier as this reduces friction during conversational scheduling while allowing for SMS confirmations.
***
## 1. Collecting Email as Your Identifier
[Section titled “1. Collecting Email as Your Identifier”](#1-collecting-email-as-your-identifier)
Collecting an email address as the primary identifier is the **recommended setup for all web-based scheduling**. This ensures that all calendar invites and automated notifications are delivered.
## How to set Email as the Identifier:
[Section titled “How to set Email as the Identifier:”](#how-to-set-email-as-the-identifier)
1. Navigate to your **Booking Form** editor.
2. Select the **Contact Email** field to open its settings on the right-hand panel.
3. Toggle **Answer required** to ON.
4. Click **Save** to confirm the changes.
**If you are using Phone Booking**
For the best Phone Booking experience, the Contact Email field’s **Do not ask for email address when bookings are made via phone booking** setting is enabled by default.
This setting allows you to maintain a single Booking Calendar for both web-based (GUI) and Phone Booking guests. It prevents forcing a caller to provide an email address during the phone conversation flow. Add a Phone field and enable SMS notifications in the Notifications tab to ensure your guest still receives all necessary reminders.
***
## 2. Collecting Only Mobile Phone Number as Your Identifier
[Section titled “2. Collecting Only Mobile Phone Number as Your Identifier”](#2-collecting-only-mobile-phone-number-as-your-identifier)
For **Phone Booking** and **phone-first businesses** where **speed is critical** or guests prefer **SMS** notifications, setting the **Phone** field as the identifier is ideal.
## How to set Phone as the Identifier:
[Section titled “How to set Phone as the Identifier:”](#how-to-set-phone-as-the-identifier)
1. Navigate to the **Booking Form** editor.
2. Select the **Phone** field to open its settings on the right-hand panel.
3. Toggle **Answer required** to ON. **IMPORTANT:** We highly recommend selecting the **Contact details and SMS (requires consent)** checkbox to ensure compliance and SMS notification delivery.
4. Click **Save** to confirm the changes.
To learn more, read our [**Scheduling Without Email: What You Need To Know**](https://help.oncehub.com/contact-management/scheduling-without-an-email-what-you-need-to-know/) article.
***
## Frequently Asked Questions (FAQs)
[Section titled “Frequently Asked Questions (FAQs)”](#frequently-asked-questions-faqs)
**What happens if Email and Mobile Phone are both collected?**
**A:** If both fields are provided, **Email remains the primary identifier**. OnceHub will prioritize matching the contact based on their email address. The phone number will be updated or added to that specific contact record.
**What if I do not collect Email OR Mobile Phone?**
**A:** If neither field is collected:
* OnceHub cannot recognize the guest. A **new contact** will be created for every activity.
* OnceHub will have no way to send calendar invites or notifications.
To learn more, read our [**How Contacts Are Identified In OnceHub**](https://help.oncehub.com/contact-management/how-contacts-are-identified-in-oncehub/) article.
# How to Pass Booking Data using Hidden Fields
> Hidden fields in Booking Calendars allow you to add invisible text questions to your booking form. These fields are never shown to guests filling out the for...
[How to Pass Booking Data using Hidden Fields](https://www.youtube-nocookie.com/embed/xZoTpXfCwz0?wmode=opaque)
Hidden fields in Booking Calendars allow you to add invisible text questions to your booking form. These fields are never shown to guests filling out the form, enabling you to pass internal data like campaign sources, tags, or known customer details discreetly.
This feature is particularly valuable for campaign tracking, lead tagging, and integrating customer information seamlessly into your workflows.
***
## Key Benefits of Hidden Fields
[Section titled “Key Benefits of Hidden Fields”](#key-benefits-of-hidden-fields)
* **Discreet Data Handling:** Pass internal data without displaying it to guests or relying on URL parameters.
* **Enhanced Tracking:** Simplify campaign tracking and lead tagging for marketing and operational needs.
***
## How Hidden Fields Work
[Section titled “How Hidden Fields Work”](#how-hidden-fields-work)
The Hidden Field question type on your Booking Form is designed specifically for discreet data capture and transfer.
When you add a Hidden Field to your Booking Form, it ensures that:
* The question will **not be visible to guests** filling out the form.
* The field remains hidden in the transcript in the guest’s notification emails and the calendar event associated with the booking.
To ensure data integrity and workflow consistency, **Field Mapping** is now required for all Hidden Fields. This mandatory step guarantees the information is saved and passed correctly.
You can populate the hidden field data in two ways:
1. **Pre-fill via URL:** Use URL parameters to populate the hidden field dynamically. If data is pre-filled via URL, it will override any set default value.
2. **Default Value:** Set a default value that will be used if no data is provided via URL.
## How to Add a Hidden Field
[Section titled “How to Add a Hidden Field”](#how-to-add-a-hidden-field)
Here’s how you can set up a hidden field in your booking form:
1. Open the **Booking Calendar** you wish to edit.
2. Select the **Booking Form** tab.
3. Click the **+ Add Questions** pane located in the top left.
4. Click or Drag & drop the **Hidden Field** question from the pane into the form.
5. Use the **Field Mapping** dropdown in the right toolbar to map the hidden field to an existing Global field.
6. **(Optional)** Enter a **Default Value**. This value will be used if no prefill data is provided via URL.
7. Click **Save**.
## Sending Hidden Field Data to Third-Party Tools
[Section titled “Sending Hidden Field Data to Third-Party Tools”](#sending-hidden-field-data-to-third-party-tools)
Hidden field data can be mapped to Object Properties for integration with third-party tools like CRMs or automation platforms (e.g., Zapier).
To achieve this, first [**map the question to a Property**](https://help.oncehub.com/product/booking-calendars/booking-forms/mapping-booking-calendar-questions-to-object-properties/). Once mapped, you can set up mapping for the third-party tool that includes the hidden field. For guides on setting up mapping for various third-party tools, please take a look at the following articles:
* [**Integrating OnceHub with Salesforce**](https://help.oncehub.com/account-integrations/crm/integrating-oncehub-with-salesforce/)
* **[Integrating OnceHub with HubSpot](https://help.oncehub.com/account-integrations/crm/integrating-oncehub-with-hubspot/)**
* **[Automate Your Scheduling Workflow by using Zapier](https://help.oncehub.com/account-integrations/automation/zapier/automate-your-scheduling-workflow-by-using-zapier/)**
* [**Automate Your Scheduling Workflow with Our API**](https://help.oncehub.com/account-integrations/automation/api-and-webhooks/custom-booking-calendar-integrations-with-webhooks-and-apis/)
***
Using hidden fields enables you to pass valuable data silently while maintaining a clean and distraction-free experience for your guests. By combining fallback values, URL pre-filling, and third-party integrations, you unlock powerful possibilities for tracking, segmentation, and workflow automation.
# Mapping Booking Calendar Questions to Object Properties
> In this guide, you will learn how to efficiently map questions in your Booking Calendar to save data in Object Properties.
[Mapping Booking Calendar Questions to Object Properties](https://www.youtube-nocookie.com/embed/z32Vvk0X0FE?wmode=opaque)
In this guide, you will learn how to efficiently map questions in your Booking Calendar to save data in **Object Properties.**
For information on **Object Properties**, please take a look at our [**Introduction to Objects and Properties**](https://help.oncehub.com/account-administration/objects-properties/introduction-to-objects-and-properties/) article.
***
## How to Map a Question to an Object Property
[Section titled “How to Map a Question to an Object Property”](#how-to-map-a-question-to-an-object-property)
Each Booking Calendar allows you to configure which Questions will be saved into a property using the following steps:
1. Open the **Booking Calendar** you wish to edit.
2. Select the **Booking Form** tab.
3. Click the **+ Add Questions** pane in the top left.
4. Click or Drag & drop the desired Questions from the pane into the form.
5. Toggle on **Do More With This Answer**.
6. Select the **Object** and **Property** you want to map the question to.
7. Click **Save**
Once completed, the responses to the mapped questions will be automatically saved in OnceHub and can be included in integrations with tools like Salesforce, Hubspot, or Zapier.
# Booking Settings
> Booking Settings documentation and guides.
[Booking Calendar Meeting Durations](https://help.oncehub.com/product/booking-calendars/booking-settings/booking-calendar-meeting-durations/)
[Booking Calendar Meeting Types](https://help.oncehub.com/product/booking-calendars/booking-settings/booking-calendar-meeting-types/)
[Booking Calendar Meeting Distribution Options](https://help.oncehub.com/product/booking-calendars/booking-settings/booking-calendar-meeting-distribution-options/)
[Booking Calendar Workload Management](https://help.oncehub.com/product/booking-calendars/booking-settings/booking-calendar-workload-management/)
[Setting up Booking Calendar Team Scheduling Scenarios](https://help.oncehub.com/product/booking-calendars/booking-settings/setting-up-booking-calendar-team-scheduling-scenarios/)
[Configuring Availability for Specific Booking Calendars](https://help.oncehub.com/product/booking-calendars/booking-settings/configuring-availability-for-specific-booking-calendars/)
[Do You Need Group Sessions Or Concurrent Sessions?](https://help.oncehub.com/product/booking-calendars/booking-settings/do-you-need-group-sessions-or-concurrent-sessions/)
[Booking Calendar Group Sessions](https://help.oncehub.com/product/booking-calendars/booking-settings/booking-calendar-group-sessions/)
[Group Sessions in Team Scheduling Scenarios](https://help.oncehub.com/product/booking-calendars/booking-settings/group-sessions-in-team-scheduling-scenarios/)
[Booking Calendar Concurrent Sessions](https://help.oncehub.com/product/booking-calendars/booking-settings/booking-calendar-concurrent-sessions/)
[Concurrent Sessions in Team Scheduling Scenarios](https://help.oncehub.com/product/booking-calendars/booking-settings/concurrent-sessions-in-team-scheduling-scenarios/)
[Hosting High Attendance Webinars With OnceHub](https://help.oncehub.com/product/booking-calendars/booking-settings/hosting-high-attendance-webinars-with-oncehub/)
[Booking Calendar Timeframe and Timeslot Preferences](https://help.oncehub.com/product/booking-calendars/booking-settings/booking-calendar-timeframe-and-timeslot-preferences/)
[How To Localize Your Booking Calendar](https://help.oncehub.com/product/booking-calendars/booking-settings/how-to-localize-your-booking-calendar/)
[Booking With Approval](https://help.oncehub.com/product/booking-calendars/booking-settings/booking-with-approval/)
# Booking Calendar Concurrent Sessions
> Concurrent Sessions allow multiple guests to book independent meetings for the same time slot with the same host(s).
**Concurrent Sessions** allow multiple guests to book independent meetings for the same time slot with the same host(s).
This functionality can be thought of as **planned overbooking**, helping high-volume teams maximize their calendar efficiency.
***
## Key Features of Concurrent Sessions
[Section titled “Key Features of Concurrent Sessions”](#key-features-of-concurrent-sessions)
* **Customizable Capacity Limits:** Specify the maximum number of bookings per time slot host(s) can receive.
* **Independent Meeting Management:** Each guest is booked with the host independently. This means every participant has their own unique booking details, and a separate calendar event is created for every individual session.
* **Smart Conflict Prevention:** Concurrent Sessions only overlap with other bookings made through the **same** Booking Calendar. The system still respects **busy time** on your **connected calendar and other Booking Calendars** to prevent unexpected conflicts.
To learn more, read our [**Concurrent Sessions in Team Scheduling Scenarios**](https://help.oncehub.com/product/booking-calendars/booking-settings/concurrent-sessions-in-team-scheduling-scenarios/) article.
***
## Use Case Scenarios
[Section titled “Use Case Scenarios”](#use-case-scenarios)
Use **Concurrent Sessions** to maintain high productivity in these common scenarios:
### High Volume Sales Teams with No-shows
[Section titled “High Volume Sales Teams with No-shows”](#high-volume-sales-teams-with-no-shows)
Sales teams often utilize a ***setter and closer*** workflow to manage leads efficiently. In this scenario, a ***setter*** confirms which prospects are available before a ***closer*** takes the meeting.
Because no-show rates can be high, allowing multiple bookings for a single slot ensures that the closer’s time is **always utilized**, even if one prospect fails to attend.
### Advisor or Medical Queues
[Section titled “Advisor or Medical Queues”](#advisor-or-medical-queues)
This feature is highly effective for college advisors or doctors who meet with individuals sequentially within a fixed time window.
While only one person is seen at a time, the system allows multiple people to book into that window, effectively creating a structured queue for a single physical room or office.
### Flexible Staffing for Interviews
[Section titled “Flexible Staffing for Interviews”](#flexible-staffing-for-interviews)
Businesses conducting high volumes of interviews can allow multiple candidates to book the same slot.
This allows the business to see the total volume first and then assign the necessary number of available interviewers to conduct the interviews.
***
## How to Configure Concurrent Sessions
[Section titled “How to Configure Concurrent Sessions”](#how-to-configure-concurrent-sessions)
Follow these steps to enable multiple bookings for your Booking Calendar:
1. Click **Booking Calendars** in the left-hand navigation menu.
2. Select the Booking Calendar you wish to edit.
3. Expand the **Session Type** section and select **Concurrent Sessions**.
4. Enter the **Maximum bookings per time slot** you wish to allow.
5. Click **Save** to apply the changes.
Caution
If any changes are made to your Booking Calendar settings, any partially booked time slots will become unavailable for further **Concurrent Session** bookings.
***
## How to Manually Overbook an Existing Meeting
[Section titled “How to Manually Overbook an Existing Meeting”](#how-to-manually-overbook-an-existing-meeting)
If you have an existing meeting and want to allow another guest to book with the host for that same time slot, you can make use of the [**Meeting Overlap**](https://help.oncehub.com/activities-analytics/activity-management/meeting-management/allowing-for-meeting-overlaps-with-booking-calendars/) feature in **Activities**.
**Meeting Overlap** can also be used with **Concurrent Sessions** to open up partially booked time slots for even further bookings, if required.
***
## Frequently Asked Questions (FAQs)
[Section titled “Frequently Asked Questions (FAQs)”](#frequently-asked-questions-faqs)
**How do Concurrent Sessions affect my analytics?**
**A:** The maximum limit set for **Concurrent Sessions** directly impacts the estimated availability displayed in [**Capacity Planning**](https://help.oncehub.com/activities-analytics/reporting-analytics/capacity-planning-for-optimizing-staffing-level/). Adjusting this limit will result in a change in the estimated capacity.
For example: Setting the limit to 2 will double the estimated availability for all time slots.
**What is the maximum number of Concurrent Sessions I can offer?**
**A:** You can offer up to 100 **Concurrent Sessions** for your Booking Calendar.
# Booking Calendar Group Sessions
> Group Sessions allow multiple guests to book seats in the same time slot with the same host for a meeting held at a single, shared location.
**Group Sessions** allow multiple guests to book seats in the same time slot with the same host for a meeting held at a single, **shared location**. Instead of managing individual one-on-one meetings, you can host a single shared event and allow guests to book seats until your capacity is reached.
Group Sessions are ideal for events where all attendees join the same meeting link or gather at a single physical location.
For more advanced team configurations, check our [**Group Sessions in Team Scheduling Scenarios**](https://help.oncehub.com/product/booking-calendars/booking-settings/group-sessions-in-team-scheduling-scenarios/) article.
***
## Key Features of Group Sessions
[Section titled “Key Features of Group Sessions”](#key-features-of-group-sessions)
* **Capacity Management:** You define the maximum number of guests permitted per group session. Once this booking limit is reached, availability **for that specific time slot** is automatically removed from the host’s **Booking Calendar** to prevent overbooking.
* **Host Calendar View:** When multiple guests book a single shared session, the host will see **multiple separate calendar events** in their connected calendar (one for each guest who books). This ensures that each guest’s unique booking data and contact details are preserved within the host’s calendar.
* **Unified Meeting Link:** All participants join the same session via a unified meeting link or physical address. For virtual meetings, OnceHub generates a **single meeting link** (Zoom, Google Meet, etc.) upon the first booking and **locks it** for all subsequent guests.
* **First-Guest Location Locking:** When multiple location options are offered, the first guest to book the session determines the meeting location.This selection is then automatically locked and applied to all subsequent bookings **for the same time slot** and **the same host**, ensuring all attendees arrive at the same place.
***
## Use Case Scenarios
[Section titled “Use Case Scenarios”](#use-case-scenarios)
**Group Sessions** are ideal for the following use cases:
* **Webinars:** Host a single session where multiple guests join the same video meeting link for presentations or announcements.
* **Workshops:** Run structured training sessions where participants book available seats in a shared time slot.
* **Group Interviews or Information Sessions:** Invite multiple candidates to book into the same time slot for hiring briefings or ***meet the team*** events.
* **Customer Onboarding Sessions:** Allow new customers to book into shared orientation sessions instead of scheduling individual onboarding calls.
***
## How to Configure Group Sessions
[Section titled “How to Configure Group Sessions”](#how-to-configure-group-sessions)
1. Go to **Booking Calendars** from the left-hand menu.
2. Select the Booking Calendar you want to edit.
3. Expand the **Session Type** section and select **Group Sessions**.
4. Enter the **Maximum guests per group session** you wish to allow (between 2 and 500).
5. Click **Save** to confirm the changes.
Caution
**Changing Settings After Bookings Have Been Made:** To maintain data integrity, if you modify your Booking Calendar settings (such as changing duration or capacity etc.), any existing time slots that are already partially booked will be unavailable for new attendees. This prevents conflicts between your old and new configurations. Future slots will follow your new settings.
## Frequently Asked Questions (FAQs)
[Section titled “Frequently Asked Questions (FAQs)”](#frequently-asked-questions-faqs)
**What happens to the meeting link if the host disconnects their video integration?**
**A:** To ensure your meeting remains consistent, the link generated for the first booking remains active. It will continue to be sent to all subsequent attendees even if the host’s video integration (like Zoom or Google Meet) is disconnected after the initial booking is made.
# Booking Calendar Meeting Distribution Options
> OnceHub Teams allows you to distribute meetings among team members, helping you:
**OnceHub Teams** allows you to distribute meetings among team members, helping you:
* **Optimize Scheduling Efficiency:** Evenly distribute meetings without conflicts.
* **Balance Workloads:** Prevent overbooking for individual team members.
* **Enhance Guest Flexibility:** Allow guests to book based on shared team availability.
* **Improve Resource Management:** Tailor meeting distribution based on meeting type and team capacity.
***
## Meeting Distribution Methods
[Section titled “Meeting Distribution Methods”](#meeting-distribution-methods)
**Booking Calendars** offers two primary distribution methods:
### Any Available Team Member
[Section titled “Any Available Team Member”](#any-available-team-member)
* Displays the combined availability of all team members in a single calendar view.
* Guests can select the time that best suits them from the shared availability.
* Assign priority levels so team members with higher priority are booked first when multiple members share the same time slot.
### Round Robin (Equal Distribution)
[Section titled “Round Robin (Equal Distribution)”](#round-robin-equal-distribution)
* Automatically assigns meetings to team members in a balanced rotation.
* Only one team member’s availability is shown at a time.
* Once a guest books with a team member, the system rotates to the next available member.
***
## Creating Teams
[Section titled “Creating Teams”](#creating-teams)
You can create teams through the **Account Menu** or directly within a **Booking Calendar**.
**From the Account Menu**
1. Click the **gear icon** in the top-right corner and select **Teams**.
2. Click **Add Team**.
3. Enter a **Team Name**, assign members, and click **Save**.
**From a Booking Calendar**
1. Open the desired **Booking Calendar**.
2. Click the **Host and Co-Hosts** dropdown and select **Create New Team**.
3. Name the team, add members, and click **Save**.
***
## Selecting Distribution Methods for Individual Booking Calendars
[Section titled “Selecting Distribution Methods for Individual Booking Calendars”](#selecting-distribution-methods-for-individual-booking-calendars)
Once a team is created, you can customize the **Meeting Distribution Method** for each **Booking Calendar**:
1. Open the desired **Booking Calendar**.
2. Go to the **Host and Co-Hosts** dropdown.
3. Select the team and choose the preferred distribution method:
* **Any Available Team Member**
* **Round Robin (Equal Distribution)**
This flexibility ensures the meeting distribution aligns with the specific scheduling needs of each calendar.
***
Choose the set up that best aligns with your team’s structure and scheduling needs for a more efficient, client-friendly booking experience.
# Booking Calendar Meeting Durations
> You can configure a Booking Calendar to offer a single duration or multiple duration options for your visitors to choose from.
You can configure a Booking Calendar to offer a single duration or multiple duration options for your visitors to choose from.
## Access Your Booking Calendar
[Section titled “Access Your Booking Calendar”](#access-your-booking-calendar)
1. Click **Booking Calendars** in the left-hand navigation menu.
2. Select the Booking Calendar you wish to edit.
***
## How to Set a Single Meeting Duration
[Section titled “How to Set a Single Meeting Duration”](#how-to-set-a-single-meeting-duration)
Follow these steps to set the meeting duration for your Booking Calendar:
1. Expand the **Duration** section.
2. Use the **dropdown** to select a duration or define a custom duration.
3. Click **Save** to apply the changes.
***
## How to Offer Multiple Duration Options
[Section titled “How to Offer Multiple Duration Options”](#how-to-offer-multiple-duration-options)
You can provide up to four **Meeting Durations** for your visitors to choose from when scheduling.
### To Add Additional Duration Options
[Section titled “To Add Additional Duration Options”](#to-add-additional-duration-options)
1. Expand the **Duration** section.
2. Click **+ Add duration** option and use the dropdown to select a duration or define a custom duration.
3. Click **Save** to apply the changes.
### To Set the Default Duration
[Section titled “To Set the Default Duration”](#to-set-the-default-duration)
You can choose one of the duration options as the default for your Booking Calendar.
1. Hover over the duration options and click **Make default**.
2. Click **Save** to confirm.
***
## Frequently Asked Questions (FAQs)
[Section titled “Frequently Asked Questions (FAQs)”](#frequently-asked-questions-faqs)
**How do multiple meeting duration options affect my analytics?**
**A:** The default duration option is used for the estimated availability displayed in [**Capacity Planning**](https://help.oncehub.com/activities-analytics/reporting-analytics/capacity-planning-for-optimizing-staffing-level/).
**How do multiple meeting duration options interact with Concurrent Sessions?**
**A:** When using multiple meeting duration options with [**Concurrent Sessions**](https://help.oncehub.com/product/booking-calendars/booking-settings/booking-calendar-concurrent-sessions/), only the duration selected for the first booking can be used for any subsequent bookings in that specific time slot with a host(s).
For example: If a host is booked for a 60-minute session at 9:00 AM, another visitor cannot book a 30-minute session starting at 9:00 AM or 9:30 AM with the same host(s).
**Can you offer multiple duration options to visitors through Phone Booking?**
**A:** Yes, the Phone Booking Agent will provide the set default as their initial option while letting them know that additional duration options are available if the default does not work for them.
**Are multiple meeting duration options supported via the API?**
**A:** No, offering multiple meeting duration options is currently not supported via the OnceHub API.
# Booking Calendar Meeting Types
> Booking Calendars offer flexible meeting types to accommodate a range of scheduling needs, including single-host, multi-host, and multi-guest setups.
**Booking Calendars** offer flexible meeting types to accommodate a range of scheduling needs, including **single-host**, **multi-host**, and **multi-guest** setups. Whether you’re scheduling one-on-one meetings, team collaborations, or group sessions, these options ensure you can customize the booking experience for your requirements.
***
## Meeting Types Overview
[Section titled “Meeting Types Overview”](#meeting-types-overview)
* **Single-Host Meeting (Pre-Assigned):** A specific host is designated upfront.
* **Single-Host Meeting (Dynamic):** The host is selected dynamically from a predefined Team.
* **Multi-Host Meeting (Pre-Assigned):** Specific hosts and co-hosts are assigned upfront.
* **Multi-Host Meeting (Dynamic):** Hosts and co-hosts are selected dynamically from a predefined Team.
* **Multi-Guest Meeting:** Allows additional guests to be included during booking.
**Meeting availability and locations** can be customized individually for each **Booking Calendar** or pulled directly from the host’s profile settings, ensuring flexibility across all meeting scenarios.
***
## Single-Host Meeting Types
[Section titled “Single-Host Meeting Types”](#single-host-meeting-types)
**Single-Host Meetings** are ideal for sessions requiring only one host. These meeting types fall into two categories:
### Pre-Assigned Single-Host Meetings
[Section titled “Pre-Assigned Single-Host Meetings”](#pre-assigned-single-host-meetings)
A single designated host manages all meetings, ideal for solo professionals or service providers managing their own schedules.
**Examples:**
* **Consultations with a Specialist:** A fitness trainer offering one-on-one sessions.
* **Client Appointments:** A lawyer scheduling legal consultations.
* **Interview Scheduling:** A recruiter conducting candidate interviews.
### Dynamic Selection Single-Host Meetings
[Section titled “Dynamic Selection Single-Host Meetings”](#dynamic-selection-single-host-meetings)
Dynamic selection single-host meetings use [**Teams**](https://help.oncehub.com/product/booking-calendars/booking-settings/booking-calendar-meeting-distribution-options/) to assign meetings to available team members based on predefined distribution methods, such as round-robin or load balancing.
**Examples:**
* **Customer Support Sessions:** Assign the next available support agent to a client query.
* **Sales Demos:** Rotate available sales representatives for product demonstrations.
* **Onboarding Calls:** Distribute new clients among onboarding specialists.
***
## Multi-Host Meeting Types
[Section titled “Multi-Host Meeting Types”](#multi-host-meeting-types)
**Multi-Host Meetings** are ideal for sessions requiring multiple hosts or co-hosts. These meeting types also fall into two categories:
### Pre-Assigned Multi-Host Meetings
[Section titled “Pre-Assigned Multi-Host Meetings”](#pre-assigned-multi-host-meetings)
Specific hosts and co-hosts are permanently assigned to a **Booking Calendar**, ensuring the same team members attend every meeting.
**Examples:**
* **Group Interviews:** A hiring committee interviewing a candidate together.
* **Customer Success Calls:** A customer success manager and sales development representative hosting a success call.
### Dynamic Selection Multi-Host Meetings
[Section titled “Dynamic Selection Multi-Host Meetings”](#dynamic-selection-multi-host-meetings)
Hosts and co-hosts are dynamically selected from predefined teams using distribution methods based on availability or workload. Each **Booking Calendar** can assign multiple teams and distribution methods simultaneously.
**Examples:**
* **Technical Support Calls:** Assign both support agents and developers for advanced client queries.
* **Sales and Onboarding:** Schedule meetings with both a salesperson and an onboarding specialist.
* **Recruitment and Onboarding:** Schedule sessions with both a recruiter and an HR coordinator.
***
## Multi-Guest Meeting Types
[Section titled “Multi-Guest Meeting Types”](#multi-guest-meeting-types)
**Multi-Guest Meetings** allow clients to invite additional participants, such as colleagues, partners, or family members, during the booking process. This feature can be enabled using the [**Additional Guests**](https://help.oncehub.com/product/booking-calendars/booking-forms/booking-calendar-booking-forms/#adding-additional-guests) option in the **Booking Form** settings.
Examples:
* **Couples Therapy Sessions:** A therapist hosting sessions for couples.
* **Family Consultations:** A school counselor meeting with parents and students.
* **Wedding Planning Meetings:** A planner meeting with a couple and their family.
***
By leveraging these **Booking Calendar Meeting Types**, you can create a tailored scheduling experience for any scenario—whether managing solo meetings, team collaborations, or group sessions. Customize your **Booking Calendar** settings to maximize flexibility, efficiency, and client satisfaction.
# Booking Calendar Timeframe and Timeslot Preferences
> Timeframe and Timeslot Preferences control how your availability is presented to clients, including when bookings can be made, how often time slots appear, a...
[Booking Calendar Timeframe and Timeslot Preferences](https://www.youtube-nocookie.com/embed/ZveX79Fmdqw?wmode=opaque)
Timeframe and Timeslot Preferences control how your availability is presented to clients, including when bookings can be made, how often time slots appear, and how far in advance meetings can be scheduled. Properly configuring these settings helps you manage availability effectively and avoid overbooking.
***
## Accessing Timeframe and Timeslot Preferences
[Section titled “Accessing Timeframe and Timeslot Preferences”](#accessing-timeframe-and-timeslot-preferences)
1. Click **Booking Calendars** in the left-hand menu.
2. Select the **Booking Calendar** you want to edit.
3. Scroll to the bottom and expand **Timeframe/Timeslot Preferences**.
***
## Timeframe Preferences
[Section titled “Timeframe Preferences”](#timeframe-preferences)
### Booking Window
[Section titled “Booking Window”](#booking-window)
**Booking Window** controls how far in the future clients can book appointments, restricting availability to a specific time range.
This setting is useful when you want to avoid long-term bookings that may require adjustments closer to the meeting date, such as in industries where demand fluctuates.
* You have the option to set the window as a sliding window. This can be configured based on either a specified number of calendar days or bookable days in the future.
* Or, you can set a specific date range for once-off booking windows.
* **Example:** If you set a 30-day limit, clients can only schedule meetings up to 30 days from the current date. Beyond this period, no time slots will be available.
### Lead Time
[Section titled “Lead Time”](#lead-time)
**Lead Time** determines how much advance notice is required before a meeting can be booked. This setting ensures you have enough time to prepare before each meeting.
* **Example:** If you set a lead time of 1 day, clients will only see available slots starting 24 hours from the current time.
***
## Timeslot Preferences
[Section titled “Timeslot Preferences”](#timeslot-preferences)
Adjusting your Timeslot Preferences helps you control how and when clients can book meetings with you, giving you flexibility for preparation and travel.
### Starting Times
[Section titled “Starting Times”](#starting-times)
**Starting Times** determine the specific minute marks when booking slots become available. You can set them to appear at intervals like 15, 30, or 60 minutes.
* This is helpful if you have a lot of available time and want to control when appointments begin.
* **Example:** If you set a 15-minute interval, your available booking slots could appear at 9:00 AM, 9:15 AM, 9:30 AM, and so on.
### Timeslot Spacing
[Section titled “Timeslot Spacing”](#timeslot-spacing)
**Timeslot Spacing** sets the minimum gap between available booking times.
* This feature is useful for spacing out when appointments appear on your calendar, especially when you have a large amount of availability.
* **Example:** If you set the spacing to 30 minutes, you might see available slots at 9:00 AM, 9:30 AM, 10:00 AM, etc.
### Buffer Time
[Section titled “Buffer Time”](#buffer-time)
**Buffer Time** adds a gap before and after each meeting to prevent back-to-back scheduling.
* This ensures you have time to prepare for meetings or travel between them.
* **Example:** If a one-hour meeting is scheduled for 10:00 AM and you have a 30-minute buffer set, your calendar will be blocked from 9:30 AM to 11:30 AM.
***
## Frequently Asked Questions (FAQs)
[Section titled “Frequently Asked Questions (FAQs)”](#frequently-asked-questions-faqs)
**What determines the format of the displayed timeslots for my guests?**
**A:** The language settings of the browser they are using to access the booking link.
# Booking Calendar Workload Management
> Workload Management prevents team members from becoming overloaded by allowing you to specify the maximum number of meetings a team member can host for a spe...
[Booking Calendar Workload Management](https://www.youtube-nocookie.com/embed/KKwucnYQsh8?wmode=opaque)
**Workload Management** prevents team members from becoming overloaded by allowing you to specify the maximum number of meetings a team member can host for a specific Booking Calendar, with the flexibility to set individual limits per day, per week, and per month. This helps maintain productivity while ensuring a balanced workload.
***
## How Workload Management Works
[Section titled “How Workload Management Works”](#how-workload-management-works)
* **Workload Separation:** Each **Booking Calendar** has its own separate meeting limit. Meetings from **Booking Calendar A** will not affect the limit for **Booking Calendar B**, even if the same host is used in both calendars.
* **Meeting Limit:** You can specify the maximum number of meetings a team member can host per day, per week, and per month.
* **Overlapping Limits:** When you use multiple limits (daily, weekly, or monthly), the system always enforces the strictest limit at any given time. This means that as soon as any limit is reached, it will block further bookings for that time period, even if another limit has not yet been met. For example, if a team member has a limit of three meetings per day and five meetings per week (Monday to Friday availability), hosting three meetings on Monday will mean that they can only host two more meetings for the rest of the week (Tuesday through Friday) even though each individual day would normally have a limit of three.
Note
Workload limits apply only to Hosts and cannot be set for assigned Co-hosts.
***
## How to Manage Workload Limits
[Section titled “How to Manage Workload Limits”](#how-to-manage-workload-limits)
Follow these steps to manage workload limits:
1. Go to **Booking Calendars** from the left navigation menu.
2. Select the **Booking Calendar** you want to edit.
3. Navigate to the **Host and Co-Hosts** section in the **Booking Settings** tab.
4. Click **Edit** next to A**llow unlimited bookings**/ **Workload limits applied**.
5. Enable and set the limits you want to apply per **Day**/ **Week**/ **Month**.
6. Click **Apply**.
***
## Frequently Asked Questions (FAQs)
[Section titled “Frequently Asked Questions (FAQs)”](#frequently-asked-questions-faqs)
**What happens if I don’t set a workload limit?**
**A:** If you choose not to set a workload limit, Booking Calendars default to **Allow unlimited bookings**.
**How does the workload limit interact with Group Sessions?**
**A:** A host’s **Workload limit** defines the maximum number of distinct **Group Sessions** they can host within a given time period, while each individual time slot’s booking capacity is determined by the **Maximum guests per group session** setting of Group Sessions.
For example, if a host has a daily **Workload limit** of one and a **Maximum guests per group session** of ten, up to ten separate guests can book spots in their 9:00 AM slot. However, because their daily workload limit is one, no other sessions can be booked for the rest of that day, even if only two or three guests actually end up booking for that 9:00 AM slot and it never reaches its full ten-guest capacity.
**How does the workload limit interact with Concurrent Sessions?**
**A:** A host’s **Workload limit** defines the maximum number of distinct **Concurrent Sessions** they can host within a given time period, while each individual time slot’s booking capacity is determined by the **Maximum bookings per time slot** setting of Concurrent Sessions.
For example, if a host has a daily **Workload limit** of one and a **Maximum bookings per time slot** of five, up to five concurrent sessions can booked in their 9:00 AM slot. However, because their daily workload limit is one, no other time slots can be booked for the rest of that day.
# Booking With Approval
> Booking with Approval lets visitors request meeting slots instead of booking immediately, so hosts can approve or decline requests before confirming a meeting.
[Booking with Approval overview](https://www.youtube-nocookie.com/embed/9cTHbUwsRcc?wmode=opaque)
**Booking with Approval** allows you to receive meeting requests from guests for specific time slots instead of letting them schedule immediately.
This workflow ensures that you maintain full control over your schedule and only meet with the right people.
***
## Key Features of Booking with Approval
[Section titled “Key Features of Booking with Approval”](#key-features-of-booking-with-approval)
* **Meeting Request Mechanism:** Guests request a time slot for when they wish to meet with a host rather than booking directly.
* **Time Slot Reservation:** The requested time slot is automatically removed from the host’s availability on all Booking Calendars to prevent double-booking while the request is pending. No standard calendar event is created in your connected calendar during this initial request phase.
* **Request Notifications:** Alongside the default notification types available to all meeting types, Booking with Approval has three [**additional notification types that can be customized**](https://help.oncehub.com/product/booking-calendars/notifications/booking-calendar-guest-notifications/) to keep the guest informed about the status of their meeting request when it is submitted, approved, or declined.
* **Request Management:** Meeting requests can be reviewed, approved, or declined within the **Activities** or **Scheduled Meetings** section of your account using either a desktop or mobile web browser.
***
## Use Case Scenarios
[Section titled “Use Case Scenarios”](#use-case-scenarios)
Use **Booking with Approval** to protect your time and add flexibility to your availability in these common scenarios:
### Managing an Unpredictable Schedule
[Section titled “Managing an Unpredictable Schedule”](#managing-an-unpredictable-schedule)
A host might want to keep their booking link active to capture client interest but cannot always guarantee that every picked slot will align with their real-world availability. Requiring approval gives them a safety net to review requests before committing.
### Filtering Out Unqualified Requests
[Section titled “Filtering Out Unqualified Requests”](#filtering-out-unqualified-requests)
A host who frequently receives an unpredictable mix of meeting requests, including automated spam or unqualified leads, can use Booking with Approval as an intentional filter to screen participants before finalizing the meeting.
***
## How to Configure Booking with Approval
[Section titled “How to Configure Booking with Approval”](#how-to-configure-booking-with-approval)
Follow these steps to enable Booking with Approval for your Booking Calendar:
1. Click **Booking Calendars** in the left-hand navigation menu.
2. Select the Booking Calendar you wish to edit.
3. Expand the **Session Type** section and select **Single Session**.
4. Enable **Approval Required**.
5. Click **Save** to apply the changes.
***
## How to Approve or Decline Meeting Requests
[Section titled “How to Approve or Decline Meeting Requests”](#how-to-approve-or-decline-meeting-requests)
You can approve or decline meeting requests by using the following steps:
1. Click **Scheduled Meetings** in the top navigation menu.
2. Select **Pending Meeting Requests** in the left-hand menu.
3. Select the meeting you wish to manage.
4. Click **Approve** or **Decline**.
Once a meeting has been approved or declined, notifications will be sent based on the [**Notification settings**](https://help.oncehub.com/product/booking-calendars/notifications/booking-calendar-guest-notifications/) configured for that specific Booking Calendar.
***
## Frequently Asked Questions (FAQs)
[Section titled “Frequently Asked Questions (FAQs)”](#frequently-asked-questions-faqs)
**Who can approve or decline meeting requests?**
**A:** Meeting requests can only be approved or declined by:
* The meeting host
* The host’s team managers
* Administrators
**Can I approve or decline meeting requests made with me from my phone?**
**A:** Yes, you can approve or decline meeting requests made with me directly from your phone by accessing OnceHub through your mobile web browser. These options can be found under the Meetings menu.
**As an Administrator, can I approve or decline meeting requests made with other hosts from my phone?**
**A:** No, you can only approve or decline meeting requests made with other hosts by accessing those requests via a desktop browser.
# Concurrent Sessions in Team Scheduling Scenarios
> When you enable Concurrent Sessions, time slots remain available on your Booking Calendar until they reach the maximum capacity you define.
When you enable [**Concurrent Sessions**](https://help.oncehub.com/product/booking-calendars/booking-settings/booking-calendar-concurrent-sessions/), time slots remain available on your **Booking Calendar** until they reach the maximum capacity you define. However, the way these sessions are distributed depends on your specific team configuration.
***
## Team as the Host (Round Robin or Any Available)
[Section titled “Team as the Host (Round Robin or Any Available)”](#team-as-the-host-round-robin-or-any-available)
Bookings follow the standard logic of your chosen [**Distribution Method**](https://help.oncehub.com/product/booking-calendars/booking-settings/booking-calendar-meeting-distribution-options/). The key difference is that each team member can receive multiple bookings for the same time slot based on the maximum **Concurrent Session** limit.
***
## Single Host and Co-Host (Panel Meeting)
[Section titled “Single Host and Co-Host (Panel Meeting)”](#single-host-and-co-host-panel-meeting)
In a Panel Meeting, guests book a session that requires both the primary host and the co-host to attend together. They can receive multiple bookings for the same time slot based on the maximum **Concurrent Session** limit.
## Single Host and a Member of a Team as a Co-Host (Panel Meeting)
[Section titled “Single Host and a Member of a Team as a Co-Host (Panel Meeting)”](#single-host-and-a-member-of-a-team-as-a-co-host-panel-meeting)
This scenario involves one specific host and a member from a designated team.
When the **first session** in a time slot is booked, the system selects a team member based on the team’s [**Distribution Method** ](https://help.oncehub.com/product/booking-calendars/booking-settings/booking-calendar-meeting-distribution-options/)to pair with the Host. **All subsequent sessions** within that same time slot use the same host–team member pairing.
**Example Scenario:** If the **Concurrent Sessions** limit is set to 2, John is the Host, and the team has 3 members (Sarah, James, Connor), the pairings would function as follows:
#### 9 AM to 10 AM Slot:
[Section titled “9 AM to 10 AM Slot:”](#9-am-to-10-am-slot)
* **Session 1:** John and Sarah
* **Session 2:** John and Sarah
#### 10 AM to 11 AM Slot:
[Section titled “10 AM to 11 AM Slot:”](#10-am-to-11-am-slot)
* **Session 1:** John and James
* **Session 2:** John and James
#### 11 AM to 12 PM Slot:
[Section titled “11 AM to 12 PM Slot:”](#11-am-to-12-pm-slot)
* **Session 1:** John and Connor
* **Session 2:** John and Connor.
***
## Members of a Team as both Host and Co-Host (Panel Meeting)
[Section titled “Members of a Team as both Host and Co-Host (Panel Meeting)”](#members-of-a-team-as-both-host-and-co-host-panel-meeting)
This scenario pairs one member from **Team A** with one member from **Team B** for the same meeting.
When the **first session** in a time slot is booked, a member from Team A and Team B are paired based on both teams’ [**Distribution Methods**](https://help.oncehub.com/product/booking-calendars/booking-settings/booking-calendar-meeting-distribution-options/). Subsequent sessions in the same slot either reuse the same pairing (until their limit is reached) or create a new pairing using other available members.
**Example Scenario:** If the **Concurrent Sessions** limit is set to 2, Team A has 2 members (John, Nolan), Team B has 3 members (Sarah, James, Connor), the pairings would function as follows:
#### 9 AM to 10 AM Slot:
[Section titled “9 AM to 10 AM Slot:”](#9-am-to-10-am-slot-1)
* **Session 1:** John and Sarah
* **Session 2:** Nolan and James
* **Session 3:** John and Sarah
* **Session 4:** Nolan and James
#### 10 AM to 11 AM Slot:
[Section titled “10 AM to 11 AM Slot:”](#10-am-to-11-am-slot-1)
* **Session 1:** John and Connor
* **Session 2:** Nolan and Sarah
* **Session 3:** John and Connor
* **Session 4:** Nolan and Sarah
# Configuring Availability for Specific Booking Calendars
> Each Booking Calendar can either inherit your default profile availability or use defined custom availability unique to that Booking Calendar.
[Configuring Availability for Specific Booking Calendars](https://www.youtube-nocookie.com/embed/20qkwlXFOsE?wmode=opaque)
Each Booking Calendar can either inherit your **default profile availability** or **use defined custom availability** unique to that Booking Calendar.
We recommend setting your **profile availability as your standard schedule**. This makes it easy to update your regular working hours in one place. Use **Booking Calendar specific availability** only when a particular meeting type needs to be offered at unique hours that differ from the standard schedule.
This article explains how to customize availability for an individual Booking Calendar.
## How to Access Your Booking Calendar Availability Settings
[Section titled “How to Access Your Booking Calendar Availability Settings”](#how-to-access-your-booking-calendar-availability-settings)
1. Click **Booking Calendars** in the left-hand navigation menu.
2. Select the Booking Calendar you wish to edit.
3. Expand the **Availability and Location** section.
4. Select the **Customize availability** **and location** radio button.
Note
At least one host must be assigned to this Booking Calendar for this section to appear.
***
## Customizing Availability for Single and Multiple Host Booking Calendars
[Section titled “Customizing Availability for Single and Multiple Host Booking Calendars”](#customizing-availability-for-single-and-multiple-host-booking-calendars)
Depending on whether your Booking Calendar has a single host or multiple hosts, you will customize availability in slightly different ways.
## Booking Calendars with a Single Host
[Section titled “Booking Calendars with a Single Host”](#booking-calendars-with-a-single-host)
Upon selecting Customize availability and location, you will see two tabs you can use to customize your availability:
* **Weekly Working Hours:** Define your standard, recurring availability.
* **Date-Specific Overrides:** Use to adjust your availability for specific dates.
Please see the sections below for detailed steps on how to set [**Weekly Working Hours**](https://help.oncehub.com/product/booking-calendars/booking-settings/configuring-availability-for-specific-booking-calendars/#defining-your-weekly-working-hours) and [**Date-Specific Overrides**](https://help.oncehub.com/product/booking-calendars/booking-settings/configuring-availability-for-specific-booking-calendars/#use-the-date-specific-overrides).
## Booking Calendars with Multiple Hosts
[Section titled “Booking Calendars with Multiple Hosts”](#booking-calendars-with-multiple-hosts)
When a Booking Calendar has more than one host, you can **Customize availability and location** for:
* **All hosts:** Applies the same common availability and locations to all hosts on this Booking Calendar.
* **Some hosts:** Set the availability and locations that will be used for each host on this Booking Calendar individually.
Caution
If the Booking Calendar is configured to **Customize availability and location for some hosts**, individual Member Users can set their own availability.
***
## Defining Your Weekly Working Hours
[Section titled “Defining Your Weekly Working Hours”](#defining-your-weekly-working-hours)
The **Weekly Working Hours** tab allows you to define your standard booking schedule and the locations where those bookings will occur for this Booking Calendar.
## Modifying Your Weekly Working Hours:
[Section titled “Modifying Your Weekly Working Hours:”](#modifying-your-weekly-working-hours)
1. Click the **Edit** link in the **Weekly Working Hours** tab.
2. Use the Add and Remove icons to adjust the preset time blocks.
3. Define the **meeting location(s)** for each time slot by clicking the corresponding meeting location icon. (For more information on Meeting Locations, see the [**Meeting Locations for Booking Calendars**](https://help.oncehub.com/account-administration/locations-rooms/offering-multiple-meeting-locations-per-time-block/) article).
4. Click **Apply** to save the changes.
## Setting Your Time Zone
[Section titled “Setting Your Time Zone”](#setting-your-time-zone)
1. Click the **Edit** link in the **Weekly Working Hours** tab.
2. Click the **Edit** link at the top at of the pop-up.
3. Select the **Time Zone** from the dropdown.
4. Click on **Apply** to save the change.
5. Click on **Apply** in the pop-up to save the change.
Tip
You can use the **`iana_time_zone`** URL parameter to ensure a booking link’s availability is initially shown in a specific time zone.
For example, if you add **`?iana_time_zone=America/New_York`** to the end of your URL, the availability shown to guests will default to Eastern Time.
## Use the Date-Specific Overrides
[Section titled “Use the Date-Specific Overrides”](#use-the-date-specific-overrides)
The Date-Specific Overrides allow you to adjust your standard availability for specific dates. This is useful for accommodating events, holidays, or other instances where your regular schedule may not apply.
To Learn more about date-specific overrides, see:
* [**How to Extend Your Availability for One-Time Events**](https://help.oncehub.com/profile-management/availability/how-to-extend-your-availability-for-one-time-events/)
* **[How to Block Availability for One-Time Events From Your Calendar](https://help.oncehub.com/profile-management/availability/how-to-block-availability-for-one-time-events-from-your-calendar/)**
# Do You Need Group Sessions Or Concurrent Sessions?
> Choosing the right Session Type ensures hosts manage their time effectively while providing a smooth experience for your guests.
Choosing the right **Session Type** ensures hosts manage their time effectively while providing a smooth experience for your guests. To help you decide which setup aligns with your business goals, it is important to understand the differences between the **Group Sessions** and **Concurrent Sessions**. Review the comparisons and real-world examples below to select the workflow that supports your goals.
***
## Group Sessions
[Section titled “Group Sessions”](#group-sessions)
**Group Sessions** are designed for scenarios where a host meets with **multiple guests at the same time for a common reason**. In this format, all guests attend the same meeting simultaneously, and the session **always takes place at the same location**.
This format is ideal for collective experiences, such as:
* **Webinars:** Presenting information to a large audience at once.
* **Seminars:** Leading a shared educational or training session.
* **Campus Tours:** Guiding a group of prospective students through a facility together.
* **Workshops:** Facilitating interactive sessions where multiple participants work on a shared topic or project.
To get started with this setup, please read our [**Booking Calendar Group Sessions**](https://help.oncehub.com/product/booking-calendars/booking-settings/booking-calendar-group-sessions/) article.
***
## Concurrent Sessions
[Section titled “Concurrent Sessions”](#concurrent-sessions)
**Concurrent Sessions** are used when a host schedules **multiple independent meetings for the same time slot**. Guests don’t meet as a group, instead the host manages separate one-on-one interactions simultaneously or sequentially. This format is ideal for high-volume or sequential workflows, such as:
* **High-Volume Sales:** Using setters to confirm which prospects are available before assigning them to closers to take the individual meetings.
* **Life Coaching:** Scheduling several individual sessions at once to stay productive despite high no-show rates.
* **Medical or Advisor Queues:** Meeting with individuals sequentially within a fixed time window.
To get started with this setup, please read our [**Booking Calendar Concurrent Sessions**](https://help.oncehub.com/product/booking-calendars/booking-settings/booking-calendar-concurrent-sessions/) article.
# Group Sessions in Team Scheduling Scenarios
> When you enable Group Sessions, that time slot remains available on your Booking Calendar until it reaches your defined maximum capacity.
When you enable [**Group Sessions**](https://help.oncehub.com/product/booking-calendars/booking-settings/booking-calendar-group-sessions/), that time slot remains available on your **Booking Calendar** until it reaches your defined maximum capacity. However, the way these sessions are distributed depends on your specific team configuration. For more information on Group Sessions and its key features, have a look at our [**Booking Calendar Group Session**](https://help.oncehub.com/product/booking-calendars/booking-settings/booking-calendar-group-sessions/) article.
Note
When multiple location options are available for a specific time slot, the first guest to book the session determines the meeting location. That selected location is then automatically locked and applied to all subsequent bookings for **the same time slot** and **the same host**, ensuring all attendees are directed to the same shared meeting location.
***
## Single-Host Meetings (Dynamic Assignment)
[Section titled “Single-Host Meetings (Dynamic Assignment)”](#single-host-meetings-dynamic-assignment)
In a team-based Group Session using dynamic assignment (such as Round Robin), bookings follow your selected distribution logic. One key distinction is that once the first booking is made with a host for a specific time slot, that host’s maximum capacity must be reached. Once the maximum capacity is reached, the system allows a booking with a different host for the same time slot.
**Example Scenario:** If the Group Session capacity is set to 3 and the team has 2 members (John and Sarah), the bookings function as follows:
* **9 AM to 10 AM Slot:**
* **Booking 1:** The first guest books, and the system assigns **John** as the host.
* **Bookings 2 & 3:** The subsequent guests are automatically added to **John’s session** until the maximum capacity of 3 is reached.
* **Booking 4:** Once John’s capacity is full, the system will assign **Sarah** as the host (Session 2).
***
## Multi-Host Meetings (Pre-Assigned)
[Section titled “Multi-Host Meetings (Pre-Assigned)”](#multi-host-meetings-pre-assigned)
In this scenario, a guest books a session where a primary host and specific co-host(s) are **required** to attend simultaneously.
* All participants booking the same time slot (e.g., 9.00 AM) receive a single meeting invitation including the primary host and all pre-assigned co-host(s).
* The session remains open for additional bookings until the maximum guest capacity for that time slot is reached.
**Example Scenario:** If the Group Session capacity is set to 3, and John (Primary Host) and Sarah (Co-host) are pre-assigned, the bookings function as follows:
* **9 AM to 10 AM Slot:**
* **Booking 1:** The first guest books, and the system assigns the pairing of **John and Sarah** as the hosts.
* **Bookings 2 & 3:** The subsequent guests are automatically added to the same shared session with **John and Sarah** until the maximum capacity of 3 is reached.
***
## Multi-Host Meetings (Dynamic Assignment)
[Section titled “Multi-Host Meetings (Dynamic Assignment)”](#multi-host-meetings-dynamic-assignment)
This scenario involves a **fixed host paired** with a **rotating member** from a specific team.
* To ensure a consistent experience, the system selects an available team member to pair with the fixed host the moment the **first guest** books a time slot.
* All subsequent guests for that specific time slot are automatically assigned to that exact host-team member pairing. This ensures that different guests don’t end up meeting different pairs at the same time.
**Example Scenario:** If the Group Session capacity is set to 3, John is the fixed Host, and the team has 2 members (Sarah and Nolan), the pairings function as follows:
* **9 AM to 10 AM Slot:**
* **Booking 1:** The first guest books with **John**, and the system selects **Sarah** as the available team member.
* **Bookings 2 & 3:** The subsequent guests are automatically assigned to the same **John and Sarah** pair.
* **10 AM to 11 AM Slot:**
* **Booking 1:** The first guest books with **John**, and the system selects **Nolan** for the new time slot.
* **Bookings 2 & 3:** The subsequent guests are automatically assigned to the same **John and Nolan** pair.
***
## Multi-Host Meetings (Dynamic Assignment)
[Section titled “Multi-Host Meetings (Dynamic Assignment)”](#multi-host-meetings-dynamic-assignment-1)
This configuration pairs members from two different teams (e.g., one member from **Team A** and one from **Team B**).
* When the first guest books, the system pairs one available member from each team based on their respective [**Distribution Methods**](https://help.oncehub.com/product/booking-calendars/booking-settings/booking-calendar-meeting-distribution-options/).
* All subsequent guests joining that specific time slot will meet with that exact same pair of host and co-host.
* The session remains available until the guest limit is reached.
**Example Scenario:** If the **Group Session** capacity is set to 2, Team A has 2 members (John, Nolan), and Team B has 2 members (Sarah, James), the pairings function as follows:
* **9 AM to 10 AM Slot:**
* **Booking 1:** The first guest books, and the system selects **John** (Team A) and **Sarah** (Team B).
* **Booking 2:** The subsequent guest is automatically added to the existing **John and Sarah** session until the maximum capacity of 2 is reached.
* **Booking 3:** Once the first pairing’s capacity is full, the system creates a new session and selects **Nolan and James** as a new pair.
* **Booking 4:** The subsequent guest is automatically added to the **Nolan and James** session.
# Hosting High Attendance Webinars With OnceHub
> While dedicated webinar platforms are built for mass broadcasts, they often feel impersonal, leading to lower engagement and attendance.
While dedicated webinar platforms are built for mass broadcasts, they often feel impersonal, leading to lower engagement and attendance. By using **OnceHub Group Sessions** as your primary scheduling and management platform, you can leverage a ***personal invitation*** strategy that drives higher commitment. This article explains how to use **OnceHub as your registration and notification engine** for your webinar while continuing to use your preferred video conferencing tools.
***
## The Trade-Off: Personalization vs. Analytics
[Section titled “The Trade-Off: Personalization vs. Analytics”](#the-trade-off-personalization-vs-analytics)
The secret to high attendance with OnceHub isn’t just automation; it’s the personal touch. Using OnceHub involves a strategic choice: prioritizing engagement over enterprise-level technical reporting.
* **The Personal Touch:** Unlike generic ***broadcast* **invites from standard webinar tools, OnceHub invitations look and feel like a personal one-on-one meeting request. Guests are more likely to attend (or notify you if they can’t) because they feel a direct connection to the host.
* **Cost Efficiency:** Traditional webinar platforms often require expensive monthly subscriptions or **per-seat** licenses. By using OnceHub with your existing video conferencing tools, you eliminate the need for a separate webinar license, significantly reducing your overhead.
* **The Strategic Trade-off:** Prioritizing engagement over granular reporting (such as viewer ***drop-off* **timestamps or ***individual poll-response*** mapping) can **significantly increase attendance**. You still retain critical data, including registration conversion rates, source tracking, and final attendance logs via your video conferencing tool.
***
## Step 1: Configuring Your Group Session
[Section titled “Step 1: Configuring Your Group Session”](#step-1-configuring-your-group-session)
To host a webinar, use the [**Group Session**](https://help.oncehub.com/product/booking-calendars/booking-settings/booking-calendar-group-sessions/) feature of OnceHub. Group Sessions allow multiple guests to book seats in the same time slot until the maximum capacity is reached.
* **Set Capacity:** Create a Group Session and define your maximum capacity. Once the limit is reached, the booking link automatically stops accepting new sign-ups.
* **Professional Branding:** Instead of sending a generic link, embed your OnceHub Booking Calendar into a custom landing page. Using no-code vibe coding apps, you can create a high-conversion, branded registration experience that far outperforms standard webinar rooms.
* **Collect Lead Data:** Use **Custom Fields** on your Booking Form to collect specific data (e.g., Job Title, Company Size) to tailor your webinar content and meet your audience’s needs.
***
## Step 2: Selecting Your Video Conferencing Tool
[Section titled “Step 2: Selecting Your Video Conferencing Tool”](#step-2-selecting-your-video-conferencing-tool)
OnceHub works as the automated coordinator in the background while you use the video conferencing tools you already know.
* **Native Integrations:** OnceHub connects directly with **Zoom**, **Google Meet**, and **Microsoft Teams**.
* **Flexible Link Options:** Choose between automatically generating a **unique meeting link** for every guest or using a consistent **static link** (like a Personal Meeting Room). In both cases, the link is automatically included in the guest’s calendar invitation and confirmation email.
***
## Step 3: Maximize Attendance with Smart Reminders
[Section titled “Step 3: Maximize Attendance with Smart Reminders”](#step-3-maximize-attendance-with-smart-reminders)
**No-shows** are the biggest hurdle for any webinar. OnceHub solves this with an **automated multi-channel notification system** to keep your event top-of-mind.
* **Set & Forget Notifications:** Configure up to three automated reminders to ensure guests remain engaged without manual effort.
* **Multi-Channel Reach:** Ensure you combine your Email reminders with an SMS text to catch your guest’s attention. Sending a text 15 minutes before you go live boosts real-time attendance.
***
## Step 4: Owning Your Data
[Section titled “Step 4: Owning Your Data”](#step-4-owning-your-data)
OnceHub automatically adds every registrant to your [**Contact Database**](https://help.oncehub.com/contact-management/introduction-to-contacts-in-oncehub/) the moment they sign up. This prevents your valuable data from being trapped inside a third-party video conferencing tool. After the webinar, you can transition these engaged contacts into your sales funnel for follow-up.
***
## Frequently Asked Questions (FAQs)
[Section titled “Frequently Asked Questions (FAQs)”](#frequently-asked-questions-faqs)
**Can I use OnceHub for webinars if I don’t have a dedicated webinar software license?**
**A:** Yes. Since OnceHub manages the registration and reminders, you can use the standard version of Zoom, Google Meet, or Microsoft Teams to host the session.
**How does OnceHub prevent overbooking for my webinar?**
**A:** Once you set the **Maximum number of attendees** in your Group Session settings, the booking link will automatically show the slot as **unavailable** once that limit is reached.
**What happens if a guest needs to cancel?**
**A:** OnceHub includes a cancellation link in the confirmation email. If a guest cancels, OnceHub updates your attendance list and instantly re-opens that slot on your booking link for another person to register.
**Will attendees receive a calendar invite automatically?**
**A:** Yes. Upon successful registration, OnceHub sends a calendar invitation to your guest with the meeting link included, ensuring the webinar is blocked on their schedule.
**Can I charge for webinar registration through OnceHub?**
**A:** Yes. If you have a [**payment integration (Stripe)**](https://help.oncehub.com/account-integrations/payment-collection/stripe/how-to-connect-oncehub-with-stripe/) connected to your OnceHub account, you can require payment at the time of booking.
**Do I need to purchase a separate Webinar plan or add-on?**
**A:** No. Unlike most scheduling platforms that charge extra for webinar features, OnceHub includes **Group Sessions** in the standard **Schedule Plan**. There are no **per-webinar** fees or expensive add-ons required to manage high-attendance events.
# How To Localize Your Booking Calendar
> Localization allows you to present your booking link in your selected native language. By selecting a specific language for your Booking Calendar, you ensure...
Localization allows you to present your booking link in your selected native language. By selecting a specific language for your **Booking Calendar**, you ensure that the guest’s booking experience is in their preferred language. This configuration involves two elements:
* **System translation:** The elements that OnceHub automatically translates.
* **User translation:** The custom content that requires manual translation.
***
## Steps to Localize Your Booking Calendar
[Section titled “Steps to Localize Your Booking Calendar”](#steps-to-localize-your-booking-calendar)
1. Go to **Booking Calendars** from the left navigation menu.
2. Select the specific **Booking Calendar** you wish to localize.
3. Navigate to the **Guest Interface Language** section within the **Booking Settings** tab.
4. Choose your **preferred language** from the dropdown menu.
5. Click **Save** to apply the system level translation.
6. **User level translation:** You must manually translate all custom text (such as Meeting Subject, Field Labels, Custom Questions etc.) into your selected language. Refer to the [**What Requires Manual Translation**](https://help.oncehub.com/product/booking-calendars/booking-settings/how-to-localize-your-booking-calendar/#what-requires-manual-translation-user-editable-text) section below for a complete list.
***
## Understanding Automatic vs. Manual Translation
[Section titled “Understanding Automatic vs. Manual Translation”](#understanding-automatic-vs-manual-translation)
OnceHub distinguishes between **non-editable text** (translated automatically) and **editable text** (requires manual translation).
### What is Automatically Translated? (Non-editable System Text)
[Section titled “What is Automatically Translated? (Non-editable System Text)”](#what-is-automatically-translated-non-editable-system-text)
OnceHub automatically translates all **system property values**:
* **Booking Link Actions:** Confirm, Schedule and Attachment.
* **Calendar & Date Text:** Days of the week, month names, and date text.
* **System UI Elements:** Timezone dropdown, [***Powered by OnceHub***](https://help.oncehub.com/account-administration/account-permissions/managing-account-permissions/#powered-by-oncehub-banner) banner, SMS consent checkbox label, and description placeholders.
* **Notification Content:** All non-editable system text within Email and SMS notifications.
* **Calendar Events:** Standard calendar event properties (e.g. Date/Time) and meeting links (e.g., *Join with Google Meet*).
* **ICS Attachments:** All non-editable system labels (e.g., Location, Booking ID) and metadata within the attached .ics file.
***
### What Requires Manual Translation? (User Editable Text)
[Section titled “What Requires Manual Translation? (User Editable Text)”](#what-requires-manual-translation-user-editable-text)
To maintain a consistent experience, you must manually translate the following:
| **Booking Calendar Tabs** | **What you need to manually translate** |
| ------------------------- | ------------------------------------------------------------------------------------------------------------------------------------------- |
| **Booking Settings** | The **Meeting Subject** (appears in all calendar events). |
| **Booking Form** | All **Field Labels** (e.g., Name, Email) and any **Custom Questions** added by you. |
| **Notifications** | **Email/SMS Text:** Any editable text (e.g. What, When, Where and Who) or custom instructions you have added to the notification templates. |
| **Page Designer** | All **Custom Display Text:** (e.g. **Heading**, **Subheading**, **Welcome Message**, and **Page Footer**). |
***
## Frequently Asked Questions (FAQs)
[Section titled “Frequently Asked Questions (FAQs)”](#frequently-asked-questions-faqs)
**Which OnceHub products support localization?**
**A:** Currently, localization settings are designed specifically for **Booking Calendars**. Other products, including **Chatbots**, **Routing Forms**, and **Phone Booking** do not support localization at this time and will remain in English.
**Which languages are supported for Booking Calendar localization?**
**A:** OnceHub currently supports localization for the following nine languages:
* English (US)
* French (France)
* German (Germany)
* Spanish (Mexico)
* Portuguese (Brazil)
* Dutch (Netherlands)
* Swedish (Sweden)
* Danish (Denmark)
* Norwegian (Norway)
**How do I apply a language to multiple Booking Calendars at once?**
**A:** You can use **Booking Calendar Templates** to apply language settings across multiple Booking Calendars simultaneously, ensuring brand consistency with minimal manual effort.
# Setting up Booking Calendar Team Scheduling Scenarios
> In a panel meeting setup, guests book a session where the host and co-hosts participate together in the same meeting.
## Host and Co-Host(s) (Panel Meeting)
[Section titled “Host and Co-Host(s) (Panel Meeting)”](#host-and-co-hosts-panel-meeting)
In a panel meeting setup, guests book a session where the host and co-hosts participate together in the same meeting.
[**Availability**](https://help.oncehub.com/product/booking-calendars/booking-settings/configuring-availability-for-specific-booking-calendars/) is determined by the time slots where all assigned users are available simultaneously.
### How to set up a panel meeting
[Section titled “How to set up a panel meeting”](#how-to-set-up-a-panel-meeting)
1. Open the Booking Calendars lobby by clicking on [**Booking Calendars**](https://help.oncehub.com/product/booking-calendars/introduction-to-booking-calendars/introduction-to-booking-calendars/) in the lefthand side menu.
2. Click on the **Booking Calendar** you want to edit.
3. Use the **Add host and co-hosts** dropdown to select all users or [**Teams**](https://help.oncehub.com/product/booking-calendars/booking-settings/booking-calendar-meeting-distribution-options/) that should attend the booking, then click on **Add**.
* If the Booking Calendar did not have a host before, a pop-up will appear to confirm who the host should be.
* The email settings and [**Meeting locations**](https://help.oncehub.com/product/booking-calendars/booking-settings/configuring-availability-for-specific-booking-calendars/) that will be available for your guests to choose from is determined by the host you select.
* You can change the host at any time in the **Host and co-hosts** section by clicking on the three dots to the right of the users added to the Booking Calendar and clicking **Set as host**.
After assigning your hosts, review the **Availability and Location** settings to ensure they align with your scheduling needs.
### Setting a Co-Host as Optional
[Section titled “Setting a Co-Host as Optional”](#setting-a-co-host-as-optional)
[Setting up Booking Calendar Team Scheduling Scenarios](https://www.youtube-nocookie.com/embed/q4z3BIDjrk4?wmode=opaque)
Setting a user as an optional co-host is useful when their attendance isn’t required for a meeting, but you want to invite them to the event.
An optional co-host functions the same way as any other co-host, but their availability and busy time will not influence the available time slots for the booking. Additionally, they will be marked as optional on the calendar event, and the time will not be blocked on their calendar by default. To set a co-host as optional:
1. Click on the 3 dots next to the co-host.
2. Select **Set as optional**.
3. Click on **Save** to confirm the change.
***
## Distributed Meeting (Dynamic Host Selection)
[Section titled “Distributed Meeting (Dynamic Host Selection)”](#distributed-meeting-dynamic-host-selection)
Dynamic host selection uses a pre-created **Team** to distribute meetings among available members based on a chosen distribution method:
### How to set up dynamic host meeting types
[Section titled “How to set up dynamic host meeting types”](#how-to-set-up-dynamic-host-meeting-types)
1. Open the Booking Calendars lobby by clicking on **Booking Calendars** in the lefthand side menu.
2. Click on the **Booking Calendar** you want to edit.
3. Use the **Add host and co-hosts** dropdown to the **Team** that should be used for bookings, then click on Add.
* The email settings and **Meeting locations** that will be available for your guests to choose from is determined by the member of the **Team** that is being booked with.
4. Next you can choose the distribution method of the bookings for the **Team** right beneath the **Add host and co-hosts** dropdown.
* **Any Available Team Member:** Ideal for offering guests the widest range of available time slots to choose from.
* **Round Robin (Equal Distribution):** Perfect for ensuring an even distribution of meetings across your team.
5. Next you can click on **Manage** next to [**Workload**](https://help.oncehub.com/product/booking-calendars/booking-settings/booking-calendar-workload-management/) to define a maximum number of bookings that a team member can accept
***
These scenarios offer flexibility to match a variety of team structures and scheduling needs. Whether you’re managing a collaborative meeting, balancing team workloads, or providing centralized scheduling options, multi-host setups ensure a seamless experience for both guests and hosts.
# Introduction to Booking Calendars
> Introduction To Booking Calendars documentation and guides.
[Introduction to Booking Calendars](https://help.oncehub.com/product/booking-calendars/introduction-to-booking-calendars/introduction-to-booking-calendars/)
[Configuring Your First Booking Calendar](https://help.oncehub.com/product/booking-calendars/introduction-to-booking-calendars/configuring-your-first-booking-calendar/)
[The Booking Calendars Lobby](https://help.oncehub.com/product/booking-calendars/introduction-to-booking-calendars/the-booking-calendars-lobby/)
[The Booking Calendar Owner](https://help.oncehub.com/product/booking-calendars/introduction-to-booking-calendars/the-booking-calendar-owner/)
[How To Use Templates With Booking Calendars](https://help.oncehub.com/product/booking-calendars/introduction-to-booking-calendars/how-to-use-templates-with-booking-calendars/)
[Image Gallery](https://help.oncehub.com/product/booking-calendars/introduction-to-booking-calendars/image-gallery/)
# Configuring Your First Booking Calendar
> Booking Calendars simplify scheduling by letting you manage and share your availability, making it easy for guests to book time with you.
**Booking Calendars** simplify scheduling by letting you manage and share your availability, making it easy for guests to book time with you. This guide covers how to create, edit, and share your **Booking Calendar**, including embedding it on your website for client access.
As part of the onboarding process, a **personal Booking Calendar** is automatically created for you on your Home page. You can:
* **Use the Personal Calendar:** Customize the existing calendar to match your preferences.
* **Create a New Calendar:** Create a fresh calendar from the Booking Calendar Lobby.
The Booking Calendar Lobby also allows you to rename, duplicate, or delete calendars as needed.
***
## Configure Basic Settings
[Section titled “Configure Basic Settings”](#configure-basic-settings)
**To configure your Booking Calendar:**
1. Open the Booking Calendar Lobby from the left-hand menu.
2. Select your existing calendar or click **Create booking calendar** on the right to start a new one.
**Begin by setting up essential details for your calendar:**
* **Set the Subject:** Enter a descriptive name for your **Booking Calendar** that reflects the type of meeting you’re offering, such as “Client Consultations” or “Team Sessions.”
* [**Meeting Duration**](https://help.oncehub.com/product/booking-calendars/booking-settings/booking-calendar-meeting-durations/)**:** Choose the duration of the meeting (e.g., 15, 30, or 60 minutes).
The remaining settings in the **Booking Settings Tab** are configured automatically:
* [**Hosts and Co-hosts**](https://help.oncehub.com/product/booking-calendars/booking-settings/booking-calendar-meeting-types/)**:** You are automatically assigned as the host of the **Booking Calendar**.
* [**Availability and location**](https://help.oncehub.com/profile-management/availability/configuring-profile-level-availability-for-booking-calendars/)**:** By default, your availability and location is pulled from your profile settings:
* **Default Availability:** Initially, your calendar matches the availability set in your profile.
* **Customizing Booking calendar-Specific Availability:** If the **Booking Calendar** requires unique availability, you can customize these settings directly within the calendar.
* [**Time Slot Settings**](https://help.oncehub.com/product/booking-calendars/booking-settings/booking-calendar-timeframe-and-timeslot-preferences/)**:** Define the spacing between available timeslots, choose how much advance notice you need, and how far in advance guests can book.
***
## Default Booking Form Fields
[Section titled “Default Booking Form Fields”](#default-booking-form-fields)
Each Booking Calendar includes a customizable **Booking Form** with default fields to collect guest information. You can add additional fields in the **Booking Form Tab** as needed.
By default, the following fields are included in the **Booking Form**:
* **Full Name:** Collects the guest’s name.
* **Email Address:** Used for sending booking confirmations and notifications.
* **Meeting Location:** If multiple meeting locations are set up in your account, guests will see options such as in-person, video, or phone during booking.
* **SMS Notifications:** If SMS notifications are enabled for the Booking Calendar, guests can opt in to receive booking-related messages during the scheduling process.
***
## Default Guest Notifications
[Section titled “Default Guest Notifications”](#default-guest-notifications)
Each **Booking Calendar** comes with these standard guest notifications:
* **Meeting Confirmation**: Sent upon successful booking.
* **Meeting Reminder:** Reminds your guests of the upcoming meeting, sent by default 1 hour before the scheduled meeting.
* **Meeting Rescheduled:** Alerts guests of schedule changes.
* **Meeting Reassigned:** Notifies guests of a new host.
* **Meeting Cancellation:** Confirms meeting cancellations.
These notifications are configured automatically, but you can set up advanced notification workflows with additional options. For more on customizing customer notifications, see [**Booking Calendar Guest Notifications**](https://help.oncehub.com/product/booking-calendars/notifications/booking-calendar-guest-notifications/).
You can also configure the notifications you receive as a host or co-host in the **User Notifications** section of your profile.
***
## Sharing Options
[Section titled “Sharing Options”](#sharing-options)
Make it easy for clients to schedule with you using these sharing options:
* **Share a Link:** Generate a direct link for clients or add it to your email signature.
* **Embed on Website:** Place the calendar on your website, allowing clients to book directly from your page.
For detailed instructions on how to share or embed your **Booking Calendar**, refer to the [**Sharing and embedding your Booking calendar**](https://help.oncehub.com/product/booking-calendars/sharing-embedding/share-and-embed-your-booking-calendar/) help page.
# How To Use Templates With Booking Calendars
> Booking Calendar Templates streamline the process of setting up new Booking Calendars by applying pre-configured templates created by Administrators.
**Booking Calendar Templates** streamline the process of setting up new Booking Calendars by applying pre-configured templates created by Administrators. This ensures a quicker onboarding process, brand consistency and enforces account wide standardization.
## Create a New Booking Calendar using Templates
[Section titled “Create a New Booking Calendar using Templates”](#create-a-new-booking-calendar-using-templates)
Follow these steps to create a new Booking Calendar using a pre-configured template:
1. Select **Booking Calendars** from the left-hand navigation sidebar.
2. From the **Booking Calendars Lobby**, click the **Create booking calendar** button in the top right.
3. In the **Create Booking Calendar** pop-up, select the **From Template** option.
4. Select a **Template** from the dropdown menu.
5. Enter a **Booking Calendar Name**.
6. (**Optional**) Edit the **Meeting Subject**.
7. Click **Create**.
Note
This field may be locked if your Administrator has enabled [**Centralized Control**](https://help.oncehub.com/account-administration/booking-calendar-templates/centralized-control-with-automatic-updates/) for this template.
## Apply a Template to an Existing Booking Calendar
[Section titled “Apply a Template to an Existing Booking Calendar”](#apply-a-template-to-an-existing-booking-calendar)
If you have an existing Booking Calendar created from scratch, you can apply any template to it by following these steps:
1. Locate the Booking Calendar in the **Booking Calendars Lobby**.
2. Click the **three-dot menu** next to the Booking Calendar you wish to apply the template to and select **Apply template**.
3. In the **Apply Template** pop-up, select a template from the dropdown menu.
4. Review the warning and click **Apply template**.
## Change the Template of a Booking Calendar
[Section titled “Change the Template of a Booking Calendar”](#change-the-template-of-a-booking-calendar)
Administrators can reassign a Booking Calendar to a different template to update its entire configuration using the following steps:
1. Locate the Booking Calendar with a template applied in the **Booking Calendars Lobby**.
2. Click the **three-dot menu** next to the Booking Calendar you wish to change the template for and select **Change template**.
3. In the **Change Template** pop-up, select the **New Template** from the dropdown menu.
4. Review the warning and click **Change template**.
## Unlink a Template from a Booking Calendar
[Section titled “Unlink a Template from a Booking Calendar”](#unlink-a-template-from-a-booking-calendar)
Unlinking a Booking Calendar from a template removes the control and allows the users to customize all settings. This option is only available if the [**Enforce Booking Calendar Templates**](https://help.oncehub.com/account-administration/booking-calendar-templates/how-to-enforce-templates/) setting is disabled under **Account Permissions**.
To unlink, follow the steps below:
1. Locate the Booking Calendar with a template applied in the **Booking Calendars Lobby**.
2. Click the **three-dot menu** next to the Booking Calendar you wish to unlink the template for and select **Unlink template**.
3. Review the warning and click the **Unlink template**.
Caution
Unlinking only removes the connection to the template; all existing data within the Booking Calendar is retained.
To learn how administrators can create, edit or manage these templates, read our [**How To Create and Manage Templates**](https://help.oncehub.com/account-administration/booking-calendar-templates/how-to-create-and-manage-templates/) article.
# Image Gallery
> To download an image in this article, right click it and select Save image as... from the menu.
[Image Gallery](https://www.youtube-nocookie.com/embed/5uhfgeVv16M?wmode=opaque)
## How to use the image gallery
[Section titled “How to use the image gallery”](#how-to-use-the-image-gallery)
1. To download an image in this article, right click it and select **Save image as…** from the menu.
2. Save the image on your computer so that you can use it when selecting an image for your OnceHub product features.
Note
All images in this gallery are property of OnceHub and are protected under copyright law. Use is permitted for your OnceHub product features only.
***
## Image gallery
[Section titled “Image gallery”](#image-gallery)
| **Duration** | | | | | | |
| --------------------------------------------------------------------- | --------------------------------------------------------------------- | --------------------------------------------------------------------- | -------------------------------------------------------------------- | ---------------------------------------------------------------------- | --------------------------------------------------------------------- | - |
|  |  |  | | | | |
|  |  |  |  |  |  | |
|  |  |  |  |  | | |
| | | | | | | |
| --------------------------------------------------------------------------- | -------------------------------------------------------------------------- | ---------------------------------------------------------------------------------- | ---------------------------------------------------------------------- | ---------------------------------------------------------------------------- | --------------------------------------------------------------------------- | --------------------------------------------------------------------------- |
| **Location** | | | | | | |
|  |  |  |  |  |  |  |
|  |  |  |  |  |  |  |
|  |  |  |  |  |  |  |
|  |  |  |  |  |  | |
|  |  |  |  | | | |
 | | | |
| ---------------------------------------------------------------------- | --------------------------------------------------------------------- | ---------------------------------------------------------------------- | ---------------------------------------------------------------------- | ---------------------------------------------------------------------- | ---------------------------------------------------------------------- | --------------------------------------------------------------------- |
| **Business** | | | | | | |
|  |  |  |  |  |  |  |
|  |  |  |  |  |  | |
|  |  |  |  |  |  | |
|  |  |  |  | | | |
 | | | |
| ------------------------------------------------------------------------------- | ------------------------------------------------------------------------------ | ------------------------------------------------------------------------------- | --------------------------------------------------------------------- | --------------------------------------------------------------------- | -------------------------------------------------------------------- | - |
| **Services** | | | | | | |
|  |  |  |  |  | | |
|  |  |  |  |  |  | |
|  |  |  |  |  | | |
|  |  |  |  | | | |
|  |  |  | | | | |
 | | |
| ------------------------------------------------------------------ | ------------------------------------------------------------------- | ------------------------------------------------------------------- | ------------------------------------------------------------------- | ------------------------------------------------------------------ | ------------------------------------------------------------------- | - |
| **Support** | | | | | | |
|  |  |  |  |  |  | |
| | | | | | | |
| | | | | | | |
| ------------------------------------------------------------------ | -------------------------------------------------------------------- | ------------------------------------------------------------------- | ------------------------------------------------------------------------- | ------------------------------------------------------------------- | ------------------------------------------------------------------ | --------------------------------------------------------------------- |
| **Queries** | | | | | | |
|  |  |  |  |  |  |  |
| | | | | | | |
| --------------------------------------------------------------------------------- | -------------------------------------------------------------------------------- | -------------------------------------------------------------------------------- | --------------------------------------------------------------------------------- | ------------------------------------------------------------------------------------- | --------------------------------------------------------------------------------- | ------------------------------------------------------------------------------- |
| **General** | | | | | | |
|  |  |  |  |  | | |
|  |  |  |  |  |  | |
|  |  |  |  |  |  |  |
|  |  |  |  |  |  |  |
|  |  |  |  |  |  | |
Are you looking for other icons? Please [let us know](https://scheduleonce.atlassian.net/servicedesk/customer/portal/7/group/10/create/170).
# Introduction to Booking Calendars
> Booking Calendars in OnceHub simplify scheduling by allowing you to share your availability so customers and prospects can easily book time with you - elimin...
**Booking Calendars** in OnceHub simplify scheduling by allowing you to share your availability so customers and prospects can easily book time with you - eliminating back-and-forth coordination.
***
## What is a Booking Calendar?
[Section titled “What is a Booking Calendar?”](#what-is-a-booking-calendar)
A **Booking Calendar** lets you share your availability, allowing customers or colleagues to schedule meetings with you based on your predefined schedule. Whether you’re coordinating with team members or scheduling client appointments, it simplifies complex scheduling needs.
**For example:**
* A consultant can share their **Booking Calendar** instead of exchanging multiple emails.
* Customers can choose a time slot based on real-time availability, reducing scheduling delays.
***
## Key Benefits of Using Booking Calendars
[Section titled “Key Benefits of Using Booking Calendars”](#key-benefits-of-using-booking-calendars)
* **Simplify Scheduling:** Allow customers to self-book based on your availability.
* **Prevent Scheduling Conflicts:** Sync with tools like Google Calendar and Microsoft 365 to avoid overlapping meetings.
* **Enhance Professionalism:** Provide a polished booking experience with customizable forms and automated notifications.
***
## Core Features of Booking Calendars
[Section titled “Core Features of Booking Calendars”](#core-features-of-booking-calendars)
* [**Availability Management**](https://help.oncehub.com/profile-management/availability/configuring-profile-level-availability-for-booking-calendars/)**:** Set working hours and location preferences to control when clients can book meetings.
* [**Customizable Booking Forms**](https://help.oncehub.com/product/booking-calendars/booking-forms/booking-calendar-booking-forms/)**:** Collect essential details from clients before meetings.
* [**Automated Notifications**](https://help.oncehub.com/product/booking-calendars/notifications/booking-calendar-guest-notifications/)**:** Send email and SMS reminders to keep clients informed.
* [**Seamless Integrations**](https://help.oncehub.com/user-integrations/basics-user-integrations/connecting-your-productivity-suite-and-standalone-integrations/)**:** Sync with tools like **Google Calendar**, **Zoom**, and **CRM platforms** for efficient scheduling.
* [**Booking Calendar Templates**](https://help.oncehub.com/account-administration/booking-calendar-templates/introduction-to-booking-calendar-templates/)**:** Use pre-configured Booking Calendar Templates to ensure consistent branding and settings across your Booking Calendars while allowing faster user onboarding.
* [**Meeting Durations**](https://help.oncehub.com/product/booking-calendars/booking-settings/booking-calendar-meeting-durations/)**:** Set up to four Meeting Durations for your visitors to select from when scheduling.
* [**Session Types**](https://help.oncehub.com/product/booking-calendars/booking-settings/do-you-need-group-sessions-or-concurrent-sessions/): Allow for a single booking or multiple independent bookings per time slot.
***
## Common Scheduling Scenarios
[Section titled “Common Scheduling Scenarios”](#common-scheduling-scenarios)
* **Single-User Scheduling:** Ideal for solo professionals where clients book directly with one person.
* **Team Scheduling:** Share a calendar for multiple team members or distribute meetings evenly across your team.
***
## Get Started with Booking Calendars Today
[Section titled “Get Started with Booking Calendars Today”](#get-started-with-booking-calendars-today)
**Booking Calendars** offer a streamlined way to manage meetings while ensuring professionalism and efficiency. Explore OnceHub’s scheduling tools to enhance productivity and provide a seamless experience for your clients.
# The Booking Calendar Owner
> The Booking Calendar Owner is the primary user authorized to manage and edit a Booking Calendar's configuration settings. Learn about owner permissions, changing ownership, and how the Owner differs from the Host.
[How to Configure The Booking Calendar Owner Setting](https://www.youtube-nocookie.com/embed/EEU3r15LPUU?wmode=opaque)
The **Booking Calendar Owner** is the primary user authorized to manage and edit a [**Booking Calendar’s**](https://help.oncehub.com/product/booking-calendars/introduction-to-booking-calendars/introduction-to-booking-calendars/) configuration settings. By default, the user who creates a Booking Calendar is automatically designated as its Owner.
***
## What Can the Booking Calendar Owner Do?
[Section titled “What Can the Booking Calendar Owner Do?”](#what-can-the-booking-calendar-owner-do)
The Booking Calendar Owner’s ability to edit an owned booking calendar depends on the Owner’s assigned [**user role**](https://help.oncehub.com/account-administration/user-management/user-roles-overview/):
* **Member:** Can edit all settings except for changing the Host.
* **Team Manager:** Can edit all settings including changing the Host for their [**managed teams**](https://help.oncehub.com/product/booking-calendars/booking-settings/booking-calendar-meeting-distribution-options/#creating-teams).
* **Administrator / Account Owner:** These roles are stronger than individual object permissions. They can edit all settings across all Booking Calendars on the account regardless if they are an owner or not.
***
## Changing the Booking Calendar Owner
[Section titled “Changing the Booking Calendar Owner”](#changing-the-booking-calendar-owner)
Permission to update ownership depends on your user role:
* **Member:** Cannot assign or change Booking Calendar Owners.
* **Team Manager:** Can set any member of their specific team as the Owner.
* **Administrator/Account Owner:** Can set any user on the account as the Owner.
### How to Change the Booking Calendar Owner
[Section titled “How to Change the Booking Calendar Owner”](#how-to-change-the-booking-calendar-owner)
Follow these steps to update ownership for an existing Booking Calendar:
1. Navigate to **Booking Calendars** in the left-hand menu.
2. Click the three-dot menu to the right of the Booking Calendar.
3. Select **Change owner**.
4. Select the new **Owner** from the dropdown.
5. Click **Save** to apply the change.
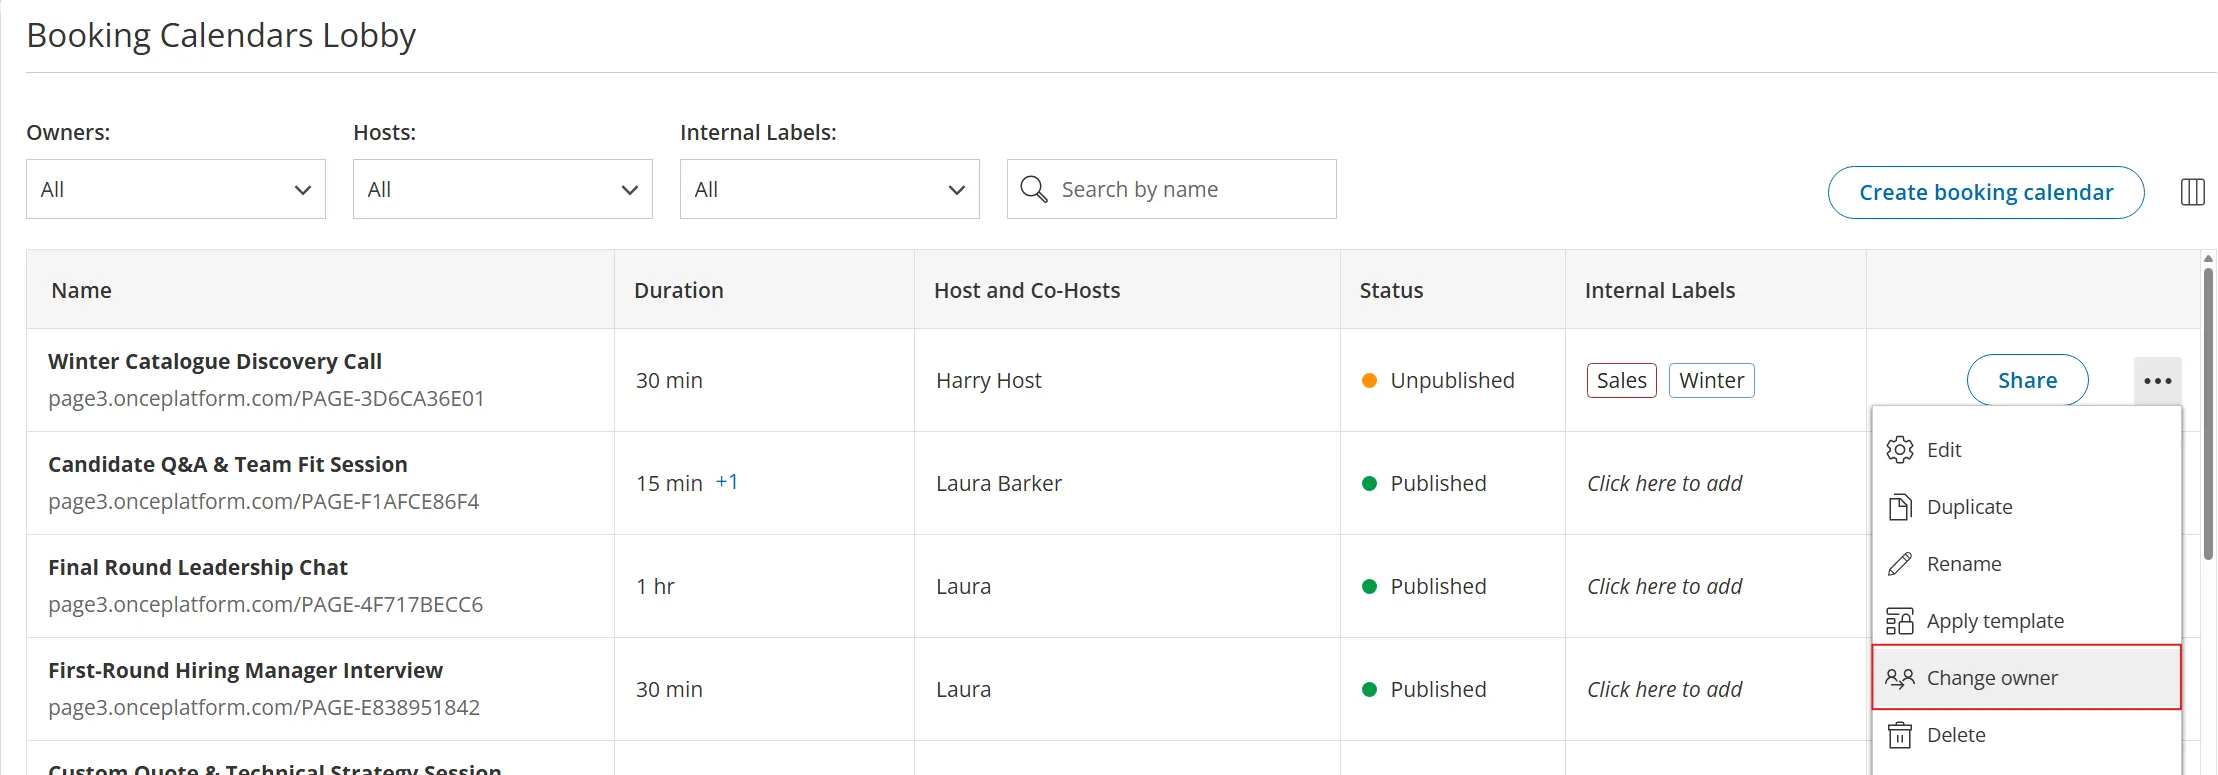
Note
You can also assign an Owner during the initial creation of a Booking Calendar.
***
## Booking Calendar Owner Vs. Host
[Section titled “Booking Calendar Owner Vs. Host”](#booking-calendar-owner-vs-host)
The Owner and Host serve distinct roles and do not need to be the same user.
* The **Owner** manages and configures the Booking Calendar settings.
* The **Host** conducts the meetings booked through the Booking Calendar.
The ability to change the Host depends on the Owner’s user role:
* **Member:** Cannot change the Host.
* **Team Manager:** Can change the Host to themselves or to a member of their team.
* **Administrator/Account Owner:** Can change the Host to any user on the account.
Note
Hosts can view meetings booked through their assigned Booking Calendar. Being an Owner **does not grant access to view scheduled meetings** unless that user is also assigned as a Host or Co-Host on the Booking Calendar.
***
### A Special Note When a Booking Calendar Uses a Team of Hosts With Custom Availability
[Section titled “A Special Note When a Booking Calendar Uses a Team of Hosts With Custom Availability”](#a-special-note-when-a-booking-calendar-uses-a-team-of-hosts-with-custom-availability)
When a Booking Calendar is set to use [**customize availability and locations for some hosts**](https://help.oncehub.com/product/booking-calendars/booking-settings/configuring-availability-for-specific-booking-calendars/), the following rules apply:
* Any user who is part of the Host or Co-Host team of the Booking Calendar can **update their own availability on the Booking Calendar**.
* Team Managers can update availability for any Host or Co-Host on their team.
# The Booking Calendars Lobby
> Manage and organize your OnceHub Booking Calendars in one central lobby. Easily create, filter, customize grid views, and share calendars with internal labels.
The **Booking Calendars lobby** is the centralized hub for managing the setup configurations of your Booking Calendars. It displays your Booking Calendars in a tabular view, allowing you to view, create, configure, filter, and share calendars from a single location.
To access the **Booking Calendars lobby**, log in to your OnceHub account and select **Booking Calendars** from the left navigation menu.
***
## Key Features
[Section titled “Key Features”](#key-features)
* **Create Booking Calendars:** Create Booking Calendars from scratch or use [**pre-configured templates for standardized setup across your account**](https://help.oncehub.com/account-administration/booking-calendar-templates/introduction-to-booking-calendar-templates/).
* **Quick Sharing:** [**Share or embed**](https://help.oncehub.com/product/booking-calendars/sharing-embedding/share-and-embed-your-booking-calendar/) your Booking Calendars directly from the lobby using built-in [**personalization**](https://help.oncehub.com/product/booking-calendars/sharing-embedding/prefilling-guest-information-in-your-booking-calendar/) and [**tracking**](https://help.oncehub.com/product/booking-calendars/sharing-embedding/adding-utms-to-your-booking-calendar/) options.
* **Advanced Filtering:** Filter Booking Calendars by **Owners**, Hosts, or custom internal labels to locate specific calendars quickly.
***
## Customize the Grid View
[Section titled “Customize the Grid View”](#customize-the-grid-view)
Click the **Customize columns** icon next to the **Create booking calendar** button to personalize your tabular view. From here, you can:
* Show or hide columns
* Reorder visible columns
***
## Organize Your Lobby With Internal Labels
[Section titled “Organize Your Lobby With Internal Labels”](#organize-your-lobby-with-internal-labels)
[How to Organize OnceHub Booking Calendars with Internal Labels](https://www.youtube-nocookie.com/embed/dTaVR1KNq7Y?wmode=opaque)
When managing a large volume of Booking Calendars, assigning internal labels allows you to organize calendars into categories and filter them to easily find the Booking Calendars you are looking for.
For example, assign a “Sales” label to all Booking Calendars used by your sales team. You can then filter for “Sales” whenever you need to manage those specific calendars in the future.&
### Adding Internal Labels to a Booking Calendar
[Section titled “Adding Internal Labels to a Booking Calendar”](#adding-internal-labels-to-a-booking-calendar)
1. Click in the **Internal Labels** column next to the Booking Calendar.
2. Define the label text in the **Internal Labels** field, or select an existing label from the list.
3. Click **Enter** to apply the label.
### Removing Internal Labels from a Booking Calendar
[Section titled “Removing Internal Labels from a Booking Calendar”](#removing-internal-labels-from-a-booking-calendar)
1. Click in the **Internal Labels** column next to the Booking Calendar.
2. Click **X** next to the label you want to remove.
***
## Frequently Asked Questions (FAQs)
[Section titled “Frequently Asked Questions (FAQs)”](#frequently-asked-questions-faqs)
**Q: Who can add and remove Internal Labels?**
**A:** Team Managers, Administrators, and the Account Owner.
# Notifications
> Notifications documentation and guides.
[Booking Calendar Guest Notifications](https://help.oncehub.com/product/booking-calendars/notifications/booking-calendar-guest-notifications/)
[Calendar Events in Booking Calendars](https://help.oncehub.com/product/booking-calendars/notifications/calendar-events-in-booking-calendars/)
# Booking Calendar Guest Notifications
> Guest notifications in Booking Calendars keep clients informed by automatically sending confirmation and reminder messages related to their appointments.
**Guest notifications** in **Booking Calendars** keep clients informed by automatically sending confirmation and reminder messages related to their appointments. This guide explains how to configure standard notifications and create custom workflows for more personalized communication.
***
## Default Guest Notifications
[Section titled “Default Guest Notifications”](#default-guest-notifications)
Each **Booking Calendar** includes default notifications that are automatically set up to keep guests informed about their bookings. These default notifications ensure that guests receive essential updates without requiring additional setup.
### Standard Notifications (Automatically Enabled)
[Section titled “Standard Notifications (Automatically Enabled)”](#standard-notifications-automatically-enabled)
* **Meeting Confirmation:** Sent immediately after a booking is made to confirm appointment details.
* **Meeting Reminder:** Sent, by default, 1 hour before the scheduled meeting.
* **Meeting Rescheduled:** Notifies clients when the meeting date or time is changed.
* **Meeting Reassigned:** Alerts clients when the meeting host changes.
* **Meeting Cancelled:** Informs clients when a meeting has been canceled.
### Booking With Approval Notifications
[Section titled “Booking With Approval Notifications”](#booking-with-approval-notifications)
These notifications are automatically enabled when [**Booking with Approval**](https://help.oncehub.com/product/booking-calendars/booking-settings/booking-with-approval/) is enabled for a Booking Calendar:
* **Meeting Request Submitted:** Sent when a request is submitted.
* **Meeting Request Approved:** Sent when the request is approved.
* **Meeting Request Declined:** Sent when the request is declined.
***
## Configure Guest Notification
[Section titled “Configure Guest Notification”](#configure-guest-notification)
Guest notifications are centrally managed at the **Booking Calendar** level to ensure consistent communication across all team members.
### To Set-up Notifications
[Section titled “To Set-up Notifications”](#to-set-up-notifications)
1. Select **Booking Calendars** from the left navigation menu.
2. Select the Booking Calendar you wish to edit and navigate to the **Notifications** tab.
3. In the **Guest Notifications** section, toggle on the **Email** or **SMS** notification type for each stage of the booking lifecycle (for example, **Meeting Confirmation**, **Meeting Reminder**, and so on). **SMS Consent:** Enabling SMS notifications automatically adds a consent checkbox to your **Booking Form** to collect the guest’s phone number and consent. Note that your account includes **25 complimentary SMS credits** to get started.
4. Adding **Meeting Reminders:**
* Scroll to the **Meeting Reminder** section.
* Click the **+ Add email reminder / + Add SMS reminder** link to configure up to five reminders.
* Use the dropdown menu to specify the exact timing (for example, **1 hour before**).
### Email Customization and Object Properties
[Section titled “Email Customization and Object Properties”](#email-customization-and-object-properties)
Personalizing your content ensures guests receive professional information tailored to your brand.
* **Customize Content:** Go to the **Notifications** tab, scroll down to the **Guest Notifications** section, and click **Customize** next to the desired notification type (for example, **Meeting Confirmation** or **Meeting Reminder**). This opens the **Email notification** tab where you can edit the **Subject** and **Body**. The rich text editor allows you to use full text formatting (such as bold, italics, alignment, lists), insert links, or include custom images.
* **Insert Object Properties:** Click **+ Object Properties** to open the properties dropdown menu, or type **@** to quickly search and insert them. These automatically pull dynamic data directly into the email, such as:
* **Guest Info:** Full name, email address.
* **Meeting Details:** Date, Time, Location.
* **Links:** Reschedule link, Cancel link.
### SMS Customization and Object Properties
[Section titled “SMS Customization and Object Properties”](#sms-customization-and-object-properties)
Personalizing your text notifications helps guests receive clear and relevant meeting information directly on their mobile devices.
* **Customize Content:** Go to the **Notifications** tab, scroll down to the **Guest Notifications** section, and click **Customize** next to the desired notification type (for example, **Meeting Confirmation** or **Meeting Reminder**). Select the **SMS notification** tab to edit the message. SMS notifications support plain text only and do not include a subject field or rich text formatting options.
* **Insert Object Properties:** Click **+ Object Properties** to open the properties dropdown menu, or type **@** to quickly search and insert them. These automatically pull dynamic data directly into the SMS, such as:
* **Guest Info:** Full name and mobile number.
* **Meeting Details:** Date, Time, Location.
* **Links:** Reschedule and cancellation links.
* **Notification-Specific Properties:** Available Object Properties vary depending on the notification type. For example, the **Reminder time** property is available only in **Meeting Reminder** notifications. Some properties, such as **Booking Form Transcript**, are not available in SMS notifications.
* **Compliance Footer:** To meet carrier and regulatory requirements, the **“Sent by OnceHub.”** text is automatically appended to all SMS notifications and cannot be removed.
# Calendar Events in Booking Calendars
> Calendar events are an indispensable tool for keeping your bookings organized and professional. They save time, ensure attendees have all the critical detail...
Calendar events are an indispensable tool for keeping your bookings organized and professional. They save time, ensure attendees have all the critical details, and enhance your workflow.
With OnceHub, every booking automatically generates a calendar event in the User’s connected calendar, while also adding the guest, as well as any other attendees, for a smooth scheduling experience.
If your calendar is not yet connected to OnceHub, we recommend reviewing our [**guide**](https://help.oncehub.com/user-integrations/basics-user-integrations/connecting-your-productivity-suite-and-standalone-integrations/) for detailed instructions on how to set it up.
***
## Customizing Calendar Events in Booking Calendars
[Section titled “Customizing Calendar Events in Booking Calendars”](#customizing-calendar-events-in-booking-calendars)
To personalize the experience for you and your guests, you can customize the details of the calendar events generated through your **Booking Calendars**. This ensures that event titles, locations, and descriptions include the specific information your team needs.
### Accessing the Calendar Events Settings
[Section titled “Accessing the Calendar Events Settings”](#accessing-the-calendar-events-settings)
1. Select **Booking Calendars** from the left navigation menu.
2. Select the Booking Calendar you wish to edit and navigate to the **Notifications** tab.
### Manage Calendar Event Recipients
[Section titled “Manage Calendar Event Recipients”](#manage-calendar-event-recipients)
Within the **Calendar Events** section, you can control who is automatically added to the meeting invitation:
* **Calendar Invitations for All Attendees:** This default setting adds the host, any co-hosts and the guest to the calendar event.
* **Calendar Invitations for Host and Co-hosts Only:** Select this if you wish to exclude guests from the primary calendar event. Guests can still add the meeting to their own calendar using the ***Guest ICS Link*** included in their notification emails.
Note
iOS automatically detects calendar events from SMS notifications. This is particularly useful for meetings scheduled via phone without an associated email address, as it ensures the event is still captured in the guest’s calendar.
### Customizing the Calendar Event Content
[Section titled “Customizing the Calendar Event Content”](#customizing-the-calendar-event-content)
Click the **Customize** link under **Host Calendar Event** to tailor the meeting details:
* **Tailored Text:** Use free-text sections to include specific instructions or context for the meeting.
* **Object Properties:** Type **@** to insert dynamic fields that automatically populate with booking data.
* **Contact Data:** Full name, email address, or phone number.
* **Meeting Data**: Date, time, location, or reschedule links.
* **Saving Your Changes:** After completing your adjustments to the title, location, or description, click the **Save** button at the bottom of the page to apply the updates to your Booking Calendar.
# Phone Booking
> Phone Booking documentation and guides.
[Introduction to Phone Booking](https://help.oncehub.com/product/booking-calendars/phone-booking/introduction-to-phone-booking/)
[How to Assign a Phone Number to Your Booking Calendar or Booking Hub](https://help.oncehub.com/product/booking-calendars/phone-booking/how-to-assign-phone-number-to-your-booking-calendar-or-booking-hub/)
[When to Use Phone Booking for Scheduling](https://help.oncehub.com/product/booking-calendars/phone-booking/when-to-use-phone-booking-for-scheduling/)
[Booking Calendar Scheduling Experience: Phone Vs. Web](https://help.oncehub.com/product/booking-calendars/phone-booking/booking-calendar-scheduling-experience-phone-vs-web/)
[Understanding Call Forwarding to Your Phone Booking Number](https://help.oncehub.com/product/booking-calendars/phone-booking/understanding-call-forwarding-to-your-phone-booking-number/)
[Using Call Forwarding to Turn Missed Calls into Booked Appointments](https://help.oncehub.com/product/booking-calendars/phone-booking/using-call-forwarding-to-turn-missed-calls-into-booked-appointments/)
[Using Phone Booking as Your Phone Scheduling Agent](https://help.oncehub.com/product/booking-calendars/phone-booking/using-phone-booking-as-your-phone-scheduling-agent/)
[Using Phone Booking to Offer a Conversational Scheduling Experience](https://help.oncehub.com/product/booking-calendars/phone-booking/using-phone-booking-to-offer-conversational-scheduling-experience/)
[Optimizing the Phone Booking Experience](https://help.oncehub.com/product/booking-calendars/phone-booking/optimizing-phone-booking-experience/)
[Booking Calendar Settings not Supported in Phone Booking](https://help.oncehub.com/product/booking-calendars/phone-booking/booking-calendar-settings-not-supported-in-phone-booking/)
[Compliance and Control for Phone Booking](https://help.oncehub.com/product/booking-calendars/phone-booking/compliance-and-control-for-phone-booking/)
[Call Recording Compliance Guidance for Phone Agent](https://help.oncehub.com/product/booking-calendars/phone-booking/call-recording-compliance-guidance-for-phone-agent/)
# Booking Calendar Scheduling Experience: Phone Vs. Web
> In OnceHub, meetings can be scheduled either via a phone call or a web browser interface.
In **OnceHub**, meetings can be scheduled either via a **phone call** or a **web browser interface**.
While both methods successfully achieve the goal of booking a meeting, the **process and overall experience differ**.
This article outlines the key distinctions between these two methods.
***
## The Core Differences in Approach
[Section titled “The Core Differences in Approach”](#the-core-differences-in-approach)
The two scheduling methods employ different approaches in how guests find a time to meet, select meeting options, and provide information.
### 1. Finding a Time to Meet
[Section titled “1. Finding a Time to Meet”](#1-finding-a-time-to-meet)
#### Scheduling via Phone Call (Guest-centric)
[Section titled “Scheduling via Phone Call (Guest-centric)”](#scheduling-via-phone-call-guest-centric)
When a guest schedules a meeting via phone call, they are first asked to provide their preferred time to schedule. **Phone Booking** then assists them in finding a suitable time when the host is also available.
#### Scheduling via Web Browser/GUI (Host-centric)
[Section titled “Scheduling via Web Browser/GUI (Host-centric)”](#scheduling-via-web-browsergui-host-centric)
When a guest schedules a meeting via a web browser, they are shown all of the host’s available time slots to select from.
### 2. Meeting Options in Booking Hubs
[Section titled “2. Meeting Options in Booking Hubs”](#2-meeting-options-in-booking-hubs)
#### Scheduling via Phone Call (Guest-centric)
[Section titled “Scheduling via Phone Call (Guest-centric)”](#scheduling-via-phone-call-guest-centric-1)
When a guest schedules via a phone call, they are asked what they would like to meet about. **Phone Booking** will then use the most appropriate Booking Calendar within the Booking Hub as the meeting option.
If they are unsure, **Phone Booking** will assist them to find the most suitable meeting option.
#### Scheduling via Web Browser /GUI (Host-centric)
[Section titled “Scheduling via Web Browser /GUI (Host-centric)”](#scheduling-via-web-browser-gui-host-centric)
When a guest schedules a meeting via a web browser, they are shown all of the Booking Calendars as configured within the Booking Hub.
### 3. When We Collect the Guest’s Information
[Section titled “3. When We Collect the Guest’s Information”](#3-when-we-collect-the-guests-information)
#### Scheduling via Phone Call (After Confirmation)
[Section titled “Scheduling via Phone Call (After Confirmation)”](#scheduling-via-phone-call-after-confirmation)
When a guest schedules via a phone call, **only the guest’s name and either an email or mobile phone number** are required to confirm the meeting. Afterwards, **Phone Booking** will ask the guest questions based on the free-text questions in your Booking Calendar form.
#### Scheduling via Web Browser/GUI (Before Confirmation)
[Section titled “Scheduling via Web Browser/GUI (Before Confirmation)”](#scheduling-via-web-browsergui-before-confirmation)
When a guest schedules a meeting via a web browser, they will need to complete all the questions on the Booking Calendar form before they are able to confirm the **meeting**.
To learn more about specific supported and unsupported features, see the [**Booking Calendar Settings not Supported in Phone Booking**](https://help.oncehub.com/product/booking-calendars/phone-booking/booking-calendar-settings-not-supported-in-phone-booking/) article.
### 4. Information in the Confirmation Email Sent to Hosts
[Section titled “4. Information in the Confirmation Email Sent to Hosts”](#4-information-in-the-confirmation-email-sent-to-hosts)
#### Scheduling via Phone Call
[Section titled “Scheduling via Phone Call”](#scheduling-via-phone-call)
When a guest schedules a meeting via a phone call, the host’s booking confirmation email includes:
* The **Booking Form** questions
* The **guest’s responses** to those questions
* A **transcript of the phone call**
#### Scheduling via Web Browser/ GUI
[Section titled “Scheduling via Web Browser/ GUI”](#scheduling-via-web-browser-gui)
When a guest schedules a meeting via a web browser, the host’s booking confirmation email includes:
* The **Booking Form** questions
* The **guest’s responses** to those questions
# Booking Calendar Settings not Supported in Phone Booking
> While Phone Booking requires no setup, there are a few unsupported features to be aware of:
While **Phone Booking** requires no setup, there are a few unsupported features to be aware of:
## 1. Booking Form Questions
[Section titled “1. Booking Form Questions”](#1-booking-form-questions)
The type of questions guests are asked differs between the two methods:
| **Question Type** | **Phone Call** | **Web Browser** |
| ----------------- | -------------- | --------------- |
| Full Name | Yes | Yes |
| Email Address | Yes | Yes |
| Phone Number | Yes | Yes |
| Free Text | Yes | Yes |
| Single Select | No | Yes |
| Multi Select | No | Yes |
| Additional Guests | No | Yes |
| Attachment | No | Yes |
## 2. Bookable Days
[Section titled “2. Bookable Days”](#2-bookable-days)
Phone Booking will not enforce the [**Booking Window**](https://help.oncehub.com/product/booking-calendars/booking-settings/booking-calendar-timeframe-and-timeslot-preferences/#booking-window) if it is set to use **Bookable days**.
# Call Recording Compliance Guidance for Phone Agent
> It is important to know that the AI Voice feature in OnceHub records calls. It then utilizes AI to produce transcripts and summaries of those transcripts, al...
It is important to know that the **AI Voice** feature in OnceHub records calls. It then utilizes AI to produce transcripts and summaries of those transcripts, all of which are saved in [**Activities**](https://help.oncehub.com/activities-analytics/activity-management/managing-guest-activities/). While this functionality helps your business, it may be subject to local and global privacy laws.
Caution
OnceHub is a technology provider and data processor. This document provides general guidance and examples for educational purposes; **it does not constitute legal advice**. You (the Controller) are responsible for ensuring your use of Phone Booking complies with the specific laws of your jurisdiction and the jurisdiction of your callers.
***
## Roles and Legal Responsibility
[Section titled “Roles and Legal Responsibility”](#roles-and-legal-responsibility)
To ensure compliance, it is critical to understand the distinction between the technology provider and the service user:
* **OnceHub (The Processor):** We record, transcribe, and summarize calls as part of the phone booking process.
* **The Business (The Controller):** You determine why calls are recorded. You may be legally responsible for:
* Providing notice and obtaining necessary consent.
* Updating your Privacy Policy to include AI processing and call recording.
* Complying with “Right to Erasure” (GDPR) or “Right to Delete” (CCPA) requests.
***
## Regional Laws and the Welcome Message
[Section titled “Regional Laws and the Welcome Message”](#regional-laws-and-the-welcome-message)
The **Welcome Message** is your primary tool for establishing consent. Because compliance varies dramatically based on regional laws, we recommend that you customize this message based on your region.
Use the following patterns to tailor your messaging to meet the specific legal requirements of different major jurisdictions:
### United States (One-Party vs. All-Party Consent)
[Section titled “United States (One-Party vs. All-Party Consent)”](#united-states-one-party-vs-all-party-consent)
While federal law often requires only one person’s consent, several states require all parties to agree. Because you may not always know a caller’s physical location, the safest industry standard is to assume two-party consent is required.
* **Recommended Message:** “Hello. You’re speaking with an automated assistant. By continuing, you consent to the call being recorded and processed using AI for quality and training purposes. How can I assist you today?”
### European Union / UK (GDPR)
[Section titled “European Union / UK (GDPR)”](#european-union--uk-gdpr)
Under GDPR, recording is considered “processing personal data” and requires a Lawful Basis (usually Consent or Legitimate Interest). You must be fully transparent about both the recording and the use of AI.
* **Recommended Message:** “Hello. This call is recorded and processed by AI to improve our service. For information on how we process your data, visit our website. How can I assist you today?”
### Canada (PIPEDA)
[Section titled “Canada (PIPEDA)”](#canada-pipeda)
The “Meaningful Consent” standard requires that individuals understand the specific consequences and reasons for the recording.
* **Recommended Message:** “Hello. This call is recorded and processed by AI to improve our service. You can request a transcript at any time. How can I assist you today?”
### Australia / South Africa (Strict Jurisdictions)
[Section titled “Australia / South Africa (Strict Jurisdictions)”](#australia--south-africa-strict-jurisdictions)
In regions like those governed by POPIA, or in specific industries like Healthcare, a passive message may not be sufficient. You should provide a clear opt-out.
* **Recommended Message:** “Hello. We record calls for accuracy; if you do not wish to be recorded, please hang up now or visit our website to book. How can I assist you today?”
# Compliance and Control for Phone Booking
> Phone Booking utilizes artificial intelligence to facilitate appointments through conversational scheduling.
**Phone Booking** utilizes artificial intelligence to facilitate appointments through conversational scheduling.
In this article, we will detail the necessary permissions, the scope and boundaries of the AI conversation, and how phone numbers are managed to ensure a **secure and controlled environment** for all your meetings.
***
## Account Permission and Agreement
[Section titled “Account Permission and Agreement”](#account-permission-and-agreement)
Before any user can use Phone Booking for their Booking Calendars, the Account Owner must explicitly authorize it for the account.
* **Express Permission**: The Account Owner is required to manually toggle on the Phone Booking feature for the account.
* **Terms Agreement**: Toggling on this feature signifies that you, as the Account Owner, officially agree to the [**Phone Booking Terms**](https://oncehub.com/trustcenter/legal/phone-booking-terms).
***
## Bounded AI Conversation
[Section titled “Bounded AI Conversation”](#bounded-ai-conversation)
The AI-powered conversation is designed to be narrow and focused, ensuring the guest’s interaction is secure and goal-oriented.
* **Limited Scope**: Phone Booking only permits guests to **schedule a booking** or **leave a message**.
* **No Setup Required**: You do not need to write any AI prompts, provide data, or input instructions. The feature **works instantly** right out of the box.
***
## Dedicated Phone Number Management
[Section titled “Dedicated Phone Number Management”](#dedicated-phone-number-management)
Users can generate a unique, system-generated phone number for every specific Booking Calendar and Booking Hub where they intend to use Phone Booking.
* **Unique Number Assignment**: Every **Booking Calendar** or **Booking Hub** receives its own dedicated, unique phone number.
* **Number Cool-Off Period**: When a Booking Calendar or Booking Hub is deleted, it **releases** its phone number. That number enters a 90-day cool-off period during which it remains inactive. This guarantees two things:
1. When you **delete** a number, no one else will use it for at least 90 days.
2. When you **generate** a new number, you are guaranteed that it has been out of use for at least 90 days.
***
## Secure Environment
[Section titled “Secure Environment”](#secure-environment)
**Phone Booking** is built on a highly secure infrastructure to ensure the privacy of all guest interactions and data.
* **Hosting**: The service uses **Secure Azure hosting** for a foundation of robust, enterprise-level security.
* **Dedicated AI**: The feature runs on a **Private OpenAI instance**, guaranteeing that the AI environment is controlled and secure.
* **Data Privacy**: Your data and your guests’ data are **never used for AI training**, ensuring complete data privacy.
***
## Recording, Transcription, and AI Summary
[Section titled “Recording, Transcription, and AI Summary”](#recording-transcription-and-ai-summary)
All Phone Booking calls are processed to provide a comprehensive record, which is available in **Activities** for review and follow-up.
* **Call Records:** All conversations are **recorded, transcribed, and summarized** using AI.
* **Caller Notification:** Users must inform callers that the conversation is being recorded. This can be done by using the **welcome message**, which by default states that the recording will be provided to the business being contacted, or by customizing the welcome message as necessary.
* **Data Deletion:** Recordings, transcripts, and summaries can be permanently removed by deleting the corresponding phone call activity.
Caution
Audio recording of Phone Booking conversations cannot be turned off.
# How to Assign a Phone Number to Your Booking Calendar or Booking Hub
> This article will guide you through the process of assigning a phone number to your Booking Calendars or Booking Hubs.
This article will guide you through the process of assigning a phone number to your [**Booking Calendars**](https://help.oncehub.com/product/booking-calendars/introduction-to-booking-calendars/introduction-to-booking-calendars/) or [**Booking Hubs**](https://help.oncehub.com/product/booking-hubs/introduction-to-booking-hubs/introduction-to-booking-hubs/). By following these steps, you will be able to offer a new way for guests to schedule meetings with you.
In order to ensure that your settings are optimized for conversational scheduling, make sure that you have fully [**configured your Booking Calendar to handle scheduling via phone call**](https://help.oncehub.com/product/booking-calendars/phone-booking/optimizing-phone-booking-experience/).
***
## How to Assign a Phone Number to Your Booking Calendar or Booking Hub
[Section titled “How to Assign a Phone Number to Your Booking Calendar or Booking Hub”](#how-to-assign-a-phone-number-to-your-booking-calendar-or-booking-hub)
Follow these steps to assign a phone number to your Booking Calendar or Booking Hub:
### Navigating to the AI Voice Tab
[Section titled “Navigating to the AI Voice Tab”](#navigating-to-the-ai-voice-tab)
1. Click **Booking Calendars** (**or Booking Hubs**) in the left-hand side menu.
2. Select the **Booking Calendar** (**or Booking Hub**) you want to generate a phone number for.
3. Go to the **AI Voice** tab.
### Setting a Welcome Message
[Section titled “Setting a Welcome Message”](#setting-a-welcome-message)
1. Provide a **Welcome Message** that **Phone Booking** will use to greet callers.
2. Click **Save**.
### Assigning the Phone Number
[Section titled “Assigning the Phone Number”](#assigning-the-phone-number)
1. Click **Assign** **phone number**.
2. Select the phone number from the dropdown.
For information on how to generate phone numbers, please see our [**Managing Phone Numbers**](https://help.oncehub.com/billing/managing-phone-numbers/) article.
***
## Frequently Asked Questions (FAQs)
[Section titled “Frequently Asked Questions (FAQs)”](#frequently-asked-questions-faqs)
**Can I use one dedicated phone number for two different booking calendars?**
**A:** Yes, you can route a single dedicated phone number to multiple Booking Calendars by using a [**Booking Hub**](https://help.oncehub.com/product/booking-hubs/introduction-to-booking-hubs/introduction-to-booking-hubs/).
# Introduction to Phone Booking
> Phone Booking allows your guests to schedule a meeting or leave a message as a fallback option using natural language over a phone call.
**Phone Booking** allows your guests to schedule a meeting or leave a message as a fallback option using natural language over a phone call. This is a **no-setup feature** that uses your Booking Calendar’s **existing availability and settings** to create a conversational scheduling experience.
To see if Phone Booking fits your scheduling needs, take a look at our [**When to Use Phone Booking for Scheduling**](https://help.oncehub.com/product/booking-calendars/phone-booking/when-to-use-phone-booking-for-scheduling/) article for more details.
***
## How Phone Booking Works
[Section titled “How Phone Booking Works”](#how-phone-booking-works)
Each Booking Calendar or Booking Hub can have its own **dedicated phone number**, allowing guests to interact with the AI-driven Phone Booking feature and easily schedule meetings.
For more information on how to manage dedicated numbers, see our article on [**Managing Phone Numbers**](https://help.oncehub.com/billing/managing-phone-numbers/).
## The Guest Experience
[Section titled “The Guest Experience”](#the-guest-experience)
When a guest calls the dedicated phone number for your **Booking Calendar** or **Booking** **Hub**, the Phone Booking feature answers with your personalized welcome message. From there it begins a conversation with your guest by offering two options:
* **Schedule a meeting:** Your guest will be guided through the process of booking a meeting.
* **Leave a message:** Your guest will be able to leave a message for the host.
When a guest chooses to schedule a meeting, the Phone Booking feature will first schedule the meeting and then ask the free text questions that you have set up in your Booking Calendar’s Booking form.
To ensure your guests have the best scheduling experience, we recommend reading these articles:
* [**Booking Calendar Scheduling Experience: Phone Vs. Web**](https://help.oncehub.com/product/booking-calendars/phone-booking/booking-calendar-scheduling-experience-phone-vs-web/)
* [**Optimizing the Phone Booking Experience**](https://help.oncehub.com/product/booking-calendars/phone-booking/optimizing-phone-booking-experience/)
***
## Frequently Asked Questions (FAQs)
[Section titled “Frequently Asked Questions (FAQs)”](#frequently-asked-questions-faqs)
**Is this feature available on all plans?**
**A:** No, the Phone Booking feature is only available on our paid plans.
**Are there extra costs for my guests to use this service?**
**A:** No, but standard phone call rates may apply. **Are there extra costs for me as a user to use Phone Booking?** **A:** Yes, each dedicated phone number requires a [**phone number license**](https://help.oncehub.com/billing/managing-your-subscription/#adding-or-removing-phone-number-licenses).
**Can I generate phone numbers for any country?**
**A:** Currently, automatic generation is limited to U.S. and Canada phone numbers. For all other countries, please [**contact our Sales team**](https://help.oncehub.com/contact-us/).
**Can I listen to the calls made via Phone Booking?**
**A:** Yes, you can access a recording as well as a full transcript of all Phone Booking conversations from Activities. For more information, please see our Phone [**Booking Conversation Summary and Recording**](https://help.oncehub.com/activities-analytics/activity-management/phone-booking-conversation-summary-and-recording/) article.
# Optimizing the Phone Booking Experience
> Phone Bookings happen through conversation, unlike online bookings made via a Booking Link or website.
**Phone Bookings** happen through conversation, unlike online bookings made via a Booking Link or website. For phone-first businesses, streamlining data collection is essential to maintain a natural conversation flow, reduce booking friction, prevent early drop-offs, and allow for error-free scheduling without interrupting callers for complex details like email addresses.
By following these recommended configurations and tips, you can make scheduling **faster, smoother, and more intuitive** for your callers.
***
## Recommended Setup
[Section titled “Recommended Setup”](#recommended-setup)
For an efficient Phone Booking workflow, it is recommended to follow the steps below to **bypass email collection** and **rely entirely on SMS notifications**:
### Step 1: Bypassing the Email Requirement:
[Section titled “Step 1: Bypassing the Email Requirement:”](#step-1-bypassing-the-email-requirement)
To allow the booking to proceed without requiring the guest to provide an email address during the call:
1. Navigate to the **Email question** configuration within your Booking Form.
2. Make sure that **Do not ask for email address when bookings are made via phone booking** setting is enabled.
3. Click **Save** to confirm the changes.
### Step 2: Capturing Phone Numbers for SMS:
[Section titled “Step 2: Capturing Phone Numbers for SMS:”](#step-2-capturing-phone-numbers-for-sms)
To capture the guest’s mobile number for SMS communication:
1. **Access** your Booking Form settings and locate the **Add Questions** pane.
2. **Drag and drop** the **Phone** question onto your form.
3. **Select** the **Contact details and SMS (requires consent)** option in the question’s settings to capture the mobile phone number necessary for all follow-up communication.
4. Click **Save** to confirm the changes.
### Step 3: Enabling SMS Notifications:
[Section titled “Step 3: Enabling SMS Notifications:”](#step-3-enabling-sms-notifications)
To ensure guests receive updates directly on their mobile devices:
1. Go to the **Notifications** tab of your Booking Calendar.
2. Scroll down to the **Guest Notifications** section.
3. **Enable** all the **SMS notification** checkboxes for each stage of the booking lifecycle, such as **Meeting Scheduled** and **Meeting Reminder**. **NOTE: Maintain Sufficient SMS Credits:** You must maintain an active SMS credit balance to ensure these updates are delivered. Without sufficient credits, notifications will fail, leaving your guests with no record of their booking details.
4. Click **Save** to confirm the changes.
***
## Tips to Keep Your Phone Booking Experience Quick and Simple
[Section titled “Tips to Keep Your Phone Booking Experience Quick and Simple”](#tips-to-keep-your-phone-booking-experience-quick-and-simple)
When setting up your **Booking Calendars** and **Booking Hubs for Phone Booking**, aim to collect only the essential information quickly and efficiently. Follow these tips to keep phone bookings quick, clear, and caller-friendly.
* **Personalize Your Welcome Message:** Customize the **Phone Booking** greeting to set a professional and welcoming tone for your guests.
* **Use Short, Free-Text Questions:** Keep questions simple and concise to avoid confusing callers or slowing down the booking process.
* **Limit the Number of Questions:** Focus on what’s essential. We recommend asking no more than three questions to keep the conversation focused.
* **Simplify Booking Hubs:** Reduce the number of Booking Calendars in your Hub to prevent overwhelming callers with too many choices.
* **Use Clear Meeting Subjects:** Provide brief, descriptive meeting titles so guests can easily select the right option through the phone menu.
# Understanding Call Forwarding to Your Phone Booking Number
> Call forwarding is a telephony feature that works by instantly rerouting an incoming call from its original destination to a different, predetermined phone n...
**Call forwarding** is a telephony feature that works by instantly rerouting an incoming call from its original destination to a different, predetermined phone number.
By configuring your existing phone system to forward incoming calls to your [**Phone Booking Number**](https://help.oncehub.com/product/booking-calendars/phone-booking/introduction-to-phone-booking/), you can ensure that you never miss a call. This allows Phone Booking to schedule meetings on your behalf 24/7.
***
## Understanding Unconditional vs. Conditional Call Forwarding
[Section titled “Understanding Unconditional vs. Conditional Call Forwarding”](#understanding-unconditional-vs-conditional-call-forwarding)
There are two types of call forwarding, offering different levels of control over how and when the Phone Booking feature answers:
### Unconditional Call Forwarding (Immediate Forwarding)
[Section titled “Unconditional Call Forwarding (Immediate Forwarding)”](#unconditional-call-forwarding-immediate-forwarding)
Every single call to your original phone number is forwarded. Your primary phone (whether it’s a business line or a mobile device) will **not** ring.
This is ideal if you want **Phone Booking** to be the primary point of contact for all scheduling and inquiries, operating as your virtual front desk 24/7.
### Conditional Call Forwarding
[Section titled “Conditional Call Forwarding”](#conditional-call-forwarding)
Calls are only forwarded if certain conditions are met. Your primary phone will ring first, and if you don’t answer or you are busy, then the call is redirected to the [**Phone Booking Number**](https://help.oncehub.com/product/booking-calendars/phone-booking/how-to-assign-phone-number-to-your-booking-calendar-or-booking-hub/).
This allows you to use **Phone Booking** as an intelligent backup and ensures calls are handled instead of being missed.
***
## Call Forwarding Costs for Your Booking Calendar
[Section titled “Call Forwarding Costs for Your Booking Calendar”](#call-forwarding-costs-for-your-booking-calendar)
Forwarding calls to your Booking Calendar may incur costs. Since the Booking Calendar phone numbers are U.S. based and aren’t toll-free, standard rates will apply.
# Using Call Forwarding to Turn Missed Calls into Booked Appointments
> If you're a busy professional, in a meeting, on another call, or away from the office, you can use Phone Booking alongside conditional call forwarding to ens...
If you’re a busy professional, in a meeting, on another call, or away from the office, you can use [**Phone Booking**](https://help.oncehub.com/product/booking-calendars/phone-booking/introduction-to-phone-booking/) alongside conditional call forwarding to ensure that you never miss an opportunity to connect with your customer.
Instead of a missed call or a simple voicemail, callers will be automatically forwarded to your **Phone Booking Number** to schedule a meeting with you.
This is especially useful for:
* **After-Hours Coverage**: Your customers can still schedule a meeting 24/7, even when your office is closed.
* **Handling Busy Times**: Automatically gives callers a convenient scheduling option when you are busy or unable to pick up.
***
## How to Set Up Conditional Call Forwarding
[Section titled “How to Set Up Conditional Call Forwarding”](#how-to-set-up-conditional-call-forwarding)
To automatically route calls to your Phone Booking Number when you can’t take them, you must set up **conditional call forwarding**.
This process needs to be done directly through your **mobile phone settings** or your **service provider**, as the exact steps vary by carrier.
You will need to specify your Phone Booking Number as the destination and select the specific conditions that trigger the redirect, such as:
* **When You’re on Another Call**: If your line is busy or currently in use.
* **When You Can’t Answer**: If the call rings for a specified time or number of rings without being picked up.
* **When Your Phone is Off**: If your device is powered down, out of range, or otherwise unavailable.
***
## Call Forwarding Costs for Phone Booking
[Section titled “Call Forwarding Costs for Phone Booking”](#call-forwarding-costs-for-phone-booking)
Before implementing call forwarding, be aware of potential charges.
* **Standard Rates Apply**: The Phone Booking Number is not toll-free.
* **Check Your Plan**: Forwarding calls to Phone Booking may incur charges based on your existing phone plan or service provider.
# Using Phone Booking as Your Phone Scheduling Agent
> Integrate Phone Booking into your existing Interactive Voice Response (IVR) System menu to offer immediate, automated scheduling and reduce call abandonment.
Integrate [**Phone Booking**](https://help.oncehub.com/product/booking-calendars/phone-booking/introduction-to-phone-booking/) into your existing Interactive Voice Response (IVR) System menu to offer immediate, automated scheduling and reduce call abandonment.
This workflow is especially useful because it:
* **Maximizes Staff Time**: Automating the scheduling process frees up your staff to handle other tasks, rather than spending time on routine scheduling.
* **Improves Accuracy**: By transferring callers directly to **Phone Booking**, all meeting details are captured digitally and consistently, minimizing the risk of human error associated with manual data entry.
***
## How the IVR-to-Phone-Booking Workflow Works
[Section titled “How the IVR-to-Phone-Booking Workflow Works”](#how-the-ivr-to-phone-booking-workflow-works)
The process is designed to be quick and easy for the caller.
**Automatic Routing & Booking:** The call is instantly redirected to your dedicated Phone Booking Number, allowing the caller to schedule their meeting without any staff intervention.
1. **Caller Dials In**: The caller contacts your main business line and is immediately greeted by your IVR menu.
2. **Scheduling Selection**: Your IVR presents multiple options (e.g., “Press 1 to schedule a meeting with Sales, Press 2 for Support,” etc.). The caller chooses the option to schedule a meeting.
3. **Automatic Routing & Booking**: The call is instantly redirected to your dedicated **Phone Booking Number**, allowing the caller to schedule their meeting without any staff intervention.
# Using Phone Booking to Offer a Conversational Scheduling Experience
> Share your dedicated Phone Booking Number for instant, direct scheduling. Guests can simply call your dedicated line instead of using a web browser to schedu...
Share your dedicated [**Phone Booking Number**](https://help.oncehub.com/product/booking-calendars/phone-booking/introduction-to-phone-booking/) for instant, direct scheduling. Guests can simply call your dedicated line instead of using a web browser to schedule a meeting.
This service is especially useful for clients who are:
* **Busy or On-the-Go**: Allows for convenient scheduling during commutes or other activities when browsing is impractical.
* **Seeking Accessibility**: Offers an essential, accessible alternative to online booking for those who are visually impaired or have other limitations.
***
## How to Share Your Phone Booking Number
[Section titled “How to Share Your Phone Booking Number”](#how-to-share-your-phone-booking-number)
Sharing your [**Phone Booking Number**](https://help.oncehub.com/product/booking-calendars/phone-booking/how-to-assign-phone-number-to-your-booking-calendar-or-booking-hub/) makes it easy for clients to find and book time with you.
To maximize meetings, make sure the number is visible everywhere your clients look:
* **Email Signature**: Add the phone number to your professional email signature.
* **Website**: Display the number prominently on your “Contact Us” page or in the website footer.
* **Social Media**: List the booking number in the bio section of all your social media profiles (e.g., Facebook, Instagram).
* **Online Directories**: Update your online listings (e.g., Google Business Profile, Yelp) with the dedicated booking number.
# When to Use Phone Booking for Scheduling
> Phone Booking helps you handle missed calls, enhance your IVR system and create a smooth conversational scheduling experience for your guests.
Phone Booking helps you handle missed calls, enhance your IVR system and create a smooth conversational scheduling experience for your guests.
***
## Turn Missed Calls into Booked Appointments
[Section titled “Turn Missed Calls into Booked Appointments”](#turn-missed-calls-into-booked-appointments)
**Use conditional call forwarding** to automatically route missed calls (when busy or unavailable) to your **Phone Booking Number**. Guests can schedule a meeting instead of reaching a simple voicemail.
See our article on [**Using Call Forwarding to Turn Missed Calls into Booked Appointments**](https://help.oncehub.com/product/booking-calendars/phone-booking/using-call-forwarding-to-turn-missed-calls-into-booked-appointments/) to learn more.
***
## Use Phone Booking as Your Phone Scheduling Agent
[Section titled “Use Phone Booking as Your Phone Scheduling Agent”](#use-phone-booking-as-your-phone-scheduling-agent)
**Integrate Phone Booking directly into your existing IVR system** to give callers an immediate, self-service option for scheduling. This powerful integration enables callers to book meetings without waiting for a human, freeing up staff to handle other tasks.
See our article on [**Using Phone Booking as Your Phone Scheduling Agent**](https://help.oncehub.com/product/booking-calendars/phone-booking/using-phone-booking-as-your-phone-scheduling-agent/) to learn more.
***
## Offer a Conversational Scheduling Experience
[Section titled “Offer a Conversational Scheduling Experience”](#offer-a-conversational-scheduling-experience)
**Promote your dedicated Phone Booking Number** across your business assets and online channels. Clients can call this number to schedule a meeting, completely **eliminating the need to use a browser interface**.
See our article on [**Using Phone Booking to Offer a Conversational Scheduling Experience**](https://help.oncehub.com/product/booking-calendars/phone-booking/using-phone-booking-to-offer-conversational-scheduling-experience/) to learn more.
# Sharing Embedding
> Sharing Embedding documentation and guides.
[Share and Embed Your Booking Calendar](https://help.oncehub.com/product/booking-calendars/sharing-embedding/share-and-embed-your-booking-calendar/)
[How To Design a Page for Your Booking Calendar](https://help.oncehub.com/product/booking-calendars/sharing-embedding/how-to-design-page-for-your-booking-calendar/)
[How to Embed Your Booking Calendar on Your Website](https://help.oncehub.com/product/booking-calendars/sharing-embedding/how-to-embed-your-booking-calendar-on-your-website/)
[Adding Video Backgrounds To Booking Calendars And Booking Hubs](https://help.oncehub.com/product/booking-calendars/sharing-embedding/adding-video-backgrounds-to-booking-calendars-and-booking-hubs/)
[Prefilling Guest Information in Your Booking Calendar](https://help.oncehub.com/product/booking-calendars/sharing-embedding/prefilling-guest-information-in-your-booking-calendar/)
[How to Quickly Create Ad Hoc Multi-Host Meetings](https://help.oncehub.com/product/booking-calendars/sharing-embedding/how-to-quickly-create-ad-hoc-multi-host-meetings/)
[Adding UTMs to Your Booking Calendar](https://help.oncehub.com/product/booking-calendars/sharing-embedding/adding-utms-to-your-booking-calendar/)
[URL Parameters: Syntax and Processing Rules](https://help.oncehub.com/product/booking-calendars/sharing-embedding/url-parameters-syntax-and-processing-rules/)
[How to Override the Guest Time Zone on Your Booking Link](https://help.oncehub.com/product/booking-calendars/sharing-embedding/how-to-override-the-guest-time-zone-on-your-booking-link/)
[Using Booking Calendars with Chatbots and Routing Forms](https://help.oncehub.com/product/booking-calendars/sharing-embedding/using-booking-calendars-with-chatbots-and-routing-forms/)
[How to Share Your Booking Link As a QR Code](https://help.oncehub.com/product/booking-calendars/sharing-embedding/how-to-share-your-booking-link-as-a-qr-code/)
# Adding UTMs to Your Booking Calendar
> UTM parameters are tags added to your booking links to track booking sources, refine marketing, and boost bookings.
UTM parameters are tags added to your booking links to track booking sources, refine marketing, and boost bookings. By understanding where your bookings originate, you can tailor your marketing strategies for maximum effectiveness.
[Adding UTMs to Your Booking Calendar](https://www.youtube-nocookie.com/embed/zJiuWuy_JvU?wmode=opaque)
***
## Add UTMs to your Booking link when sharing as a Page
[Section titled “Add UTMs to your Booking link when sharing as a Page”](#add-utms-to-your-booking-link-when-sharing-as-a-page)
Follow the steps below to add UTM parameters when sharing your **Booking Calendar** as a standalone page:
1. **Navigate to the Booking Calendar Lobby:**
* Open the **Booking Calendars Lobby**.
* Locate the **Booking Calendar** you wish to share.
* Click the **Share** button associated with that calendar.
* Check **Personalization and Tracking** in the popup.
2. **Enter Your UTM Values:**
* Under UTM parameters dropdown, enter the appropriate values for each UTM parameter (e.g., `utm_source`, `utm_medium`, and `utm_campaign`).
3. **Copy and Share:**
* Click **Copy & close** to copy the URL with UTM parameters to your clipboard.
You can now share this URL with your guests.
***
## Adding UTMs to your personal webpage where you have an embedded Booking Calendar
[Section titled “Adding UTMs to your personal webpage where you have an embedded Booking Calendar”](#adding-utms-to-your-personal-webpage-where-you-have-an-embedded-booking-calendar)
Follow the steps below to add UTM parameters to your **Booking Calendar** which is embedded directly on your website:
1. **Begin UTM Parameters:**
* Add a question mark (`?`) to the end of your webpage URL. This marks the beginning of your UTM parameters.
2. **Enter UTM Parameters:**
* Add your desired UTM parameters immediately after the question mark.
* Format each parameter as `parameter=value`.
* Example: `utm_source=LinkedIn`.
3. **Include Additional UTM Parameters (if applicable):**
* If you need to add more UTM parameters, separate them with an ampersand (`&`).
* Example: `&utm_medium=Social&utm_campaign=JanuaryPromo`.
* The resulting URL will resemble: `https://yourwebsite.com?utm_source=LinkedIn&utm_medium=Social&utm_campaign=JanuaryPromo`.
Use this full URL to direct visitors to your site with the added UTM tracking.
***
## Key Points to Remember
[Section titled “Key Points to Remember”](#key-points-to-remember)
* **Consistency is Key:** Maintain consistent naming conventions for your UTM parameters across all campaigns
* **Accurate Values:** Ensure the values you enter accurately reflect the source, medium, and campaign of your link.
* **Testing:** Always test your UTM parameters by clicking on the generated URL and verifying the data is being recorded correctly in your analytics platform.
Adding UTM parameters provides vital data that helps you understand the effectiveness of your marketing efforts. This data enables you to make informed decisions, optimize your campaigns, and ultimately drive more bookings.
# Adding Video Backgrounds To Booking Calendars And Booking Hubs
> Using videos as a background provides a dynamic alternative to static images or GIFs, enhancing the visual appeal of your booking links.
Using videos as a background provides a dynamic alternative to static images or GIFs, enhancing the visual appeal of your booking links. Whether you are using brand videos for **company storytelling** to build interest or high-energy footage to capture an **event atmosphere**, motion backgrounds can significantly drive higher registration rates.
***
## Prerequisites
[Section titled “Prerequisites”](#prerequisites)
To ensure high quality, your video must meet these requirements:
* **Format:** MP4/ WEBM / OGG/ AVI/ MOV
* **File Size:** Under 20MB
* **Duration:** 10 seconds
***
## How to Configure the Video as Background
[Section titled “How to Configure the Video as Background”](#how-to-configure-the-video-as-background)
1. Open the **Page Designer** tab on your selected Booking Calendar/Hubs.
2. Locate the **Page Background** section in the right-hand pane.
3. Click the **Video** icon.
4. Choose Your Video Source:
* **Predefined:** Select from curated **Subtle Motion** presets, such as *Ocean* or *Nature* etc.
* **Custom:** Switch to the **Custom** tab to upload your own file.
5. Click **Apply** to preview the background.
6. Use the **Information Background Opacity** slider to ensure your Booking Calendar/Hubs remains readable against the moving video.
7. Click **Save** to confirm the changes.
***
## Best Practices for Video Backgrounds
[Section titled “Best Practices for Video Backgrounds”](#best-practices-for-video-backgrounds)
To provide the best experience for your visitors, keep these visual and technical tips in mind:
* **Use Still Camera Shots:** Ensure the video is filmed from a **steady and fixed** **position**. Excessive camera movement can distract guests and make your calendar text difficult to read.
* **Create Seamless Loops:** For a professional look, use a video where the first and last frames are identical to prevent **jumps** during playback.
* **Leverage AI for Video Generation:** Consider using AI tools as a go to solution for generating high quality, professional video loops tailored for your brand.
* **Adjust Transparency:** Consider adjusting transparency settings to ensure that the video remains visible without compromising the readability of your booking links.
# How To Design a Page for Your Booking Calendar
> The Page Designer in your Booking Calendar allows you to create a fully customizable, standalone page.
The Page Designer in your **Booking Calendar** allows you to create a fully customizable, standalone page. This page is perfect for sharing your Booking Calendar across various channels, making it accessible to a wide audience.
***
## How to Design your Booking Calendar’s Page
[Section titled “How to Design your Booking Calendar’s Page”](#how-to-design-your-booking-calendars-page)
The Page Designer allows extensive customization, and you’ll see changes in real-time using the **Live Preview (WYSIWYG)**, which works for both desktop and mobile views.
### Navigating to the Page Designer
[Section titled “Navigating to the Page Designer”](#navigating-to-the-page-designer)
1. Click on **Booking Calendars** in the left-hand side menu.
2. Select the Booking Calendar you want to design a page for.
3. Go to the **Page Designer** tab.
### Customizing the Page URL
[Section titled “Customizing the Page URL”](#customizing-the-page-url)
You can click on **Customize URL** in the customization pane on the right to specify a custom URL for your page.
### Customizing the Page Background
[Section titled “Customizing the Page Background”](#customizing-the-page-background)
Choose a background style that aligns with your brand or purpose:
* **Solid color:** Select a single color for the background.
* **Image:** Upload an image to use as the page backdrop.
* **Dynamic gradient:** Pick from predefined gradient options or create a custom gradient with up to three colors.
* **Video:** Upload a video to use as a cinematic background for your booking links.
### Customizing the Information Pane
[Section titled “Customizing the Information Pane”](#customizing-the-information-pane)
You can customize the Information pane that appears on the left-hand side of the screen when guests are interacting with your Booking Calendar. The options you have available are:
* **Upload a Logo:** Add a logo to establish your branding.
* **Upload a Profile Image:** Include an image to make your page more personable.
* **Add a Heading and Subheading:** Provide essential context or branding information at a glance.
* **Welcome Message:** Write a friendly message to greet visitors when they land on your page.
* **Social Links:** Add clickable icons to your social profiles (e.g., website, X (formerly Twitter), YouTube).
* **Text Color:** Select the font color that displays in the Information Pane.
* **Pane Opacity:** Adjust the transparency to blend the panel with your background design.
### Customizing the Interaction Pane
[Section titled “Customizing the Interaction Pane”](#customizing-the-interaction-pane)
You can customize the Interaction pane that appears in the right-hand side of the screen when guests are interacting with your Booking Calendar. The options you have available are:
* Button Color: Select the color of your action buttons.
* Pane Opacity: Adjust the transparency to match your design preferences.
### Adding a Page Footer
[Section titled “Adding a Page Footer”](#adding-a-page-footer)
Use the Page Footer text box to input text that will appear at the bottom of your Booking Calendar page. This could be additional information, a tagline, or a closing message.
# How to Embed Your Booking Calendar on Your Website
> Embedding your Booking Calendar ensures clients can schedule appointments effortlessly while staying on your website.
[How to Embed Your Booking Calendar on Your Website](https://www.youtube-nocookie.com/embed/cWKi2voP2m4?wmode=opaque)
Embedding your **Booking Calendar** ensures clients can schedule appointments effortlessly while staying on your website. This not only enhances convenience but also strengthens your site’s professional image.
## Why Embed Your Booking Calendar?
[Section titled “Why Embed Your Booking Calendar?”](#why-embed-your-booking-calendar)
Embedding your calendar is a great solution if you want to:
* **Enable direct booking:** Let clients schedule appointments directly on your website without being redirected.
* **Maintain a unified experience:** Display your services and booking options on the same page.
* **Boost engagement:** Keep visitors on your site longer by simplifying the scheduling process.
* **Streamline service-based journeys:** Perfect for businesses where scheduling is a core part of the user journey, such as salons, fitness centers, or consulting services.
Embedding helps service-based businesses create a smooth, professional booking experience while keeping clients engaged on their site.
***
## How to Embed Your Booking Calendar
[Section titled “How to Embed Your Booking Calendar”](#how-to-embed-your-booking-calendar)
### Navigating to the Embed Designer
[Section titled “Navigating to the Embed Designer”](#navigating-to-the-embed-designer)
1. Click on **Booking Calendars** in the left-hand side menu.
2. Select the Booking Calendar you want to embed.
3. Go to the **Embed Designer** tab.
### Selecting your Embed Options
[Section titled “Selecting your Embed Options”](#selecting-your-embed-options)
When embedding your Booking Calendar, you have two display options:
* **Inline Embed:** This option embeds the Booking Calendar directly within a page of your website, making it always visible to users.
* **Lightbox on Click:** This option adds a button to your webpage. When clients click the button, the Booking Calendar opens as a pop-up (lightbox).
Select the option that best suits your website’s design and user experience.
### Choosing a Color Scheme
[Section titled “Choosing a Color Scheme”](#choosing-a-color-scheme)
Use the **Choose a Color** selector to select a color scheme that matches your website’s branding.
### Embedding the Code on Your Website
[Section titled “Embedding the Code on Your Website”](#embedding-the-code-on-your-website)
1. Click on **Get the embed/lightbox code**.
2. Click on **Copy & close**.
3. Open your website’s HTML editor.
4. Paste the embed code where you want the embed to appear on your webpage.
***
## How to Customize your Lightbox Button
[Section titled “How to Customize your Lightbox Button”](#how-to-customize-your-lightbox-button)
If you choose to use the lightbox button to embed your booking calendar, you can personalize its appearance to fit your website’s design. This is done by editing the HTML code provided for the lightbox embed.
### Important: Keep Core Code Intact
[Section titled “Important: Keep Core Code Intact”](#important-keep-core-code-intact)
For the lightbox to function correctly, certain parts of the HTML must remain unchanged. Specifically, the code highlighted in green below must be preserved. The rest of the code, such as styles, buttons, or text can be modified to suit your needs.
Below is the default code provided for the lightbox button:
```plaintext
```
This creates a button labeled **Schedule Now** with default styling and color chosen in the Embed Designer.
### Customizing the Button
[Section titled “Customizing the Button”](#customizing-the-button)
You can adjust elements such as the style, text, or even replace the button entirely. For example:
You might want to modify the button’s color, font, or messaging while keeping the button format. Simply edit the inline style attribute and the text inside the `
` tag.
If you have some basic understanding of CSS, you can apply [further customization](https://help.oncehub.com/scheduleonce/sharing-publishing/publishing-on-websites/website-button-customization/ "Website button customization") (button design and lightbox height) on top of the core settings.
OnceHub handles the lightbox height in one of two ways:
* **Fixed height**: This is the default option and height is set to 580 pixels. You can change the default height to any number you want by changing the height property in the code.
* **Responsive height**: This will automatically adjust the height to the frame content. To use this method, you must delete the height property in the code.
[Learn more about customizing the Website button](https://help.oncehub.com/scheduleonce/sharing-publishing/publishing-on-websites/website-button-customization/ "Website button customization")
## Restrictions for the Website button
[Section titled “Restrictions for the Website button”](#restrictions-for-the-website-button)
* The button and lightbox are an HTML 5 app and are not supported on old browsers, including Microsoft Internet Explorer.
* The button code contains JavaScript, which might be blocked by some low-cost web hosting providers. In this case, you will not be able to embed a booking page on this website.
# Website button: Business scenarios
> The OnceHub Website button publishing option can be added to any page on your website, allowing your Customers to schedule without leaving your website.
The OnceHub Website button [publishing option](https://help.oncehub.com/scheduleonce/sharing-publishing/publishing-on-websites/website-button/ "Introduction to publishing options") can be added to any page on your website, allowing your Customers to schedule without leaving your website. This scheduling method creates an effective call to action, motivating your leads and prospects to schedule with you. The button [text and design can be customized](https://help.oncehub.com/scheduleonce/sharing-publishing/publishing-on-websites/website-button-customization/ "Website button customization") and the scheduling lightbox is fully brandless.
The Website button can also be integrated with your [lead generation](https://help.oncehub.com/scheduleonce/sharing-publishing/web-form-integration/using-oncehub-for-lead-generation/ "ScheduleOnce for lead generation") process, letting you offer scheduling to every website visitor. If you want to offer scheduling to specific prospects, such as your top prospects, you can use the Website button in conjunction with our [Web form integration](https://help.oncehub.com/scheduleonce/sharing-publishing/web-form-integration/introduction-to-web-form-integration/ "Introduction to Web form integration") feature.
In this article, you’ll learn about different business scenarios for the Website button publishing option.
## Using the Website button to engage any website visitor
[Section titled “Using the Website button to engage any website visitor”](#using-the-website-button-to-engage-any-website-visitor)
You can embed a Website button in any website page. When the Customer clicks the the button, they will be taken directly to your [Booking page](https://help.oncehub.com/scheduleonce/event-types-booking-pages/booking-pages/introduction-to-booking-pages/ "Introduction to Booking pages") or [Master page](https://help.oncehub.com/scheduleonce/master-pages-resource-pools/master-pages/introduction-to-master-pages/ "Introduction to Master pages"). The Website button acts as a call-to-action that allows any website visitor to schedule with you without ever leaving your website.
[Learn more about the Website button](https://help.oncehub.com/scheduleonce/sharing-publishing/publishing-on-websites/website-button/ "Website button")
## Using the Website button with Web form integration
[Section titled “Using the Website button with Web form integration”](#using-the-website-button-with-web-form-integration)
You can use a Website button with [Web form integration](https://help.oncehub.com/scheduleonce/sharing-publishing/web-form-integration/introduction-to-web-form-integration/ "Introduction to Webform Integration") to offer scheduling to leads right after they submit a [lead generation](https://help.oncehub.com/scheduleonce/sharing-publishing/web-form-integration/using-oncehub-for-lead-generation/ "ScheduleOnce for lead generation") form.
You have the option to offer scheduling only to your top leads, based on their web form submission, or to every prospect who fills out your web form. Prospects that have already provided their details in your web form will not have to do so again in the Booking form. Customer data is passed from your web form directly to OnceHub.
There are two options for passing data to OnceHub when you integrate scheduling with your web form:
### Passing data via URL parameters**[](https://help.oncehub.com/scheduleonce/sharing-publishing/web-form-integration/integrating-web-forms-using-url-parameters/ "Integrating your Web form with ScheduleOnce using URL parameters")**
[Section titled “Passing data via URL parameters ”](#passing-data-via-url-parameters-)
When you [pass data via URL parameters](https://help.oncehub.com/scheduleonce/sharing-publishing/personalized-links/personalizing-with-dynamic-url-parameters/ "How to create a Personalized link (URL parameters)"), web form data is passed to OnceHub via the URL. You can choose to [prepopulate](https://help.oncehub.com/scheduleonce/event-types-booking-pages/booking-forms-redirect/prepopulated-booking-forms/ "Prepopulated Booking forms") or skip the Booking form.
If you are using a third-party web form, such as Wufoo, the Booking form data you pass via the URL needs to match the [supported OnceHub URL parameters](https://help.oncehub.com/scheduleonce/sharing-publishing/personalized-links/url-parameters-syntax-and-processing-rules/ "ScheduleOnce URL parameters and processing rules"). This will ensure the right information is extracted from the URL and placed in the correct Booking form fields.
### Passed data via CRM record IDs
[Section titled “Passed data via CRM record IDs”](#passed-data-via-crm-record-ids)
When you [pass data via CRM record IDs](https://help.oncehub.com/scheduleonce/sharing-publishing/personalized-links/personalizing-with-dynamic-crm-record-ids/ "Personalized links using CRM record IDs"), the CRM record ID is passed to OnceHub via the URL. You can choose to prepopulate or skip the Booking form.
* If you are using **Infusionsoft**, you can use the Infusionsoft Contact ID to [integrate with Infusionsoft Web forms](https://help.oncehub.com/scheduleonce/sharing-publishing/web-form-integration/integrating-with-infusionsoft-web-forms/ "Integrating with Infusionsoft Web forms") or [personalize the booking process on landing pages](https://help.oncehub.com/scheduleonce/account-integrations/crm/infusionsoft/personalizing-scheduling-on-landing-pages-with-infusionsoft-contact-ids/ "Using InfusionSoft Contact ID to personalize scheduling in landing pages").
* If you are using **Salesforce**, you can use the Salesforce Record ID to [personalize the booking process on landing pages](https://help.oncehub.com/scheduleonce/account-integrations/crm/salesforce/personalizing-scheduling-on-landing-pages-with-salesforce-ids/ "Using the Salesforce Record ID to personalize scheduling in landing pages").
Note
The button is a HTML 5 app and is not supported on old browsers, including Microsoft Internet Explorer.
# Website button customization
> The Website button publishing options can be added to any page on your website, allowing your Customers to schedule without leaving your website.
The Website button publishing options can be added to any page on your website, allowing your Customers to schedule without leaving your website. This scheduling method creates an effective call to action, motivating your leads and prospects to schedule with you.
The code provided by OnceHub creates two elements on your page: the button and the lightbox that shows the scheduling pane. The design and layout of the call-to-action button and the scheduling lightbox can be customized. Many button settings[ can be customized](https://help.oncehub.com/scheduleonce/sharing-publishing/publishing-on-websites/website-button/ "Website button") on the **Share & Publish** page. For more customization, you can add CSS properties to the code.
In this article, you’ll learn about customizing the Website button publishing option.
Note
This article describes customizing button design and size of the Website button. The design of the scheduling process itself is determined by the [Theme](https://help.oncehub.com/scheduleonce/customization-branding/theme-designer/introduction-to-theme-designer/ "The Theme Designer") applied on the Overview section of the embedded [Booking page](https://help.oncehub.com/scheduleonce/event-types-booking-pages/booking-pages/booking-pages-overview/ "Booking page: Overview section") or [Master page](https://help.oncehub.com/scheduleonce/master-pages-resource-pools/master-pages/master-pages-overview/ "Master Page: Overview section").
## Requirements
[Section titled “Requirements”](#requirements)
To embed a scheduling pane on your website, you must be a webmaster for your company’s website, or have direct access to your company website’s admin area.
## Customization steps
[Section titled “Customization steps”](#customization-steps)
1. Go to **Booking** **pages** in the bar on the left → **Booking page → Share & Publish**.
2. Select the **Website button** tab (Figure 1). 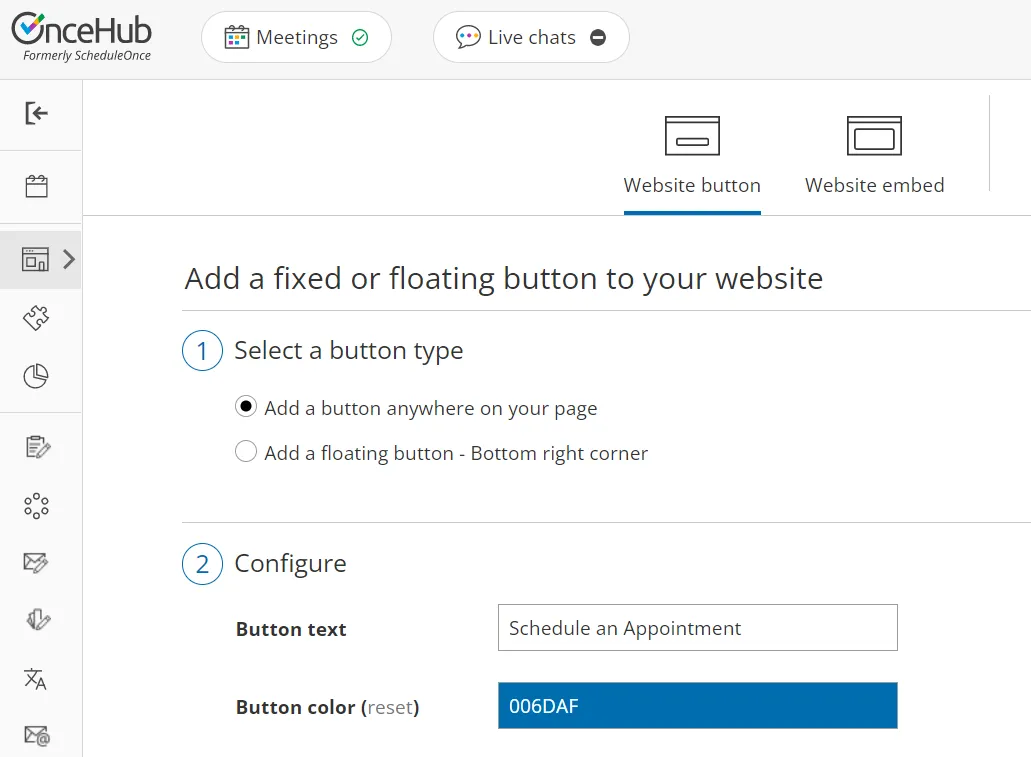Figure 1: Website button tab
3. In the **Select a button type** step, select whether you want to **Add a button anywhere on your page** or **Add a floating button**.
4. In the **Configure** step, you can edit the **Button text** and select the **Button color**.
5. In the **Select a Booking page** step, select the [Booking page](https://help.oncehub.com/scheduleonce/event-types-booking-pages/booking-pages/introduction-to-booking-pages/ "Introduction to Booking pages") or [Master page](https://help.oncehub.com/scheduleonce/master-pages-resource-pools/master-pages/introduction-to-master-pages/ "Introduction to Master pages") you want to create the website button for.
6. In the **Customer data** step, select to have Customers fill out the Booking form, or select a [web form integration](https://help.oncehub.com/scheduleonce/sharing-publishing/web-form-integration/introduction-to-web-form-integration/ "Introduction to Webform Integration") option.
7. From the **Button code** step, choose the **Display type**.
8. Click the **Copy** button to the copy the code to your clipboard.
9. Paste the code into the relevant location on your website.
After you’ve pasted the code, you can follow the steps below to customize the button design and lightbox layout.
## Customizing the button design
[Section titled “Customizing the button design”](#customizing-the-button-design)
You can modify, add, or remove CSS properties in the code to achieve the most effective design for your website visitors. The text on the button can also be modified. The text on the button appears in the code just before the closing `` tag.
``
`